Board and Batten Coop on 4x4 Runners
My wife and I recently moved from the city to nice secluded 12-acre wooded lot. It hasn't even been a year yet and she decides that she wants to get some chickens (and alpacas, but we'll save that story for another day).
So.. after looking on Craigslist for a few weeks and finding a bunch of really rough looking chicken coops, we decide to look at buying a new coop. The prices on new 6'x8' coops are more than I wanted to spend to house 12 little chickens so I decided to draw something up.
I spent a little bit of time doing some research on here and other websites and came up with the following plan. I normally don't take the time to post stuff like this, but I figured that I would share it in the chance that it might help someone out in the future. No sense designing a coop and only using the plan one time.
Disclaimer: I am an electrical engineer, not an architect or a carpenter.
 I'm pretty sure that the coop will hold up to the winters we have here. In fact, it's probably over-built as far as a chicken-coop goes, but 2x4's are cheap and I'd rather throw a few extra studs in and make it strong rather than hope for the best and have the whole thing come crashing down on the little chickens.
Almost nothing in this design is starndardized to normal building practices, I basically put studs where I needed them and if the spacing was more than 24" I threw in some extra ones. The studs on the wall with the nesting boxes are spaced to end up with 13" for each nesting box. The studs on the other walls are based on the location of windows and doors with the other studs thrown in for good measure.
Here is a picture of the CAD drawing that you can save to your computer and zoom-in on to see the details. Just click on the picture, then right-click, save-as to get the full resolution picture. A picture of the CAD file is going to have to do for now until I get to ten posts and I'm allowed to attach files.
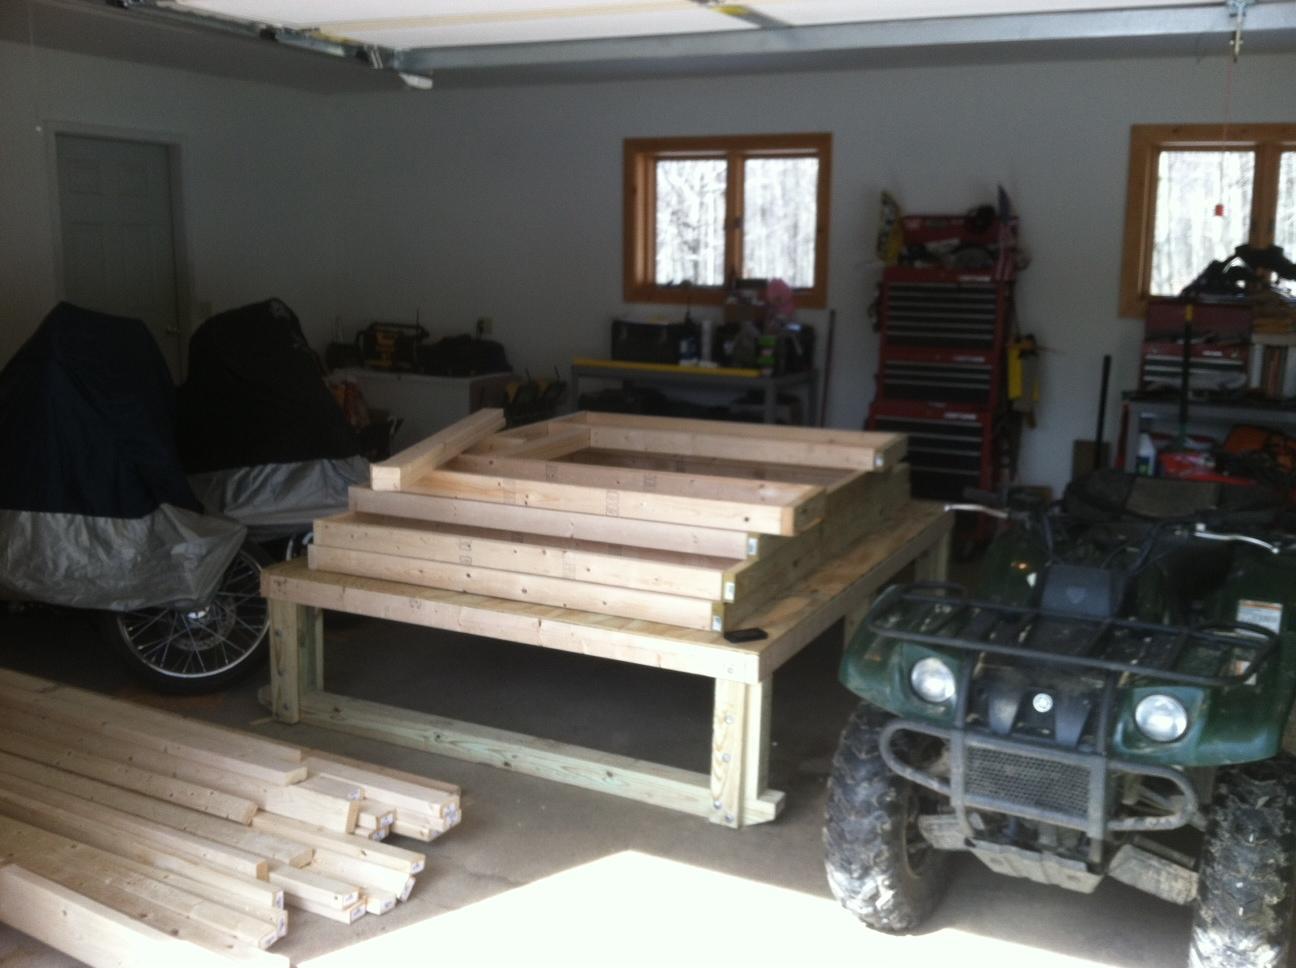
Pressure Treated 4x4 Runner Base
The base of the coop is built of pressure treated 2x4s and 4x4's. I used 1/2"x8" galvanized carriage bolts to hold the runners together. It is never going to come apart and will be perfect for dragging it around with the tractor, but galvanized carriage bolts are EXPENSIVE. If you can find a better way to put your runners together, let me know because I have about $50 in carriage bolts alone
Here is a picture of what the base looks like so far with the four walls framed out and sitting on top of it, hopefully this weekend I'll have some time to stand the walls up and start putting the roof on.
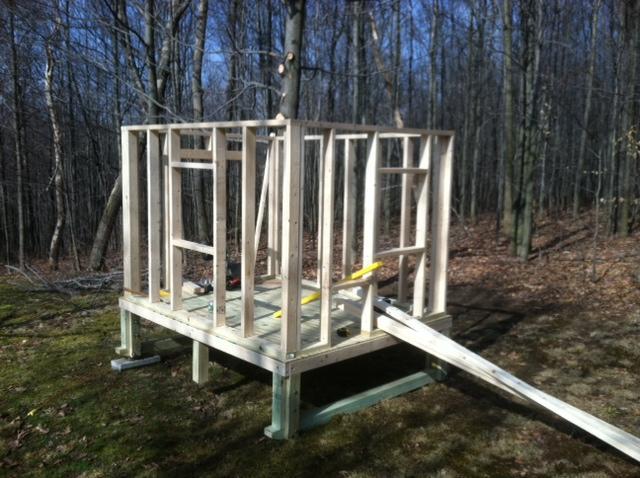
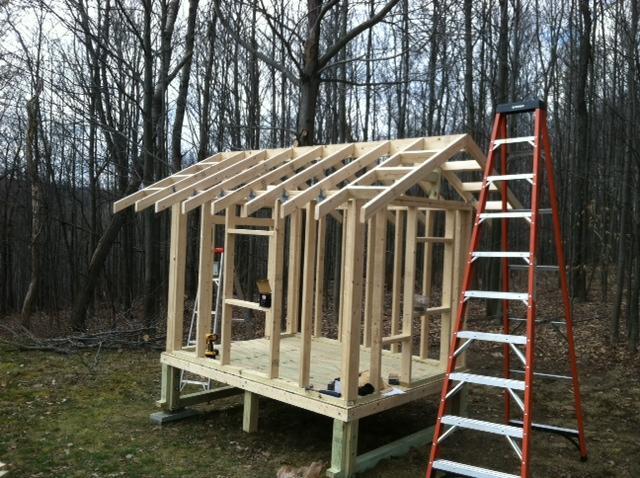
Standing Up the Walls
I got the walls put up without issue. Just needed to do a little leveling to get the base to sit right so I could use the level on the walls.
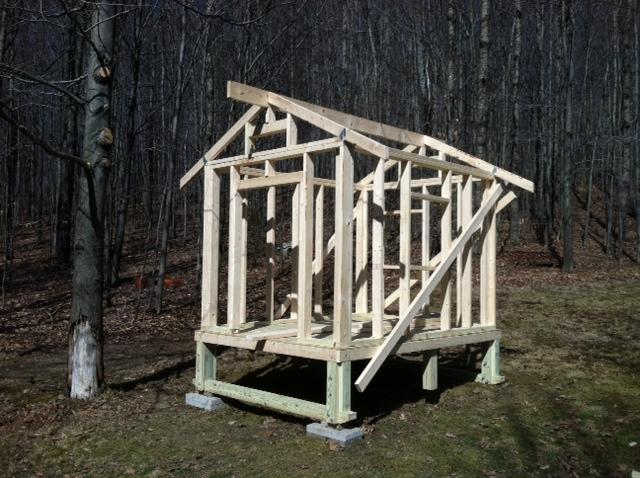
Putting on the Roof
I've never really built anything like this, so I wasn't sure how good my carpentry skills would be, but after laying out one rafter and using that as the template for all the other rafters, everything started to fall into place. I used Simpon StrongTies for the rafter connection to the wall... probably overkill for a chicken coop, but for $12, I figured it was some cheap insurance.
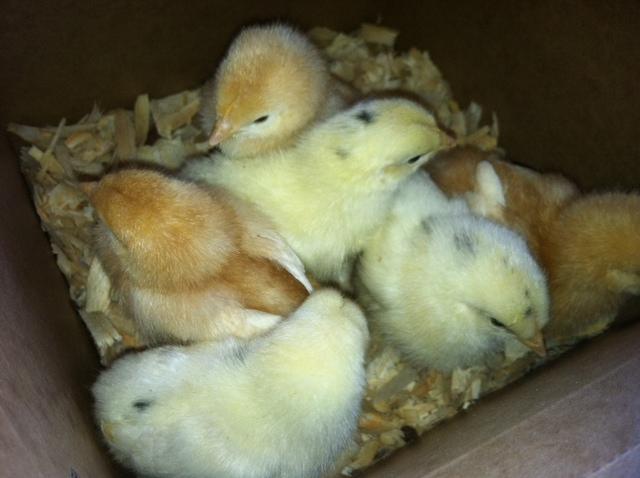
Picked up Some of the Future Tennants
The wife decided that I was far enough along to go out and look for some tennants for the new space. They won't be ready to move in for at least 4 weeks, so that gives me plenty of time to finish things up. Don't worry, this was just the box that we picked them up in, they are in a much bigger area now with heat, food, and water.
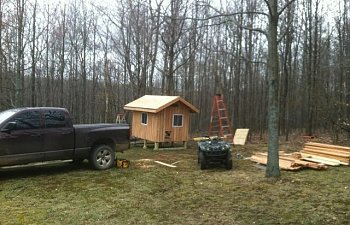
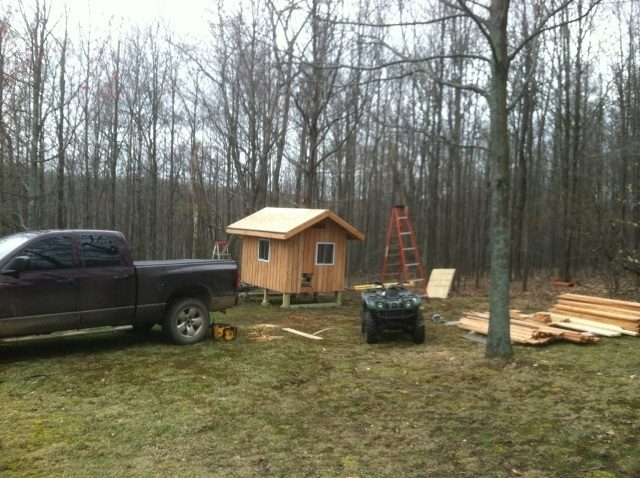
Roof with 16" Overhangs
I like big overhangs on buildings to keep the rain off of the walls as much as possible. I decided on 16" overhangs for the coop and once the wife saw what they look like, I'm thinking it was the right decision. Next step is to put the girts on for the board and batten and put the sheeting and shingles on the roof.
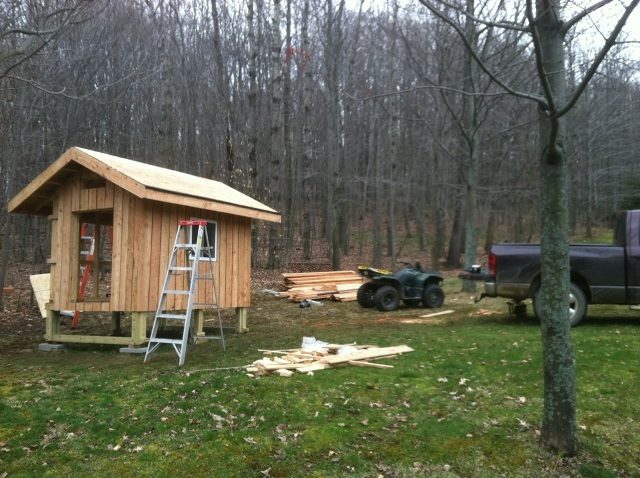
Board and Batten Siding
I got most of the board siding done, just need to finish up the nesting boxes, put up the battens, trim the windows and finish shingling the roof. It's getting close, the little chicks are going to be ready to go outside in the next couple weeks. I need to get this done so they have a place to go, they are getting a little to big to be hanging out in a pen in the basement.
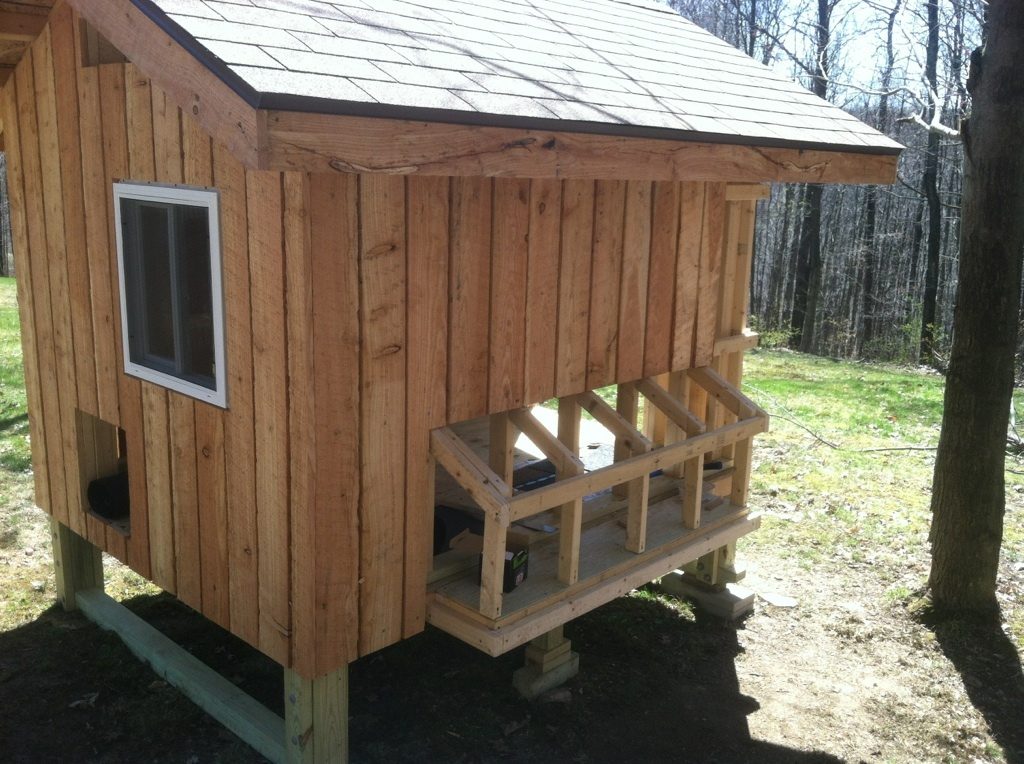
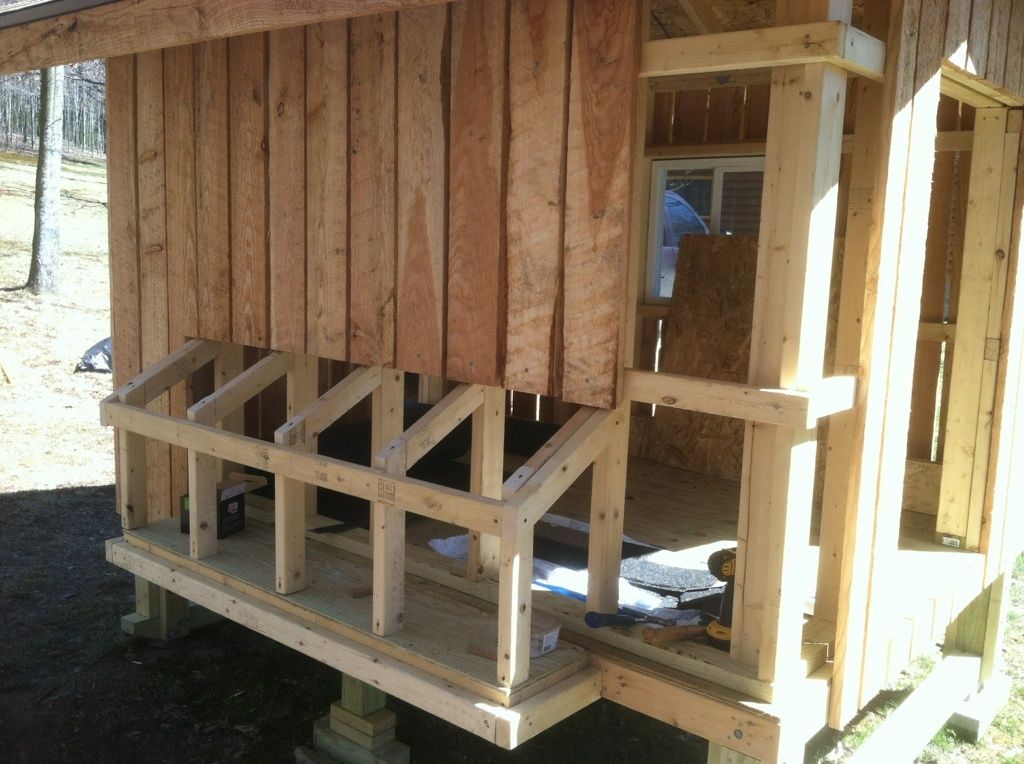
Nesting Boxes
I didnt bother drawing up the nesting boxes in the original plan because I figured I'd just wing it with whatever wood was left. Here are a few pics showing what the boxes look like before I put the siding on them.
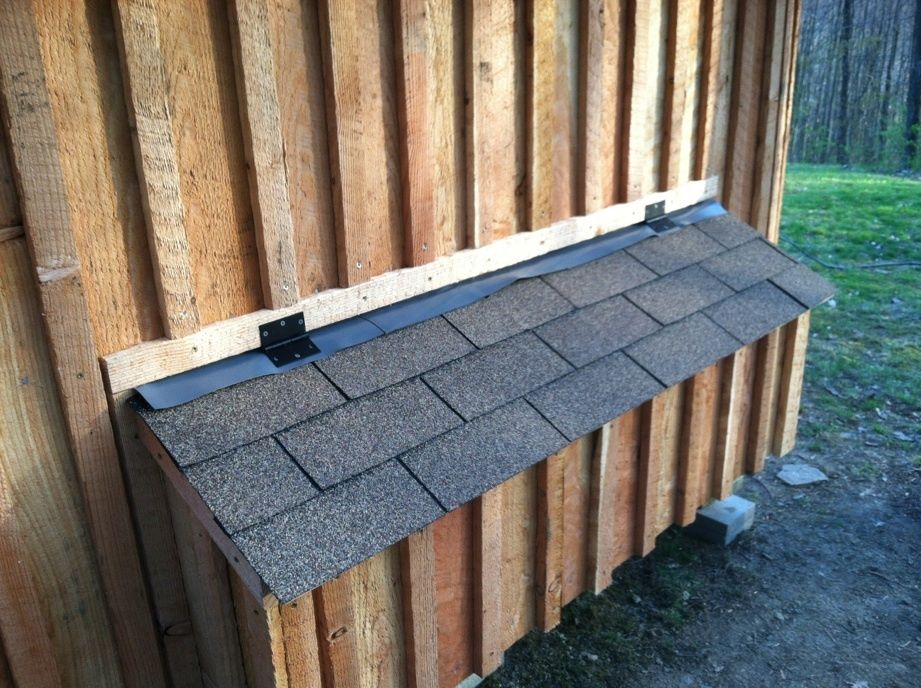
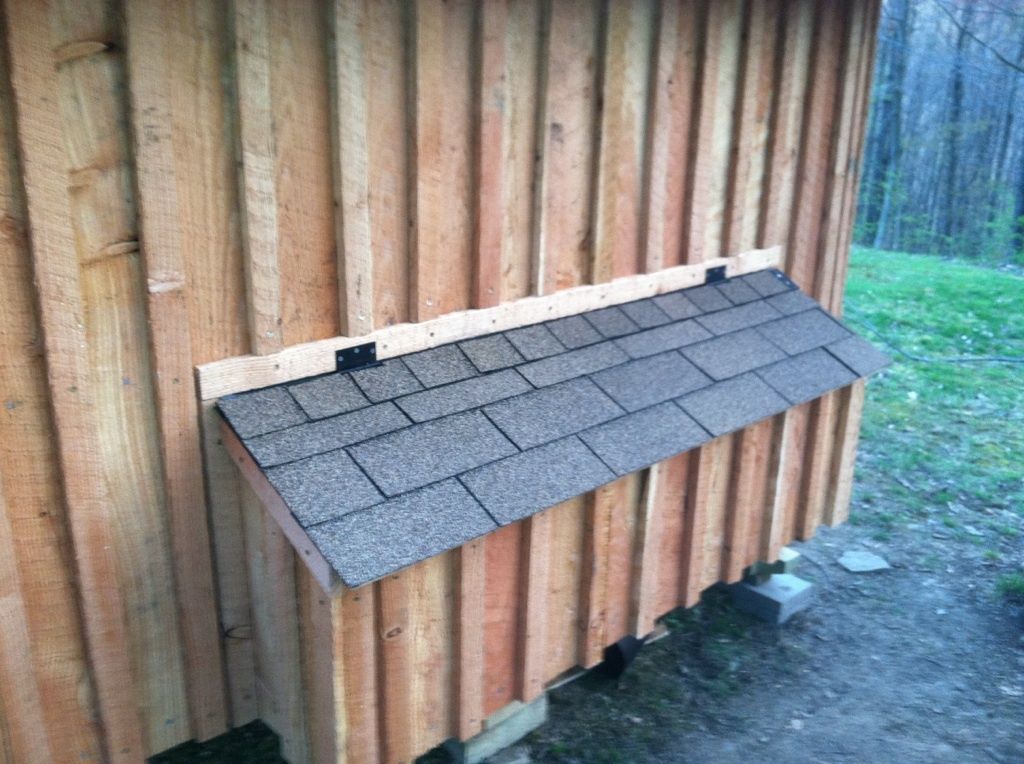
Waterproof Nesting Box Lid
I came up with this for my nesting box lid and wanted to see what people thought about it. It's not perfect, but I think it should keep the girls dry. I'm hoping the 16" overhangs keep most of the water out and this should only be needd when it's raining sideways...
I searched around Home Depot for rubber strips to seal the hinge area and I was just about to leave with a piece of garage door bottom seal when I stumbled on a roll of shower pan liner. The shower pan liner was four foot wide and cost $5/ft so I got two 1'x4' pieces for $10 and I was on my way.
My nesting box lid is about six feet long so I had to take the two pieces and 'glue' them together to make a 7.5' long piece (6" overlap). I used some leftover black RTV sealant and spread a thin layer on the over lap and left it sit overnight with some weight on it.
I took off the trim board above the nesting box lid and screwed the rubber on about halfway up.
Then I reattached the trim board and put the lid on temporarily to see how much to trim off the bottom of the rubber.
I put the nesting box lid on and mounted the hinges through the rubber.
Then I put on a row of 'ridge shingles' to cover up the hinge and the rubber. Because it isn't truely a ridge cap, you will need to get some roofing tar and glue down the top and side of each ridge shingle.
I'm also planning on putting some clear silicone along the top of the trim board in between each batten to really seal it up nicely.
Interior Shots
Costs (So far)
$285 - Lumber for pressure treated base, wall framing, rafters ,wall girts, roof purlins, and homemade door
$50 - Galvanized carriage bolts
$14 - Hurricane clips to hold rafters on
$40 - Misc nails / scerws
$60 - Two slider windows ordered from HomeDepot.com Price includes delivery
$180 - Roofing
$125 - Board and batten siding (larch)
Total - $754
My wife and I recently moved from the city to nice secluded 12-acre wooded lot. It hasn't even been a year yet and she decides that she wants to get some chickens (and alpacas, but we'll save that story for another day).
So.. after looking on Craigslist for a few weeks and finding a bunch of really rough looking chicken coops, we decide to look at buying a new coop. The prices on new 6'x8' coops are more than I wanted to spend to house 12 little chickens so I decided to draw something up.
I spent a little bit of time doing some research on here and other websites and came up with the following plan. I normally don't take the time to post stuff like this, but I figured that I would share it in the chance that it might help someone out in the future. No sense designing a coop and only using the plan one time.
Disclaimer: I am an electrical engineer, not an architect or a carpenter.


Almost nothing in this design is starndardized to normal building practices, I basically put studs where I needed them and if the spacing was more than 24" I threw in some extra ones. The studs on the wall with the nesting boxes are spaced to end up with 13" for each nesting box. The studs on the other walls are based on the location of windows and doors with the other studs thrown in for good measure.

Here is a picture of the CAD drawing that you can save to your computer and zoom-in on to see the details. Just click on the picture, then right-click, save-as to get the full resolution picture. A picture of the CAD file is going to have to do for now until I get to ten posts and I'm allowed to attach files.

Pressure Treated 4x4 Runner Base
The base of the coop is built of pressure treated 2x4s and 4x4's. I used 1/2"x8" galvanized carriage bolts to hold the runners together. It is never going to come apart and will be perfect for dragging it around with the tractor, but galvanized carriage bolts are EXPENSIVE. If you can find a better way to put your runners together, let me know because I have about $50 in carriage bolts alone

Here is a picture of what the base looks like so far with the four walls framed out and sitting on top of it, hopefully this weekend I'll have some time to stand the walls up and start putting the roof on.
Standing Up the Walls
I got the walls put up without issue. Just needed to do a little leveling to get the base to sit right so I could use the level on the walls.
Putting on the Roof
I've never really built anything like this, so I wasn't sure how good my carpentry skills would be, but after laying out one rafter and using that as the template for all the other rafters, everything started to fall into place. I used Simpon StrongTies for the rafter connection to the wall... probably overkill for a chicken coop, but for $12, I figured it was some cheap insurance.
Picked up Some of the Future Tennants
The wife decided that I was far enough along to go out and look for some tennants for the new space. They won't be ready to move in for at least 4 weeks, so that gives me plenty of time to finish things up. Don't worry, this was just the box that we picked them up in, they are in a much bigger area now with heat, food, and water.
Roof with 16" Overhangs
I like big overhangs on buildings to keep the rain off of the walls as much as possible. I decided on 16" overhangs for the coop and once the wife saw what they look like, I'm thinking it was the right decision. Next step is to put the girts on for the board and batten and put the sheeting and shingles on the roof.
Board and Batten Siding
I got most of the board siding done, just need to finish up the nesting boxes, put up the battens, trim the windows and finish shingling the roof. It's getting close, the little chicks are going to be ready to go outside in the next couple weeks. I need to get this done so they have a place to go, they are getting a little to big to be hanging out in a pen in the basement.
Nesting Boxes
I didnt bother drawing up the nesting boxes in the original plan because I figured I'd just wing it with whatever wood was left. Here are a few pics showing what the boxes look like before I put the siding on them.
Waterproof Nesting Box Lid
I came up with this for my nesting box lid and wanted to see what people thought about it. It's not perfect, but I think it should keep the girls dry. I'm hoping the 16" overhangs keep most of the water out and this should only be needd when it's raining sideways...
I searched around Home Depot for rubber strips to seal the hinge area and I was just about to leave with a piece of garage door bottom seal when I stumbled on a roll of shower pan liner. The shower pan liner was four foot wide and cost $5/ft so I got two 1'x4' pieces for $10 and I was on my way.
My nesting box lid is about six feet long so I had to take the two pieces and 'glue' them together to make a 7.5' long piece (6" overlap). I used some leftover black RTV sealant and spread a thin layer on the over lap and left it sit overnight with some weight on it.
I took off the trim board above the nesting box lid and screwed the rubber on about halfway up.
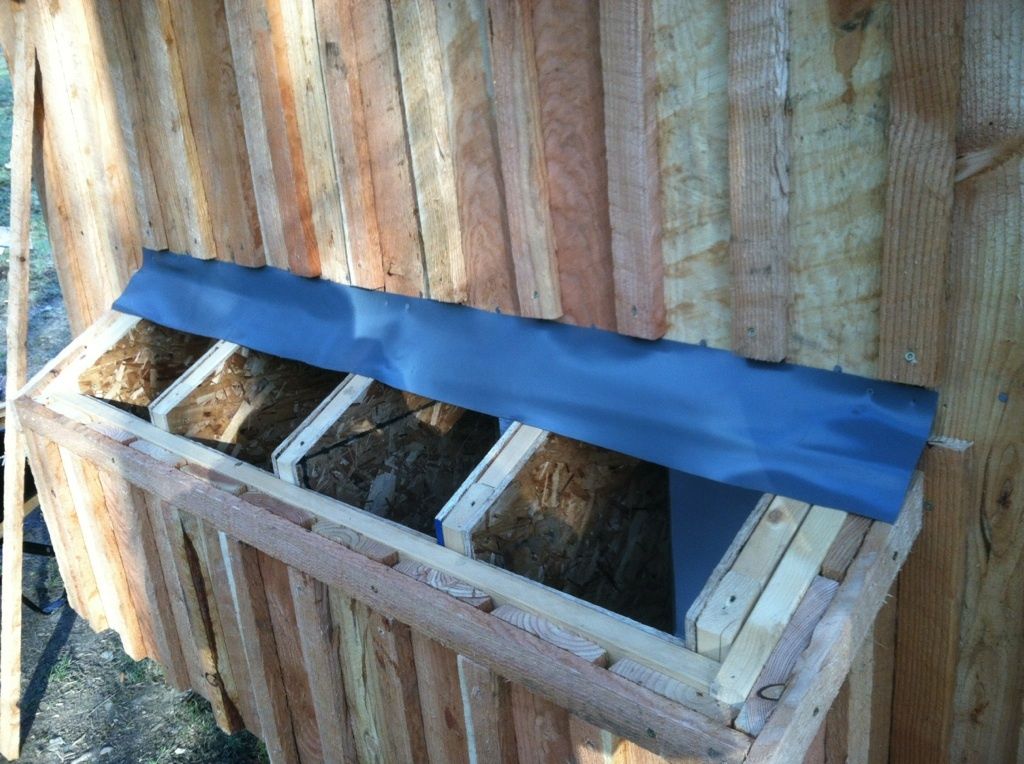
Then I reattached the trim board and put the lid on temporarily to see how much to trim off the bottom of the rubber.
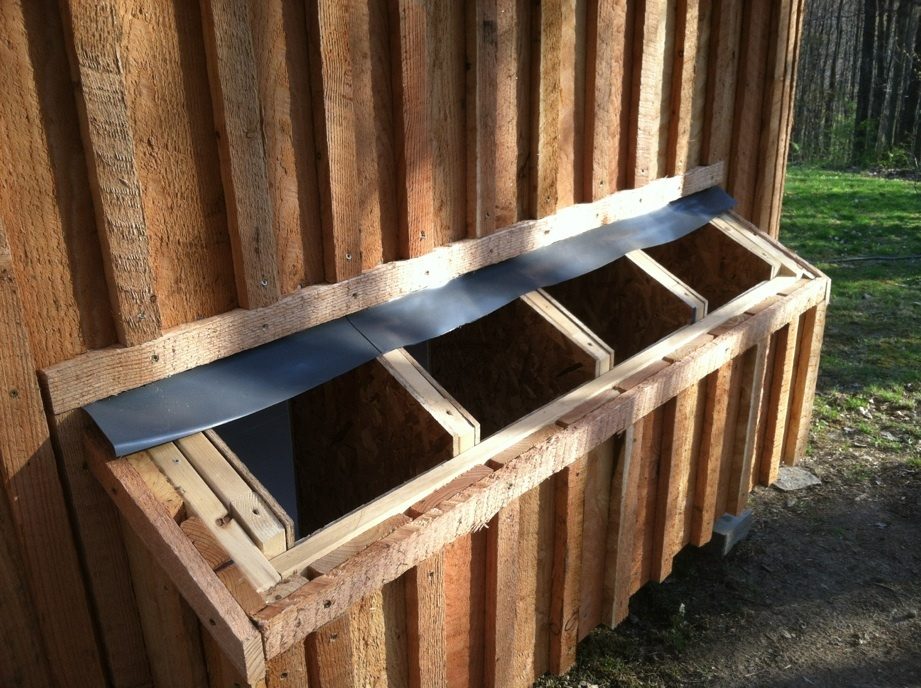
I put the nesting box lid on and mounted the hinges through the rubber.
Then I put on a row of 'ridge shingles' to cover up the hinge and the rubber. Because it isn't truely a ridge cap, you will need to get some roofing tar and glue down the top and side of each ridge shingle.
I'm also planning on putting some clear silicone along the top of the trim board in between each batten to really seal it up nicely.
Interior Shots
Costs (So far)
$285 - Lumber for pressure treated base, wall framing, rafters ,wall girts, roof purlins, and homemade door
$50 - Galvanized carriage bolts
$14 - Hurricane clips to hold rafters on
$40 - Misc nails / scerws
$60 - Two slider windows ordered from HomeDepot.com Price includes delivery
$180 - Roofing
$125 - Board and batten siding (larch)
Total - $754