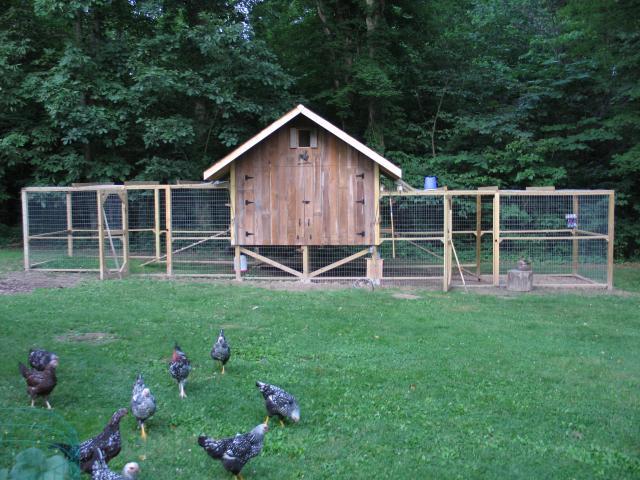
Raised Duplex Chicken Coop
Welcome to my chicken coop design and construction page.
First some Specifications:
Width: 10 ft.
Depth: 8 ft.
Height: 11 ft.
Coop Square Footage: 80 ft2
Run Square Footage: 160 ft2 each run
Number of Runs: 2
Style: Raised Duplex with Gabled Roof
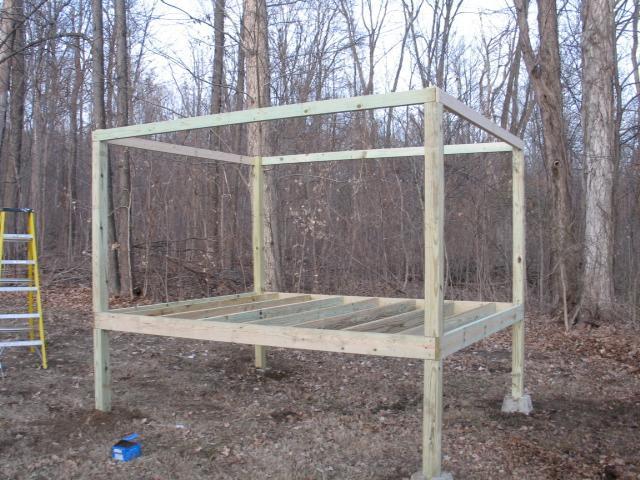
 Here's the frame made out of pressure treated 4x4's, 2x6's, and 2x4's. I chose to join the frame with dado joints. My initial thought was to set it on piers so it could be moved although it's become too heavy to realistically move. The piers were set and leveled prior to setting the frame in them. The floor joists are pressure treated 2 x 6's hung with metal joist hangers.
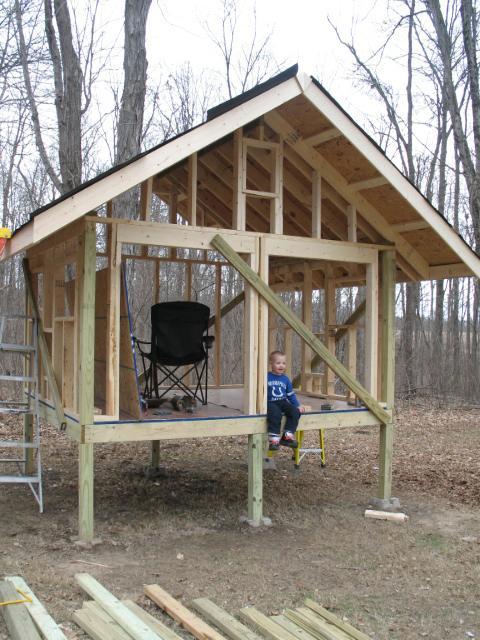
 Here the walls are framed with 2x4's. I used 3/4" OSB for the floor and covered it with inexpensive precut linoleum. The rafters are 2x6's and the roof decking is 7/16" OSB. As you can see, I added two more posts and piers in front and back midway because the structure is much heavier than I envisioned. I also made some changes with the structure's frame because I was doing things the hard way. (I'm not a carpenter by trade.) The diagonal 2x4's on the outside walls are for structural support until the inside walls are sheeted and also help to keep the structure plumb and square. I left a gap between the doors so that the duplex divider can be inserted and removed as needed. Each side of the coop has two large windows and a coop door framed and each gable is framed for gable vents. I had planned on a ridge vent but decided the gable vents along with the windows should provide plenty of ventilation. Perched in the doorway is my big helper.
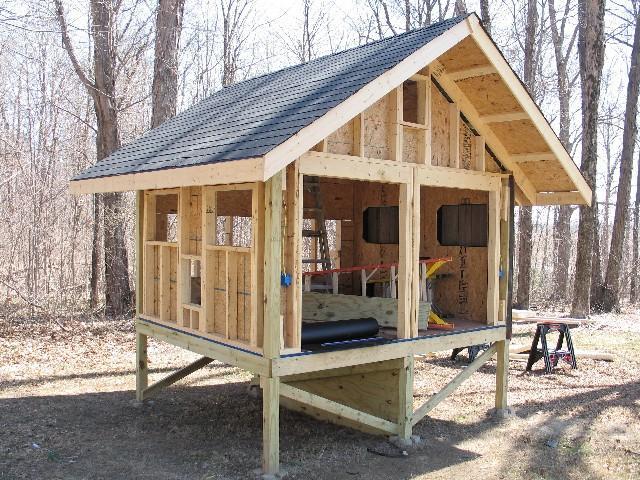
 Interior walls were covered with 7/16" OSB. To make things easier, I covered over the windows, gable vents, and run doors with the OSB and then drilled holes in the corners from the outside. After than I inserted framing nails in the 1/8" holes I drilled and wrapped a chalk line around the nails then snapped my chalk line. I cut out the windows, gable vents, and run doors from the inside using a circular saw making plunge cuts on the chalk lines and finished cutting out the corners with a jigsaw. In this photo, you can also see some electrical boxes on each side of the door. Each side of the duplex will have a basic porcelain light fixture in the ceiling with a switch inside each door. There will also be a gable vent exhaust fan in the back that will be controlled by a dimmer switch. I felted and shingled the roof with basic three tab 20 year shingles. As you can see, I'm also not a professional roofer but it's good enough for a chicken coop I think. You can also see I added a divider on the underside. For this I used 3/4" pressure treated plywood. I also added some bracing underneath to sturdy and strengthen the structure. She's pretty solid now.
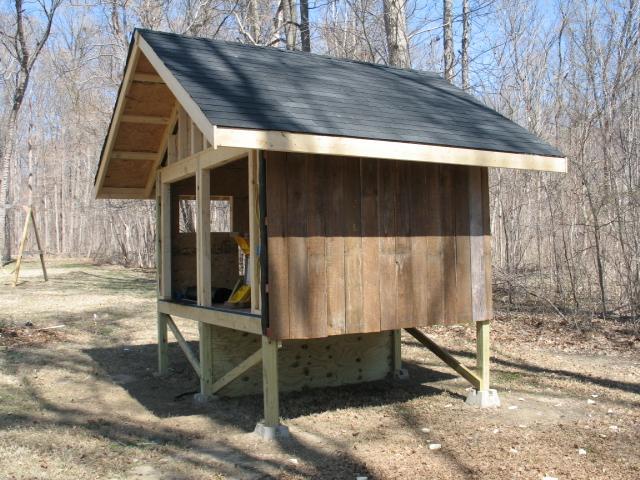
 At this point we are running way over budget so we scored some free old barn siding from a barn that my brother-in-law was fixing to tear down. I scored some 4 inch insulation foam board for free from a carpenter friend that had some left over from a log cabin that he is building. I cut it to size to fill all the gaps in the walls and ceiling. After installing the insulation, I covered the exterior walls with roofing felt because it's cheap and will help weatherproof and then added furring to nail the barn siding to. I cut the barn siding an inch or two long and will eventually snap a chalk line at the bottom and cut them all even. The barn siding is run all the way up through the eaves and notched for the rafters. I'm choosing to do it this way and keep the eaves open instead of boxing them or building a soffit to help reduce cost. The next step is to do as I did for the interior walls and drill holes in the corners of the openings.
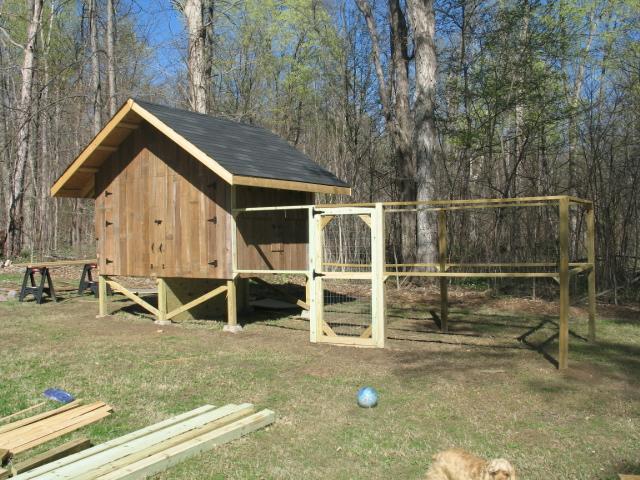
 Here we have all but the back sided (not shown) and windows and doors cut and hinged. To make life easier, I installed 1 x 6 braces on the inside of the doors and windows then made the hinge cut and installed the hinges. Once the hinges were installed, I made the remainder of the cuts. I've started one of the runs. It is approximately 8 ft by 16 ft and will be covered with welded wire. The run door is on and is finished except for one hinge that I didn't get done because I ran out of daylight. The run door hinges are spring hinges so I don't have to worry about my kids leaving it open. There will be an identical (but hopefully more plumb) run on the other side.
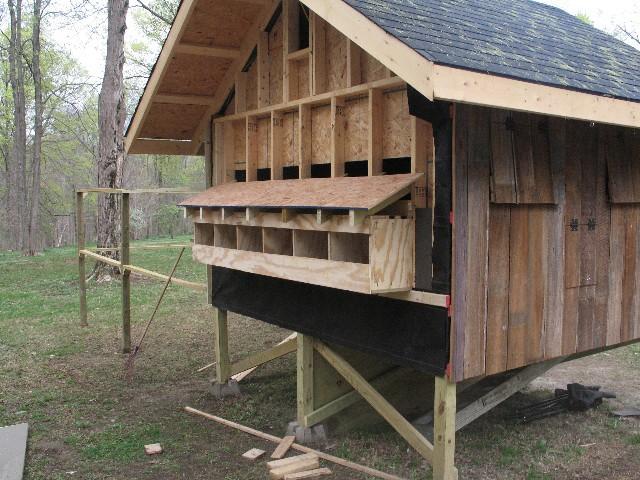
 Here is the back side. The nest boxes are framed. I built the nest boxes out of 3/4" plywood with the bottom piece being the leftover pressure treated scrap from the divider under the coop since it will be exposed to the elements. I assembled it using a pocket hole jig and 1 1/4" screws and wood glue in the garage. I spaced the box openings to line up with the studs in the wall and framed up the top and bottom entry into the boxes from the interior so there are no gaps. This was much easier than notching out the plywood to fit between each stud. I then attached a 2x4 to the top of the boxes with deck screws and used that and the furring strip underneath to mount it to the outside. I then installed the roof to the nest boxes with 2x4's and OSB. The nest boxes are 16 inches cubed.
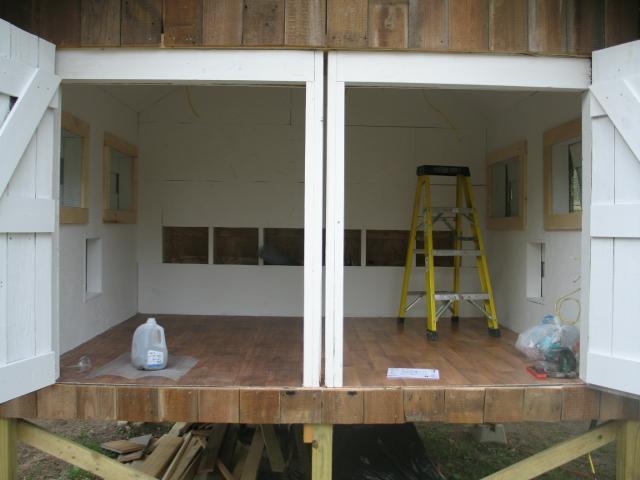
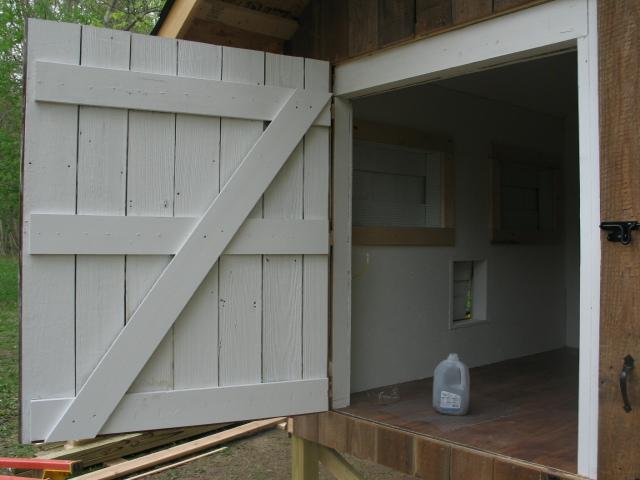
 Here's the interior. It's painted and the windows have 1/2" hardware mesh and have been framed. The slot in the door jam is where the divider is inserted in duplex mode. I haven't gotten to that part yet.
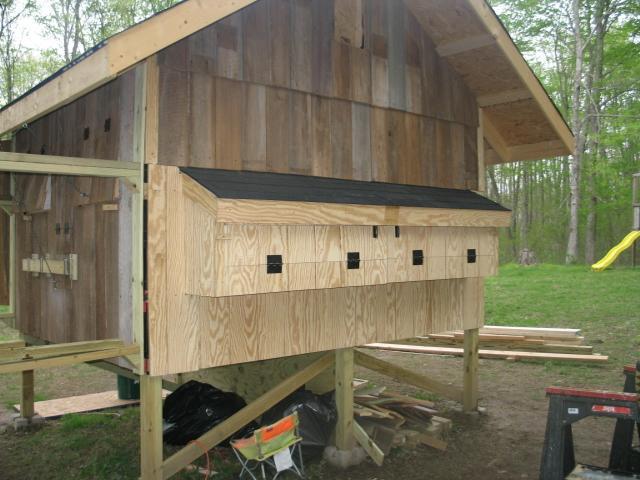
 I only had enough salvaged barn siding to do the top part of the back. The rest is finish with T1-11 plywood. I probably should have just done the whole back side with the T1-11. It looks a bit hodge-podge but I'm hoping that once it's stained it will look a little better.
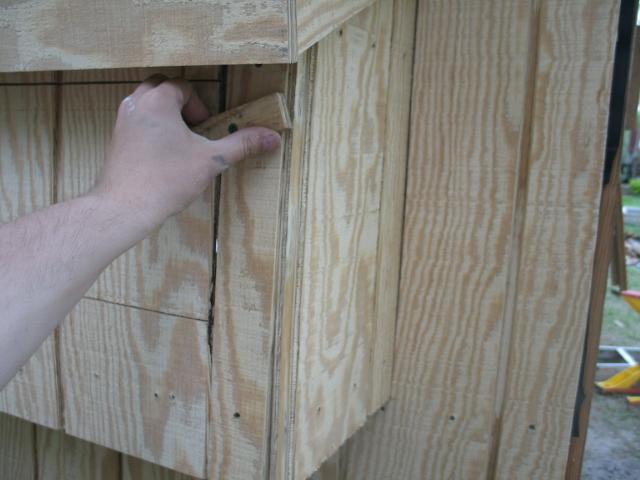
 I've used simple latches on each end.
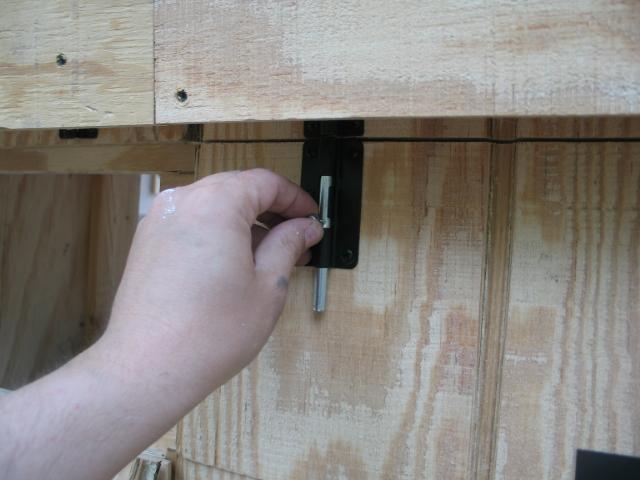
 And bolt latches for the inside corners.
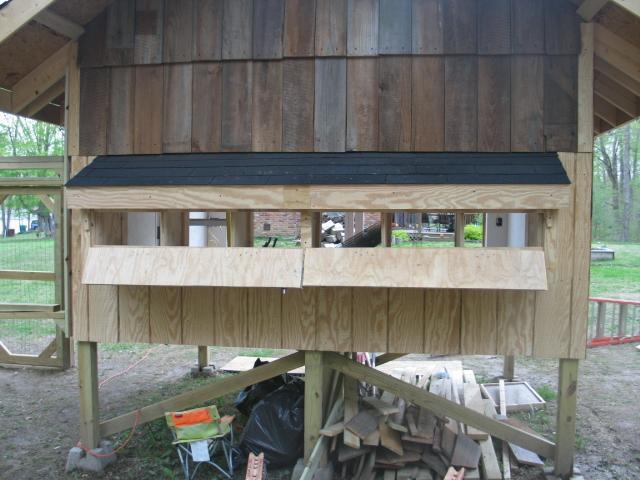
 And here they are both open. Since it's a duplex, I separated the nest boxes and made a door for each group of three.
 I added a cross brace because the doors were sagging and wouldn't close without catching. They open and close as smooth as butter now.
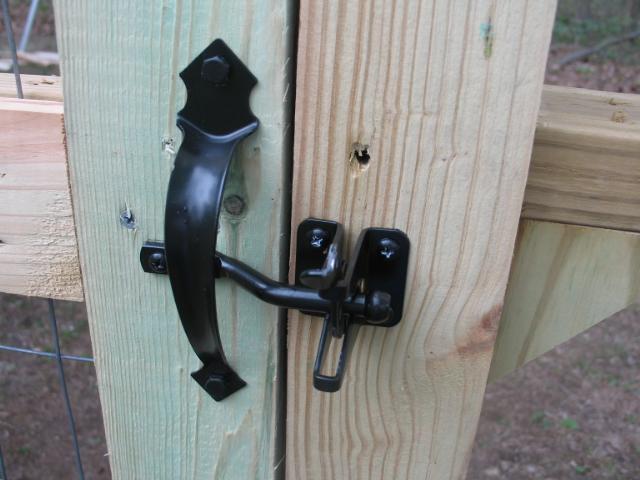
 I installed springe hinges and an automatic latch. One problem though; when it closes it locks you in the run. To solve this problem I've drilled a hole just above the latch and will run a piece of cord through the hole and tie it to the latch so that the cord can be pulled from inside the run to release the latch.
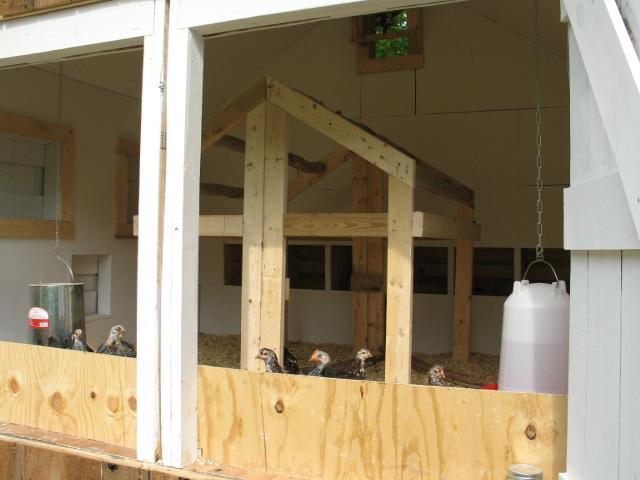
 The interior is complete enough here to move the chickens in. They love it. I used a fan and motor from our fireplace exhaust as a gable vent fan. It's wired on a dimmer so the speed can be adjusted. It works great for this application because it's quiet and moves air very well for this size of space. The roost is made to separate into two individual sections when the duplex divider is in place. I used trees from our woods for the perches screwed into place so they can be easily replaced if they rot or what not. They are approximately 3" in diameter and the chickens love them. Poop boards will be install where the braces are located on the frame and the top section above that will be covered in chicken wire. The room underneath preserves floor space.
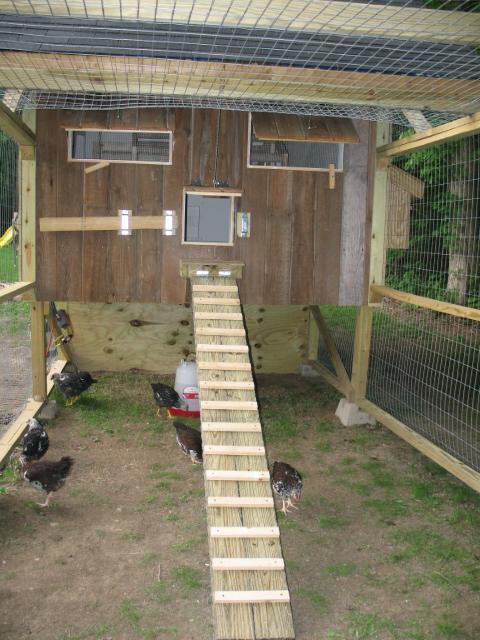
 The run is covered in 2" x 4" welded wire including the roof which has pressure treated 2 x 4's on end at the seams. The run has a 18" apron around it. We intend to bury it for appearance purposes. The ramp is two eight foot 6" deck boards wrapped in chicken wire for traction. The rungs are 1 x 2's placed every six inches. The ramp is attached to the coop with two 3" hinges so it can be lifted out of the way and attached from the run roof for cleaning the run. I built a small 12" x 15" deck outside the coop door to lower the height of the ramp. It works great and the chickens figured it out very quickly.
 The run is almost complete. I had to get a little creative in attaching the run to the coop because my windows were too high to attach it directly. The welded wire is attached to the side of the coop in front and back and a 1" x 4" board is installed over top of the wire to dress up the corners. The welded wire is installed underneath the barn siding where it runs under the front and back. It looks better than if we stapled it directly on the surface of the siding.
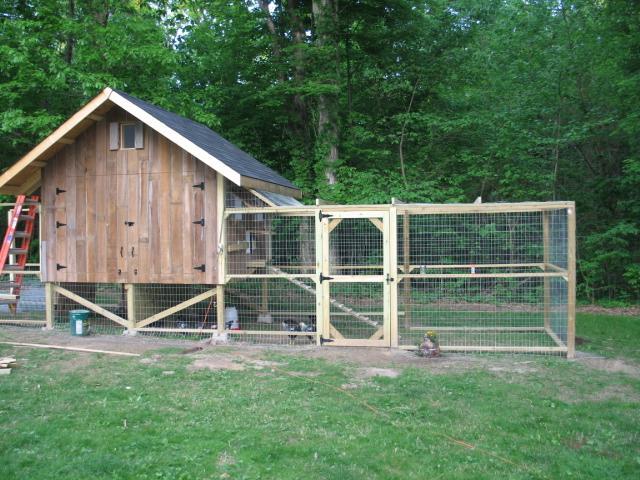
 And here it is with both runs complete. The top of each run is covered in welded wire. If I had to do it over again I would have used 4x4's for all of the run framing. I can see, over time, the 2x4's are going to sag and I'll have to add some support.
Welcome to my chicken coop design and construction page.
First some Specifications:
Width: 10 ft.
Depth: 8 ft.
Height: 11 ft.
Coop Square Footage: 80 ft2
Run Square Footage: 160 ft2 each run
Number of Runs: 2
Style: Raised Duplex with Gabled Roof
