Spring through early summer is the best way to start a flock (from my experience) but let’s backtrack to how to prepare.

Step 1: Know how many hens you are getting so you can plan on how big the coop (and fenced in run if you so desire) needs to be to accommodate them.

Step 2: Start looking for the materials and plans you will need to successfully build your coop.
(I used rough sawn pine boards from a local lumber mill to make my coop)
Step 3: Also look up the laws in your state and county for how many chickens you can have or if you can have a rooster (If you so desire) or if you can’t have any at all! (If you can’t have any chickens in your area I would suggest you stop reading this article here.)
Step 4: (This is VERY important) Water is critical to your chickens’ health. The water should (ALWAYS be clean and fresh so that they stay hydrated which is vital because chickens are 50% water and eggs are 65% water! (WOW!) Also the water should always be in a sheltered area. If you live in a place where your water can freeze, DON’T put it inside the coop for the hens could get frostbite! Put it outside.
I use a heating pad that goes underneath my watering bowl so that it doesn’t freeze. (It is also outside.)
Step 5: (Food choice is critical!)
Start researching what kind of feed you would want to feed your chickens. It can’t be any random feed you would pick up at your local farm supply store! It has to be a feed that has everything your chickens need to survive, thrive, and give you delicious eggs!

(I am going to be raising meat chickens this year for the first time so I have nothing to share about that yet!)
The feed I use is from a company called Poulin Grain. Here is a link: https://www.poulingrain.com/
If you decide to free range your chickens, that is better for them then keeping them ‘cooped up’ when the weather is amazing!
Food should also be in a sheltered place from the weather. I keep my feeder inside the coop where the chickens can eat if the weather is bad.
(The feeder in this photo is the old one that I replaced this spring)
Step 6: Bedding is important for your coop because it provides soft material for your nesting boxes, absorbent material for manure and moisture, and also acts as an insulator for cold weather.
I use pine shavings because they are cheap and effective and are a great compostable material!
I use hay or straw (depending on whether if they are available) for the nesting boxes for the hens to lay their eggs in so that they don’t crack.
Step 7: When you finally get your hens they will be nervous at first and a little scared because of traveling from a place they have known all their life to a place they know nothing about. What I did is I gave them electrolyte water to calm them down and placed them inside the coop with food to get them accustomed to their new home.
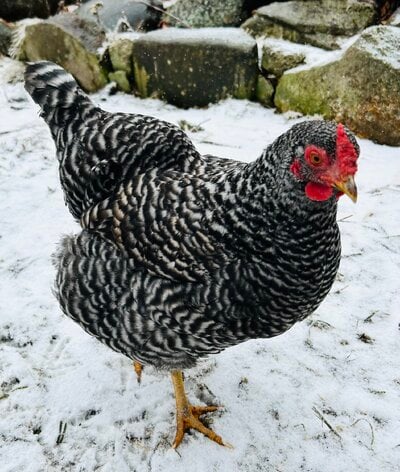
Here are some photos from this year:
This is honestly all I have to share about my experience with starting out with adult hens! I hope you find this either useful, or just a good read! Thank you for taking the time to read this!
Step 1: Know how many hens you are getting so you can plan on how big the coop (and fenced in run if you so desire) needs to be to accommodate them.
Step 2: Start looking for the materials and plans you will need to successfully build your coop.
(I used rough sawn pine boards from a local lumber mill to make my coop)
Step 3: Also look up the laws in your state and county for how many chickens you can have or if you can have a rooster (If you so desire) or if you can’t have any at all! (If you can’t have any chickens in your area I would suggest you stop reading this article here.)
Step 4: (This is VERY important) Water is critical to your chickens’ health. The water should (ALWAYS be clean and fresh so that they stay hydrated which is vital because chickens are 50% water and eggs are 65% water! (WOW!) Also the water should always be in a sheltered area. If you live in a place where your water can freeze, DON’T put it inside the coop for the hens could get frostbite! Put it outside.
I use a heating pad that goes underneath my watering bowl so that it doesn’t freeze. (It is also outside.)
Step 5: (Food choice is critical!)
Start researching what kind of feed you would want to feed your chickens. It can’t be any random feed you would pick up at your local farm supply store! It has to be a feed that has everything your chickens need to survive, thrive, and give you delicious eggs!
(I am going to be raising meat chickens this year for the first time so I have nothing to share about that yet!)
The feed I use is from a company called Poulin Grain. Here is a link: https://www.poulingrain.com/
If you decide to free range your chickens, that is better for them then keeping them ‘cooped up’ when the weather is amazing!
Food should also be in a sheltered place from the weather. I keep my feeder inside the coop where the chickens can eat if the weather is bad.
(The feeder in this photo is the old one that I replaced this spring)
Step 6: Bedding is important for your coop because it provides soft material for your nesting boxes, absorbent material for manure and moisture, and also acts as an insulator for cold weather.
I use pine shavings because they are cheap and effective and are a great compostable material!
I use hay or straw (depending on whether if they are available) for the nesting boxes for the hens to lay their eggs in so that they don’t crack.
Step 7: When you finally get your hens they will be nervous at first and a little scared because of traveling from a place they have known all their life to a place they know nothing about. What I did is I gave them electrolyte water to calm them down and placed them inside the coop with food to get them accustomed to their new home.
Here are some photos from this year:
This is honestly all I have to share about my experience with starting out with adult hens! I hope you find this either useful, or just a good read! Thank you for taking the time to read this!