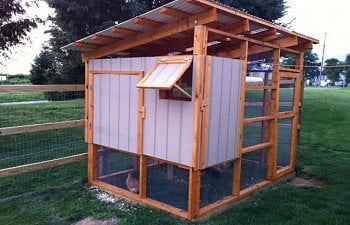
Corey's Coop-Dee-Doop
I had thrown around the idea of getting a few chickens so I could have fresh eggs. I feed my dogs an egg a day as they are on a raw, prey-based diet. I thought it only made sense to have my own chickens to have fresh eggs. Easter weekend, I ventured to the local lumber yard. I had no intention of purchasing chickens that particular day... until I showed up and they were having a spring easter day with rabbits and chickens. I had also mulled over the idea of rabbits, but they happened to not have the particular breed I was looking for. This is probably a good thing. I ended up bringing home four, one week old baby chicks. I didn't manage to find out what breed they were before I left, but they did say they were layers. So here is where the adventure started.
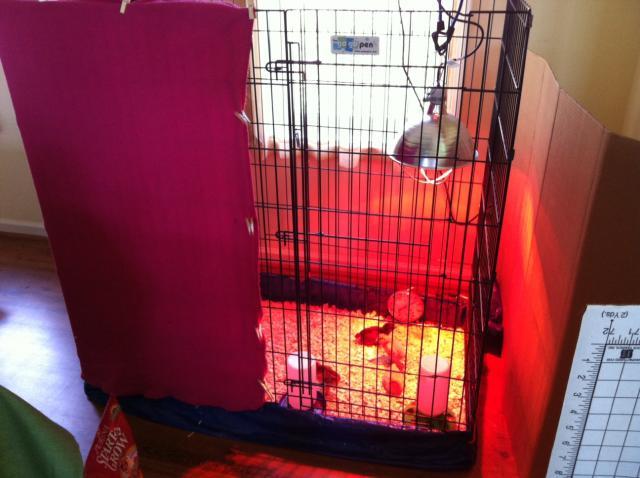
I brought the chickies home in their little cardboard box. I set up one of my dog exercise pens in the dining room (I felt like it was still too cold for them to be in the garage especially since they needed warmth. I set up the pen on a tarp, and folded the tarp around the sides and poured some shavings in the bottom. I hooked up the heat lamp, filled the feeder and waterer, wrapped a blanket around the sides to hold in the heat, and added the chickies. They didn't look so good after being in the cardboard box for over an hour. Had I been prepared, I would have set up everything ahead of time so they wouldn't of had to stay in there so long. (That's what happens when you impulse buy) After an hour or so under the heat lamp they perked up, and started moving around. I felt better.
Here is the makeshift brooder... yes I realize the height of the pen is a bit overkill, but it's what I had on hand.
Then became the reality that I had to construct something for these little chickies to live in. After a couple of days I swear I could see them grow... I was in trouble. I ordered a couple of books and found the BYC site and started looking at coops. I had an idea of what I wanted in my head. I drew something on paper just so I would have an idea down (although after I started I don't think I referred to it again). In my drawing I decided the coop would be 10 feet long and 6 feet wide, with a raised henhouse that was 6 feet long and roughly 3 feet wide.
Within a week I went back to the lumber yard to have them deliver the lumber I would need to finish a portion of the fence... what?!?!? Oh yea... the coop was going next to the un-finished fence. So one project created the finishing (or starting) of another. The fence had been in the works for some time, but digging holes by hand is time consuming. I had thirteen dug, and posts in them. I just needed rails and wire fencing to go up.
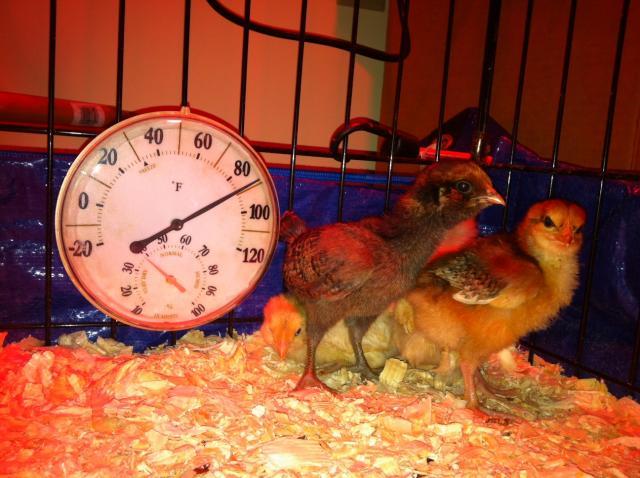
Here's a close up of the little peepers during their first two weeks. The thermometer behind them, is only about 6 inches in diameter.

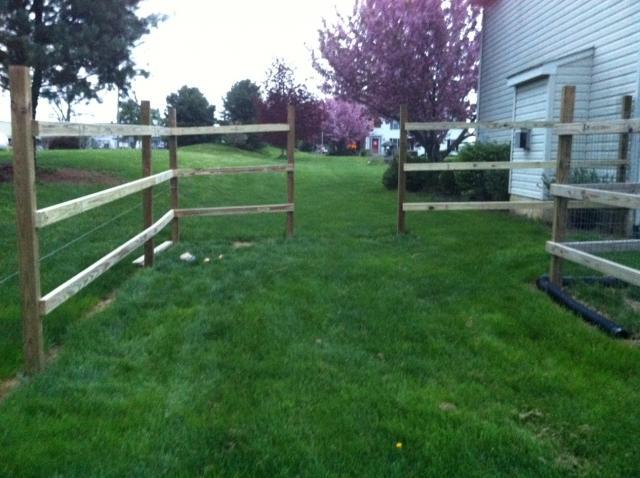
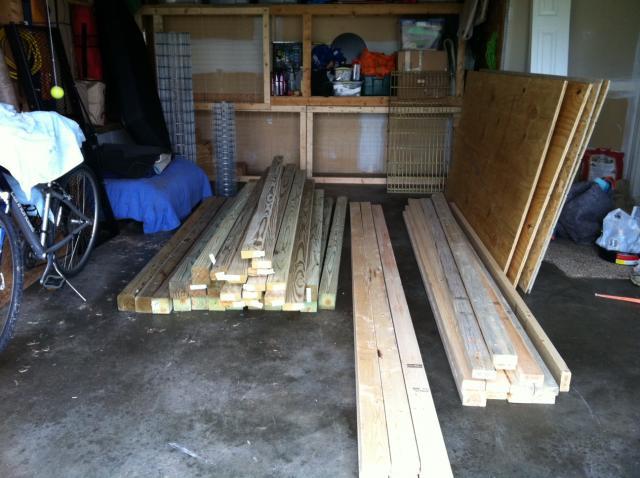
In the left pic, is the area of the yard where the coop will be located. Between the fence on the left and the right side fence (where you can see the downspout). Sort of in front of the gate. On the right photo, is the condition of my garage after the lumber was delivered... little did I know I would make a hundred more trips back to the lumber yard.


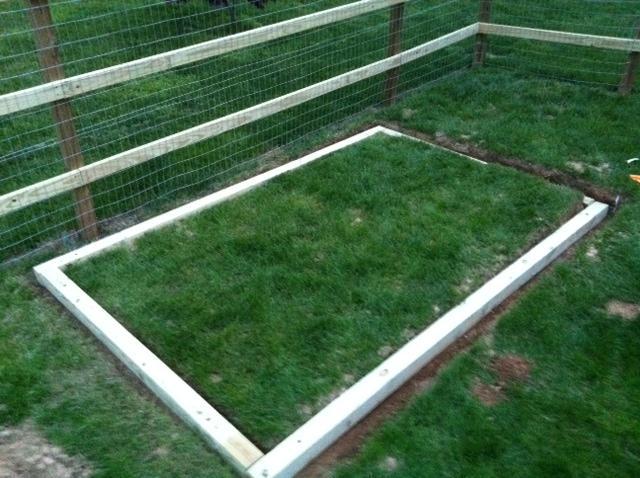
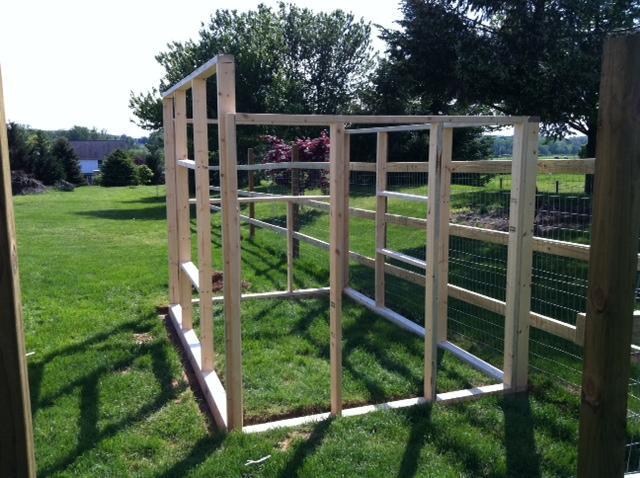
I couldn't start on my project right away, because I had three weekends in a row with dog events. Those had to take priority, since they were already paid for. So the chickens continued to live in my dining room... and continued to grow like weeds. Finally I was able to get the foundation started, after the section of the fence was completed of course. I chose to use treated 4 X 4's for the base, and level them out. I drilled some holes in them and drove rebar through them so they wouldn't shift. The foundation is 6 feet wide by 10 feet long.
Here's the foundation.

Next came building the frame. Let me start out by saying I am not a carpenter, nor do I have the best math skills. All I had for cutting was a circular saw, and a saws-all. For tools I used a small triangle with level, hammer, tape measure, tin snips, 4 foot ladder, and drill. That's pretty much all I used for the entire project.
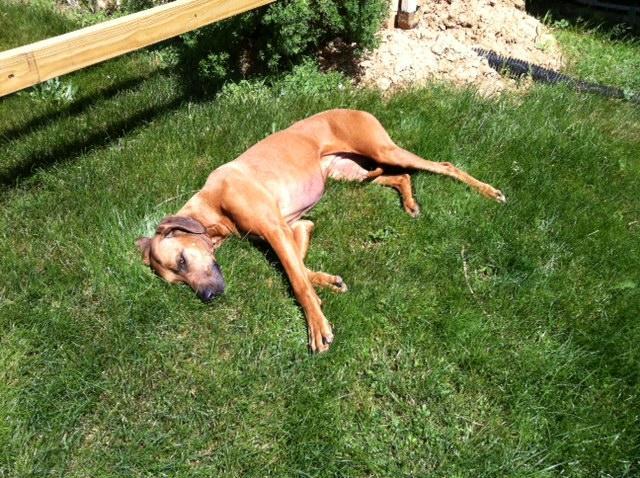
I built the frame in the driveway... which was not level, so that did make it a bit challenging. I used 2X4's for the frame. I also had a helper-dog who was all in all pretty useless! It seemed all she wanted to do was sun bathe.


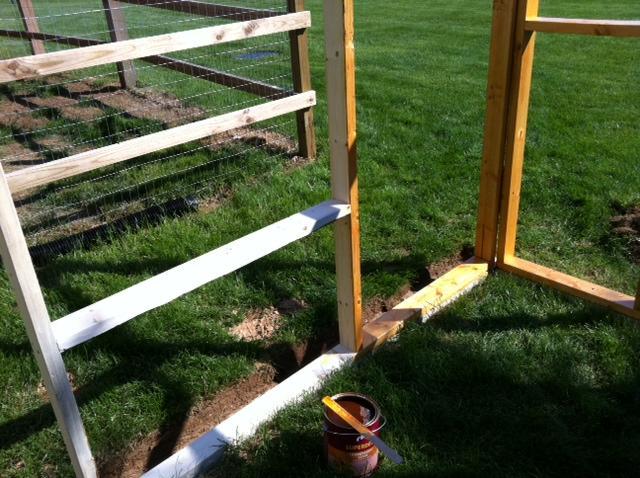
I built all of the frame pieces in the driveway, and then carried them all out to the foundation after building them. In hindsight, all of the trips back and forth probably doubled the actual building time. Somewhere along the line, I managed to miscalculate, and the frame corners didn't exactly fit together like they were supposed to. But I made it work anyway. After the frame was up I stained/sealed it with an outdoor oil based deck sealer.


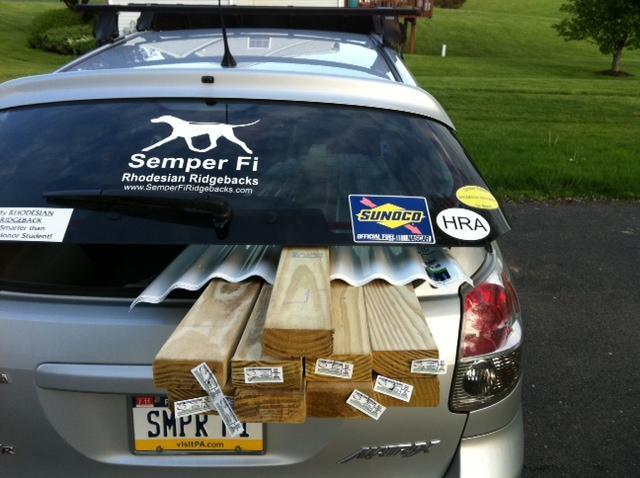
Sometime after the frame went up I had to make another trip back to the lumberyard. I also purchased the plastic corrugated panels I would need for the roof as well. The car worked out really well for going back and forth to get lumber. It was much easier to load and unload from the car than the truck.

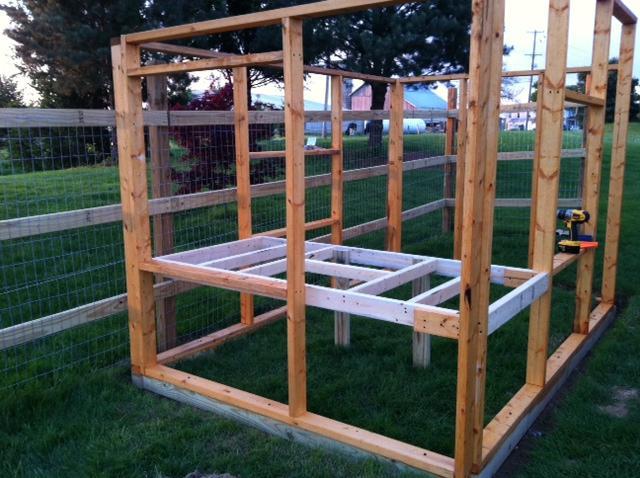
After the frame was sealed, I started on the actual coop part. I wanted the coop portion to be raised, so I purchased two drop pans 30X36 to slide inside for the bedding. This meant there would need to be two large doors so the pans could be slid out. Here's the coop getting framed out. I added the ceiling, and then the floor after I installed some of the 1/2" X 1/2" hardware cloth around the bottom. I figured it would be easier to do the hardware cloth before the floor went in. At some point I may go back and insulate under the floor, but for now it's just 3/4" plywood. Thinking back, I wish I would have done the roof first. This would have made dealing with the weather a lot easier... but remember... not a carpenter.


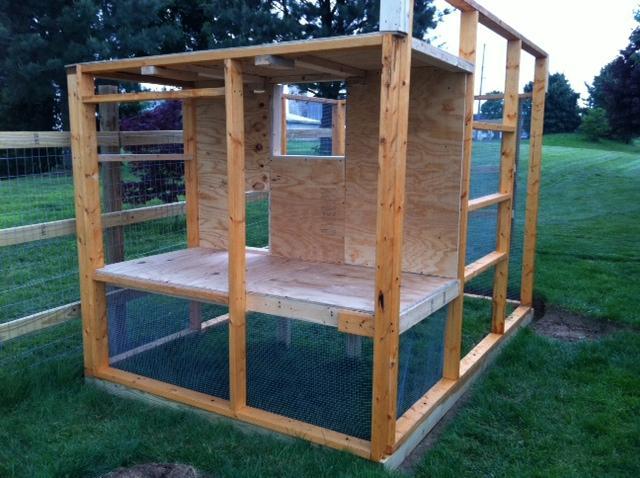
Next I used 1/2" plywood for the inside walls. I used screws instead of nails, so again if I decide to insulate, I can. I made space for two large windows, and the pop door. Then the outside walls started to go up. I used 1/2" pre-primed, T1-11 for the outside walls. I did have a friend come and help with the outside walls. I wanted them to be on there straight so I thought it was wise to enlist some help. It was much easier with two of us. While he did the cutting and measuring, I worked on getting some more hardware cloth tacked down on the other end. I used hardware staples because I didn't like the look of the other available fasteners, and didn't think staple gun staples would be strong enough to keep critters out.


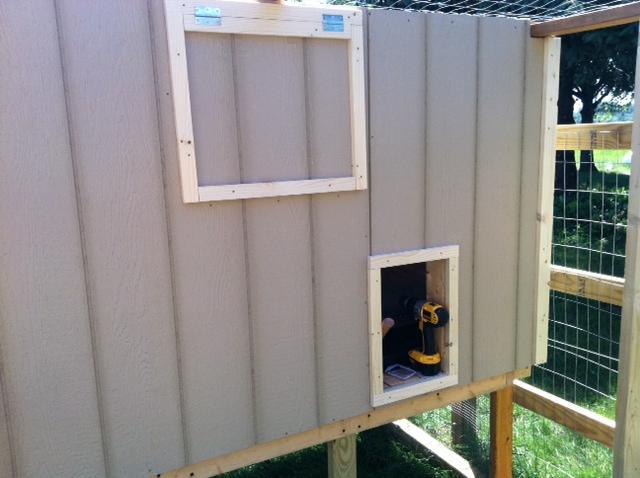
After the walls were up, I had to decide on how I was going to do the doors. I think the most tedious part was putting the trim on, and getting everything lined up and straight. I used 1X2's for all of the trim for around the windows, doors and on the corners. I constantly had to keep reminding myself that "it's only a chicken coop". After the doors were hung I actually felt like I was getting something accomplished. I stained all the trim to match the frame of the run. At some point I installed mesh fencing across the top. I chose this option instead of waiting until the roof was on to put the chickens in their new home. At this point they were taking up the garage, and I really wanted my garage back! Once again, the helper dog was there.... NOT helping....


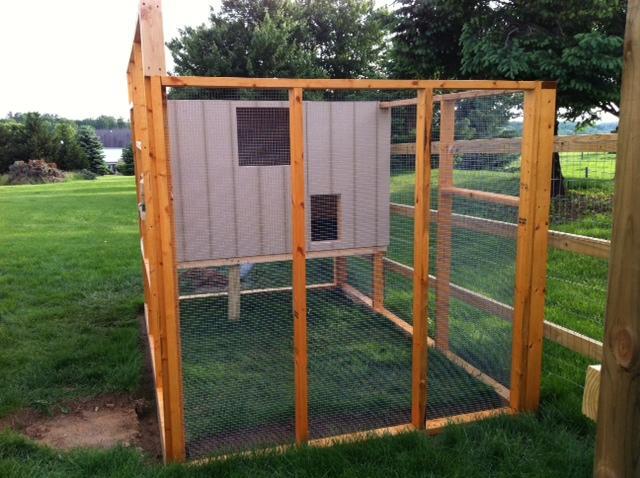
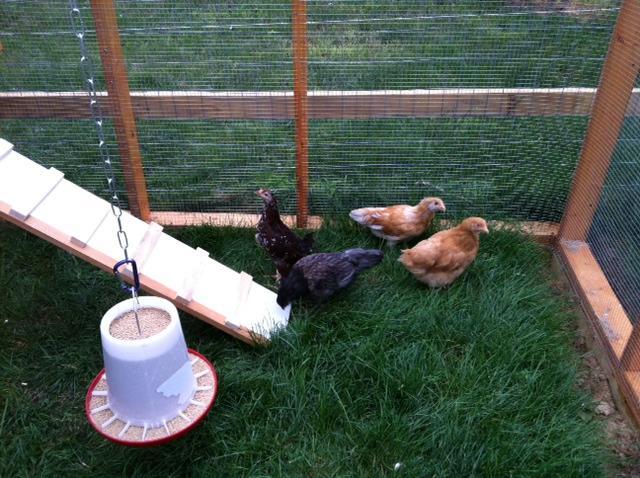
Next I had to build a people door.... as it turns out, I had one piece of warped lumber left... but 'it's only a chicken coop', and as long as it was functional that was all that mattered. I used hardware cloth to line the door as well. Amazingly enough after I built the door, it actually fit! I stained it after this pic was taken, along with all of the roof trusses that I would be using. At this point I moved the chickies now 8 weeks, into their new home. I used two tarps to protect them from the weather until I could get going on the roof the next day. I put all the chickies into the coop, and then sorta forced them down the ramp. When it started to get dark they all went back into the coop on their own.


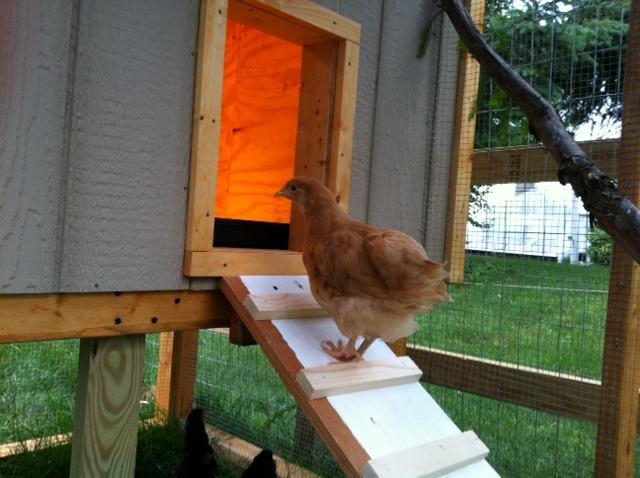
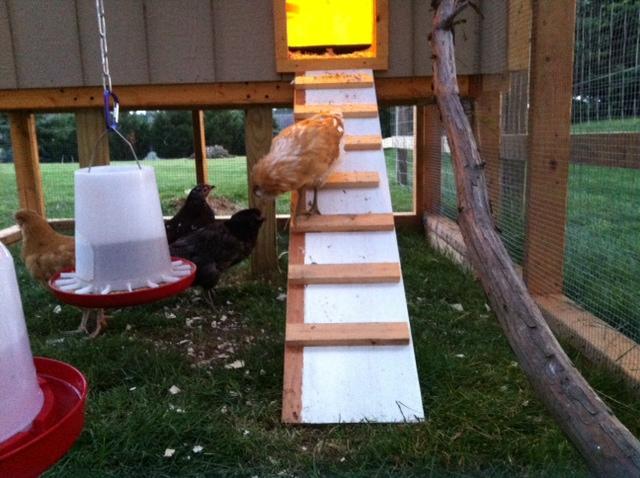
Here is Clara trying out the ramp (after I took this pic, she slipped and fell (yes I laughed)). I think she tripped over her own feet.

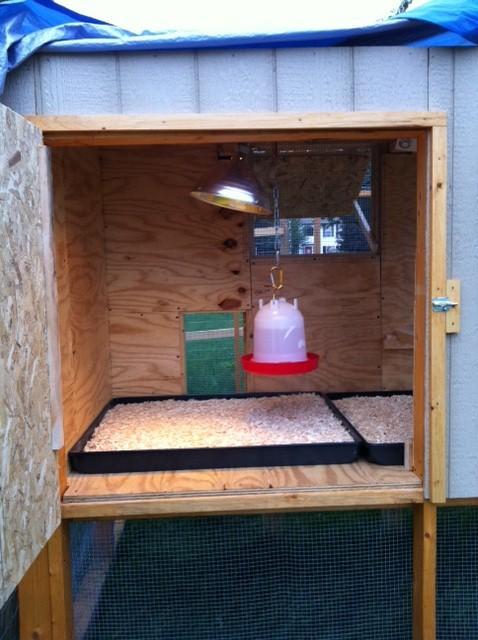
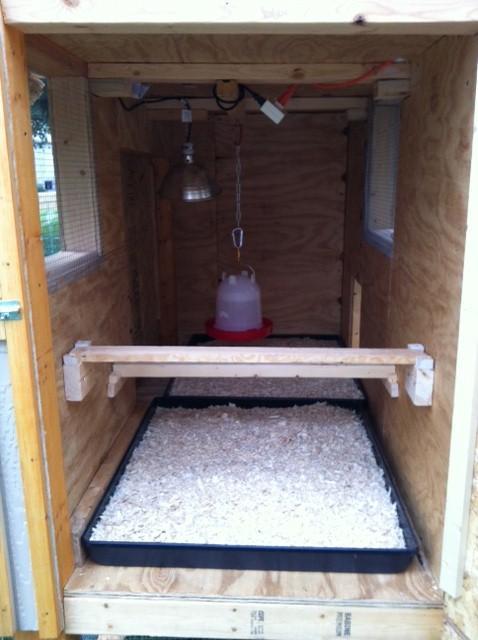
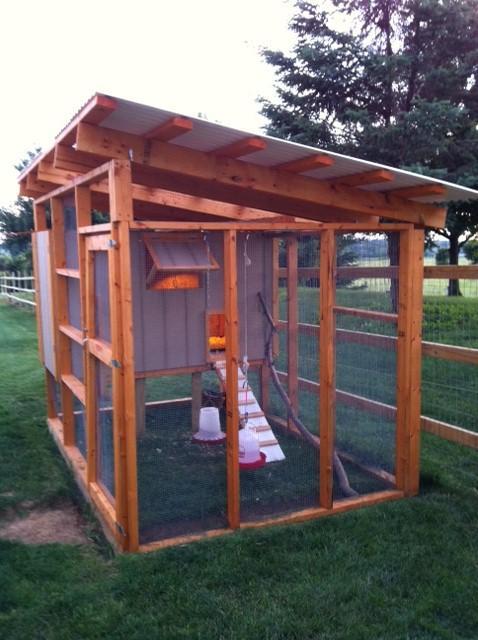
Here is the inside of the coop (pre-roof). I ran an extension cord through a small hole in the roof and rigged it up to a timer. The light comes on at dusk and goes off around 10pm. As the fall gets closer I will adjust the time with the sunset to give them light. You may notice there are no actual nesting boxes. I am still thinking about where/how I will put them. In the left pic I may put them against the wall next to the door, or against the rear (closest) right up against the door. I will have to accomodate for the sliding tray however. I think I can make it work. I chose to put the waterer inside for now. If I make a closable door for the pop door I want them to be able to at least drink if they are locked in.


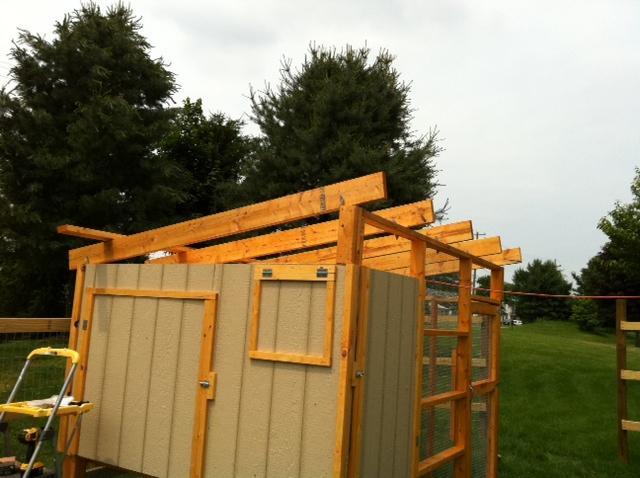
I measured and remeasured, and remeasured for the roof. I finally got it all straight, and used metal braces to hold the 2X6's in place. Then I used 2X4's for the top. I bought the plastic gap filler pieces for the roof panels, and only when the roof was nearly complete did I realize I miscalculated on how many filler pieces and roof panels I would need. Back to the feed store....

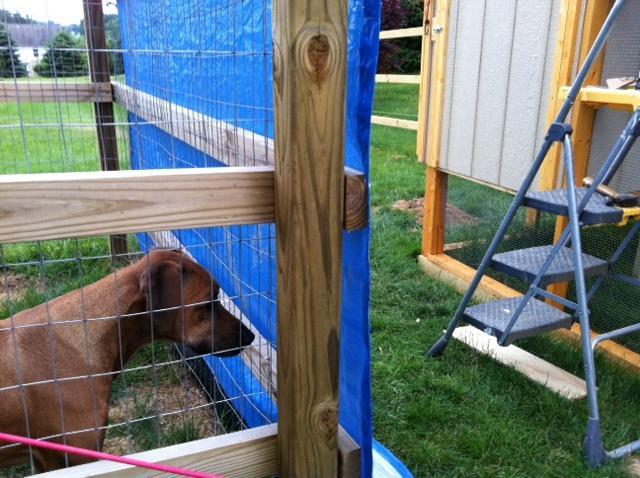
Another thing I did not account for was how the helper dog's demeanor would change once the chickies were in the coop where they could be seen from the dog's daytime potty yard. I had to temporarily hang a tarp across the end until the dogs were used to the chickies being so close. They really wanted to see them, and were crying and trying to look around the edge of the tarp. Poor puppies.

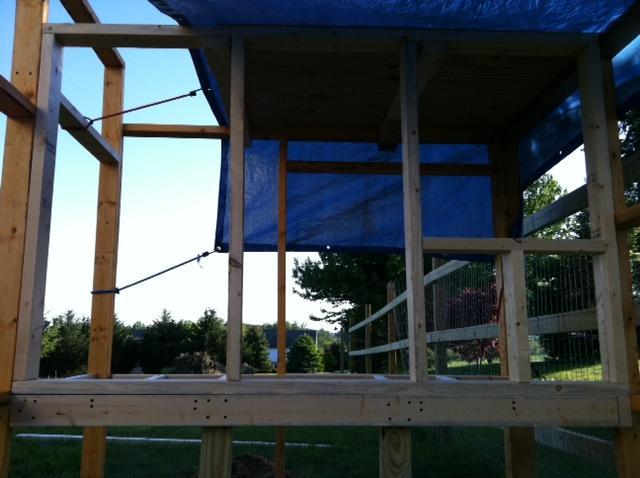
I used the corrugated plastic roof panels for the roofing. When I got about half way done I realized I needed one more panel. Instead of waiting a week for another white panel to be ordered I opted to use a clear panel for the middle. I figured this would let some more sunshine in, and I could get the roof finished sooner. In the interim, I had to use a tarp to cover half of the roof until I could get it finished. In hindsight I should have just gotten it all done, because the weight of the tarp did bend the plastic roofing a bit in the back. I think if I put another brace under there, it will straighten out though.
Here's the clear roof panel.

Here's where the roof got bent a little bit.

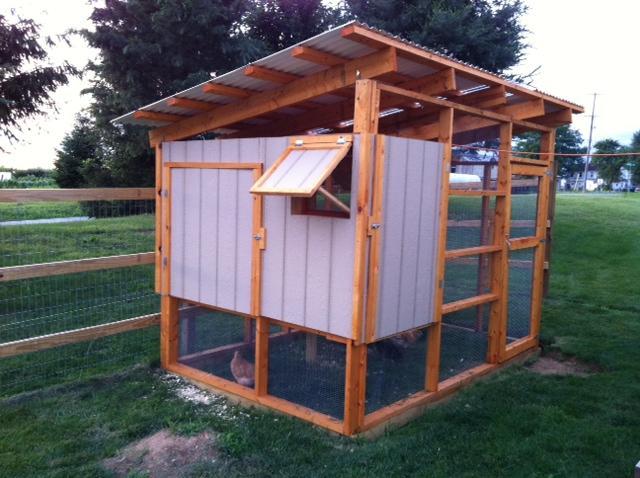
So here's the finished coop!!! I think it turned out great. I even had someone ask if I used a kit or some sort of plans... nope.... I would say the majority of it, I was really winging it. But it looks really good, and is functional.


A few other things I still plan on doing....
1. Fill the trench around the bottom with concrete to prevent any sly critters from trying to dig in.
2. I still need to build the nest boxes. Since the girls are only 9 weeks I figure I can do this on a rainy day. DONE!!!
3. I hope to plant some tall pampas grass outside of the fence to help shade it, and to keep prying eyes off the coop.
4. I might possibly dig out the grass in the run and put down some sort of sand instead. Depends on how well it all holds up. I do like the idea of letting them eat the grasses.
Things I would have done different....
1. Used pressure treated wood vice untreated. Although I do like the look of the stained trim and wood, I am unsure how well it will hold up. Time will tell.
2. Size. In case I want to make it bigger I don't have a lot of room to grow. Now that being said, I can always expand toward the gate, adding another few feet of run space.
3. Location. I'm unsure how I will feel this winter having to trudge through 2 feet of snow to check if there are any eggs. Also being right next to the fence... sucks. It had to be moved to do any work on it. Ugh.
4. Taken More pictures. It was hard for me to remember to take pictures since I was mostly doing all the work myself.
Thank You's
First off I would like to Thank my friends Lisa and Dave for coming out several times to help. With digging, hammering in hardware cloth, inside walls, etc. I would also like to Thank Kyle for dedicating an ENTIRE Saturday to help me put up the exterior walls. I could not have done this without him. Lastly I would like to give a shout out to Oxford Feed and Lumber located in Oxford, PA. They were indispensible in giving advice and helping me out. They were awesome!
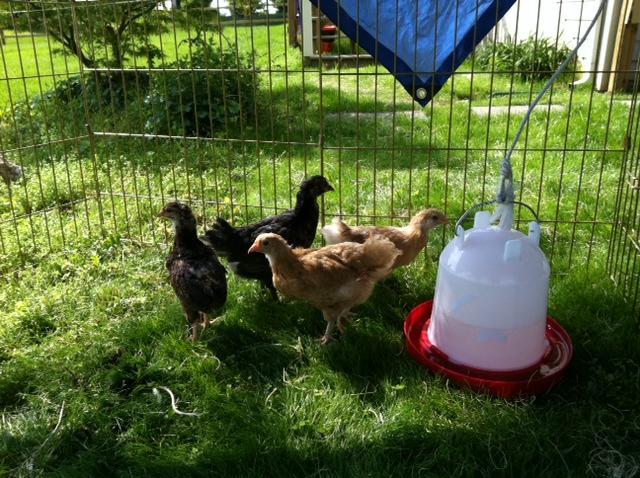
Here are some pictures of the actual chickens. More to follow....
On the left, chickens at about 8 weeks old. Their first day in the coop. On the right, here they are before the completion of their run/coop at about 6 weeks old or so.


Within a week I went back to the lumber yard to have them deliver the lumber I would need to finish a portion of the fence... what?!?!? Oh yea... the coop was going next to the un-finished fence. So one project created the finishing (or starting) of another. The fence had been in the works for some time, but digging holes by hand is time consuming. I had thirteen dug, and posts in them. I just needed rails and wire fencing to go up.
Here's a close up of the little peepers during their first two weeks. The thermometer behind them, is only about 6 inches in diameter.
In the left pic, is the area of the yard where the coop will be located. Between the fence on the left and the right side fence (where you can see the downspout). Sort of in front of the gate. On the right photo, is the condition of my garage after the lumber was delivered... little did I know I would make a hundred more trips back to the lumber yard.
I couldn't start on my project right away, because I had three weekends in a row with dog events. Those had to take priority, since they were already paid for. So the chickens continued to live in my dining room... and continued to grow like weeds. Finally I was able to get the foundation started, after the section of the fence was completed of course. I chose to use treated 4 X 4's for the base, and level them out. I drilled some holes in them and drove rebar through them so they wouldn't shift. The foundation is 6 feet wide by 10 feet long.
Here's the foundation.
Next came building the frame. Let me start out by saying I am not a carpenter, nor do I have the best math skills. All I had for cutting was a circular saw, and a saws-all. For tools I used a small triangle with level, hammer, tape measure, tin snips, 4 foot ladder, and drill. That's pretty much all I used for the entire project.
I built the frame in the driveway... which was not level, so that did make it a bit challenging. I used 2X4's for the frame. I also had a helper-dog who was all in all pretty useless! It seemed all she wanted to do was sun bathe.
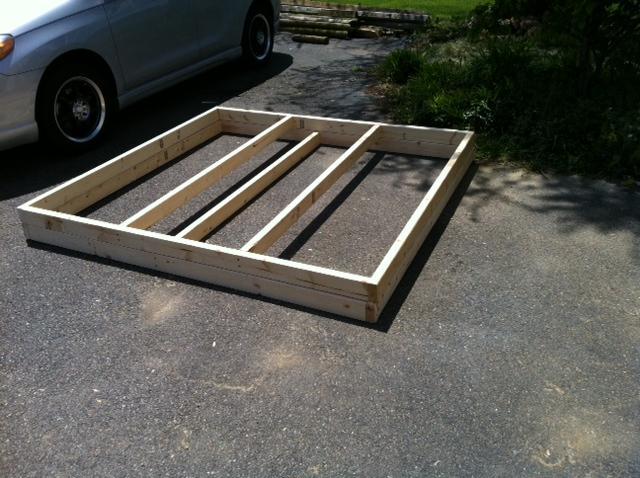
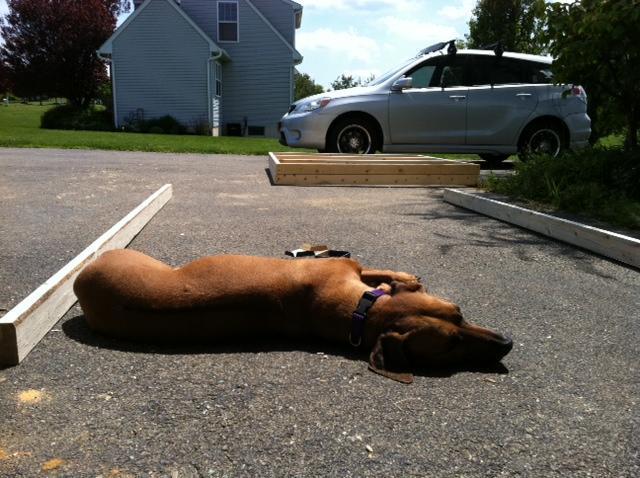
I built all of the frame pieces in the driveway, and then carried them all out to the foundation after building them. In hindsight, all of the trips back and forth probably doubled the actual building time. Somewhere along the line, I managed to miscalculate, and the frame corners didn't exactly fit together like they were supposed to. But I made it work anyway. After the frame was up I stained/sealed it with an outdoor oil based deck sealer.
Sometime after the frame went up I had to make another trip back to the lumberyard. I also purchased the plastic corrugated panels I would need for the roof as well. The car worked out really well for going back and forth to get lumber. It was much easier to load and unload from the car than the truck.
After the frame was sealed, I started on the actual coop part. I wanted the coop portion to be raised, so I purchased two drop pans 30X36 to slide inside for the bedding. This meant there would need to be two large doors so the pans could be slid out. Here's the coop getting framed out. I added the ceiling, and then the floor after I installed some of the 1/2" X 1/2" hardware cloth around the bottom. I figured it would be easier to do the hardware cloth before the floor went in. At some point I may go back and insulate under the floor, but for now it's just 3/4" plywood. Thinking back, I wish I would have done the roof first. This would have made dealing with the weather a lot easier... but remember... not a carpenter.
Next I used 1/2" plywood for the inside walls. I used screws instead of nails, so again if I decide to insulate, I can. I made space for two large windows, and the pop door. Then the outside walls started to go up. I used 1/2" pre-primed, T1-11 for the outside walls. I did have a friend come and help with the outside walls. I wanted them to be on there straight so I thought it was wise to enlist some help. It was much easier with two of us. While he did the cutting and measuring, I worked on getting some more hardware cloth tacked down on the other end. I used hardware staples because I didn't like the look of the other available fasteners, and didn't think staple gun staples would be strong enough to keep critters out.
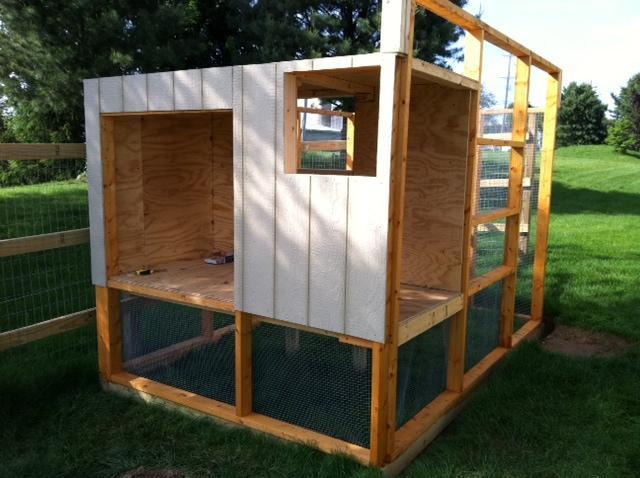
After the walls were up, I had to decide on how I was going to do the doors. I think the most tedious part was putting the trim on, and getting everything lined up and straight. I used 1X2's for all of the trim for around the windows, doors and on the corners. I constantly had to keep reminding myself that "it's only a chicken coop". After the doors were hung I actually felt like I was getting something accomplished. I stained all the trim to match the frame of the run. At some point I installed mesh fencing across the top. I chose this option instead of waiting until the roof was on to put the chickens in their new home. At this point they were taking up the garage, and I really wanted my garage back! Once again, the helper dog was there.... NOT helping....
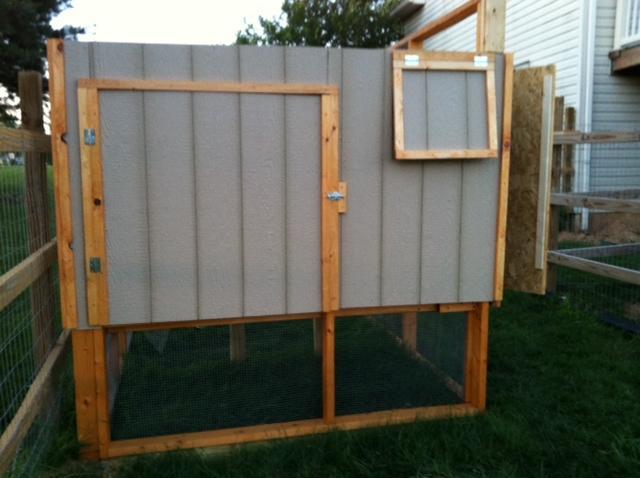
Next I had to build a people door.... as it turns out, I had one piece of warped lumber left... but 'it's only a chicken coop', and as long as it was functional that was all that mattered. I used hardware cloth to line the door as well. Amazingly enough after I built the door, it actually fit! I stained it after this pic was taken, along with all of the roof trusses that I would be using. At this point I moved the chickies now 8 weeks, into their new home. I used two tarps to protect them from the weather until I could get going on the roof the next day. I put all the chickies into the coop, and then sorta forced them down the ramp. When it started to get dark they all went back into the coop on their own.
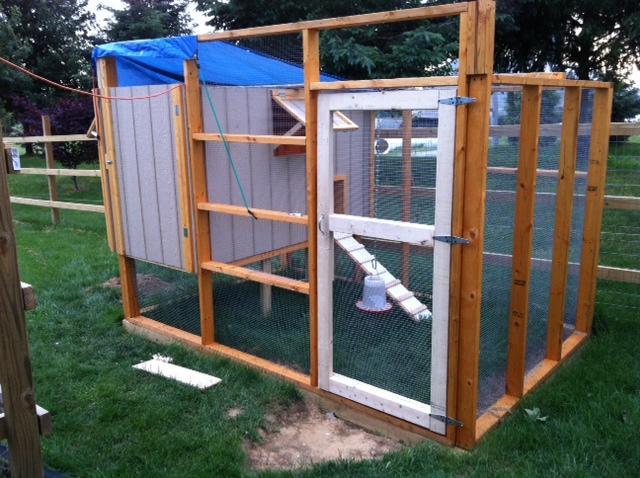
Here is Clara trying out the ramp (after I took this pic, she slipped and fell (yes I laughed)). I think she tripped over her own feet.
Here is the inside of the coop (pre-roof). I ran an extension cord through a small hole in the roof and rigged it up to a timer. The light comes on at dusk and goes off around 10pm. As the fall gets closer I will adjust the time with the sunset to give them light. You may notice there are no actual nesting boxes. I am still thinking about where/how I will put them. In the left pic I may put them against the wall next to the door, or against the rear (closest) right up against the door. I will have to accomodate for the sliding tray however. I think I can make it work. I chose to put the waterer inside for now. If I make a closable door for the pop door I want them to be able to at least drink if they are locked in.
I measured and remeasured, and remeasured for the roof. I finally got it all straight, and used metal braces to hold the 2X6's in place. Then I used 2X4's for the top. I bought the plastic gap filler pieces for the roof panels, and only when the roof was nearly complete did I realize I miscalculated on how many filler pieces and roof panels I would need. Back to the feed store....
Another thing I did not account for was how the helper dog's demeanor would change once the chickies were in the coop where they could be seen from the dog's daytime potty yard. I had to temporarily hang a tarp across the end until the dogs were used to the chickies being so close. They really wanted to see them, and were crying and trying to look around the edge of the tarp. Poor puppies.
I used the corrugated plastic roof panels for the roofing. When I got about half way done I realized I needed one more panel. Instead of waiting a week for another white panel to be ordered I opted to use a clear panel for the middle. I figured this would let some more sunshine in, and I could get the roof finished sooner. In the interim, I had to use a tarp to cover half of the roof until I could get it finished. In hindsight I should have just gotten it all done, because the weight of the tarp did bend the plastic roofing a bit in the back. I think if I put another brace under there, it will straighten out though.
Here's the clear roof panel.
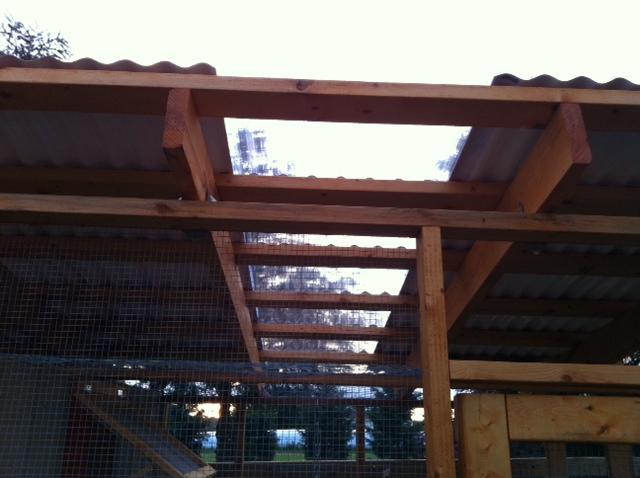
Here's where the roof got bent a little bit.
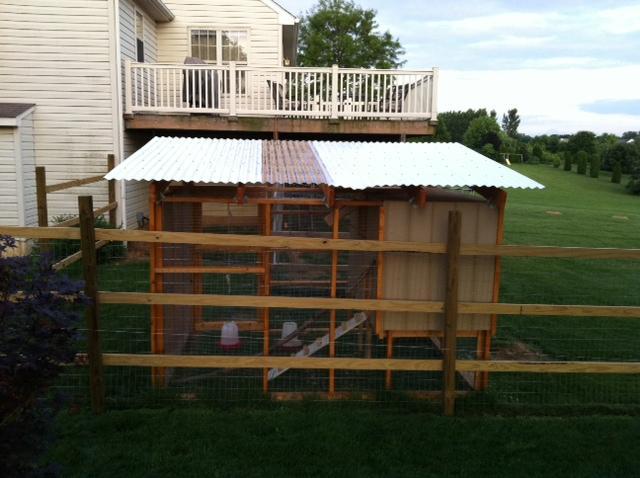
So here's the finished coop!!! I think it turned out great. I even had someone ask if I used a kit or some sort of plans... nope.... I would say the majority of it, I was really winging it. But it looks really good, and is functional.
A few other things I still plan on doing....
1. Fill the trench around the bottom with concrete to prevent any sly critters from trying to dig in.
2. I still need to build the nest boxes. Since the girls are only 9 weeks I figure I can do this on a rainy day. DONE!!!
3. I hope to plant some tall pampas grass outside of the fence to help shade it, and to keep prying eyes off the coop.
4. I might possibly dig out the grass in the run and put down some sort of sand instead. Depends on how well it all holds up. I do like the idea of letting them eat the grasses.
Things I would have done different....
1. Used pressure treated wood vice untreated. Although I do like the look of the stained trim and wood, I am unsure how well it will hold up. Time will tell.
2. Size. In case I want to make it bigger I don't have a lot of room to grow. Now that being said, I can always expand toward the gate, adding another few feet of run space.
3. Location. I'm unsure how I will feel this winter having to trudge through 2 feet of snow to check if there are any eggs. Also being right next to the fence... sucks. It had to be moved to do any work on it. Ugh.
4. Taken More pictures. It was hard for me to remember to take pictures since I was mostly doing all the work myself.
Thank You's
First off I would like to Thank my friends Lisa and Dave for coming out several times to help. With digging, hammering in hardware cloth, inside walls, etc. I would also like to Thank Kyle for dedicating an ENTIRE Saturday to help me put up the exterior walls. I could not have done this without him. Lastly I would like to give a shout out to Oxford Feed and Lumber located in Oxford, PA. They were indispensible in giving advice and helping me out. They were awesome!
Here are some pictures of the actual chickens. More to follow....
On the left, chickens at about 8 weeks old. Their first day in the coop. On the right, here they are before the completion of their run/coop at about 6 weeks old or so.

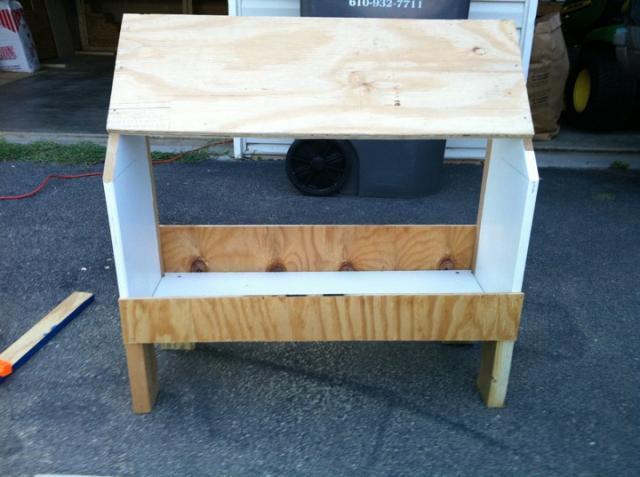
Finally got around to building my very crude but functional nesting box. I opted for a large long box without dividers. If it becomes apparent that I need dividers, I think they can pretty easily be added.
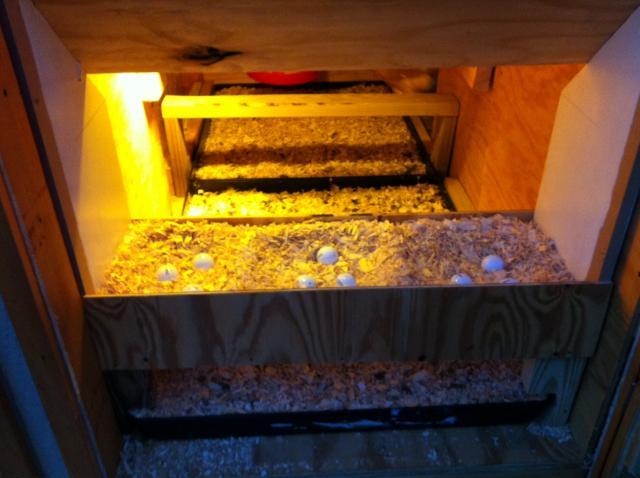
The girls combs are just starting to turn a bit more red, so hopefully the golf balls will give them the right idea!
