The Fuzzbucket Express

So I like many BYC'ers have gotten a taste of coop fever! So this time my idea was to build my first tractor, as my chickens will be free range during the day when I'm home and I want something I can move around and not have the chickens tear up a hunk of ground and have to build a big permanent coop and run SO the tractor...
Now my idea came from seeing some challenge to build a building using 75% reusable, recycled, natural, or on hand materials. SO since I had wanted a few more chickens oh a chicken coop/tractor! So a looksee at what I had...
Lots of lumber of different types, sizes, age
PVC pipe
Paint
Thousands and thousands of nails and screws to choose from
zip ties
netting and hardware cloth I had left over from the last coop project...
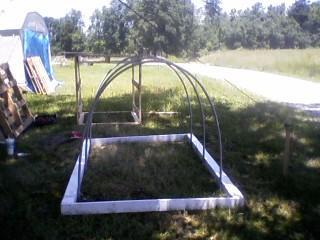
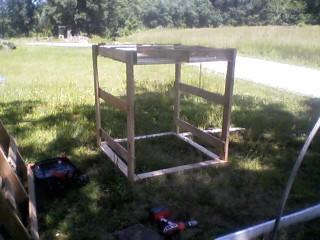
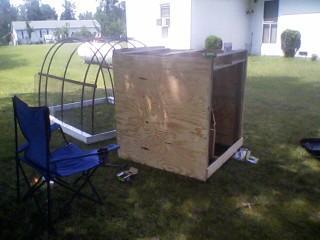
I had already seen a hoop coop design before so when I got to thinking about the PVC i went back online and did some research and got a general idea...Right after I got the run frame up :
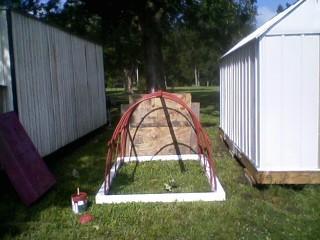
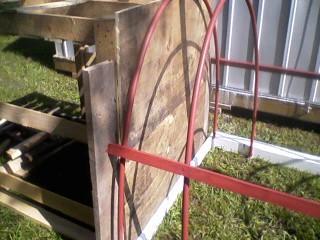
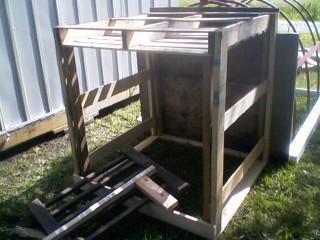
I found a crate frame that I watched be dumped on the edge of the road by a warehouse...Now my idea came from seeing some challenge to build a building using 75% reusable, recycled, natural, or on hand materials. SO since I had wanted a few more chickens oh a chicken coop/tractor! So a looksee at what I had...
Lots of lumber of different types, sizes, age
PVC pipe
Paint
Thousands and thousands of nails and screws to choose from
zip ties
netting and hardware cloth I had left over from the last coop project...
I had already seen a hoop coop design before so when I got to thinking about the PVC i went back online and did some research and got a general idea...Right after I got the run frame up :
*LIGHT BULB*
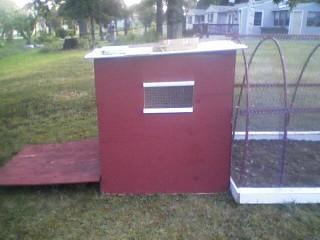
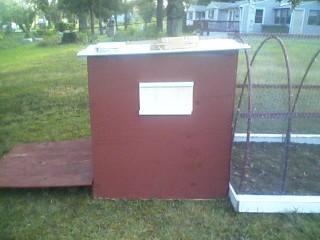
The coop. its about 54"X52" so roughly 4.5' X4.5' so about 20 sq ft and its tall so i can add something a bit higher up since it will be for some silkies!
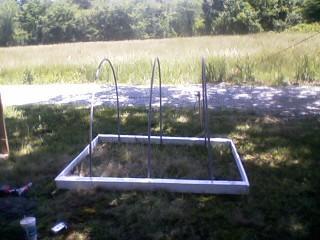
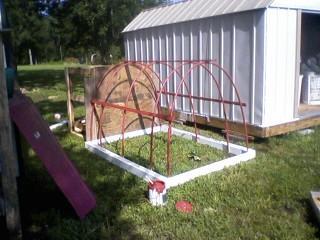
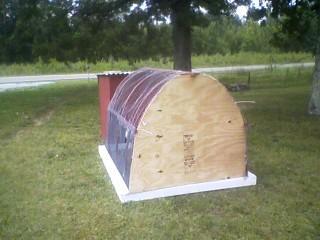
Painted the run and got the wood braces up :
2 braces are 1X2 top brace is 1X3
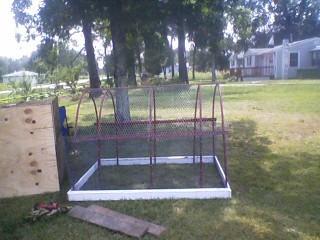
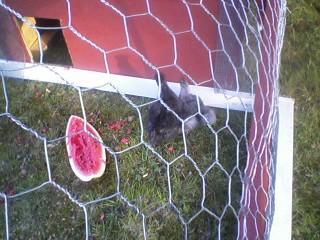
(update without pic 6/5/10) Have the run all covered bottom is hardware cloth top is chicken wire.
(my take a break chair gotta have it)
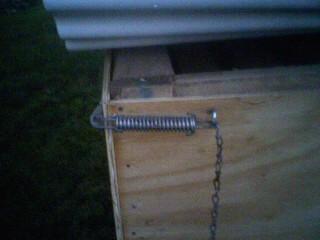
I dont know what you call them but these things are used for doors so they dont get slammed open...decided they'd make good catches/locks for my pop down door. (hook facing downward and I pull the spring and latch it to the hook on both sides)
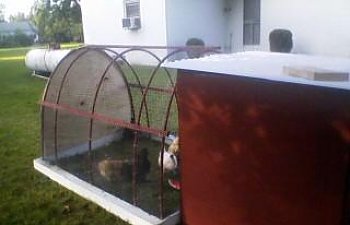
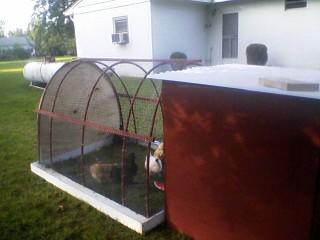
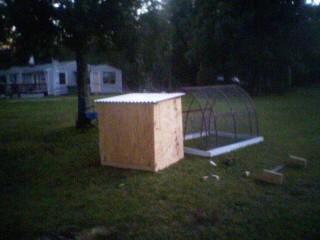
UPDATE: 6/9/10 - NEARLY done! I need to fix my run door (right now it is strapped on to end of PVC, i need to smooth it out and add some hinges to drop it up and down and a hook on the top and sides to secure it. then paint that part. ALSO need some re-habbing inside, need to fix the 3rd nest box and do the window I wanted to do, but decided to wait on it to see if I could get a small sliding window...Here's what I got!
The kids : "WHAT IN THE WORLD!?!" *all huddled up by themselves at first*
..then I added my other silkies and they got excited and joined them checking everything out and dirt bathing - only issue with adding the 7 weekers with the 9 monthies is the white hen - she's a meanie butt but the buff hens and the black roo defend the chicks against her surprisingly!
UPDATE : 6/19/10
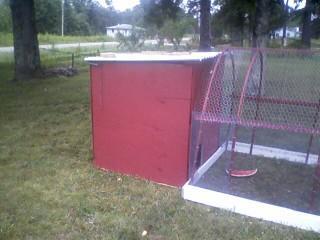
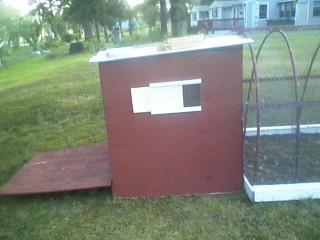
The window is hardware cloth, I was going to secure with the trimming on the outside, which i would have had to remove and then retack on (i did the cutting and trim/track early in the day while they were free ranging and then went to put hardware cloth on last evening when it cooled off) but at the time I decided to tack up the hardware cloth my drill was stolen for use somewhere else inside on another project, I need to get another drill since the 2nd one's motor died
Anyway I couldn't find any small actual windows so using the scraps from paneling the add on washroom/tool room inside the house I thought of a way to fix a window I could use and still close up at night or when it rained. SO i used a thin piece of wood about 1/2 thick and maybe 2" wide and then a piece of moulding, glued them together so the moulding as a bit of lip maybe 1/2 inch above the piece of wood it was glued to. I then screwed them into the outside of the coop. This leaves a 1/2 gap between the outer wall and the lip of the moulding, and so I cut a piece of 15/32 plywood to the size of the window and I can slide that back and forth or totally remove it to allow ventilation. I am thinking about adding a small peg hole on each side of the slidding panel to be able to secure it when we're expecting thunderstorms so the panel doesn't slide out and fly off from wind
(making a materials list out of total everything not just whats up so far will update if I end up using/getting more materials)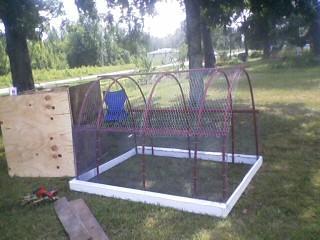
(my take a break chair gotta have it)
I dont know what you call them but these things are used for doors so they dont get slammed open...decided they'd make good catches/locks for my pop down door. (hook facing downward and I pull the spring and latch it to the hook on both sides)
UPDATE: 6/9/10 - NEARLY done! I need to fix my run door (right now it is strapped on to end of PVC, i need to smooth it out and add some hinges to drop it up and down and a hook on the top and sides to secure it. then paint that part. ALSO need some re-habbing inside, need to fix the 3rd nest box and do the window I wanted to do, but decided to wait on it to see if I could get a small sliding window...Here's what I got!
The kids : "WHAT IN THE WORLD!?!" *all huddled up by themselves at first*
..then I added my other silkies and they got excited and joined them checking everything out and dirt bathing - only issue with adding the 7 weekers with the 9 monthies is the white hen - she's a meanie butt but the buff hens and the black roo defend the chicks against her surprisingly!
UPDATE : 6/19/10
The window is hardware cloth, I was going to secure with the trimming on the outside, which i would have had to remove and then retack on (i did the cutting and trim/track early in the day while they were free ranging and then went to put hardware cloth on last evening when it cooled off) but at the time I decided to tack up the hardware cloth my drill was stolen for use somewhere else inside on another project, I need to get another drill since the 2nd one's motor died
Anyway I couldn't find any small actual windows so using the scraps from paneling the add on washroom/tool room inside the house I thought of a way to fix a window I could use and still close up at night or when it rained. SO i used a thin piece of wood about 1/2 thick and maybe 2" wide and then a piece of moulding, glued them together so the moulding as a bit of lip maybe 1/2 inch above the piece of wood it was glued to. I then screwed them into the outside of the coop. This leaves a 1/2 gap between the outer wall and the lip of the moulding, and so I cut a piece of 15/32 plywood to the size of the window and I can slide that back and forth or totally remove it to allow ventilation. I am thinking about adding a small peg hole on each side of the slidding panel to be able to secure it when we're expecting thunderstorms so the panel doesn't slide out and fly off from wind
Materials / price / location :
2 - 4X4's for length of run - on hand - 0$
2 - 2X4's for width of run - on hand - 0$
Hardware cloth - onhand / part of lumber bundle i got or 15$
1" Chicken wire - lowes - 8$Paint - white - on hand - 0$
Paint - Red - Lowes (wrong color mix so 1/2 price ) -8$
5 - PVC pipes 1/2" - on hand - 0$
15/32cm (1/2") plyboard 2 whole sheets 1 3/4 piece sheet - on hand / bought from a guy who had too much after fixing his roof - total cost - 10$
PVC panel/roofing - neighbor donation - 0$
hinges and locks/catches - Walmart and lowes - $7
nails, screws, staples = on hand - 0$
Main door catches - screen door catches - on hand - 0$
Roost poles - 1X3 - on hand - 0$
moulding and trim pieces - on hand - 0$
sliding window panel - (15/32 plyboard again) on hand - 0$