Our First Coop
~Biddy's Barn~
43881_biddys_barn.jpg
My dear hubby, Gary and I have been talkin about getting us some chicks for nearly a year now. Ever since his uncle decided that in this economy having chickens would assure that they always at least had eggs. We have talked and talked and talked about it. However, there was always some reason why we needed to wait. However, our local feedstore had a Fall Extravaganza where they gave 5 free chicks to the first 40 families. So we went and got some - 3 Barred Plymouth Rocks and 2 supposed Orphington Buffs, but maybe red-sex links, maybe Rhode Island Reds, they weren't sure about them. Since we had a nearly 9 month old son, they came home and spent the first day and a half in a Pampers box. I would get them out in the yard and carefully watch over them for an hour every few hours, and at any noise they would come running back to me. That first night, I told dear hubby that they could not live in a Pampers box indefinately, and started searching online "How to build a chicken coop?" Of course BYC was the top website that popped up.
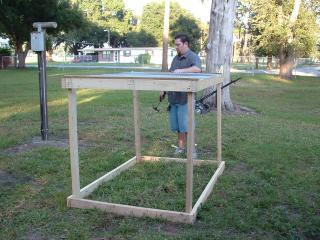
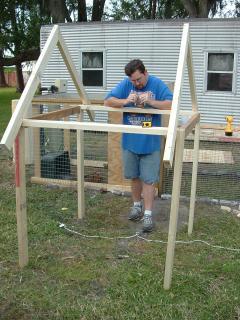
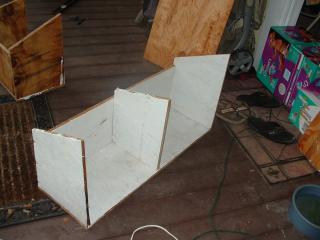
Planning...I spent several long hours on here that night, and sat around with my graph paper, and read and read and read. I was trying to figure out how big of a coop and run I could convince hubby to help me build - ok, really for him to build. I was trying to figure out how many nesting boxes, how many roost, how many feet per chicken, how to best keep them cool in this unbearably hot Florida climate. Finally, drawing most of my inspiration from alamogirl's Midwest Cottage. Here are the plans I drew up.
However, me and Britt (our son) were heading up to Alabama to visit my family in just a few days and we didn't have time to build it. So, we threw some stuff together the next day to be a . Complete with our recycling bin for a shelter. It's just farthing strips with wire wrapped around them, wire streached across the top, and old stones and bricks around the base. temporary home
43881_dscf0051.jpg
We ended up being gone for nearly 3 weeks. Now the chicks were a month old, and they really need a sturdy permanent home. So with the scrap materials we got from my father and grandfather in Alabama, and Gary's grandfather, and the assistance of some borrowed tools we set to work on a run first. On Saturday we framed it, and on Sunday we covered it in wire, added a door, and covered the side that will open to the coop with a sheet of plywood for now. Early Sunday morning, we lost one of our mystery chicks to a hawk. My favorite chick too - Fifi. So we were down to four. Framing it wasn't too bad, though I would suggest to use screws rather than nails, we used nails to start with, and kept having to go back and knock them in. The wire was the tricky part, we thought we were going to be able to use a staple gun, but they wouldn't hold, so we placed farthing strips over the wire, and screwed the farthing strip, wire, and board.
43881_dscf0046.jpg

43881_dscf0001.jpg
43881_dscf0003.jpg
Then I went to back to the feed store and bought more chickens - 5 pullets from the same hatching as our orginal 5; I just felt so sorry for them and they really wanted to come home with me (I know because they told me so). The next Saturday we started on the coop itself. First we took our cut 4x4s and sunk them in the ground exactly 4 ft apart. We put them in 2 1/2 ft deep and left 2 1/2 ft above the ground. Next we screwed our cut our plywood for the floor and screwed it on. I held things in place, but some how hubby felt like I was laying down on the job. After that we put the wire around the bottom just like we did for the run. Next we took the sheet of plywood off of the side of the run and slid it over to the bottom of the coop, and put them together. I also moved the water up on some old bricks, so that they would stop kicking leaves into the water. After that we called it quits for the day.
43881_laying_around.jpg

43881_dscf0008.jpg
43881_dscf0010.jpg
43881_dscf0013.jpg
On Sunday after noon, we first framed up the house, and then the roof. Next we attatched the roof and then the wall that would attatch against the run. Finally with a bit of help from a couple of friends we lifted it onto the base, and screwed it all down. At this point, it's finally starting to look like a real coop! However, you know what these ladies did with almost twice the space. They all continued to argue over the original corner, and just don't know what to do with the new space. They would walk over to it, and look around but wouldn't go in, silly ladies.
43881_dscf0016.jpg
43881_dscf0032.jpg
43881_dscf0033.jpg
The next weekend we had a church meeting so we didn't work on it, but the following Thursday we got back to work, hubby used the jigsaw and cut an opening for a door and then attached the front wall. At that point a friend and I used a primer/sealer on the whole coop, then painted the outside a bright and happy red. The next day we got an early start. Gary pulled out the jigsaw again, and cut out the openning for the nesting boxes. At this point he decided to scrap our plans for windows, because he felt like it would weaken the structure of too much. On Saturday we had alot going on, but I managed to spent part of the afternoon priming the remaining outside pieces and giving the inside a new coat of paint. Hubby helped me out after work, he added the perches, vents under the eaves, and the triangular pieces along the roof line. On Sunday we took the day off, but I hit the ground working on Monday by cutting out almost all of the pieces for the nesting boxes that day. The now 10 month old baby is loving the coop and chickens.
43881_dscf0105.jpg

43881_dscf0102.jpg
43881_dscf0101.jpg
43881_dscf0109.jpg
43881_dscf0110.jpg
43881_dscf0114.jpg
I was hoping to be finished by Thanksgiving, but the weather wouldn't cooperate on Tuesday and Wednesday. On Tuesday we built the nesting boxes on the front porch and on Wednesday we painted the insides white. By now we had discovered that we had a total of 3 Barred Plymouth Rocks (my favorites of the bunch), 3 Easter Eggers (though they were sold to us as Americans), and 3 Rhode Island Reds. At this point I think it's important to note that we changed the design a little we planned for bantams, and had a sneaking suscipicion that these weren't bantams at all, so we made two boxes, one for either side of the coop, and only placed two separate compartments inside instead of three. (Measurements are 12 in. deep, 12 in. high in the back, and 18 inches high in the front, with about an 1 inch and half lip in the front to keep the bedding in and the eggs from rolling out.) Thursday through Sunday we celebrated with family, but on Sunday afternoon, we did hang the nesting boxes. To make things sturdier, hubby used the scraps of 2X4s underneath the box to help support the weight. He hung one of the roof pieces and we were very happy when they worked! On Monday I hung the other roof piece the way he showed me the night before, then I hung the door to the coop, and proceded to paint the entire outside red, and give the floor of the coop, one last coat of white. Finally on Wednesday, Gary nailed down the tin to the roof. Then we took the shingles that the lady who lives behind us gave us and covered the nesting boxes to keep the water out. He couldn't get to the one side to finish nailing down the tin so a few days later we borrowed a ladder to nail down the front.


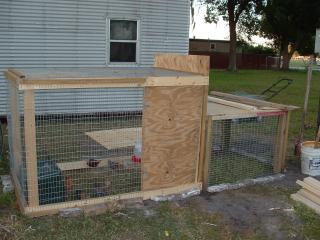
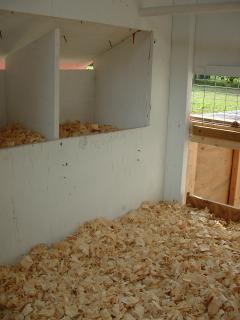
At that point all that we had left to do was to add the bedding, a few of hubby's old golf balls so that they know where to lay when the time gets here, and to move the birds in. I am so proud of my husband who spent alot of time and effort to make this for me. It's perfect, and plenty big for up to maybe 20 birds inside. Let's just say that Biddy and her 8 other friends are very pleased with the coop inside and out.
43881_dscf0022.jpg
What we still need to work on/add:


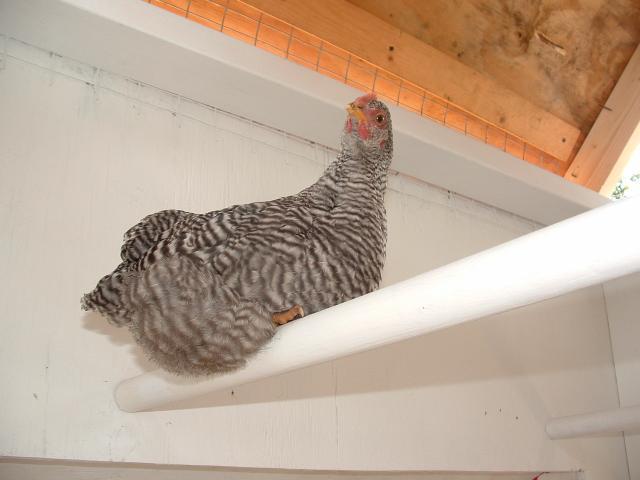
    • A ladder - though most of our ladies have learned how to fly up there, I still think they need one for getting up.
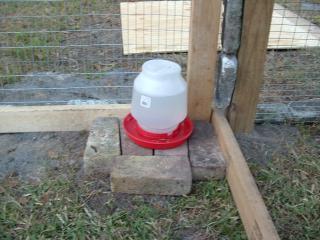
    • Some set up for food and water in the coop for rainy, wet days. Perferably without soaking all the bedding, still working on that idea.
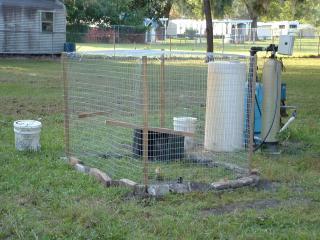
    • Finally a bigger run, they don't have enough room when they get full grown. Hopefully we will start on that SOON.
What I like:


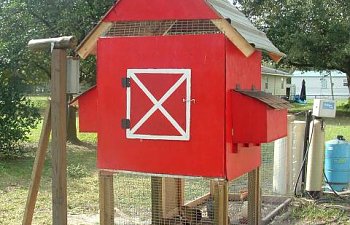
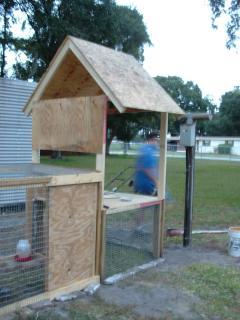
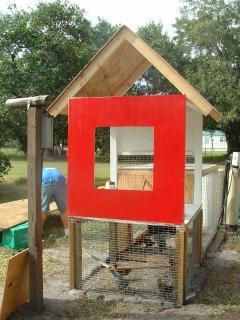
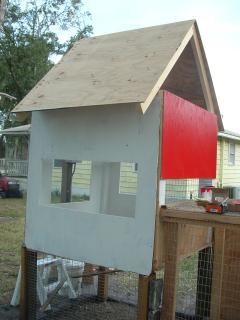
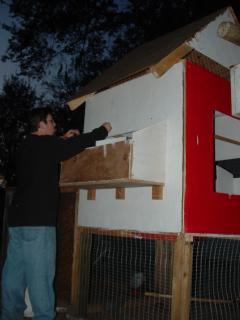
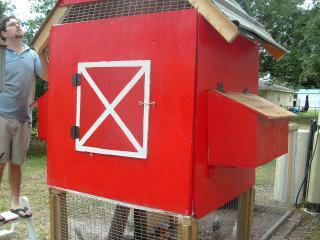
    • The look - It looks just like a little red barn, which was exactly what I wanted. Not like a junky cock fighting hut, like some of the things I saw growing up. It's classy looking, not just adequet coverage.
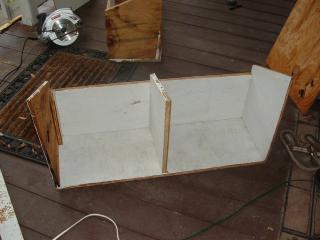
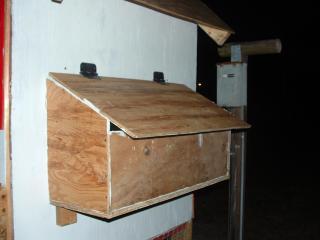
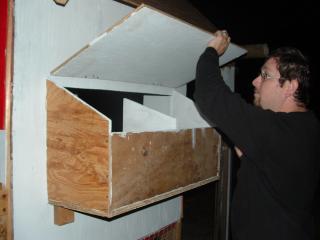
    • I'm really thrilled with the way that the nesting boxes turned out. They are up enough that they aren't going to be laying eggs on the floor, but not so high that they stay perched there. They are really easy to get into, and I can open them easily.
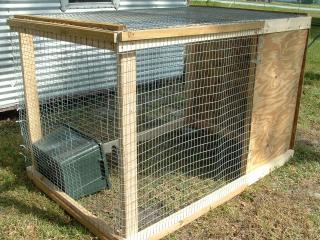
    • The door on the run. In my orginal drawing I had it at the end, but hubby suggested moving it to the side, from the door way it's easy to get under the coop and to the end of the run.
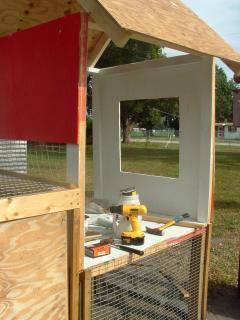
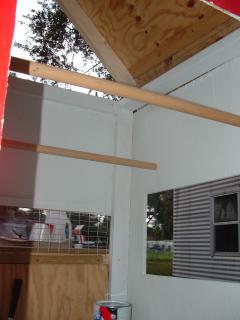
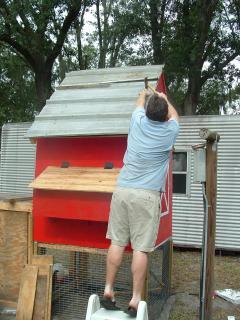
    • The ventaliation, thought I can't claim that inovation, I straight up stole it from alamogirl with vents under the eaves, and 2 vents front to back.
    • The coop is easy to get into and clean out, without knocking all of the bedding out.
    • Super glad that hubby talked me out of putting the door on the bottom, with it on the side, we don't have near the trouble with bedding coming out that we would have, especially since I've decided to use the DLM.
What I don't:


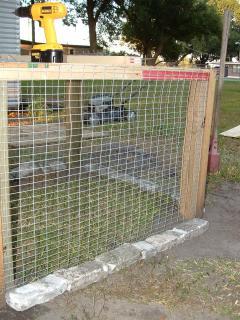
    • The run is only 4 foot tall. It would be nice to be able to stand up inside.
    • The door is already about to fall off the run, we need some better hinges.
      • I can't imagine trying to move the set up because other than the post being in the ground, it's incredibly heavy. If we ever move, I don't know that the coop can.
      • [FONT=trebuchet ms,geneva]The run should be bigger cause I want about another 20 chickens now. haha.[/FONT]
      Supplies for the run:


    • hinges (2 for the run door)
    • 1 eye hook
    • 2x4s about 9 measuring 4 foot, and 4 measuring 6 foot long
    • 6 farthing strips for the run about 4 foot long, and another 2 about 6 foot long.
    • 24 foot of hardcloth wire
Supplies for the house:


    • hinges (3 for the nesting boxes, and 2 for the door on the coop)
    • 1 eye hook
    • Wire for 2 small vents (orginially I wanted to use actual vents, but this was cheaper and would provide with more air flow for Florida)
    • 3 pieces of tin (2 for the roof of the house, and on for the roof of the nesting boxes)
    • 2x4s about 16 measuring 4 foot long, and 3 measuring 4 1/2 foot long for the roof
    • 12 foot of hardcloth wire, plus some scrap for vents under the roof and covering the windows
    • trim
    • 1 qt of red paint
    • 1 gallon of white primer/sealer
  • Like
Reactions: Nikki.richardt