Chicken Tractor Hoop House
*altered from one found on backyard chickens: Barred Babies made a post back in 2012 of a house that they made from a plan they saw elsewhere as well-thanks for the outline for my hoop house!!!!*
Here is a list of everything I purchased:
3 - 1x6x10 ft long (treated) $7.97 each total $23.91
8 - 1/2 inch 10 foot long PVC pipe $2.35 each total $18.80
1 - 4x50 ft. roll of plastic netting “chicken wire” $24.57 (I’ll explain!)
12 - PVC Pipe Straps $2.35 for a 10 pack (bought 2 packs) total $4.70
1 bag - 8" Cable ties/Zip ties $17.98 for 800 (used less than half the pack)
4 - 1/2 inch PVC 90 degree elbows 40¢ each total $1.60
1 - 3/4 inch 10ft long PVC pipe $4.89
2 - Cabinet handles $2.78 (came in a 2-pack)
2 - Gate hook & eye $1.24 (came in a 2-pack)
2 - 3 inch door hinges $1.67 each, total $3.34
1 - Bottle of E6000 Adhesive glue $4.28
1 - Tarp...I already had a tarp so this isn’t a part of the total
Box of wood screws (already had these as well)
For a grand total of $114.65
(I bought everything at Lowes and get a discount so it was $103.77 in actuality if you also get a 10% off discount for Lowes!!)
Additional things you may need to buy if you don’t already have laying around: staple gun and staples, hand drill, screwdriver/drill, wheels and the bolts (if you choose to have wheels-my version doesn’t), scissors, needle nose pliers with cutter, wood screws.
••••images are in order from the process of making the hoop coop to give visual aides••••
Directions for Hoop House:
1. Cut one of 1x6x10 boards in half (these will be your end pieces). Each piece should be 5 foot long.
2. I pre-drilled holes in the pieces of wood for 3 screws per side and added the adhesive glue to each piece to secure in place.

3. Once the boards were all fastened together I laid out the PVC piping. I did it so the end poles were as close to the ends as possible with the PVC pipe fasteners flushed to the top of the boards. I measured 5 foot and penciled where that pipe would go then did 2.5 foot on either side and penciled it in so they were all evenly spaced for 5 hoops.

4. I screwed in one side of the fastener, then placed the pipe in and then drilled it closed on the PVC pipe. I flushed the bottom of the PVC pipe to the bottom of the fastener to get the most height out of my hoops.

5. I went around and carefully bent the PVC pipes and drilled in the fasteners (again-flushed to the top of the boards to get optimal height!!) and completed all hoops.
6. I then attached the 3/4 inch 10-foot PVC to the top with zip ties.

7. Next came cutting and fitting the door. Please note that my door is NOT perfect and you may need to alter yours as you see fit! Here is how I did mine with the 3 left over 1/2 inch PVC pipes: I cut two 47.5 inch pipe (these will be the door frame), then used 2 PVC pipe fasteners to secure them the the inside wood panel. I just eye-balled these and did it so they fit nicely and looked even. These pipes go to the bottom of the wood (for extra security for the door). Then I laid the extra piece of PVC pipe (25 inches long) from those cuts on the top and secured it with zip ties (for a top frame).


8. Next comes the door itself: I cut two 39.5 inch PVC poles (sides of the door) and two 23.5 inch PVC poles (top and bottom of the door) and secured them with the four 90 degree 1/2 inch PVC pipe elbows. Makes a nice rectangle door.
(Like I mentioned: my door doesn’t fit perfectly, but it is super secure and does not leave space for critters to squeeze in!! You may need to alter yours!)
9. Next, I pre-drilled small holes into the pipes where I measured out the hinges and screwed them in place (one at the top of the door, and one at the bottom).

10. I then measured out how my handles would be and just eye balled them and screwed them into place. This wasn’t huge for me because this hoop house is an extension of their coop so I didn’t waste time putting on wheels or making it perfect, I just needed handles to drag it into the backyard! But if you choose to have wheels then don’t forget to add those to your purchase list.

(I then lugged the frame to the backyard—close to the coop for easy moving about to do the netting)
I stopped here for the day and picked up on the rest the following day!
11. Here is where time is consumed! Putting on the netting. I said I would explain this plastic “chicken wire” netting... our entire property is fenced in, this keeps out almost all predators we have *besides the evil hawks*. So my hoop house is being used as a coop extension for when we are out of town, or cold weather to keep them protected. They typically free range all day!!! That being said, I HATE CHICKEN WIRE! I’ve used it on other projects and had scrapes all over my hands, legs, etc! Miserable. So instead I opted for plastic netting that was a dream to work with!!!!!! It was time consuming yes, but pain free
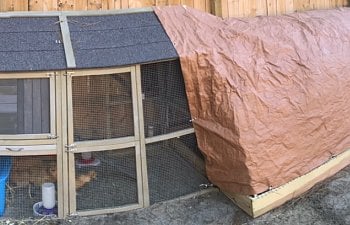
12. I moved the hoop frame over to their coop and made it nice and snug so their “main latch door” could stay open at all times. I then began to drape the netting over the top, stapled it into the wood, and went to town with the zip ties! SO MANY ZIP-TIES! It literally looked like a hedgehog from all the zip ties. I secured it all in place around the door frame and then did the door separately. I kept my scraps of netting because I knew I wanted to attach it to their coop instead of enclosing the back with the netting. The chickies were VERY interested in what I was doing all day so they kept coming over to investigate the situation!


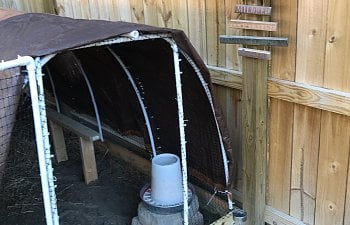
13. Once I got all the netting done, and secured all the pieces to the coop, I went around and clipped down all of the zip ties. I also double checked to be sure there were no openings, and then I laid the tarp over the top. I didn’t want to staple the tarp so I used the eye holes and just zip tied it down very securely for wind and rain purposes!!

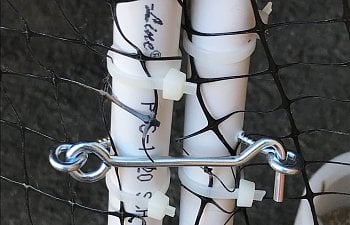
14. I then measured and pre-drilled some holes into the PVC door so I could latch it closed, and I drilled in the eye latch end to the main door frame so the door would stay securely closed. Then I also pre-drilled a hole at the bottom and screwed in another latch and then drilled the eye latch into the wood panel so when they chickens can free range in the day, their door can stay latched open so they can get in and out for food and water.


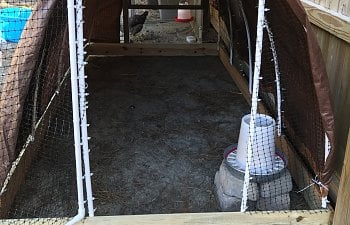
15. I then moved around their feed and water so they had more mobility room. I already had a roost bar I made and had under the porch for the hot summer and put it in the hoop house for them to use. Then I added some hay for warmth, they just slung it everywhere of course. And I made my momma-Katniss Everdeen and her baby chick-‘KFC’ (Kalula Francesca Chicken) more room in the main coop with their storage bin nest box and chick feeder and waterer so the bigger hens & roo will stop knocking everything over! I left their main waterer hanging because they spill it less that way and I didn’t want to hang it from the hoop house because I wasn’t sure how much weight it could bear.

All in all, it took about 2ish hours on the first day and then about 6ish hours on the second day (I also had to clean their main coop and rearrange everything, rake dirt and cover holes in the base... so it should have taken less time!)


I hope I explained everything well enough!
I searched high and low for a hoop house that was easy enough for me to make solo and was large enough for my feathered friends (I have 4 confirmed hens: Katniss Everdeen-cuckoo maran and her chick KFC, Lagertha-Easter Egger, Mildred-speckled Sussex, Chicken Nugget-splash Ameraucana. 1 unconfirmed buff silkie-Clementine, and 1 nonstop crowing blue silkie rooster-Rufio). I used a post from backyard chickens (by: Barred Babies) as a framework and just made mine a little bigger and tried to help give steps with making the door.
All said and done, it’s a little less than 5 foot high, 5 foot wide, and 10 foot long. And they all fit in this hoop house very comfortably!!!!!!!!!!!!
Just enough space for my overly-spoiled flock
*altered from one found on backyard chickens: Barred Babies made a post back in 2012 of a house that they made from a plan they saw elsewhere as well-thanks for the outline for my hoop house!!!!*
Here is a list of everything I purchased:
3 - 1x6x10 ft long (treated) $7.97 each total $23.91
8 - 1/2 inch 10 foot long PVC pipe $2.35 each total $18.80
1 - 4x50 ft. roll of plastic netting “chicken wire” $24.57 (I’ll explain!)
12 - PVC Pipe Straps $2.35 for a 10 pack (bought 2 packs) total $4.70
1 bag - 8" Cable ties/Zip ties $17.98 for 800 (used less than half the pack)
4 - 1/2 inch PVC 90 degree elbows 40¢ each total $1.60
1 - 3/4 inch 10ft long PVC pipe $4.89
2 - Cabinet handles $2.78 (came in a 2-pack)
2 - Gate hook & eye $1.24 (came in a 2-pack)
2 - 3 inch door hinges $1.67 each, total $3.34
1 - Bottle of E6000 Adhesive glue $4.28
1 - Tarp...I already had a tarp so this isn’t a part of the total
Box of wood screws (already had these as well)
For a grand total of $114.65
(I bought everything at Lowes and get a discount so it was $103.77 in actuality if you also get a 10% off discount for Lowes!!)
Additional things you may need to buy if you don’t already have laying around: staple gun and staples, hand drill, screwdriver/drill, wheels and the bolts (if you choose to have wheels-my version doesn’t), scissors, needle nose pliers with cutter, wood screws.
••••images are in order from the process of making the hoop coop to give visual aides••••
Directions for Hoop House:
1. Cut one of 1x6x10 boards in half (these will be your end pieces). Each piece should be 5 foot long.
2. I pre-drilled holes in the pieces of wood for 3 screws per side and added the adhesive glue to each piece to secure in place.
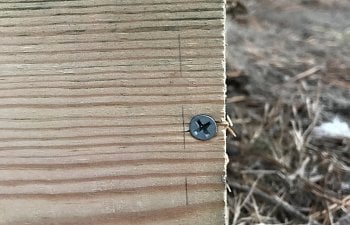
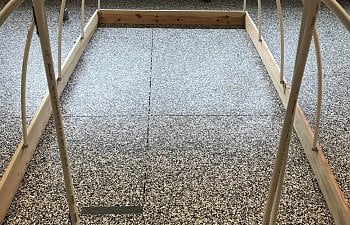
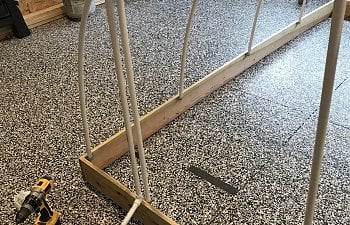
3. Once the boards were all fastened together I laid out the PVC piping. I did it so the end poles were as close to the ends as possible with the PVC pipe fasteners flushed to the top of the boards. I measured 5 foot and penciled where that pipe would go then did 2.5 foot on either side and penciled it in so they were all evenly spaced for 5 hoops.
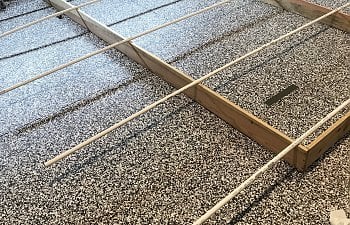
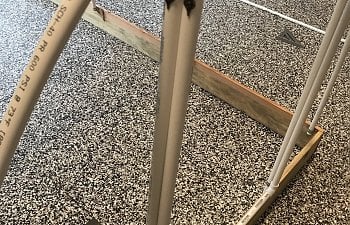
4. I screwed in one side of the fastener, then placed the pipe in and then drilled it closed on the PVC pipe. I flushed the bottom of the PVC pipe to the bottom of the fastener to get the most height out of my hoops.
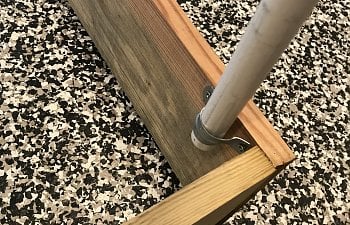
5. I went around and carefully bent the PVC pipes and drilled in the fasteners (again-flushed to the top of the boards to get optimal height!!) and completed all hoops.
6. I then attached the 3/4 inch 10-foot PVC to the top with zip ties.
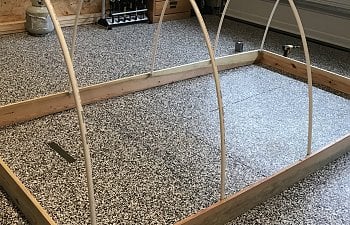
7. Next came cutting and fitting the door. Please note that my door is NOT perfect and you may need to alter yours as you see fit! Here is how I did mine with the 3 left over 1/2 inch PVC pipes: I cut two 47.5 inch pipe (these will be the door frame), then used 2 PVC pipe fasteners to secure them the the inside wood panel. I just eye-balled these and did it so they fit nicely and looked even. These pipes go to the bottom of the wood (for extra security for the door). Then I laid the extra piece of PVC pipe (25 inches long) from those cuts on the top and secured it with zip ties (for a top frame).
8. Next comes the door itself: I cut two 39.5 inch PVC poles (sides of the door) and two 23.5 inch PVC poles (top and bottom of the door) and secured them with the four 90 degree 1/2 inch PVC pipe elbows. Makes a nice rectangle door.
(Like I mentioned: my door doesn’t fit perfectly, but it is super secure and does not leave space for critters to squeeze in!! You may need to alter yours!)
9. Next, I pre-drilled small holes into the pipes where I measured out the hinges and screwed them in place (one at the top of the door, and one at the bottom).
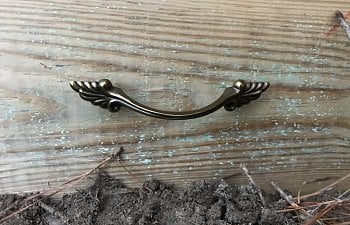
10. I then measured out how my handles would be and just eye balled them and screwed them into place. This wasn’t huge for me because this hoop house is an extension of their coop so I didn’t waste time putting on wheels or making it perfect, I just needed handles to drag it into the backyard! But if you choose to have wheels then don’t forget to add those to your purchase list.
(I then lugged the frame to the backyard—close to the coop for easy moving about to do the netting)
I stopped here for the day and picked up on the rest the following day!
11. Here is where time is consumed! Putting on the netting. I said I would explain this plastic “chicken wire” netting... our entire property is fenced in, this keeps out almost all predators we have *besides the evil hawks*. So my hoop house is being used as a coop extension for when we are out of town, or cold weather to keep them protected. They typically free range all day!!! That being said, I HATE CHICKEN WIRE! I’ve used it on other projects and had scrapes all over my hands, legs, etc! Miserable. So instead I opted for plastic netting that was a dream to work with!!!!!! It was time consuming yes, but pain free

12. I moved the hoop frame over to their coop and made it nice and snug so their “main latch door” could stay open at all times. I then began to drape the netting over the top, stapled it into the wood, and went to town with the zip ties! SO MANY ZIP-TIES! It literally looked like a hedgehog from all the zip ties. I secured it all in place around the door frame and then did the door separately. I kept my scraps of netting because I knew I wanted to attach it to their coop instead of enclosing the back with the netting. The chickies were VERY interested in what I was doing all day so they kept coming over to investigate the situation!
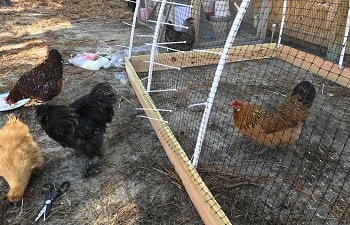
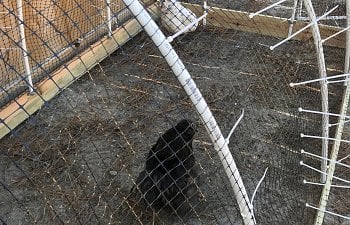
13. Once I got all the netting done, and secured all the pieces to the coop, I went around and clipped down all of the zip ties. I also double checked to be sure there were no openings, and then I laid the tarp over the top. I didn’t want to staple the tarp so I used the eye holes and just zip tied it down very securely for wind and rain purposes!!
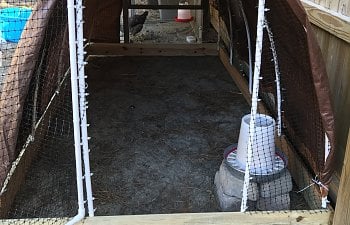
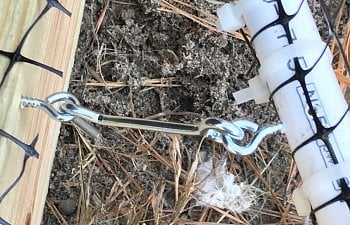
14. I then measured and pre-drilled some holes into the PVC door so I could latch it closed, and I drilled in the eye latch end to the main door frame so the door would stay securely closed. Then I also pre-drilled a hole at the bottom and screwed in another latch and then drilled the eye latch into the wood panel so when they chickens can free range in the day, their door can stay latched open so they can get in and out for food and water.
15. I then moved around their feed and water so they had more mobility room. I already had a roost bar I made and had under the porch for the hot summer and put it in the hoop house for them to use. Then I added some hay for warmth, they just slung it everywhere of course. And I made my momma-Katniss Everdeen and her baby chick-‘KFC’ (Kalula Francesca Chicken) more room in the main coop with their storage bin nest box and chick feeder and waterer so the bigger hens & roo will stop knocking everything over! I left their main waterer hanging because they spill it less that way and I didn’t want to hang it from the hoop house because I wasn’t sure how much weight it could bear.
All in all, it took about 2ish hours on the first day and then about 6ish hours on the second day (I also had to clean their main coop and rearrange everything, rake dirt and cover holes in the base... so it should have taken less time!)
I hope I explained everything well enough!
I searched high and low for a hoop house that was easy enough for me to make solo and was large enough for my feathered friends (I have 4 confirmed hens: Katniss Everdeen-cuckoo maran and her chick KFC, Lagertha-Easter Egger, Mildred-speckled Sussex, Chicken Nugget-splash Ameraucana. 1 unconfirmed buff silkie-Clementine, and 1 nonstop crowing blue silkie rooster-Rufio). I used a post from backyard chickens (by: Barred Babies) as a framework and just made mine a little bigger and tried to help give steps with making the door.
All said and done, it’s a little less than 5 foot high, 5 foot wide, and 10 foot long. And they all fit in this hoop house very comfortably!!!!!!!!!!!!
Just enough space for my overly-spoiled flock


