Good afternoon! We just completed our backyard coop and moved the chicks into it three days ago with a mix of heat lamp and brooder plate. Here's a quick documentation of our journey.
Wish list:
Started out in my old trusty Google Sketchup, which I've used to design my kids playhouse and our kitchen, way back in the day. Please ignore the missing purlins in the roof area!


Footprint is 8' deep by 10' wide, and a little over 8' at the high point of the roof. Coop is elevated almost 3'. The laying box shown on the back in this rendition got moved around to the side for easier access.
The two pop doors shown on there are for the chickens on the left and the pigeons on the right. There is a movable divider inside, which we can remove later on if we decide to only have one or the others. Each bird-door panel can be removed and rotated. Perhaps we can use the right side as a chicken brooder someday?
Other planning notes - I followed details of a lot of plans I saw on here. I hardware clothed the whole run outside and top, underneath the plastic roofing. Had a 2' apron of hardware cloth outside, pinned down with lawn/garden staples. We bought two Omlet doors as a big splurge - but they are so pretty and get around the problem of needing a horizontal door for the high pigeon entrance. And I wanted the doors to match....
First off - our site. Gently sloping from the woods behind us down to the street. This panorama shot shows the kids playhouse that we built in 2020. I couldn't take over the only open green spot that we have for the kids to play on, so I got the shady midnight hole indicated by the arrow. It's a relatively short walk from the house and is near water and within reach of an outdoor extension cord (for now).

Leveling the site was a huge pain because of the roots and rocks. Taking out too much material would kill the surrounding trees. So, we went with removing about six inches from the high side and building the base on solid concrete blocks. That is what we did with the kids playhouse, which is bigger and has handled 100 lb kids jumping up and down in it for the last few years. A week of working away after hours resulted in this:
Since our build involved the 2x4 framing to run along the fronts of the pressure-treated base plates (rather than taking their full width, it helped to notch them.

Built the 4 sides in our garage over the course of the next week, and then hauled them out and assembled one afternoon. That was a fun day.
Hubby and kids immediately got started on their part - staining the wood! Yeah, would have been easier beforehand, but there were other issues with schedules.
View from the side as the rafters were going up. Note the now-lowered horizontal supports in the coop area (left), a result of me realizing that the coop was too high for me. I'd assembled those with pocket screws, so it wasn't hard to move them down.
View of our door and the purlins on top, with a glance at the rolls of plastic roofing on the right. I ran into some supply chain issues there and we were missing one of our eight panels for about a week and a half. Still gave us enough cover to work even when it was raining.
Most of the roof on!! Just avoid that one corner if there is a downpour. I made the dumb move of not continuing my top plate into the eaves, so they are just supported by purlins. Ah well, you aren't supposed to walk on this type of roof anyway. Installed it by standing on a ladder and reaching over to fix screws right about at the end of my reach. Next time would go with the 2' wide panels instead of the 3' wide ones. Because we wanted to do our hardware cloth along the top frame of the structure, UNDER the roof and rafters, the roof had to go on first. Otherwise I couldn't stand up inside and put the panels on. But that mean doing all the hardware cloth over my head. Definitely the worst part of this whole project.
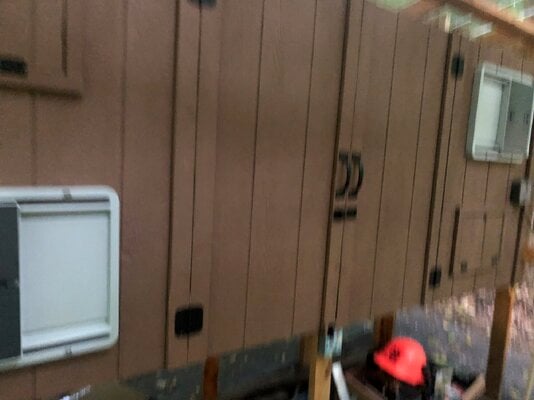
We used LP smartside for the coop walls and went cheap with 1x3 furring strips for the trim. Here is the back of the coop - opens up almost entirely! Note that I almost forgot to make the door top lower so that it can clear the rafters! Whoops.
Found a mix of 18" and 12" linoleum squares for <25 cents each, so that is our coop flooring. Nest boxes (tool storage for now) on the far end.
View from the run area before the front pieces were put on. Later on I added draft blocking strips to the inside of all of those doors, and barrel locks between the floor and doors to really cinch them in. They overlap the edge of the coop by 3.5 inches, AND have other locks on the doors, so I think we are pretty good re: predators.
The laying box trim was a bit wonky, but it is solid! Here you see the hardware cloth before I went through and did all the hundreds of zip ties at junctions. Also, note that I added windows (with hardware cloth and eventually a shutter) above and below the two doors.
While all this was going on, our chicks from Mt. Healthy arrived! This one is Dolly and she is the only one who seems to like me. She runs over and hops in my hand and won't get off. I'm smitten.

Everything looked better when painted to match our house. Here you can start to see ALL THE ZIP TIES
And to share some more difficulties - that uneven ground? Made the 2' apron REALLY hard to fix. Gaps and cracks emerged that I have attempted to fix with more hardware cloth and zipties. Also note the TERRIBLE 11 gauge stainless steel garden stakes that just bent like butter when I tried to hammer them into our soil. I found some 8gauge ones later and those go in solidly. This will all be covered with rocks/gravel/etc.
Difference between the good and bad lawn/garden staples:
I really hate pounding in the poultry staples at this point.
More inside work - put in two roosts and a poop board that is just resting on a piece of 1x4 and that can be removed pretty easily. Poop board is just a piece of siding with some scraps of half-round trim we had lying around. I also got a power inlet (meant for motorhomes) that we can plug into our extension cord. This one has two outlets, which we are currently using for a heat lamp AND a brooder plate. You can see the pieces of trim I used for draft blockers on those back doors, too.
Also note that our roof (of the henhouse) is open to the run. That leaves about 4" in the front of ventilation. The run is entirely close in by hardware cloth, so I am hoping this is safe. This also allows me to easily slide in a piece of cardboard, siding, whatever, to close off that open ceiling if we get a really cold night. The rafters meet the back of the coop, so that closes in all but about 2" (with hardware cloth underneath). So it's not really OPEN, but is just very well vented.
View with front doors open (from the run). Frame on the right is our movable pigeon/chicken divider. Next to it is our 2nd roost+poop board. This is basically the shot right before we filled it with wood shavings and our 7 chicks.
They are so cute!!! Here they are on a hot day when we turned off their lamp. They went as far away from it as they could and napped all day since the heat lamp had messed up their perception of day/night.
Something I hadn't anticipated is just how perfect this would look for halloween if it were already here!!!
And some glamour shots of the Omlet doors and the front all painted:
Waiting for the final twist-hasp lock to show up:
And now we have a lock AND a barrel bolt.
Final shot is of our door, which feels very sturdy and has a pull string so I can't lock myself in.
"Can't", she says.....
Wish list:
- Room for 5-6 chickens.
- Possible separate area for a pair of pigeons.
- Big cleaning doors in back
- "Nice" enough run that we'd enjoy going out there to play with them a bit
- No flat areas on lot - already took the only reasonable one for a kids playhouse at the start of COVID.
- Cold winters (upstate New York)
- Tons of predators - I watch the neighbors poultry occasionally and once came on the aftermath of a mink attach. Whew.
- We travel for ~1-2 weeks at a time to see family. See: cold winters and predators
Started out in my old trusty Google Sketchup, which I've used to design my kids playhouse and our kitchen, way back in the day. Please ignore the missing purlins in the roof area!


Footprint is 8' deep by 10' wide, and a little over 8' at the high point of the roof. Coop is elevated almost 3'. The laying box shown on the back in this rendition got moved around to the side for easier access.
The two pop doors shown on there are for the chickens on the left and the pigeons on the right. There is a movable divider inside, which we can remove later on if we decide to only have one or the others. Each bird-door panel can be removed and rotated. Perhaps we can use the right side as a chicken brooder someday?
Other planning notes - I followed details of a lot of plans I saw on here. I hardware clothed the whole run outside and top, underneath the plastic roofing. Had a 2' apron of hardware cloth outside, pinned down with lawn/garden staples. We bought two Omlet doors as a big splurge - but they are so pretty and get around the problem of needing a horizontal door for the high pigeon entrance. And I wanted the doors to match....
First off - our site. Gently sloping from the woods behind us down to the street. This panorama shot shows the kids playhouse that we built in 2020. I couldn't take over the only open green spot that we have for the kids to play on, so I got the shady midnight hole indicated by the arrow. It's a relatively short walk from the house and is near water and within reach of an outdoor extension cord (for now).

Leveling the site was a huge pain because of the roots and rocks. Taking out too much material would kill the surrounding trees. So, we went with removing about six inches from the high side and building the base on solid concrete blocks. That is what we did with the kids playhouse, which is bigger and has handled 100 lb kids jumping up and down in it for the last few years. A week of working away after hours resulted in this:

Since our build involved the 2x4 framing to run along the fronts of the pressure-treated base plates (rather than taking their full width, it helped to notch them.

Built the 4 sides in our garage over the course of the next week, and then hauled them out and assembled one afternoon. That was a fun day.

Hubby and kids immediately got started on their part - staining the wood! Yeah, would have been easier beforehand, but there were other issues with schedules.

View from the side as the rafters were going up. Note the now-lowered horizontal supports in the coop area (left), a result of me realizing that the coop was too high for me. I'd assembled those with pocket screws, so it wasn't hard to move them down.

View of our door and the purlins on top, with a glance at the rolls of plastic roofing on the right. I ran into some supply chain issues there and we were missing one of our eight panels for about a week and a half. Still gave us enough cover to work even when it was raining.

Most of the roof on!! Just avoid that one corner if there is a downpour. I made the dumb move of not continuing my top plate into the eaves, so they are just supported by purlins. Ah well, you aren't supposed to walk on this type of roof anyway. Installed it by standing on a ladder and reaching over to fix screws right about at the end of my reach. Next time would go with the 2' wide panels instead of the 3' wide ones. Because we wanted to do our hardware cloth along the top frame of the structure, UNDER the roof and rafters, the roof had to go on first. Otherwise I couldn't stand up inside and put the panels on. But that mean doing all the hardware cloth over my head. Definitely the worst part of this whole project.

We used LP smartside for the coop walls and went cheap with 1x3 furring strips for the trim. Here is the back of the coop - opens up almost entirely! Note that I almost forgot to make the door top lower so that it can clear the rafters! Whoops.

Found a mix of 18" and 12" linoleum squares for <25 cents each, so that is our coop flooring. Nest boxes (tool storage for now) on the far end.

View from the run area before the front pieces were put on. Later on I added draft blocking strips to the inside of all of those doors, and barrel locks between the floor and doors to really cinch them in. They overlap the edge of the coop by 3.5 inches, AND have other locks on the doors, so I think we are pretty good re: predators.

The laying box trim was a bit wonky, but it is solid! Here you see the hardware cloth before I went through and did all the hundreds of zip ties at junctions. Also, note that I added windows (with hardware cloth and eventually a shutter) above and below the two doors.

While all this was going on, our chicks from Mt. Healthy arrived! This one is Dolly and she is the only one who seems to like me. She runs over and hops in my hand and won't get off. I'm smitten.

Everything looked better when painted to match our house. Here you can start to see ALL THE ZIP TIES

And to share some more difficulties - that uneven ground? Made the 2' apron REALLY hard to fix. Gaps and cracks emerged that I have attempted to fix with more hardware cloth and zipties. Also note the TERRIBLE 11 gauge stainless steel garden stakes that just bent like butter when I tried to hammer them into our soil. I found some 8gauge ones later and those go in solidly. This will all be covered with rocks/gravel/etc.

Difference between the good and bad lawn/garden staples:

I really hate pounding in the poultry staples at this point.

More inside work - put in two roosts and a poop board that is just resting on a piece of 1x4 and that can be removed pretty easily. Poop board is just a piece of siding with some scraps of half-round trim we had lying around. I also got a power inlet (meant for motorhomes) that we can plug into our extension cord. This one has two outlets, which we are currently using for a heat lamp AND a brooder plate. You can see the pieces of trim I used for draft blockers on those back doors, too.
Also note that our roof (of the henhouse) is open to the run. That leaves about 4" in the front of ventilation. The run is entirely close in by hardware cloth, so I am hoping this is safe. This also allows me to easily slide in a piece of cardboard, siding, whatever, to close off that open ceiling if we get a really cold night. The rafters meet the back of the coop, so that closes in all but about 2" (with hardware cloth underneath). So it's not really OPEN, but is just very well vented.

View with front doors open (from the run). Frame on the right is our movable pigeon/chicken divider. Next to it is our 2nd roost+poop board. This is basically the shot right before we filled it with wood shavings and our 7 chicks.

They are so cute!!! Here they are on a hot day when we turned off their lamp. They went as far away from it as they could and napped all day since the heat lamp had messed up their perception of day/night.

Something I hadn't anticipated is just how perfect this would look for halloween if it were already here!!!

And some glamour shots of the Omlet doors and the front all painted:

Waiting for the final twist-hasp lock to show up:

And now we have a lock AND a barrel bolt.

Final shot is of our door, which feels very sturdy and has a pull string so I can't lock myself in.

"Can't", she says.....