I don’t have blueprints or parts list for this as it was a build-as-we-go but I will try to flesh out details later on so anyone interested in this type of design can get some helpful tips.
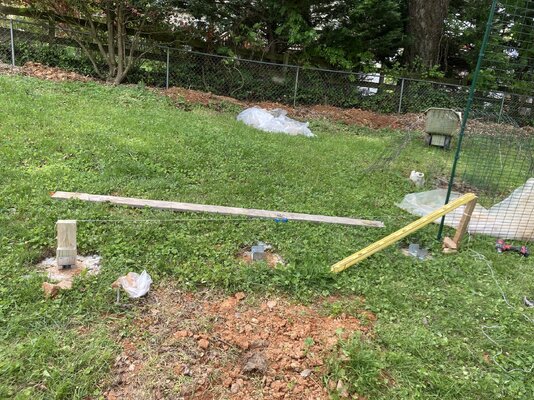
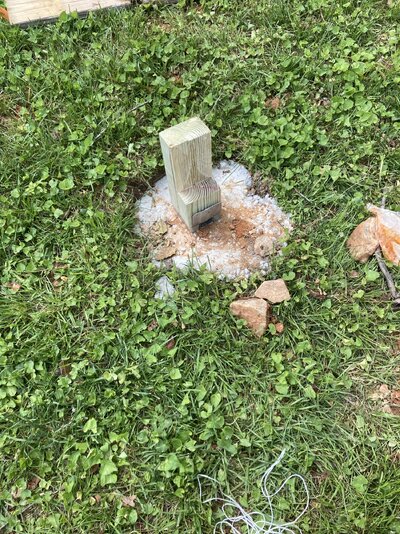
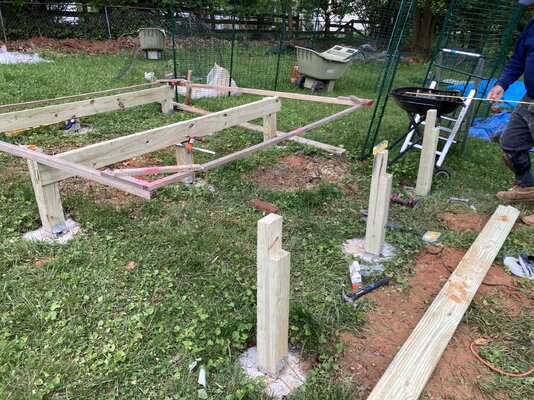
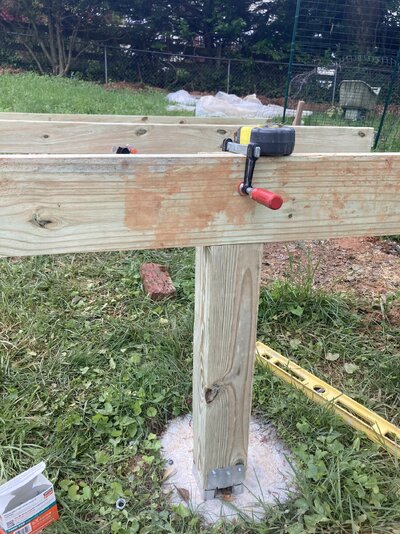
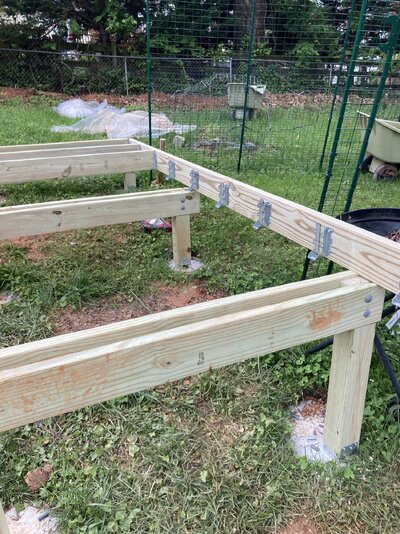
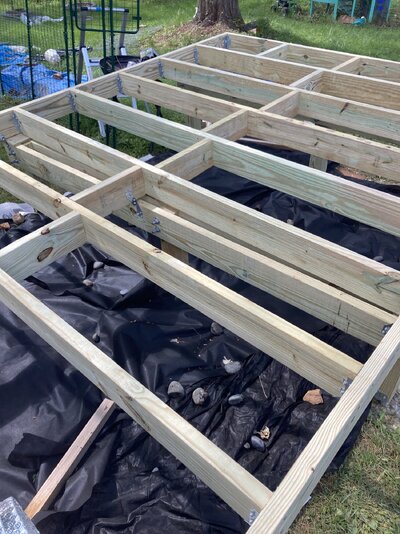
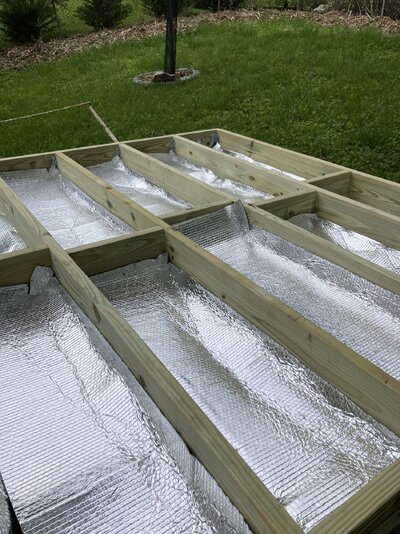
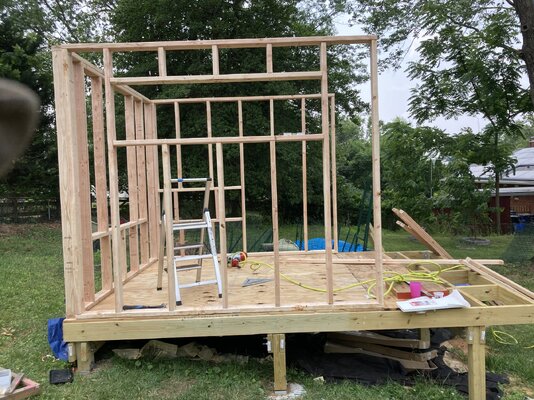
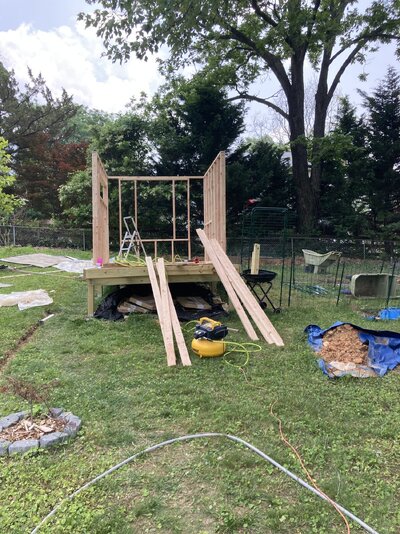
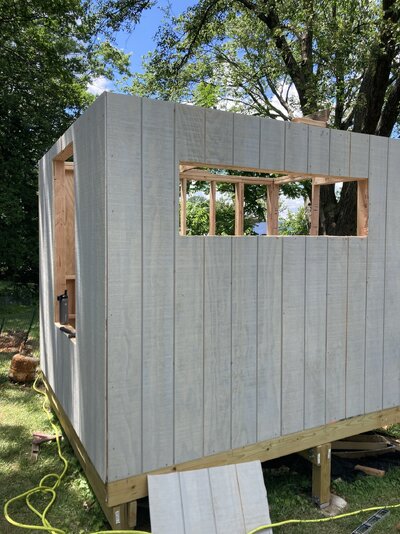
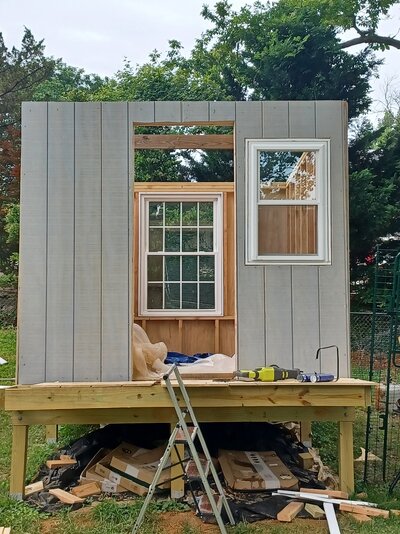
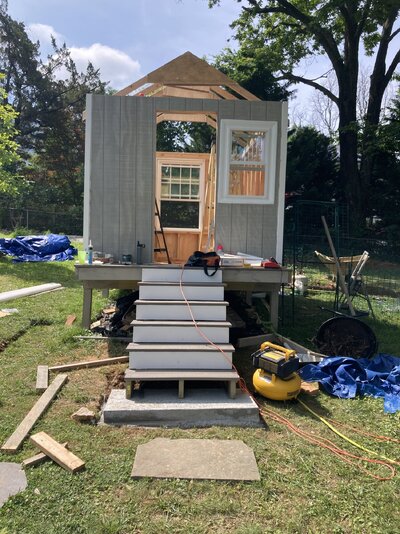
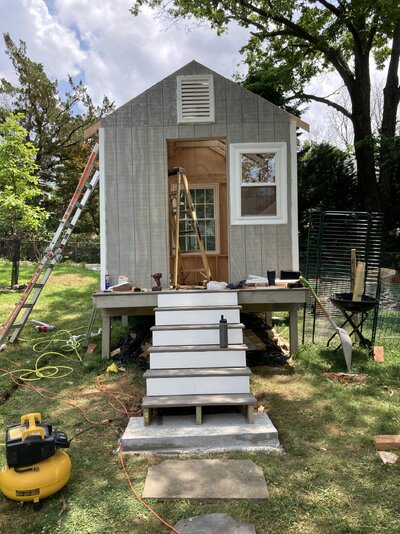
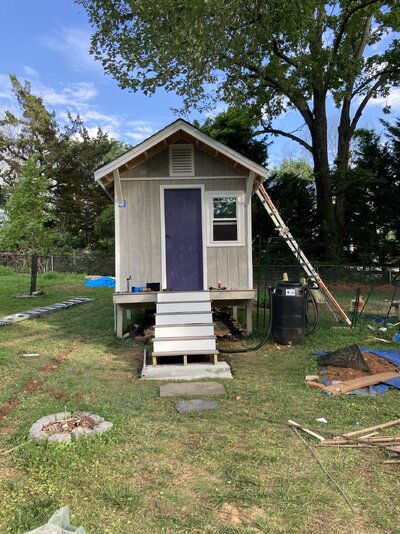
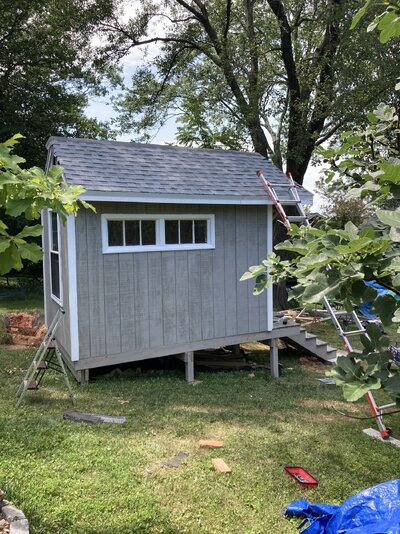
Here are some additional details: the enclosed structure is 8 x 10, with an additional 2 feet for a covered “porch” (really just somewhere to stand under a roof overhang in case it pours). The hardest part for my builder and I, for some bizarre reason, was getting the square for the base (or floor) to be even and level. The backyard has a significant slope so building a square on level ground out of long pieces of wood and then marking the actual spot on the ground where the building would go kept giving us uneven measurements for the concrete footer grid. In the end we figured it out but it was a challenge (the back of the chalet is around 3 inches or so off the ground while the front is over a foot off the ground), The first step was using a post hole digger to dig 12 holes, probably about 2 to 2 1/2 feet down and fill those holes with concrete. You can see those in the first couple of pics. We then waited 24 hours for the concrete to dry and my builder used a special drill bit to drill rebar Into the hole and the other end went into the treated wood footing (the wood footers also used metal brackets-all materials were purchased at your local big box building store-I’ll load pics of the specific materials at some point). That was done for nine of the holes, which made up the base of the enclosed unit. He then used 2 x 4s to construct the base, with each “rib” of the base going into a metal bracket that had been drilled into the long wood piece that made up the exterior wall of the base (you can see this in one of the photos). Quick note: before we built the base I placed newspaper and black weed cloth, then rocks, over the area where the building would be, to try to keep weeds and grass from coming up. Because I wanted the whole structure to be insulated (for the one week of cool weather we get here in MD in the winter, unlike real winters where I grew up in New England), we used sheet insulation which got stapled to the interior of the 2 x 4 base where possible. We then used large sheets of plywood (along with liquid nails and a nail gun) to be the floor. The framing for the walls were 2 x 4s and, compared to the base, they went up quickly (with special areas framed out for where the windows would go). I got the windows at a local Restore store (which is a business that accepts used items and resells them, the profits go to habitat for humanity), you should definitely stalk your local goodwill or businesses that resell used stuff), these windows were a steal at $75 and $50, as they were barely used. The smaller windows on the side of the chalet were actually really old basement windows I found stored in the attic of my house when I bought it. They are clearly not great (not insulated, don’t open), but they will be an additional source of light for the girls. The exterior of the building is primed hardieboard. I really liked the color of it and didn’t want to paint over it, so a challenge became how to weatherproof it without changing the color. I ended up using varathane wood stain in the color “sunbleached“ to enhance the color, then a clear coat over it to protect it.


Here are some additional details: the enclosed structure is 8 x 10, with an additional 2 feet for a covered “porch” (really just somewhere to stand under a roof overhang in case it pours). The hardest part for my builder and I, for some bizarre reason, was getting the square for the base (or floor) to be even and level. The backyard has a significant slope so building a square on level ground out of long pieces of wood and then marking the actual spot on the ground where the building would go kept giving us uneven measurements for the concrete footer grid. In the end we figured it out but it was a challenge (the back of the chalet is around 3 inches or so off the ground while the front is over a foot off the ground), The first step was using a post hole digger to dig 12 holes, probably about 2 to 2 1/2 feet down and fill those holes with concrete. You can see those in the first couple of pics. We then waited 24 hours for the concrete to dry and my builder used a special drill bit to drill rebar Into the hole and the other end went into the treated wood footing (the wood footers also used metal brackets-all materials were purchased at your local big box building store-I’ll load pics of the specific materials at some point). That was done for nine of the holes, which made up the base of the enclosed unit. He then used 2 x 4s to construct the base, with each “rib” of the base going into a metal bracket that had been drilled into the long wood piece that made up the exterior wall of the base (you can see this in one of the photos). Quick note: before we built the base I placed newspaper and black weed cloth, then rocks, over the area where the building would be, to try to keep weeds and grass from coming up. Because I wanted the whole structure to be insulated (for the one week of cool weather we get here in MD in the winter, unlike real winters where I grew up in New England), we used sheet insulation which got stapled to the interior of the 2 x 4 base where possible. We then used large sheets of plywood (along with liquid nails and a nail gun) to be the floor. The framing for the walls were 2 x 4s and, compared to the base, they went up quickly (with special areas framed out for where the windows would go). I got the windows at a local Restore store (which is a business that accepts used items and resells them, the profits go to habitat for humanity), you should definitely stalk your local goodwill or businesses that resell used stuff), these windows were a steal at $75 and $50, as they were barely used. The smaller windows on the side of the chalet were actually really old basement windows I found stored in the attic of my house when I bought it. They are clearly not great (not insulated, don’t open), but they will be an additional source of light for the girls. The exterior of the building is primed hardieboard. I really liked the color of it and didn’t want to paint over it, so a challenge became how to weatherproof it without changing the color. I ended up using varathane wood stain in the color “sunbleached“ to enhance the color, then a clear coat over it to protect it.
