Our Coop
My wife and I have been interested in keeping chickens for quite some time now. We happen to live in a city that's friendly toward keeping chickens (Austin, TX) and do not live in an HOA neighborhood. The only thing holding us back was trying to figure out what we wanted to do for a coop. We knew that we would want something that was pleasing to the eye. We knew that we would also need a raised coop that would work well with our sloping backyard. I appreciate many of the "recycled" coops that I come across, but that just wasn't what we wanted.
Well, after looking at a bunch of pictures and plans, we found a design that we really liked. The plans were cheap and available through eBay so we went ahead and bought them. Unfortunately, as I looked through the plans, I quickly realized that this design was not what we were going to build. The use of dimensional lumber (2x4's, 2x6's, etc.) was very minimal and pretty much limited to the floor. The plans called for cement board walls with no additional support. In other words, cement board (which is a siding material, not a structural material) was holding up the entire weight of the roof. I decided that this design would probably go up quickly and look nice for a little while, but would quickly begin to sag and deteriorate.
Alright, time to break out the Google Sketchup. I followed the dimensions and visual design of the plans that we purchased but used proper construction practices. Using Sketchup, I layed out the stud walls with rough-outs for windows (two in the front, one up high in the back) and doors (one human, one chicken), nest boxes, and nest box lid. (By the way, this turned out to be a good learning experience for a cabin that is currently in the works.) At this time, I also made a couple of changes to the design. I enlarged the "human door". I also raised the chicken door and entrances to the nest boxes as my wife wanted to use the deep litter method in the coop. This would allow all of the litter to be contained without spilling out of the chicken door or into the nest boxes.
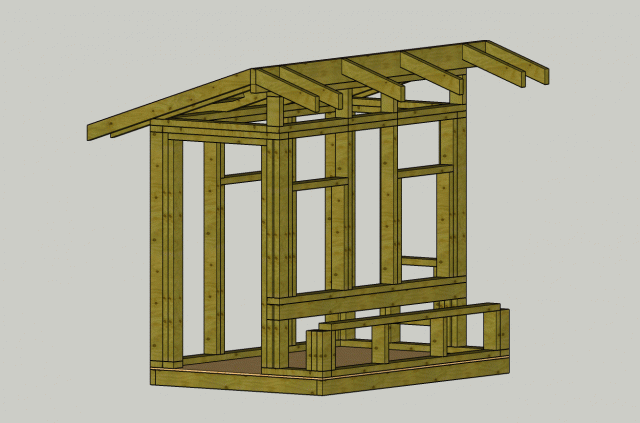
Sketchup Design of Coop
Using the plans from Sketchup, we have all of our walls planned and ready to construct.

South Wall | | 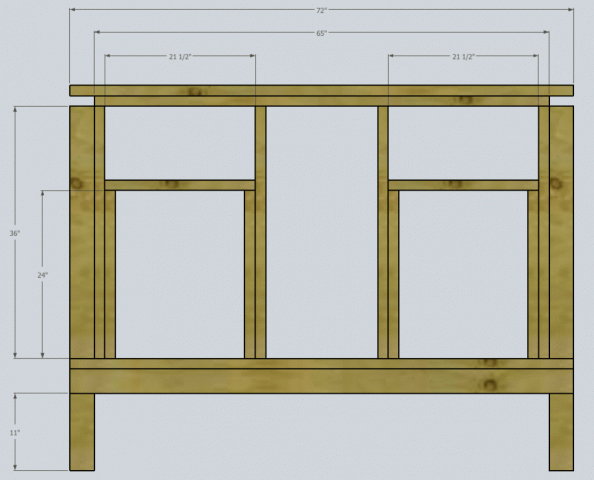
Middle Wall |

East Wall | 
West Wall | |

North Wall |
Alright, we've looked, researched, and talked about building this coop for long enough. Let's get started! First things first, let's go ahead and get chicks, right? Haha. Well, at least having the chicks was a good incentive to keep progress moving on the coop.
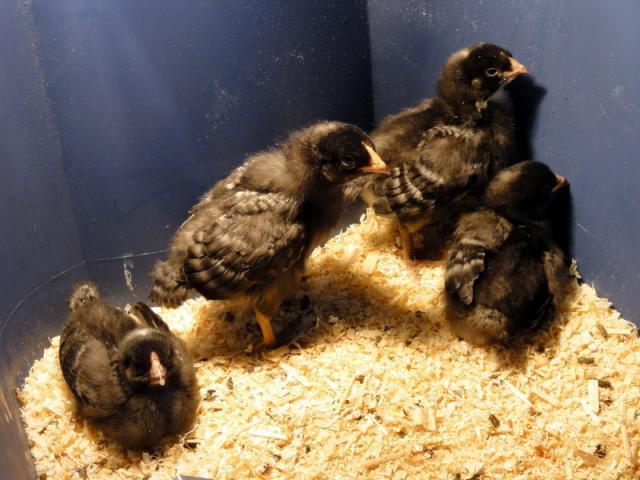
Let's talk about chicks, man.
The floor was framed with 2x6's about 20-24 inches off the ground on Dek-Blocks to accomodate the slope. This method doesn't require any digging which would be a huge pain since we can only go about 6 inches before hitting limestone.
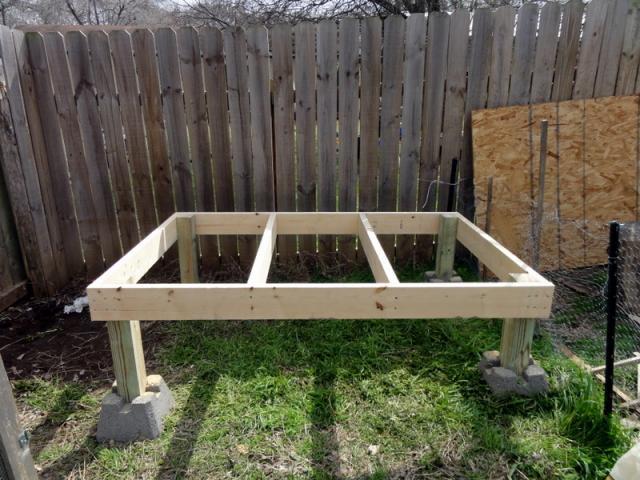
Floor Framing
The walls were constructed one by one with 2x4 studs and set aside until time to erect them all. Luckily, when it came time to raise the walls, everything fit together as planned and the roof framing was added without too much trouble.
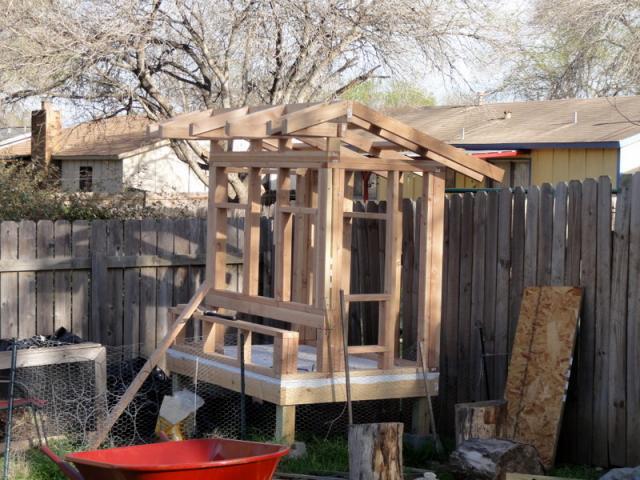
Walls and Roof Framing
The walls were sheathed with 1/2-inch OSB plywood, and the window holes were cut out later with a router.
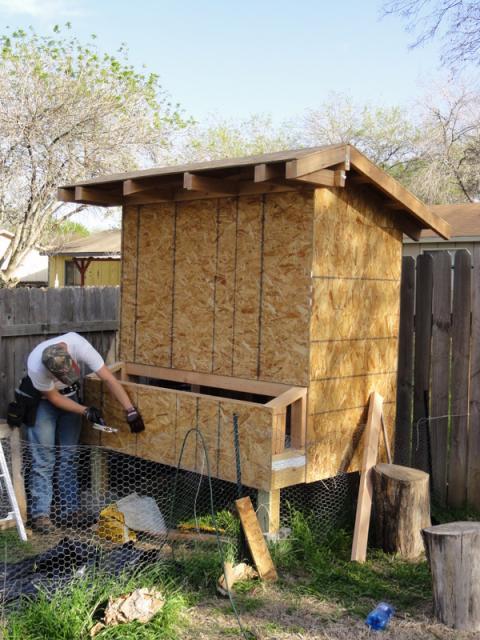
Walls Sheathed
The coop was then roofed and the walls were wrapped with tar paper in preparation for doors, windows, and siding. Note the ridge vent on the roof. Some visitors like to comment on the fact that our chicken coop has a ridge vent and our house doesn't. The wife has even made the comment that if anything happens to our house, we could just move into the coop.


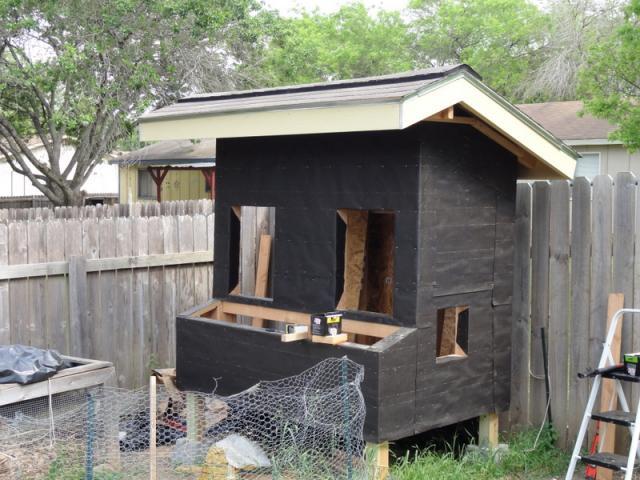
Tar Papered and Ready for Siding
At this time, I built windows with plexiglass panes and hinged 2x2 frames based on some playhouse plans that I found online (http://www.buildeazy.com/newplans/playhouse_6x6_window_frame.html). The windows and Hardie Board siding and trim was then added.
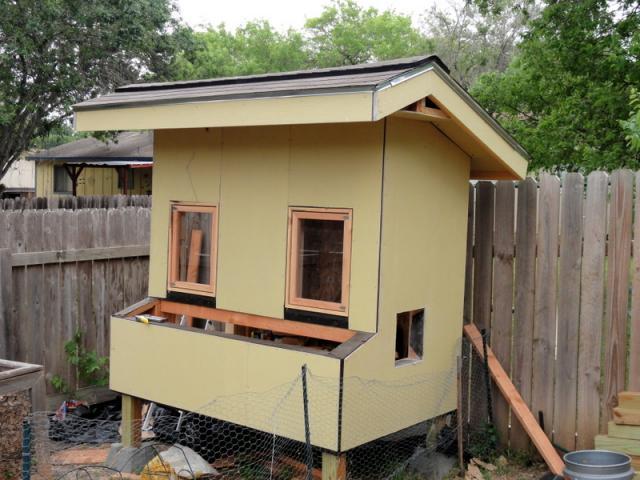
Sided and Ready for Trim
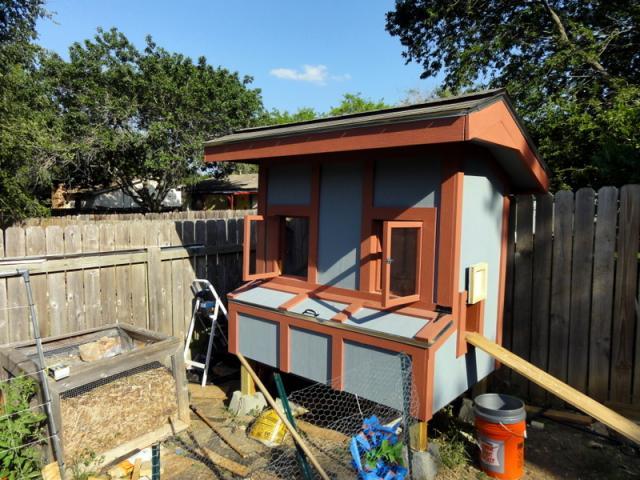
Trimmed, Painted and Ready for Move-In
Here's a shot of the door construction. The door was built from 2x2's, 2x6's, 1/2-inch plywood, and a plexiglass pane based on the same playhouse plans as the windows (http://www.buildeazy.com/newplans/playhouse_6x6_door.html).
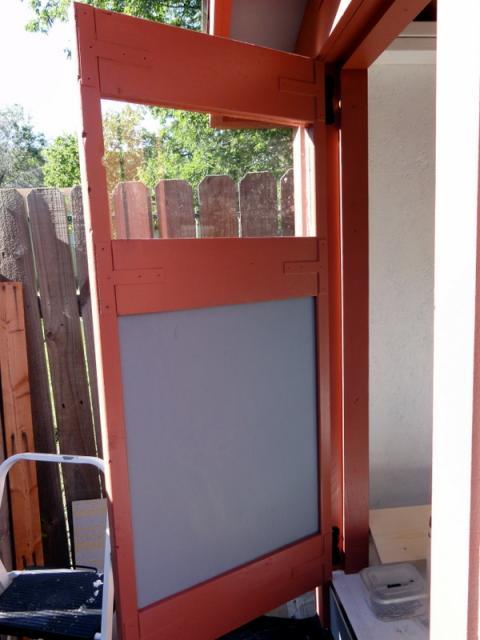
Door
The inside got a quick coat of white paint which really brightened up the interior. The windows were then covered with 1/2-inch hardware cloth. Finally a roost was built by chamfering a 2x4 and adding a little bracing. Then came the inspectors. Looks like this one approves.
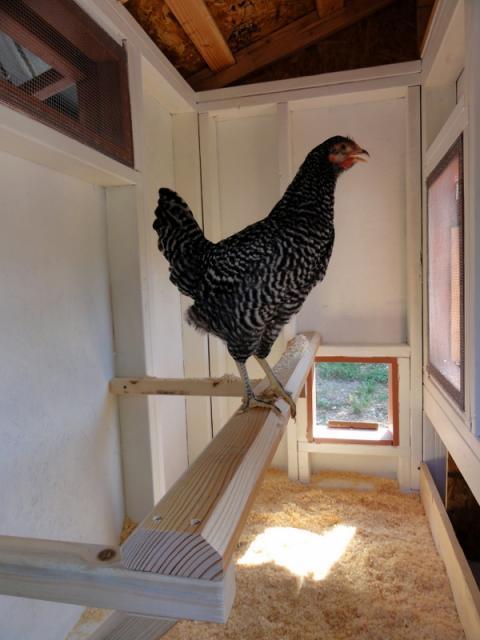
Roost
The girls spend most of the day in the coop, but we try to let them free-range around the back yard as much as possible. They really seem to like the coop and go running for it every evening when it starts to get dark and we come outside to put them up.
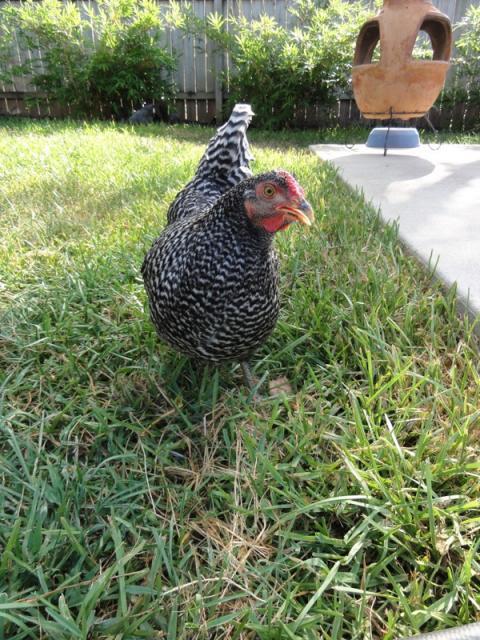
Chickens Free-Ranging in the Yard
Here are our first three eggs that we found just yesterday! All three eggs were found at the same time in the same nest box.
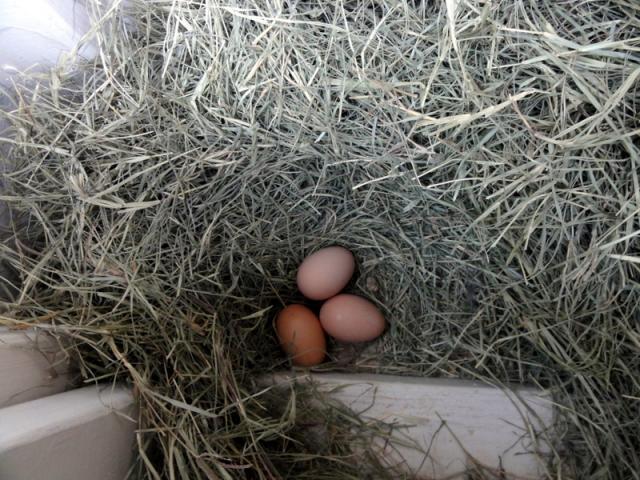
First Eggs
Still left to be done: we need to construct a run off the end of the coop for the girls to use during the day while we're not home. This will come off of the end with the chicken door and extend over to the nearby fig tree.
Thanks for looking at our coop!
Thanks for looking at our coop!

