GUIDE TO STORAGE AND HANDLING OF CHICKEN EGGS FOR HATCHING

So, you have an incubator you want to set or have a hen showing signs of going broody. You need to prepare for the day when you’re ready to set the eggs. Hatching your own eggs is a fun experience, especially magical for kids, but remember: likely half of these adorable chicks will end up being roosters, so have a plan for that inevitability.
First, let's look at what we can learn from the broody hen.
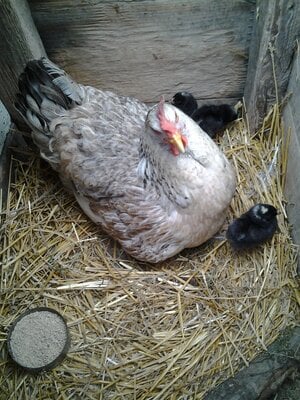
Let’s walk through the process from a broody hen’s perspective. Naturally, a hen will find a clean, quiet trusted spot to steal her nest and lay one egg daily in that nest until she has a sufficient clutch, anywhere from 7 to 10 eggs.
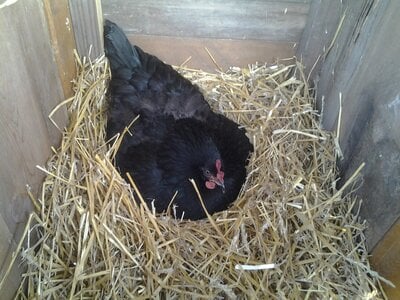
Sometimes the spot a hen chooses is unsafe for her and situated in a way that will create difficulty for newly hatched chicks. Usually, this spot is secluded and dark. She will also pluck quite a few of her breast and underbelly feathers to build this nest. This bare belly will give her good skin-to-egg contact. In laying that daily egg, she will be moving the others around, turning them slighting. These eggs are kind of in an “On Hold” status during this time.
When she feels she has enough eggs, she will begin to set in earnest. She will not be leaving the nest very long each day; only to eat, drink, and defecate. This is now "day one", starting all the eggs’ development at the same time, (no matter what day they were laid.) Her temperature rises and she seems to go into a somewhat hypnotized state. She will rustle and rotate on the nest many times each day and, in the process, turning the eggs. The moisture from her skin adds exactly the right humidity for the embryo’s development.

The eggs will usually start to hatch on day 19, but some eggs may take up to 23 days. The health and vitality of parent stock and length of time eggs waited will be determining factors here.
If you are like me, with a small backyard flock, you will want to save eggs from your own stock to see what you get. Of course, you need a rooster in order for those eggs to be fertile. The accepted concept is that for good fertility one rooster to ten hens is a good ratio. The truth is, a lot will depend on the health and vitality of your flock and your particular rooster. If your climate is hot (above 85 degrees), gather your eggs 3 to 5 times daily to get them to a safe storage temperature.
When a hen lays an egg, it is wet with what is called “Bloom”. This bloom quickly dries to an invisible shield that protects the contents of the egg from bacteria and deterioration.

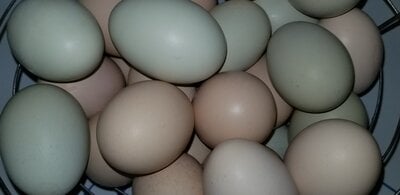
Start collecting your eggs and place them in a fiber egg carton, pointed-end down to keep the air bubble on the rounded-end and the yolk properly suspended in the white. This keeps the egg yolk from adhering to the sides of the eggshell. The rounded end is where the chick will pip when hatching.

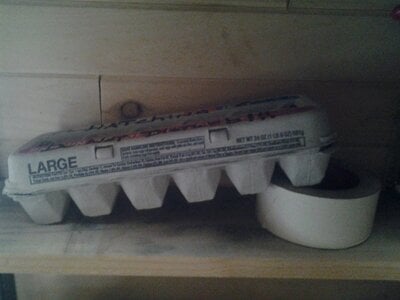
I like the fiber cartons, as they offer better ventilation than the foam cartons and allow breathing space. Use a prop (a roll of masking tape in my case) and alternate the tilt of the carton each day. Keep the carton in a cool, (55 degrees) humid (75% percent) area away from activity, vibration, and fumes. I like a shelf in my basement for this, as the temperature does not fluctuate.

You can use a marker and write “Fertile eggs” on this carton so there are no mishaps. Do not refrigerate or wash hatching eggs. Storing eggs for more than 7 days will decrease hatchability.
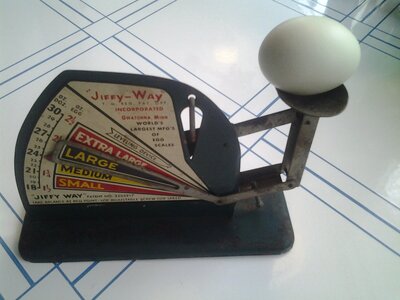
So after a week of saving eggs, you are ready to choose which ones you want to hatch. Select eggs that are normal size and shape. Remember that small eggs will produce small chicks. Pullet eggs are not a good bet. Most time there is not enough room in the egg for proper development of the chick. Never try to hatch very large (double Yolk-er) eggs.
Eggs that are misshapen, rough, bumpy, or wrinkly, should not be set. Oddly shaped eggs with no pointy end or elongated eggs may hatch but may be more troublesome for the chick to turn and navigate, causing the chick difficulty — sometimes to die inside the shell.
Also, eggs that seem to have soft or thin shells are not a good choice. If the shell is thin it is more prone to allow bacteria in, killing the embryo and allowing necessary moisture to evaporate out. A heavy hen may also crush a soft-shelled egg in the nest and contaminate the entire hatch. See this article for a great explanation of egg deformities and problems:
https://www.backyardchickens.com/articles/common-egg-quality-problems.65923/
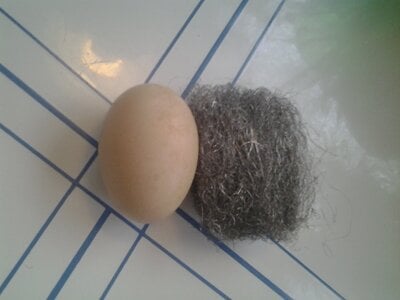
If the egg you want to hatch has some dirty substance on it, use soft sandpaper to gently scrape it off. Even tho I rarely have dirty eggs. I like to use some Steel wool (non-detergent) to gently remove any foreign matter.

Within that 7 days, any eggs you do not choose are still good for eating or baking.
Bring your hatching eggs slowly up to room temperature before placing them for incubation to avoid condensation on the surface of the egg. Sweat on the eggs can impact the Bloom or introduce bacteria into the egg.
You will hear stories of folks buying eggs from the grocery store and hatching chicks. Not a profitable process, as most store-bought eggs are from factory farm hens where there are no roosters.
Also, you may find people that wash their hatching eggs and still have a good result. Removal of the Bloom opens and exposes the porous surface of the egg and leads to the likelihood of bacteria entering the egg and moisture escaping. Yes, it can happen, but remember: anything done to the eggs that is unnecessary and unnatural will likely have a negative impact on the hatchability of that egg, lowering the hatch rate. Ask yourself, does the broody hen do this?
Shipped eggs.
Sometimes you want some exotic breed unavailable in your area, and purchasing fertile eggs is your only option for those.
Shipped eggs have gone through quite a bit of potential rough handling and vibration on their journey through the postal system. Also, who knows what temperature extremes the eggs may encounter on their trip. How far did the eggs come? Airplane baggage holds can get pretty cold. Maybe too cold.
These eggs may not offer a good hatch rate. I have had many disappointments myself. Results are never as good as I receive from using my own eggs, or finding eggs locally.
Also, it is rare you will find a seller offering money back, as there are no guarantees how they will be handled during shipping. You have no idea how old the eggs were when they were boxed up and shipped to you. I have received eggs not packaged well and half were broken and the rest covered in egg goo. A total loss.
With shipped eggs, it’s important to inspect each egg closely once you have received them. Make sure the shell was not damaged during its journey. Also look for that thin shell or dirtiness that needs removal. Introducing dirty eggs in your incubator can destroy the entire hatch.
Give shipped eggs a time of rest. Again, pointy end down in an egg carton to re-adjust the air bubble for at least 24 hours before setting them in the incubator.
MISCONCEPTIONS AND BAD ADVICE
“If your broody hen pushed out a certain egg from her nest, it means the egg is no good.”
Not so, it may be that other hens are laying daily eggs in her nest and there simply is not room for all of them all under her any longer. If hens could discern a good hatchable egg from one that is not, why do I have hens trying to hatch plastic eggs, rocks, and golf balls every summer?
However, it may be true the egg is now dead depending on how long it was chilled.
“If your broody is not in solitary confinement, mark your eggs in a way to discern them from fresh and gather all unmarked eggs daily.”
In most cases, this is disastrous. With other hens climbing in and on her constantly, and then you bothering her to remove these fresh eggs every day, is likely to break your broody early, or result in broken eggs from all the commotion and turmoil.
The mark you put on the eggs will often wear off with the movement of the broody hen and half-formed eggs end up being put in your refrigerator. Yuck!
Best to confine your broody to her own space, allowing her room to still get up off the nest daily and stretch her legs.
Check out this thread I wrote about broody hutches I built from reclaimed materials: https://www.backyardchickens.com/threads/broody-hutches-my-mothers-day-project-finished.1312804/

Candling eggs.
Yes, it may be fun to see the progress — especially for children — but I wonder how many good eggs are discarded because folks don’t know what they are looking at. Also, this is another unnecessary step that can be skipped as it is more interference with your broody hen and results in more unnecessary handling of eggs and more chance of mishap. I actually have a candler but never use it. I also have never had an egg explode in my incubator. Usually your nose and eyes will tell you when you have an egg going bad. It will smell and start to sweat and you can identify and remove it quickly.
If you must candle, please see the below article:
https://www.backyardchickens.com/articles/information-on-candling-eggs.73302/
Adding eggs after the clock has started.
Sometimes you find another egg you want to hatch after the broody is set or the incubation process is started.
Sometimes it happens when you don’t realize as above, when other hens are adding fresh eggs to the clutch.
This almost always ends badly for the unhatched eggs or the chicks already hatched when broody mom tries staying with the unhatched eggs in an effort to hatch them out, and the existing chicks don’t get off the nest to take in adequate food and water.
Most times after day 23, she is switching gears from Broody Hen to Chick Mom and she leaves any unhatched eggs to mother the live ones, and the half-developed chicks in the eggs perish.
If it’s an added egg in your incubator, and it hatches... now you have a chick to integrate into a batch of chicks that are much older than them. Even one week can be a big difference in chick size.
Using the Float Test for hatching eggs.
The float test is for determining the freshness of an egg for eating!
When immersed in water the egg will either lay on its side if it’s fresh, stand on its pointy end if it’s still edible, or float to the top if it’s bad or quite old.
Do not immerse hatching eggs in water, it removes the Bloom and can shock any live chick that may be inside the egg with abrupt temperature change.
CONCLUSION
We all would like a 100% hatching experience, but even an 80% is considered a good result. The advice above is gathered from years of personal experience, trial and error, and tips from my broody hen. Good luck, and happy hatching!

So, you have an incubator you want to set or have a hen showing signs of going broody. You need to prepare for the day when you’re ready to set the eggs. Hatching your own eggs is a fun experience, especially magical for kids, but remember: likely half of these adorable chicks will end up being roosters, so have a plan for that inevitability.
First, let's look at what we can learn from the broody hen.
Let’s walk through the process from a broody hen’s perspective. Naturally, a hen will find a clean, quiet trusted spot to steal her nest and lay one egg daily in that nest until she has a sufficient clutch, anywhere from 7 to 10 eggs.
Sometimes the spot a hen chooses is unsafe for her and situated in a way that will create difficulty for newly hatched chicks. Usually, this spot is secluded and dark. She will also pluck quite a few of her breast and underbelly feathers to build this nest. This bare belly will give her good skin-to-egg contact. In laying that daily egg, she will be moving the others around, turning them slighting. These eggs are kind of in an “On Hold” status during this time.
When she feels she has enough eggs, she will begin to set in earnest. She will not be leaving the nest very long each day; only to eat, drink, and defecate. This is now "day one", starting all the eggs’ development at the same time, (no matter what day they were laid.) Her temperature rises and she seems to go into a somewhat hypnotized state. She will rustle and rotate on the nest many times each day and, in the process, turning the eggs. The moisture from her skin adds exactly the right humidity for the embryo’s development.
The eggs will usually start to hatch on day 19, but some eggs may take up to 23 days. The health and vitality of parent stock and length of time eggs waited will be determining factors here.
If you are like me, with a small backyard flock, you will want to save eggs from your own stock to see what you get. Of course, you need a rooster in order for those eggs to be fertile. The accepted concept is that for good fertility one rooster to ten hens is a good ratio. The truth is, a lot will depend on the health and vitality of your flock and your particular rooster. If your climate is hot (above 85 degrees), gather your eggs 3 to 5 times daily to get them to a safe storage temperature.
When a hen lays an egg, it is wet with what is called “Bloom”. This bloom quickly dries to an invisible shield that protects the contents of the egg from bacteria and deterioration.
Start collecting your eggs and place them in a fiber egg carton, pointed-end down to keep the air bubble on the rounded-end and the yolk properly suspended in the white. This keeps the egg yolk from adhering to the sides of the eggshell. The rounded end is where the chick will pip when hatching.
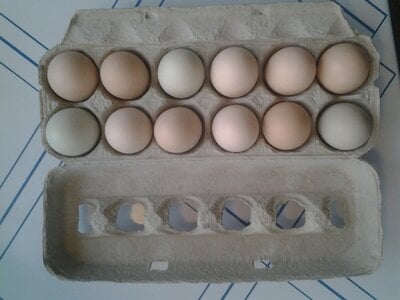
I like the fiber cartons, as they offer better ventilation than the foam cartons and allow breathing space. Use a prop (a roll of masking tape in my case) and alternate the tilt of the carton each day. Keep the carton in a cool, (55 degrees) humid (75% percent) area away from activity, vibration, and fumes. I like a shelf in my basement for this, as the temperature does not fluctuate.
You can use a marker and write “Fertile eggs” on this carton so there are no mishaps. Do not refrigerate or wash hatching eggs. Storing eggs for more than 7 days will decrease hatchability.
So after a week of saving eggs, you are ready to choose which ones you want to hatch. Select eggs that are normal size and shape. Remember that small eggs will produce small chicks. Pullet eggs are not a good bet. Most time there is not enough room in the egg for proper development of the chick. Never try to hatch very large (double Yolk-er) eggs.
Eggs that are misshapen, rough, bumpy, or wrinkly, should not be set. Oddly shaped eggs with no pointy end or elongated eggs may hatch but may be more troublesome for the chick to turn and navigate, causing the chick difficulty — sometimes to die inside the shell.
Also, eggs that seem to have soft or thin shells are not a good choice. If the shell is thin it is more prone to allow bacteria in, killing the embryo and allowing necessary moisture to evaporate out. A heavy hen may also crush a soft-shelled egg in the nest and contaminate the entire hatch. See this article for a great explanation of egg deformities and problems:
https://www.backyardchickens.com/articles/common-egg-quality-problems.65923/
If the egg you want to hatch has some dirty substance on it, use soft sandpaper to gently scrape it off. Even tho I rarely have dirty eggs. I like to use some Steel wool (non-detergent) to gently remove any foreign matter.
Within that 7 days, any eggs you do not choose are still good for eating or baking.
Bring your hatching eggs slowly up to room temperature before placing them for incubation to avoid condensation on the surface of the egg. Sweat on the eggs can impact the Bloom or introduce bacteria into the egg.
You will hear stories of folks buying eggs from the grocery store and hatching chicks. Not a profitable process, as most store-bought eggs are from factory farm hens where there are no roosters.
Also, you may find people that wash their hatching eggs and still have a good result. Removal of the Bloom opens and exposes the porous surface of the egg and leads to the likelihood of bacteria entering the egg and moisture escaping. Yes, it can happen, but remember: anything done to the eggs that is unnecessary and unnatural will likely have a negative impact on the hatchability of that egg, lowering the hatch rate. Ask yourself, does the broody hen do this?
Shipped eggs.
Sometimes you want some exotic breed unavailable in your area, and purchasing fertile eggs is your only option for those.
Shipped eggs have gone through quite a bit of potential rough handling and vibration on their journey through the postal system. Also, who knows what temperature extremes the eggs may encounter on their trip. How far did the eggs come? Airplane baggage holds can get pretty cold. Maybe too cold.
These eggs may not offer a good hatch rate. I have had many disappointments myself. Results are never as good as I receive from using my own eggs, or finding eggs locally.
Also, it is rare you will find a seller offering money back, as there are no guarantees how they will be handled during shipping. You have no idea how old the eggs were when they were boxed up and shipped to you. I have received eggs not packaged well and half were broken and the rest covered in egg goo. A total loss.
With shipped eggs, it’s important to inspect each egg closely once you have received them. Make sure the shell was not damaged during its journey. Also look for that thin shell or dirtiness that needs removal. Introducing dirty eggs in your incubator can destroy the entire hatch.
Give shipped eggs a time of rest. Again, pointy end down in an egg carton to re-adjust the air bubble for at least 24 hours before setting them in the incubator.
MISCONCEPTIONS AND BAD ADVICE
“If your broody hen pushed out a certain egg from her nest, it means the egg is no good.”
Not so, it may be that other hens are laying daily eggs in her nest and there simply is not room for all of them all under her any longer. If hens could discern a good hatchable egg from one that is not, why do I have hens trying to hatch plastic eggs, rocks, and golf balls every summer?
However, it may be true the egg is now dead depending on how long it was chilled.
“If your broody is not in solitary confinement, mark your eggs in a way to discern them from fresh and gather all unmarked eggs daily.”
In most cases, this is disastrous. With other hens climbing in and on her constantly, and then you bothering her to remove these fresh eggs every day, is likely to break your broody early, or result in broken eggs from all the commotion and turmoil.
The mark you put on the eggs will often wear off with the movement of the broody hen and half-formed eggs end up being put in your refrigerator. Yuck!
Best to confine your broody to her own space, allowing her room to still get up off the nest daily and stretch her legs.
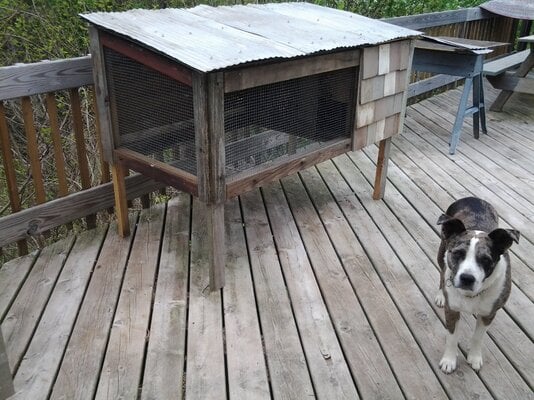
Check out this thread I wrote about broody hutches I built from reclaimed materials: https://www.backyardchickens.com/threads/broody-hutches-my-mothers-day-project-finished.1312804/
Candling eggs.
Yes, it may be fun to see the progress — especially for children — but I wonder how many good eggs are discarded because folks don’t know what they are looking at. Also, this is another unnecessary step that can be skipped as it is more interference with your broody hen and results in more unnecessary handling of eggs and more chance of mishap. I actually have a candler but never use it. I also have never had an egg explode in my incubator. Usually your nose and eyes will tell you when you have an egg going bad. It will smell and start to sweat and you can identify and remove it quickly.
If you must candle, please see the below article:
https://www.backyardchickens.com/articles/information-on-candling-eggs.73302/
Adding eggs after the clock has started.
Sometimes you find another egg you want to hatch after the broody is set or the incubation process is started.
Sometimes it happens when you don’t realize as above, when other hens are adding fresh eggs to the clutch.
This almost always ends badly for the unhatched eggs or the chicks already hatched when broody mom tries staying with the unhatched eggs in an effort to hatch them out, and the existing chicks don’t get off the nest to take in adequate food and water.
Most times after day 23, she is switching gears from Broody Hen to Chick Mom and she leaves any unhatched eggs to mother the live ones, and the half-developed chicks in the eggs perish.
If it’s an added egg in your incubator, and it hatches... now you have a chick to integrate into a batch of chicks that are much older than them. Even one week can be a big difference in chick size.
Using the Float Test for hatching eggs.
The float test is for determining the freshness of an egg for eating!
When immersed in water the egg will either lay on its side if it’s fresh, stand on its pointy end if it’s still edible, or float to the top if it’s bad or quite old.
Do not immerse hatching eggs in water, it removes the Bloom and can shock any live chick that may be inside the egg with abrupt temperature change.
CONCLUSION
We all would like a 100% hatching experience, but even an 80% is considered a good result. The advice above is gathered from years of personal experience, trial and error, and tips from my broody hen. Good luck, and happy hatching!
