*~*~WARNING~*~*
This is a VERY long, PICTURE HEAVY coop build article. Brew a pot of coffee, get comfy and enjoy (I hope!)
Less than one year into my life with chickens I became one of those people.This is a VERY long, PICTURE HEAVY coop build article. Brew a pot of coffee, get comfy and enjoy (I hope!)
You know who I'm talking about. The people who swear up one wall and down another that they will never have more than 10 chickens. Ever. And just a few short months later they are stricken with a severe case of Chicken Addiction, a malady with no known cure. This is then compounded by a secondary infection of Chicken Mathitis Extremus. Oh my.
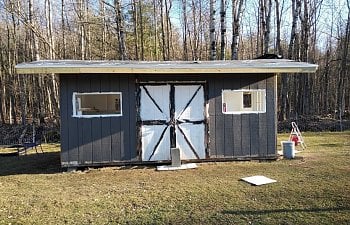
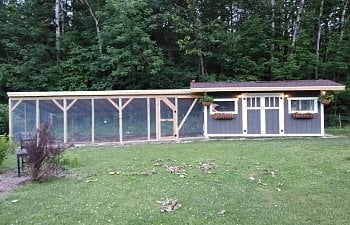
Yep. That's me. So what's a girl to do when her chicken accommodations can only comfortably house 11 birds? Why she commandeers the 8' x 16' cosmetically challenged shed stuffed to the rafters with a bunch of junk, that's what!
This lovely, albeit quite stinky, structure is destined for greater things.
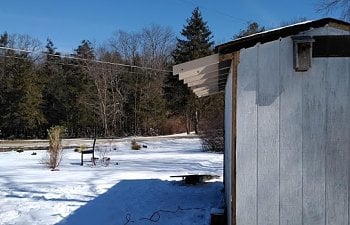
This side faces the road (north) - that is some sexy paint job, no?!

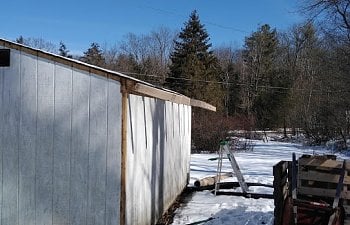
This side faces our backyard (west).

This is the rear of the building (south facing but shaded by the woods approximately 18' away).
And the east facing side.
What a diamond in the rough!
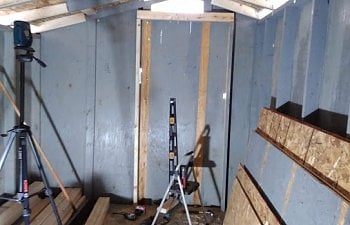
A little work to clean this out.
No problem with all these little elves to help.
Now, what do I need to convert this shed into my new coop?
PLANNING
On to the planning stage.
Many, many newbies, myself included, started out learning as much as they could about raising chickens so they could design the "perfect" coop. The perfect coop must provide for all the chickens needs first and foremost and then the caretakers needs and desires. The unfortunate reality is that you do the best you can and just go for it. If you find your coop isn't working out they way you hoped, either you make modifications if that's feasible or you call a Mulligan and do it over.
The coop I built from scratch was cute and it worked for the chickens. I'll be perfectly honest here and say that I was looking for a "quick fix" and chose that coop because it came with (crappy) plans and was visually appealing. My back and occasionally my forehead hated it.
Hated.
It.
I NEED a walk-in coop.
I NEED a walk-in run.
Did anyone look at my first coop article and see the run I built? WHAT was I thinking? The 2' high extension was inaccessible and un-cleanable, two features you should avoid like the plague in chicken husbandry.
What I learned after becoming a chicken caretaker is invaluable. I now know all the shortcomings of my initial choices so those mistakes won't be repeated.
As I am planning to increase my flock, I will be converting the 8'x16' shed into a coop with an 8'x12' coop and a 4'x8' room that houses the brooder, nest box and storage. I plan to keep between 20 and 28 birds in this coop but because of the attached, fully predator-proof winterizable run, that will not be crowed when I am on the high population end of the design.
I was able to come up with a must-have list:
And a want-to-have short list:
Many, many newbies, myself included, started out learning as much as they could about raising chickens so they could design the "perfect" coop. The perfect coop must provide for all the chickens needs first and foremost and then the caretakers needs and desires. The unfortunate reality is that you do the best you can and just go for it. If you find your coop isn't working out they way you hoped, either you make modifications if that's feasible or you call a Mulligan and do it over.
The coop I built from scratch was cute and it worked for the chickens. I'll be perfectly honest here and say that I was looking for a "quick fix" and chose that coop because it came with (crappy) plans and was visually appealing. My back and occasionally my forehead hated it.
Hated.
It.
I NEED a walk-in coop.
I NEED a walk-in run.
Did anyone look at my first coop article and see the run I built? WHAT was I thinking?
The 2' high extension was inaccessible and un-cleanable, two features you should avoid like the plague in chicken husbandry.What I learned after becoming a chicken caretaker is invaluable. I now know all the shortcomings of my initial choices so those mistakes won't be repeated.
As I am planning to increase my flock, I will be converting the 8'x16' shed into a coop with an 8'x12' coop and a 4'x8' room that houses the brooder, nest box and storage. I plan to keep between 20 and 28 birds in this coop but because of the attached, fully predator-proof winterizable run, that will not be crowed when I am on the high population end of the design.
I was able to come up with a must-have list:
- Walk-in coop and run. Duh! Unless you are young, small and very flexible, do yourself a favor and design your coop for EASY access to clean it out AND retrieve chickens at roost time for routine health checks, etc.
- Run must have lots of perches and as close to twice the recommended minimum square footage per bird as I can get. Wouldn't you know it? Those darn chickens like to perch on items off the ground. Confined birds need exercise and stimulation. Adding multi-height perching locations also adds vertical dimension to the space. My plan is for a 32' x 12' run to house 26 birds.
- Fully wired. If you have the ability to understand basic wiring, (correctly) run a circuit to the coop and install more receptacles than you think you will need. I cover unused outlets with child-proof covers to prevent dust and chicken beaks from getting in the slots.
- Heated nest boxes. If I find ONE MORE frozen egg...
 . I typically have many consecutive days during winter that never get above 25 ºF. I will not always have someone available to collect eggs for me during the day. (See link for what will be installed).
 - Poop boards
 . Such an easy way of managing the 'poop in the coop'. I have a compost bin to dump it in. What the little darlings deposit on the main floor of the coop can be easily mixed into the thick bedding and the poop in the run will compost on it's own with the wood chips I will use for run litter.
 - Built-in brooder. As I plan to raise replacement pullets each spring, this feature is invaluable. When not being used as a brooder, it can be used for overly amorous cockerels or injured birds... or brooding broody hens!!

- Year round protected dust bath site.
- Heated waterer that the chickens don't hate.
- Some way to keep my fermented feed from freezing during winter. Again, I will not always have someone to continually bring in the feed trough to thaw and put it back out with warmed feed throughout those long, cold winter days.
- A relatively easy way of wind-proofing the run for winter. The pop door from my coop to my run is never closed unless I want to lock the birds in or out of the coop for some reason. As soon as they leave the roost in the morning, out they go to the run. That is where they spend the vast majority of their winter days. This is a very important aspect for newbies to consider. Make your run as predator proof as possible so you can leave that pop door open.
- Copious amounts of ventilation. My old coop had lots of ventilation and I had very little frostbite even with some bitterly cold weather. And the coop itself never stunk.
- BIG eaves and gable overhangs. I leave windows open year round unless they will allow a draft directly across the roosting space in cold weather. The large eaves and gable overhangs will allow me to do this without rain getting into the coop. The other obvious benefit is it will direct roof runoff further away from the base of the structure. I want 2' overhangs. Yes. TWO FEET.
- Must have equal level of predator protection as the first coop. I have never had any predator gain access to my pen or coop/run. I have seen evidence of access attempts.
- Timer-controlled automatic door between run and electro-netted pen. I don't really want my birds to go out too early. And they have been known to dawdle around in the evening waiting until the very last minute to go to roost. I'm certain they would be locked out of the secured area if the automatic door operated in dusk-to-dawn mode.
- MUST NOT LOOK LIKE A BUTT UGLY EYESORE!!!! When we bought our property, the entire parcel (house, detached garage, septic, landscaping) needed renovation and most of that has been done. Seems silly to do all that work just to have a big huge eyesore of a coop and run plunked down in the middle of it.
And a want-to-have short list:
- Coop cameras.
- Functional cupola with weather-vane. Who wouldn't want one?
- Window boxes with chicken-proof plants.

DESIGN
DESIGN
I hit the BYC Coop Articles pages and perused through lots and lots of coop designs. We have some seriously creative and talented folks here at BYC. I read some very cool stuff and saw absolutely jaw dropping designs. But I'm stuck with what I've got and money IS an object and so I must make the best use of it.
I must give a huge "thank you" to @aart for much of my inspiration. Her coop article was oft visited when making my sketches and decisions.
This is the best I've got for my blueprint. Please don't laugh so hard that you spit your coffee on your computer screen when you look at it.


The total coop size is 8'x16' but the chickens have access to only 8'x12'. The other 8'x4' is where I have the maternity ward (formerly known as the brooder) and storage for highly used tools:
- my egg basket
- a bag of Sweet PDZ with a scoop
- a bag of oyster shell with a scoop
- an old kitty litter bucket with a metal litter scoop and another plastic scoop with a kitchen strainer wired to it for finer cleaning of the boards once a month
- a toilet brush and a set of flexible brushes that are used to keep the waterers clean
- an old 8 in 1 paint scrapper and crappy hammer used to chisel the poop off the boards in winter
- my electric scale that I use to weigh birds
- a bag of mixed wild bird seed with some cracked corn in it that I use for scratch
- a jar of raisins to tame the wild beast... Fabio. I've learned that he turns into a marshmallow for raisins.
- assorted maintenance items like heavy duty nail files and dog clippers, an LED head lamp, a jar of coconut oil, etc
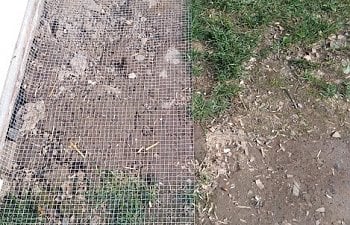
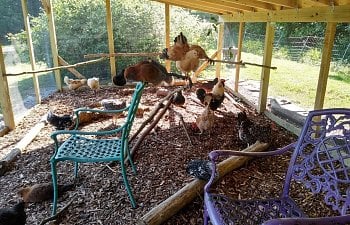
They still use the dust bath area but have also created many craters in the run and dust bath in the now broken down dry wood chips.
A few notes about why I made the choices I did for various aspects of the coop:
Roosts: all at the same height. Chickens can be brutal at roost time. If all the roosts are the same height, there will be no preference there. However, I'm certain roost positions in front of windows year round will be prime spots.
Poop boards: made with 2" high lips to retain sand/PDZ mixture. Flat boards without a lip for retention will surely end up the contents strewn far and wide as the chickens are jockeying for roost positions in the evening.
Nest box: I went with a community style very deep nest box. I will ultimately have 24 layers. My largest girl is Draco, my Delaware. My old nest boxes were 12x12x12. Draco's tail was always a little tatty from rubbing against the back of the box. The smaller depth left little room for a deep cushy nest which the chickens enjoy. Why community instead of divided? I think more chickens will fit in the community box. We'll have to see how this all works out when the pullets coming down the pike start laying...
* 10/27/19 update: I ended up putting in 4 divider panels to make 5 individual nest boxes as the girls were doing an awful lot of growling when a new girl was attempting to enter the box. These 5 boxes seem to be plenty for my
Clean out doors: These doors lock from the inside on the top and bottom. I ultimately ended up barrel bolting them tight to the frame so nothing can squeeze in. They cannot be opened from the outside unless unlocked on the inside. This serves for security as well as an emergency escape hatch if one accidentally gets locked in the coop. I will not mention the manner in which I may someday find myself in such a situation. It is a real possibility.
Cost estimate: I put about $2500 total into this project. I saved some money be recycling my old run but I didn't skimp on materials. I bought three 4'x50' rolls of galvanized 1/2" hardware cloth from Amazon. I could not find it cheaper anywhere else. I also recycled some of the HC and hardware from the old run.
The Coop Cams: I will mention them here. I purchased 6 Wyze coop cameras based on a thread posted by @Sue Gremlin. The cameras cost less than $100 total. You will see many stills I took from these cameras. They are awesome. Thanks Sue!
DEMO AND CONSTRUCTION
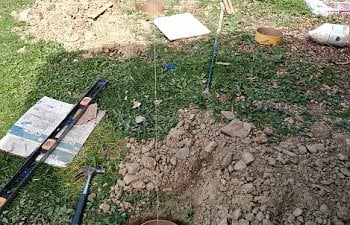
It was early March in New York when I could no longer control my desire to begin working on the new coop. And I knew I was going to order my new chicks soon so I needed to get moving.
The first thing I had to do was remove all the trim, fascia and soffit boards.
I wanted to get the roof done first so I needed to install the rafter extensions I needed to get my 2 foot roof overhangs.
The quick method I used to determine the angle of the cuts was to clamp a piece of 2x4 onto a rafter tail then mark a plumb line on the end of the 2x4 using a bullet level. I then took the marked piece of 2x4 to the chop saw and moved the table until the laser line for the cut overlapped my mark. The front rafters were 13º and the rear rafters were 15º.
I didn't want to just trace the existing rafter tails as the shed was no longer perfectly level.
I shot ten 3" framing nails into each sistered rafter extension.
Front:
Rear:
I had an unexpected inspection just prior to the end of work that day. Thankfully, I passed!
After I installed the rafter extensions, I marked the rafters on the gable ends for the outriggers I needed to install to support the fly rafters for the 2' overhangs on the rakes. The outriggers were positioned over vertical support members in the gable walls.
Now these are just 2x4 rafters so I ended up routing out 3/4" on the rafter top and outrigger bottom then mating them together. I made the outriggers 4' long so I could end nail to the next rafter in. This is a large overhang so when I finish painting the siding, I will be installing braces under the outriggers for added support as the snow load in my area will be an issue if I don't. The ends would also eventually sag. For now, it's fine.
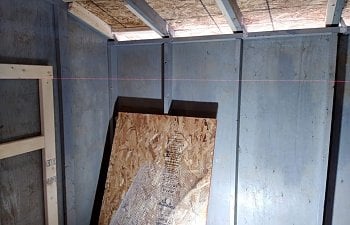
I was in an all-fired hurry to get the roof decking done and covered with the underlayment before it snowed so I never got a good picture of how I did the outriggers but this is what they look like inside the coop and under the gable overhang.
It was too cold to install the shingles so I just put up the eave drip edges and the underlayment to make it watertight and moved on to interior framing.
I began by reframing the west wall for the entry door. This not being a load bearing wall, I did not need much of a header. I reused as many of the existing wall studs as I could. Note the opening over the door. This will remain open and eventually be covered with 1/2" HC and become one of the gable end vents.
I originally planned to build a 30" door out of siding but on my way home from work one day, I saw someone had discarded an exterior door. Score! I grabbed the truck and DH and we went back down the hill for it. It's steel and needed the bottom interior framing replaced as the wood had rotted. I ripped and cut a scrap piece of pressure treated (PT) 2x4 and glued it into the bottom of the door with Loctite PL 3X construction adhesive (my favorite) and clamped it. The door will need a little sanding, priming and painting and it'll be good to go.
I won't have full trim around the window and door because this door is 36" but that's okay. It's just a coop and free is free!
I installed the rough opening (RO) on the east wall to receive one of these 60" x 16" salvage windows I picked up for $25 each.
(Ignore the gawdawful garage door they are leaning against.
It was either work on the coop or the rest of the property. I chose the coop. )
)
The second of these 60" x 16" windows will be installed on the rear (south) wall, centered-ish along the length of the 10' roost. Now this is a load bearing wall so I needed a decent header.
A quick image on basic framing technique for those interested. (I did not create this sketch, I did modify it though.)
In the interest of not having to cut more of the existing studs than absolutely necessary, I shifted the window position off center and used an existing wall stud for the right side king stud, because this is just a coop and I am lazy!
I had some miscellaneous lengths of 2x6 and 2x8 scrap in the garage from previous construction projects. I used a 2x6 for the header and used my favorite construction tool, my laser level, to line up the RO for the south wall window with the east wall window.
I then marked the studs I needed to cut where the laser crossed them, measured up the width of the header and made a cut mark on three sides of the stud. I used a sawzall to cut through about 90% of each stud then finished it with a Fein saw (oscillating saw).
Next step was to measure down the height of the RO and add on the thickness of the sill framing (1.5"), mark the studs and cut again. After prying out the studs pieces from the window RO, I cut the jack studs and nailed them to the king studs then cut and placed the header on top of the jack studs and under the upper cripple studs. I toe nailed through the upper cripple studs into the header and through the header into the jack and king studs to secure the header.
I drilled 1" holes in opposite corners of the sheathing that needed to be removed to open up the RO. I cut the sheathing out with the sawzall.
Rafter ties were installed on all the rafter assemblies to protect the roof from uplift forces.
The north wall required the most work as I had to center the existing doors on the wall and make two ROs for the two windows that will flank the doors. Instead of making the cleanout doors from scratch, I salvaged the doors that were on the shed by cutting off the rotted bottoms. The cleanout doors had to be shorter than the original doors because the extended eaves prevented the old doors from opening. I will eventually re-trim these doors but for now, I had to keep the chickens out becaaaaause...
I had yet another unexpected inspection and received an OSHA violation citation for an unsafe worksite. So the Inspector sent in his OWN work crew and had the nerve to act as foreman and give directions!!
Well!
I evicted his entire crew AND the Inspector for failure to wear proper protective equipment on the worksite!
The Inspector flogged me.
This is the north side of the coop reframed (I still need to install some siding over the doors but at least I can keep the Inspector and his flunky crew out).
I framed out the partition wall between the coop and what I call the brooder room. I took no pictures of this.
I framed out the community nest box using 2x2's and 3" screws.
I re-used pieces of the old roof deck for the sheathing and door on the nest box. I clamped a level to the OSB and used my little Versacut saw to rip and cut the OSB.
I used 1 1/4 brads to pin the OSB pieces to the framing. (Nice jeans, huh?)
I slid the nest box into the framing in the partition wall and nailed it in place and then installed a landing roost in front of the box.
Next step was building the poop boards. I did not get good pictures of how I built the poop boards. This is a little sketch showing the cross-section of how I did it.
07/05/19 Update: I made another PB with roost and took some pictures and posted them to the Move In and Modifications Page.
The black framed box is the 2x4 framing. The solid blue boxes are pieces of a 1x8 board I had laying around that I ripped down to 1" high ledge boards. The yellow lines are the brad nails. I brad nailed the (blue) ledge boards flush with the bottoms of the 2x4 framing. I used salvaged pieces of 22" x 8' OSB (solid red) for the "poop deck" and brad nailed them onto the ledges I made. The poop boards where then nailed to the walls and angle braces were cut and installed to support the fronts of the boards. I can stand up on the framing. It is strong.
This is the finished product. (Note the ever present caffeine dispenser in many of these pictures).
I screwed the roost uprights into the PB frames, then routed out an overlap for the area where the roosts crossed and screwed the roosts to the uprights so they can easily be removed if needed for cleaning or for installing shorter or taller uprights to adjust the roost height over the PBs. The starting height is 10" over the PB.
At this point it was time for cleaning. The entire coop was swept, vacuumed and every original painted surface was scrubbed with a solution of TSP-phosphate free (doesn't that just make it TS then?), rinsed and allowed to dry.
I had an old 5-gallon bucket of Kilz Max primer in the basement from one of my past flips. It was purchased because it is great as an exterior stain blocking primer and also an odor sealant. I used about 4.5 gallons to prime all surfaces of the coop interior and under the exposed overhangs outside.
There was a casualty during exterior priming of the undersides of the overhangs. It couldn't happen to one of the white chickens. It had to happen to Astrid.
A coat of white satin exterior paint went on everything but the floor, PB surface and the bottom of the nest box. Those horizontal surfaces were painted with 2 coats of Porch and Floor paint. I got an "Oops" can at the Home Depot for $9. Yay!
Before I painted the PBs, I caulked between the edges of the board and the framing to keep sand, PDZ and (ahem) other material from getting down into the cracks.
As one can see, I ended up cutting the corner off the brooder in the interest of not ramming a hip into it every time I walked in the coop. The entrance door and the door into the chicken's area swing away from the brooder room. There is not enough space for doors to swing into the brooder room.
Exterior painting was done at this time while the weather was warm enough to cooperate.
I also decided I'd better get the shingles on the roof so I didn't have to do it when the chicks were in the brooder. I had a box of coil nails left over from yet another flip so I used them even though they were about 1/2" longer than I would have preferred and the points stick a little too far through the decking.
Once all the painting was done, I wired up the coop. I again had left over wire, electric boxes, staples and light fixtures from, you guessed it, previous flips. The wire is 12/2 run on a 15-amp circuit. Perfectly acceptable, just usually not done. I wasn't going to waste the wire. I still used 15-amp receptacles on the 12 gauge wires.
I installed a ceiling light in the brooder room and one in the coop.
A motion light at the entry door with a dusk to dawn feature was installed next. This light is wired up to control two coach lamps on the north side of the coop.
After locking up the birds for the night, I turn the lights on (all low lumens LED bulbs so I'm burning 9 watts) overnight. That way a quick peek out my deck door tells me all is well with the coop circuit and it serves as a reminder that I did indeed lock up the birds. A peek into the future...
The area that is stapled to the siding will be covered with 1x4 trim boards.
I then stapled HC over the gable end vents, all the window openings and the rest of the brooder enclosure.
I enclosed the area of the brooder closest to the coop door with scrap plywood so it would be better protected from drafts. I installed two 3.5" x 5" slide up doors in the plywood wall between the brooder and the coop for future integration use.
The rest of the partition wall and the door was covered in chicken wire.
After the partition wall was done I built and installed the main and brooder pop doors. Details of their construction and installation are on this page.
I used a 48" piano hinge to attach the OSB door and a small latch with carabiner to keep it closed.
I attached chains to the sides to hold it level when I open it to collect eggs.
(Pictures taken after the move in)
Oops! Sorry, Amelia! Didn't know you were in there.
At this point, I was pretty much out of time. I had been puttering with stripping the salvaged windows but still had a long way to go before they were ready to install so I ended up eventually cutting cardboard and old tarps to cover the openings to keep drafts from blowing into the coop on cold nights. The chicks were coming and I was anxious for the flock to be moved in. So I prepped the coop for occupancy on Easter Sunday.
I used three bags of pine shavings to bed down the floor.
I picked up a vinyl tablecloth for $3 and sewed curtains for the front of the nest box. I have about a 4" thick bed of chopped straw in the nest box.
Poop boards covered with about 1/2" of sand/PDZ mixture.
The feed trough hangs off the underside of the front edge of the shorter PB. I will be making a second 6' long trough to hang under the longer PB before the new chicks get integrated into the flock.
I made this waterer out of a TSC bucket I had and some horizontal chicken nipples I bought off Amazon. I already have a thermostatically controlled bird bath heater that I will put in the bucket for the winter. All the chickens drank from it on their first night in the coop.
I cut a hole in the side of an empty jar and screwed it to the wall under the ramp and filled it with crushed egg shells. I also have an OS feeder suspended next to the trough.
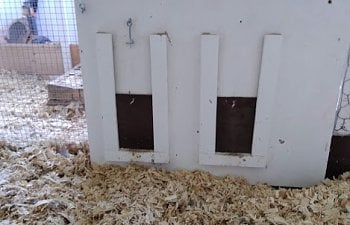
The upper barrel bolts on the clean-out doors. The bottoms of the doors are secured with barrel bolts as well.
Next I moved on to trimming out the coop.
For this I used 1x4 furring strips. Each piece was pre-cut and dry fitted then taken into the garage to be primed on all six sides with the Kilz max then painted on all six sides with the same satin white paint I used on the interior of the coop.
All trim was nailed on with 1 1/2" brad nails and the pneumatic brad nailer. I caulked where trim met trim and over the divots of the brads then painted the fronts of the trim a second coat.
I also changed out the old rusty hinges on the clean-out doors and installed some pull handles. I have yet to install the gable fascia boards or paint the eave fascia boards as they are PT deck boards and I want them good and dry before priming and painting to avoid the paint peeling off.
This has been a particularly difficult time for the Inspector, Fabio. He began to really object to all the commotion going on in his territory. He did not like me walking in the pen with all those noisy tools and long trim boards.
It is not his fault when I had difficulty controlling my knee jerk reactions to his floggings. He frequently went airborne, straight up and sometimes flung backwards a good 6 feet. Sorry bud. One day, Fabio was also flung off of me with a trim board that I blocked him with. Chickens cannot fly backwards. I will also admit that I was fascinated observing Fabio's ninja warrior moves. He is quite agile. Just not agile enough. I have since started scooping him up before things escalate to this level. He rarely gets past the giving me the stink eye phase.
Fabio and I are, at the writing of this article, working on relationship repair. He is starting to come back around. Ah. But we still have the run to build...
The first thing I had to do was remove all the trim, fascia and soffit boards.
I wanted to get the roof done first so I needed to install the rafter extensions I needed to get my 2 foot roof overhangs.
The quick method I used to determine the angle of the cuts was to clamp a piece of 2x4 onto a rafter tail then mark a plumb line on the end of the 2x4 using a bullet level. I then took the marked piece of 2x4 to the chop saw and moved the table until the laser line for the cut overlapped my mark. The front rafters were 13º and the rear rafters were 15º.
I didn't want to just trace the existing rafter tails as the shed was no longer perfectly level.
I shot ten 3" framing nails into each sistered rafter extension.
Front:
Rear:
I had an unexpected inspection just prior to the end of work that day. Thankfully, I passed!
After I installed the rafter extensions, I marked the rafters on the gable ends for the outriggers I needed to install to support the fly rafters for the 2' overhangs on the rakes. The outriggers were positioned over vertical support members in the gable walls.
Now these are just 2x4 rafters so I ended up routing out 3/4" on the rafter top and outrigger bottom then mating them together. I made the outriggers 4' long so I could end nail to the next rafter in. This is a large overhang so when I finish painting the siding, I will be installing braces under the outriggers for added support as the snow load in my area will be an issue if I don't. The ends would also eventually sag. For now, it's fine.
I was in an all-fired hurry to get the roof decking done and covered with the underlayment before it snowed so I never got a good picture of how I did the outriggers but this is what they look like inside the coop and under the gable overhang.
Interior underside view of outriggers
Exterior underside view of outookers
I originally planned to replace all the roof decking but most of it was in good shape after I removed it so I reused a few full sized pieces for the new roof deck and kept the rest to use for the poop boards and nest box. I left a 1" gap at the peak of each side of the roof deck for my ridge vent.
Exterior underside view of outookers
It was too cold to install the shingles so I just put up the eave drip edges and the underlayment to make it watertight and moved on to interior framing.
I began by reframing the west wall for the entry door. This not being a load bearing wall, I did not need much of a header. I reused as many of the existing wall studs as I could. Note the opening over the door. This will remain open and eventually be covered with 1/2" HC and become one of the gable end vents.
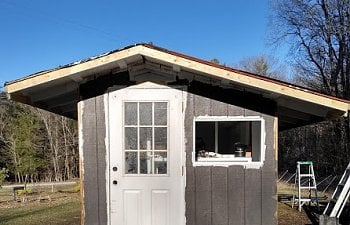
I originally planned to build a 30" door out of siding but on my way home from work one day, I saw someone had discarded an exterior door. Score! I grabbed the truck and DH and we went back down the hill for it. It's steel and needed the bottom interior framing replaced as the wood had rotted. I ripped and cut a scrap piece of pressure treated (PT) 2x4 and glued it into the bottom of the door with Loctite PL 3X construction adhesive (my favorite) and clamped it. The door will need a little sanding, priming and painting and it'll be good to go.
I won't have full trim around the window and door because this door is 36" but that's okay. It's just a coop and free is free!
I installed the rough opening (RO) on the east wall to receive one of these 60" x 16" salvage windows I picked up for $25 each.
(Ignore the gawdawful garage door they are leaning against.
It was either work on the coop or the rest of the property. I chose the coop.
)The second of these 60" x 16" windows will be installed on the rear (south) wall, centered-ish along the length of the 10' roost. Now this is a load bearing wall so I needed a decent header.
A quick image on basic framing technique for those interested. (I did not create this sketch, I did modify it though.)
I had some miscellaneous lengths of 2x6 and 2x8 scrap in the garage from previous construction projects. I used a 2x6 for the header and used my favorite construction tool, my laser level, to line up the RO for the south wall window with the east wall window.
Next step was to measure down the height of the RO and add on the thickness of the sill framing (1.5"), mark the studs and cut again. After prying out the studs pieces from the window RO, I cut the jack studs and nailed them to the king studs then cut and placed the header on top of the jack studs and under the upper cripple studs. I toe nailed through the upper cripple studs into the header and through the header into the jack and king studs to secure the header.
I drilled 1" holes in opposite corners of the sheathing that needed to be removed to open up the RO. I cut the sheathing out with the sawzall.
Rafter ties were installed on all the rafter assemblies to protect the roof from uplift forces.
The north wall required the most work as I had to center the existing doors on the wall and make two ROs for the two windows that will flank the doors. Instead of making the cleanout doors from scratch, I salvaged the doors that were on the shed by cutting off the rotted bottoms. The cleanout doors had to be shorter than the original doors because the extended eaves prevented the old doors from opening. I will eventually re-trim these doors but for now, I had to keep the chickens out becaaaaause...
I had yet another unexpected inspection and received an OSHA violation citation for an unsafe worksite. So the Inspector sent in his OWN work crew and had the nerve to act as foreman and give directions!!
I evicted his entire crew AND the Inspector for failure to wear proper protective equipment on the worksite!
The Inspector flogged me.
This is the north side of the coop reframed (I still need to install some siding over the doors but at least I can keep the Inspector and his flunky crew out).
I framed out the partition wall between the coop and what I call the brooder room. I took no pictures of this.
I framed out the community nest box using 2x2's and 3" screws.
I re-used pieces of the old roof deck for the sheathing and door on the nest box. I clamped a level to the OSB and used my little Versacut saw to rip and cut the OSB.
I used 1 1/4 brads to pin the OSB pieces to the framing. (Nice jeans, huh?)
I slid the nest box into the framing in the partition wall and nailed it in place and then installed a landing roost in front of the box.
Next step was building the poop boards. I did not get good pictures of how I built the poop boards. This is a little sketch showing the cross-section of how I did it.
07/05/19 Update: I made another PB with roost and took some pictures and posted them to the Move In and Modifications Page.
The black framed box is the 2x4 framing. The solid blue boxes are pieces of a 1x8 board I had laying around that I ripped down to 1" high ledge boards. The yellow lines are the brad nails. I brad nailed the (blue) ledge boards flush with the bottoms of the 2x4 framing. I used salvaged pieces of 22" x 8' OSB (solid red) for the "poop deck" and brad nailed them onto the ledges I made. The poop boards where then nailed to the walls and angle braces were cut and installed to support the fronts of the boards. I can stand up on the framing. It is strong.
This is the finished product. (Note the ever present caffeine dispenser in many of these pictures).
I screwed the roost uprights into the PB frames, then routed out an overlap for the area where the roosts crossed and screwed the roosts to the uprights so they can easily be removed if needed for cleaning or for installing shorter or taller uprights to adjust the roost height over the PBs. The starting height is 10" over the PB.
At this point it was time for cleaning. The entire coop was swept, vacuumed and every original painted surface was scrubbed with a solution of TSP-phosphate free (doesn't that just make it TS then?), rinsed and allowed to dry.
I had an old 5-gallon bucket of Kilz Max primer in the basement from one of my past flips. It was purchased because it is great as an exterior stain blocking primer and also an odor sealant. I used about 4.5 gallons to prime all surfaces of the coop interior and under the exposed overhangs outside.
There was a casualty during exterior priming of the undersides of the overhangs. It couldn't happen to one of the white chickens. It had to happen to Astrid.
A coat of white satin exterior paint went on everything but the floor, PB surface and the bottom of the nest box. Those horizontal surfaces were painted with 2 coats of Porch and Floor paint. I got an "Oops" can at the Home Depot for $9. Yay!
Before I painted the PBs, I caulked between the edges of the board and the framing to keep sand, PDZ and (ahem) other material from getting down into the cracks.
As one can see, I ended up cutting the corner off the brooder in the interest of not ramming a hip into it every time I walked in the coop. The entrance door and the door into the chicken's area swing away from the brooder room. There is not enough space for doors to swing into the brooder room.
Exterior painting was done at this time while the weather was warm enough to cooperate.
I also decided I'd better get the shingles on the roof so I didn't have to do it when the chicks were in the brooder. I had a box of coil nails left over from yet another flip so I used them even though they were about 1/2" longer than I would have preferred and the points stick a little too far through the decking.
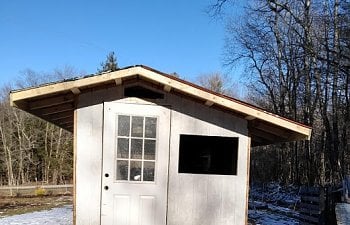
The finished roof with ridge vent.
Once all the painting was done, I wired up the coop. I again had left over wire, electric boxes, staples and light fixtures from, you guessed it, previous flips. The wire is 12/2 run on a 15-amp circuit. Perfectly acceptable, just usually not done. I wasn't going to waste the wire. I still used 15-amp receptacles on the 12 gauge wires.
I installed a ceiling light in the brooder room and one in the coop.
A motion light at the entry door with a dusk to dawn feature was installed next. This light is wired up to control two coach lamps on the north side of the coop.
After locking up the birds for the night, I turn the lights on (all low lumens LED bulbs so I'm burning 9 watts) overnight. That way a quick peek out my deck door tells me all is well with the coop circuit and it serves as a reminder that I did indeed lock up the birds. A peek into the future...
I had left over 1/2" HC from my original coop construction that I cut up and used to secure the soffit openings.
The area that is stapled to the siding will be covered with 1x4 trim boards.
I then stapled HC over the gable end vents, all the window openings and the rest of the brooder enclosure.
I enclosed the area of the brooder closest to the coop door with scrap plywood so it would be better protected from drafts. I installed two 3.5" x 5" slide up doors in the plywood wall between the brooder and the coop for future integration use.
The rest of the partition wall and the door was covered in chicken wire.
After the partition wall was done I built and installed the main and brooder pop doors. Details of their construction and installation are on this page.
Next I finished assembly of the nest box.I used a 48" piano hinge to attach the OSB door and a small latch with carabiner to keep it closed.
I attached chains to the sides to hold it level when I open it to collect eggs.
Oops! Sorry, Amelia! Didn't know you were in there.
At this point, I was pretty much out of time. I had been puttering with stripping the salvaged windows but still had a long way to go before they were ready to install so I ended up eventually cutting cardboard and old tarps to cover the openings to keep drafts from blowing into the coop on cold nights. The chicks were coming and I was anxious for the flock to be moved in. So I prepped the coop for occupancy on Easter Sunday.
I picked up a vinyl tablecloth for $3 and sewed curtains for the front of the nest box. I have about a 4" thick bed of chopped straw in the nest box.
Poop boards covered with about 1/2" of sand/PDZ mixture.
The feed trough hangs off the underside of the front edge of the shorter PB. I will be making a second 6' long trough to hang under the longer PB before the new chicks get integrated into the flock.
I made this waterer out of a TSC bucket I had and some horizontal chicken nipples I bought off Amazon. I already have a thermostatically controlled bird bath heater that I will put in the bucket for the winter. All the chickens drank from it on their first night in the coop.
I cut a hole in the side of an empty jar and screwed it to the wall under the ramp and filled it with crushed egg shells. I also have an OS feeder suspended next to the trough.
The upper barrel bolts on the clean-out doors. The bottoms of the doors are secured with barrel bolts as well.
Next I moved on to trimming out the coop.
For this I used 1x4 furring strips. Each piece was pre-cut and dry fitted then taken into the garage to be primed on all six sides with the Kilz max then painted on all six sides with the same satin white paint I used on the interior of the coop.
All trim was nailed on with 1 1/2" brad nails and the pneumatic brad nailer. I caulked where trim met trim and over the divots of the brads then painted the fronts of the trim a second coat.
I also changed out the old rusty hinges on the clean-out doors and installed some pull handles. I have yet to install the gable fascia boards or paint the eave fascia boards as they are PT deck boards and I want them good and dry before priming and painting to avoid the paint peeling off.
It is not his fault when I had difficulty controlling my knee jerk reactions to his floggings. He frequently went airborne, straight up and sometimes flung backwards a good 6 feet. Sorry bud. One day, Fabio was also flung off of me with a trim board that I blocked him with. Chickens cannot fly backwards. I will also admit that I was fascinated observing Fabio's ninja warrior moves. He is quite agile. Just not agile enough. I have since started scooping him up before things escalate to this level. He rarely gets past the giving me the stink eye phase.
Fabio and I are, at the writing of this article, working on relationship repair. He is starting to come back around. Ah. But we still have the run to build...
RUN CONSTRUCTION
By the time I got to building the new run, the chicks were in the brooder and getting big. I had left the old run open for the chickens to use when it rained and to dust bathe. I closed it off and tore it down to reuse the materials for the portion of the new run that extended along the back of the new coop that shelters the dust bathing area and the brooder run.
I ripped an 8' PT 2x4 in half, set the two pieces end to end along the back of the coop level with the underside of the rear window trim and screwed them to the wall and into the studs. These will serve as the hinge points for the roof framing over the run extension.
I measured the required distance out from the back of the coop and marked the ground for the outer run wall of the extension. I ended up making the extension flush with the main run rear wall instead of the way it is shown on the plans.
There was a pretty deep hole and generally uneven ground behind the coop. Before backfilling, I screwed two PT 2x8s (rated for ground contact) to the rim joist at the rear of the coop to keep the fill from flowing under the coop.
I got 2 loads of #1/#2 crushed gravel mix and spread and tamped that into the space to level it out. Then I got 600 pounds of mason sand (for a mere $6) and spread a layer of that over the gravel and tamped again. This gave me a nice base to lay out the PT 2x4 framing for the wall.
I then framed in the dust bathing area with a new ground contact rated PT 2x8. I used the rest of my mason sand, a large bag of peat moss and all the wood ash in my stove and ash bucket to fill the dust bath. I wasn't 2 minutes done with that when the girls showed up to see what I was up to.
I think they approve.
After finishing up the outer wall framing, I made two roof frames, each with the long ends bevel cut through the table saw to 25°. After removing the polycarbonate roofing panels from the old run, I measured the distance between the screw holes on the panels and centered a support 2x4 in my new roof framing at that distance so that I would be able to use the old holes. I used two 30" long piano hinges on each roof assembly to attach them to the wall ledge board then attached the closure strips.
I gang ripped the old polycarb roof panels by stacking them up after lining up the screw holes then clamping a 4' level across them and cutting them with the blade reversed on my versa-cut circular saw. I wanted the roofing of one assembly to overlap the second. Because I will be opening the dust bath roof far more often than the brooder roof, I overlapped the dust bath roof on top of the brooder roof. The roof assemblies are heavy. I will eventually put heavy duty handles on them to help lift them but they certainly needed prop sticks to hold them open safely. I just used more pieces of PT 2x4 salvaged from the old run.
I shoveled up 3 loads of wood chips and dumped them into the brooder run then installed salvaged 1/2" HC to staple between the dust bath area and the brooder run.
I wasn't happy with the gap in the ends of the roof.
It turns out that my 1x2 furring strips fit the gap perfectly so I cut up some scrap, slid it between the roof and the framing then screwed down through the roof and furring strips and into the framing to close the gap.
After attaching the rest of the HC and adding some old logs and branches from the old run, I opened the brooder run pop door for business.
Fabio and the girls took notice that those noisy little peeping things were now outside.
Now, on to the hardest part: digging the holes for the concrete piers I'm using for the main section of the run foundation. Uugh! I HATE digging through the hard pan up here! And I'm right next to the woods so I know roots are inevitable. This is why the run was delayed. I know what's coming and I have been trying to work myself up to it. I've been watching entirely too much chicken TV and enjoying the relative peace between me and Fabio. That is about to come to a screeching halt...
After running a straight line out off the run extension wall down towards "the chicken bush" I found that my plans for a 32' x 12' run were not going to fit without cutting out part of the chicken bush. NOT happening. They love this thing. It is an old style Quince and great hawk cover.
So the new run will only be 28' long. That will still give the new flock a total area of about 17.7 sq ft per bird between the run and the coop. And this is for winter time only as I always allow them access to their pen after I feed them in the morning. I estimate their pen size at roughly 1/3-acre. This is the basic layout of their space.
Yellow line is the poultry netting, red are the gates, white is the new coop and blue is the run.
After running two string lines out parallel to the long sides of the coop and marking my pier locations I started digging. I needed to go down 42". I hit a big flat rock at 32" in the very first hole.
I made arrangements to bring in a Groundhog hydraulic auger. That was the biggest waste of money ever. As soon as the bit hit a rock, it bound up because all rocks up here are well embedded in hardpan clay. The only thing the Groundhog did do was make sure Fabio was good and mad at me again. He slammed into the back of my leg on one of my trips into the pen to work.
To deal with the first hole and the rock that wouldn't budge, I used a spud bar that comes to a point instead of a blade. DH held the bar for me while I hit it with a sledge hammer and the rock finally broke up enough to remove it from the hole and get down to code depth.
The rest of the holes were finished for the front wall and the forms were put in place to be essentially level with the ground surface. Normally, I would keep them a couple of inches above ground level but I wanted things tighter to the ground for when the bottom framing for the predator apron went in.
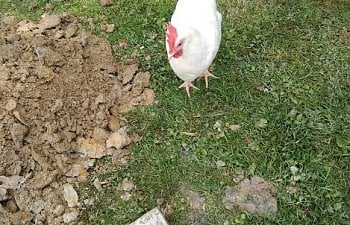
This little girl loved to follow me around to eat any worms that were unearthed during the digging. (Note to self: get a fecal float done to check for tapeworms!)
I like to use the adjustable 1" raised post bases that bolt on to the piers so I embedded 1/2" x 9" galvanized J-bolts into the wet concrete of each pier. It took me two days to finish all the digging, setting the forms and mixing and pouring the concrete. Then another two days to let my back quiet down.
Things went pretty fast after that. I didn't take pictures at every step of construction but the general idea is very straight forward.
I ripped an 8' PT 2x4 in half, set the two pieces end to end along the back of the coop level with the underside of the rear window trim and screwed them to the wall and into the studs. These will serve as the hinge points for the roof framing over the run extension.
I measured the required distance out from the back of the coop and marked the ground for the outer run wall of the extension. I ended up making the extension flush with the main run rear wall instead of the way it is shown on the plans.
There was a pretty deep hole and generally uneven ground behind the coop. Before backfilling, I screwed two PT 2x8s (rated for ground contact) to the rim joist at the rear of the coop to keep the fill from flowing under the coop.
I got 2 loads of #1/#2 crushed gravel mix and spread and tamped that into the space to level it out. Then I got 600 pounds of mason sand (for a mere $6) and spread a layer of that over the gravel and tamped again. This gave me a nice base to lay out the PT 2x4 framing for the wall.
I then framed in the dust bathing area with a new ground contact rated PT 2x8. I used the rest of my mason sand, a large bag of peat moss and all the wood ash in my stove and ash bucket to fill the dust bath. I wasn't 2 minutes done with that when the girls showed up to see what I was up to.
After finishing up the outer wall framing, I made two roof frames, each with the long ends bevel cut through the table saw to 25°. After removing the polycarbonate roofing panels from the old run, I measured the distance between the screw holes on the panels and centered a support 2x4 in my new roof framing at that distance so that I would be able to use the old holes. I used two 30" long piano hinges on each roof assembly to attach them to the wall ledge board then attached the closure strips.
I shoveled up 3 loads of wood chips and dumped them into the brooder run then installed salvaged 1/2" HC to staple between the dust bath area and the brooder run.
After attaching the rest of the HC and adding some old logs and branches from the old run, I opened the brooder run pop door for business.
Now, on to the hardest part: digging the holes for the concrete piers I'm using for the main section of the run foundation. Uugh! I HATE digging through the hard pan up here! And I'm right next to the woods so I know roots are inevitable. This is why the run was delayed. I know what's coming and I have been trying to work myself up to it. I've been watching entirely too much chicken TV and enjoying the relative peace between me and Fabio. That is about to come to a screeching halt...
After running a straight line out off the run extension wall down towards "the chicken bush" I found that my plans for a 32' x 12' run were not going to fit without cutting out part of the chicken bush. NOT happening. They love this thing. It is an old style Quince and great hawk cover.
After running two string lines out parallel to the long sides of the coop and marking my pier locations I started digging. I needed to go down 42". I hit a big flat rock at 32" in the very first hole.
I made arrangements to bring in a Groundhog hydraulic auger. That was the biggest waste of money ever. As soon as the bit hit a rock, it bound up because all rocks up here are well embedded in hardpan clay. The only thing the Groundhog did do was make sure Fabio was good and mad at me again. He slammed into the back of my leg on one of my trips into the pen to work.
On a side note regarding my dear boy, Fabio. He is insecure but desperately wants to protect his girls. He is only a 6 pound chicken with stumpy little spurs. His floggings do not hurt me. Regardless of how his behavior may appear to those reading this extremely long article, he is NOT human aggressive. It is only me he behaves this way with and it is because of all the work I have done in his territory. He hates it and this is the result. It is my choice to deal with him. I have had dogs with resource guarding issues that I have worked with. They learned to control themselves. Why is it such a common theme to say "throw that rotten bird in the crock-pot" but no one immediately jumps to "kill that rotten dog"? I choose to work with Fabio because I understand where he is coming from and he is a very good rooster in all other regards. He was not like this before the construction began. He was never a big fan of me and did act out a few times, but nothing like this.
When I see him preparing to do battle with me, I squash him to the ground then scoop him up and waltz around with him or sit down with him and stand him on my leg and try to get his rage under control. It works for him. For the rest of that day, he will behave as I have once again reassured him I am not going to hurt him or put up with his nonsense. When work resumes the next day, all bets are off and we start again. I feel that he will come around again when the work is done.
To deal with the first hole and the rock that wouldn't budge, I used a spud bar that comes to a point instead of a blade. DH held the bar for me while I hit it with a sledge hammer and the rock finally broke up enough to remove it from the hole and get down to code depth.

The rest of the holes were finished for the front wall and the forms were put in place to be essentially level with the ground surface. Normally, I would keep them a couple of inches above ground level but I wanted things tighter to the ground for when the bottom framing for the predator apron went in.
This little girl loved to follow me around to eat any worms that were unearthed during the digging. (Note to self: get a fecal float done to check for tapeworms!)
I like to use the adjustable 1" raised post bases that bolt on to the piers so I embedded 1/2" x 9" galvanized J-bolts into the wet concrete of each pier. It took me two days to finish all the digging, setting the forms and mixing and pouring the concrete. Then another two days to let my back quiet down.
Things went pretty fast after that. I didn't take pictures at every step of construction but the general idea is very straight forward.
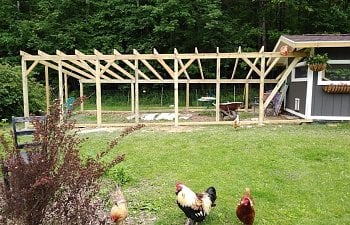
Post bases bolted onto the J-bolts embedded in the concrete piers. 4x4 PT posts attached with structural screws.
Post/beam caps designed for double 2x beams attached to the tops of the posts. I used double PT 2x6's. Posts were spaced 8' OC.
First post of front wall with plumb brace. The chicks could not resist checking this out.
Rear wall post is 2' shorter than the front wall posts to maintain the minimum 12/2 pitch for asphalt shingles.
Birds mouth cuts on the rafters to sit on the beams.
All posts, beams and rafters installed with rafter ties. Cross bracing added to reduce east/west racking. Bottom and 4' OC vertical framing installed for HC attachment.
Roof decking and underlayment installed, then the 1/2" HC. I used 3/4" galvanized poultry staples to secure the HC to the framing. Two mid-sized pickup truck full loads of FREE wood chips spread.
The hardware cloth was installed vertically in 4' wide strips. I ran the HC up the walls, under the rafter tails and up about 2 inches or more over the ends of the rafter tails. The 5/4 deck boards I used for fascia secure the HC to the rafter tails. I then added more staples (pneumatic 1/2" as I couldn't possibly swing a hammer in there) to secure the HC to back of the fascia boards.
The run with the roofing finished, (wo)man door made and installed. It was open for business at this point but still needed a bit more work to finish it.
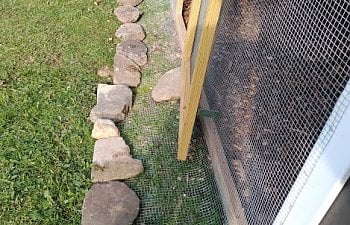
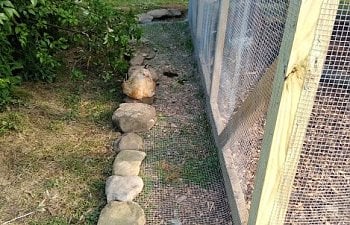
The predator apron extends out from 18" to 24" depending on the strip I cut and is pinned on the outer edges with landscape pins.
The edges of the apron were then lined with field stones I collected from the roadside.
The rest of the apron was covered with #2 rounds that I got from a local quarry for just under $20 for 1 ton.
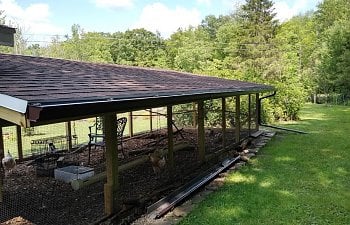
Gutters installed along the back of the run to divert water to "the moat" that runs between the woods and our lawn. I will install a gutter on the rear of the coop soon that will flow onto the run roof and into it's gutter.
Post/beam caps designed for double 2x beams attached to the tops of the posts. I used double PT 2x6's. Posts were spaced 8' OC.
First post of front wall with plumb brace. The chicks could not resist checking this out.
Rear wall post is 2' shorter than the front wall posts to maintain the minimum 12/2 pitch for asphalt shingles.
Birds mouth cuts on the rafters to sit on the beams.
All posts, beams and rafters installed with rafter ties. Cross bracing added to reduce east/west racking. Bottom and 4' OC vertical framing installed for HC attachment.
Roof decking and underlayment installed, then the 1/2" HC. I used 3/4" galvanized poultry staples to secure the HC to the framing. Two mid-sized pickup truck full loads of FREE wood chips spread.

The hardware cloth was installed vertically in 4' wide strips. I ran the HC up the walls, under the rafter tails and up about 2 inches or more over the ends of the rafter tails. The 5/4 deck boards I used for fascia secure the HC to the rafter tails. I then added more staples (pneumatic 1/2" as I couldn't possibly swing a hammer in there) to secure the HC to back of the fascia boards.
The run with the roofing finished, (wo)man door made and installed. It was open for business at this point but still needed a bit more work to finish it.
The predator apron extends out from 18" to 24" depending on the strip I cut and is pinned on the outer edges with landscape pins.
The edges of the apron were then lined with field stones I collected from the roadside.
The rest of the apron was covered with #2 rounds that I got from a local quarry for just under $20 for 1 ton.
Gutters installed along the back of the run to divert water to "the moat" that runs between the woods and our lawn. I will install a gutter on the rear of the coop soon that will flow onto the run roof and into it's gutter.
MOVE IN AND MODIFICATIONS
MOVE IN DAY
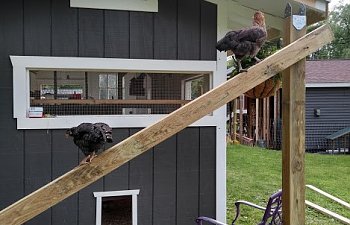
Easter Sunday, I transferred the flock in the evening, one by one, into the new coop. I left the coop light on all night for them to get their bearings and explore their new digs.I've had to clip all of the birds wings to varying degrees to keep them in their 1/3-acre electro-netted pen as they were accustomed to free-ranging all over tarnation and beyond and were getting into trouble. Therefore, many of them need the ramp to get up to the roosts. But they needed a bit of training to show them how to do it. Three nights of training and they had it down.
I had stapled some old tarp scraps over the window openings as late April and May in NY can still offer up cold windy nights and the windows still aren't done.
This day, three days after Easter, was also the day the chicks arrived.
They immediately took to the "baby bottle" I made for the first brood. SO much cleaner and drier than a fount waterer.
The rooster and hens view of the chicks.
After about 2 1/2 weeks, I shut the bigs out of the coop and opened the chick pop doors so they could explore the coop. Once they got over their initial apprehension, it was utter mayhem as they chest bumped and flew around the coop.
MODIFICATIONS
The plywood panel in the cut off corner area and it's bottom framing were modified into a door that I can open and sweep everything out into the brooder room to pick up from there. That was SOOOOO much easier.
"Kick boards" were also added to the wire wall between the brooder and the room as the kids made a fine mess scratching through their bedding and flinging it through the HC.
After observing the roost time behavior it also became apparent I needed to adjust the height of the roosts as it was too easy for roosted hens to give head shots to the lower ranking hens walking past them to find their roost spot. The height was raised from 10" to 13".
I took this opportunity to rip the roosts in half and rasp and sand the edges to make them smooth and rounded and easier to grasp. This shape and new height worked out MUCH better. You can see these modifications in the above image.
By the time the chicks were 10 weeks old, I decided I needed more roosting space so I built another 6' section of poop board and 7' of roosting space and installed it where the ramp was, in front of one of the clean out doors. I don't need to open both clean out doors but I made this extra roosting space removable.
In my old coop/run combo, I kept the feed trough in the run. I don't know why I was compelled to put my feeders in the coop. In the interest of additional landing and unobstructed floor space, the troughs have been moved to the run. The added roosting space greatly reduced the Roost-time Rumble.
Below is a night time snapshot from my Wyze cam. BTW, chickens do not sleep all night long. I have looked in on them at any and all hours of the night to find many little glowing eyes open and preening going on.
THE BATTLE OF THE BROODIES
My head hen went broody on me first. I broke her in 3 nights and one day in the crate.My second in command went next. She was showing no signs of breaking after 7 days. Quite the contrary she was getting worse as time went on. I gave in.
My third in command went next!! What gives here?? I broke her in 8 days. She showed signs of weakening as we went along.
This brings us back to number two. Meet my sweet Barbara doing her best turkey impersonation...
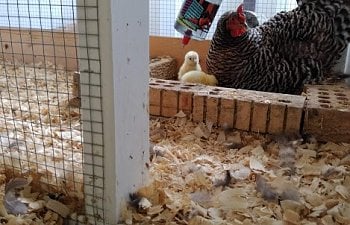
On July 24, 2019 the eggs began to pip.
This is her reward.

One chick had daddies 5 toes on both feet, one chick had 4 toes, and one had 5 toes on one foot and 4 on the other! All got his feathered legs and muffs. I hope none inherited his attitude!
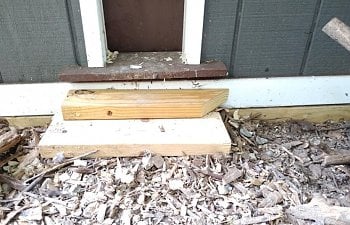
I had to modify the brooder to coop access to accommodate mom and chicks when she is ready to bring them out to meet the family.
I also put some boards in to make steps for when Barb decides to take them outside to the brooder run.
Barb's first day outside with the chicks - 2 days old.
A chilly morning with 2 kids snuggled into mom's belly.
POP DOOR DETAILS
To build the pop doors, I first cut an old piece of 1x6 PT board for a sill plate.
The width of the sill plate was equal to the width of my pop door opening: 10".
The exterior portion of the sill plate was extended out on either side of the opening by the width of the 1x2 trim, so 3/4", and I added another 1/2" to that.
The pop door framing sides are routed out 2x lumber that I ripped to 2" wide. The routed slots are 1/2" deep and about 1/8" wider than the plywood door. I used my table saw to route the slots.
I ripped two strips of lumber and screwed them to the tops of the slotted wood to finish the pop door framing.
I positioned my pop door frame about 7" above the coop floor. I placed a torpedo level on the top of the frame to ensure it was level then traced along the inside of the framing to mark the coop wall where I needed to cut the hole for the door. I added the thickness of the sill plate to the bottom of the traced lines. I drilled a 1" hole in opposite corners and used a sawzall to cut through the coop wall.
The sill plate was inserted through the opening and tipped towards the outside of the coop before pilot drilling two holes straight down through the sill plate and into the center of the T1-11 sheathing. I countersunk the screw heads and covered them with some painters caulk. I reinforced the sill plate with metal angle brackets that I already had on the inside of the coop. This could just as easily been supported with a ledge board attached to the sheathing and then the sill plate.
I then set the pop door framing level with the top of the sill and screwed the framing to the inside of the sheathing from the exterior and dropped the door in place. The screws are covered with the exterior trim.
Below is a cross-section sketch of how the pop door was constructed and installed.
The solid green is the sheathing.
The framed green is the hole through the sheathing with solid sheathing in front of the framing.
The grey is the angle bracket.
The blue is the side framing and the two top strips that hold the sides together.
The black lines are the screws.
Because I rarely close the pop door, I just used a cord tied to an eye screw at the top of the door to pull it open then tied the cord off on a rope cleat. I screwed two pieces of scrap lumber to the inside of the wall to act as stops to keep me from yanking the door right out of the framing.
WINDOW DETAILS
First, a word about draft free coop construction.
When it is mentioned that chickens require draft free roosting space in cold weather, that does NOT mean that you should have tight construction with the windows and doors to prevent air leakage. Quite the contrary. Allowing air to leak into the coop around window and door openings is allowing fresh air in while the stale air leaves higher placed vents via the stack effect. Draft free means that the chickens insulating feathers should not be blowing in the wind. Allowing those feathers to move about will allow their body heat to escape to the colder air.
Windows and doors should be tight enough to prevent predator and rodent entry.
Installing windows hinged at the top allows them to remain open even in downpours without water getting in the coop.
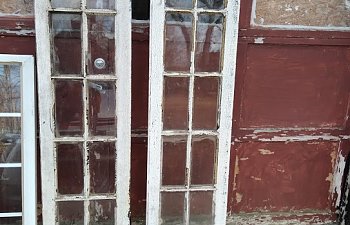
I purchased three 100+ year old multi-pane salvage windows and two younger aluminum clad wood, simulated multi-pane windows for my coop and then framed the ROs to fit these windows (after ripping off the rotted portions of wood on the table saw).
After framing out the ROs, I temporarily screwed in a piece of scrap 1x4 trim where the top trim piece was destined to be installed.
The window was held flush with the plane of the trim board. I cut and installed 1x2 furring strips all the way around each RO to act as window stops to keep the windows from swinging into the coop and stressing the hinges and screws.
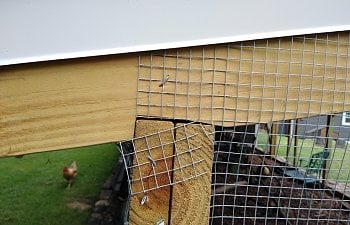
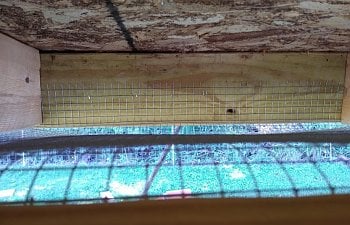
1/2" hardware cloth was heavily stapled to the coop side of the window stops.
Although I did save lots of money by using salvaged window, I did not save lots of time. It took many many hours to strip the paint and dry crumbling glazing compound off the windows with a heat gun and paint scraper. And I cracked a few panes of glass. It was impossible to get the panes out of the frames as they were painted in place. BUT, again, this is just a coop and they'll still look great when they are completed.
I installed the windows then attached hook screws to the bottom center framing and the rafter tails to hold a medium weight chain.
I installed barrel bolts on the bottom left corners to hold the windows closed during the winter.
This is what they look like during the summer months hung fully open.
Note the flower box guard.
I made it all the way through the first season without incident. During the winter the chickens started flying up into the basket and digging around in the potting soil and taking dust baths in there.
And a side view of how they are suspended open in the chain.
When it is mentioned that chickens require draft free roosting space in cold weather, that does NOT mean that you should have tight construction with the windows and doors to prevent air leakage. Quite the contrary. Allowing air to leak into the coop around window and door openings is allowing fresh air in while the stale air leaves higher placed vents via the stack effect. Draft free means that the chickens insulating feathers should not be blowing in the wind. Allowing those feathers to move about will allow their body heat to escape to the colder air.
Windows and doors should be tight enough to prevent predator and rodent entry.
Installing windows hinged at the top allows them to remain open even in downpours without water getting in the coop.
I purchased three 100+ year old multi-pane salvage windows and two younger aluminum clad wood, simulated multi-pane windows for my coop and then framed the ROs to fit these windows (after ripping off the rotted portions of wood on the table saw).
After framing out the ROs, I temporarily screwed in a piece of scrap 1x4 trim where the top trim piece was destined to be installed.
The window was held flush with the plane of the trim board. I cut and installed 1x2 furring strips all the way around each RO to act as window stops to keep the windows from swinging into the coop and stressing the hinges and screws.
1/2" hardware cloth was heavily stapled to the coop side of the window stops.
Although I did save lots of money by using salvaged window, I did not save lots of time. It took many many hours to strip the paint and dry crumbling glazing compound off the windows with a heat gun and paint scraper. And I cracked a few panes of glass. It was impossible to get the panes out of the frames as they were painted in place. BUT, again, this is just a coop and they'll still look great when they are completed.
The stripping process.
After stripping the windows I primed all the wood with an exterior grade primer then painted two coats of oil modified latex exterior paint and THEN I applied the DAP glazing compound. This stuff takes FOREVER to cure! I left the windows propped up against my house on the deck in the blazing sun for 3 weeks and I was still putting finger prints in the glaze when painting over it. Oh well... it's still just a chicken coop and the chickens don't seem to give a one whit.
I installed the windows then attached hook screws to the bottom center framing and the rafter tails to hold a medium weight chain.
I installed barrel bolts on the bottom left corners to hold the windows closed during the winter.
This is what they look like during the summer months hung fully open.
Note the flower box guard.
I made it all the way through the first season without incident. During the winter the chickens started flying up into the basket and digging around in the potting soil and taking dust baths in there.
And a side view of how they are suspended open in the chain.
The Cameras!!
The cameras I purchased are stationary Wyze cameras. I got 6 for under $100. You do need power in the coop to plug them in but they are otherwise wireless with some neat features.
Here are some neat videos I managed to capture on them.
Fabio being a complete butt munch to Lucy who does a fine job of evasion!
The first night the chicks roosted with the adults.
First broody mom, Barb, and her chicks the morning they hatched:
Something outside the run startled the birds. To this day I'm not sure what it was.
The funny stuff is happening in the back of the run in this video. For some odd reason, one of the Easter Eggers, Veronica, got it in her head to challenge the junior cockerel, Captain.
Some video I took with my phone.
This is the first day the chicks were released into the adult coop.
Interesting interaction with two hens. The RIR is picking ice out of the White Rocks chest feathers on a chilly -2F morning.
Captains first crows while hiding in the chicken bush and other neat chicken behaviors.
RECOVERY
I am quite pleased to report that Fabio has transformed back into the boy he was before this project began.
Still not a fan of me, but he will allow me to groom him on occasion, will gently eat from my hand and hasn't really flogged me since construction ended. Just once. A rather pathetic scolding of me to remind me of how he feels about lawn tractors, weed trimmers and the chop saw.
He knows he is a daddy and I look forward to the day he can meet his chicks. I will post a few pictures of this when the day comes.
I want to now extend a "Thank You" to @Shadrach for his very well written article. I've read it twice. I've learned a lot. I'll read it more and continue to learn.
If you are like me and want to learn how to work with and understand your rooster, please give it a read. Give peace a chance!!
When the chicks began to mingle with the adult flock, Fabio was hands down the kindest to them. Even the young Ameraucana cockerel, Captain.
My little Ancona, Annie, is snuggled up right next to him in this image.
Mom, Barb, out with the first three chicks hatched here with Dad watching over them.
Spring 2020 arrives and with it, the hormone surge and the shaggy line backer tries to be a tough guy while my back is turned.
What I said to him after the auto-recording ended was "Would you care to repeat that?" He didn't.
I have had a lot of positive results bribing Fabio with raisins. He will come to me when I call him with a specific hand motion that wins him a raisin. He has allowed me to pet him without going on the defense.
He is a daddy again and was in checking on the new mother-to-be in the now called Maternity Ward in this snapshot.

Another "Thank You" to my friends in the Café who tolerated my regular updates and tales of woe with Fabio. You guys are the BEST!
Still not a fan of me, but he will allow me to groom him on occasion, will gently eat from my hand and hasn't really flogged me since construction ended. Just once. A rather pathetic scolding of me to remind me of how he feels about lawn tractors, weed trimmers and the chop saw.
He knows he is a daddy and I look forward to the day he can meet his chicks. I will post a few pictures of this when the day comes.
I want to now extend a "Thank You" to @Shadrach for his very well written article. I've read it twice. I've learned a lot. I'll read it more and continue to learn.
If you are like me and want to learn how to work with and understand your rooster, please give it a read. Give peace a chance!!
My little Ancona, Annie, is snuggled up right next to him in this image.

Mom, Barb, out with the first three chicks hatched here with Dad watching over them.
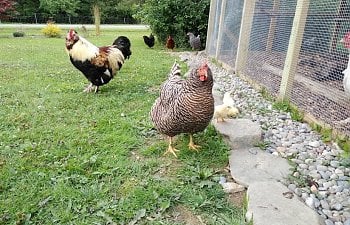
I have had a lot of positive results bribing Fabio with raisins. He will come to me when I call him with a specific hand motion that wins him a raisin. He has allowed me to pet him without going on the defense.
He is a daddy again and was in checking on the new mother-to-be in the now called Maternity Ward in this snapshot.
Another "Thank You" to my friends in the Café who tolerated my regular updates and tales of woe with Fabio. You guys are the BEST!
I hope you enjoyed this article and thanks for getting this far! It was very long in the making but I couldn't be more pleased with how well my setup is running. If you have any questions not answered in this article, please feel free to ask in the comments section and I will do my best to answer them.


 . I eat a Paleo diet which led me to wanting chickens for fresh, healthy eggs. After acquiring my flock, I quickly realized that they play a huge roll in stress management.
 Oooh, a serial story!
") I'm sure your chickens are very happy to be yours!
I'm sure your chickens are very happy to be yours!") Thank you so much for posting in such detail—it is very generous of you. I'm probably going to owe you brownies or a tea towel or something for stealing so many ideas and design elements!
Thank you so much for posting in such detail—it is very generous of you. I'm probably going to owe you brownies or a tea towel or something for stealing so many ideas and design elements! 
 but I see you are using wood chips. Why did you choose this material? Where did you get your chips from?