First off, we went on youtube and did a search on how to build a homemade incubator. We found one under "Home Made Incubator with Fan, Thermostat, and Automatic Egg Turner" by user name 'tlgrimmy' -- very informative videos -- thank you again, tlgrimmy!!!!! What was suppose to be a $65 dollar project, ended up being a much more expensive project --- but its been fun!!!!!! We decided to basically double his original design and add a few nicities like the built in switches, a webcam, and a PID instead of the conventional water heater thermostat design. As you will see from the pictures, we also put some smaller access doors in so we don't have to open the large lid every time we need to add water to the trays or if we should need to get to the eggs for any reason....We used a 1'' styrafoam board as our interior insulation,with a plywood structure around it...If you ever decide to build this...please make sure you build the plywood structure FIRST!!! And then the styrofoam box to fit inside. Also, do NOT use DAP Welwood contact Cement on styrofoam board. IT MELTS!!!
 Initially we went and bought 1/4 inch plywood that we stained and cut to fit around the already made strofoam box that we made. We tried many types of glue to adhere the plywood onto the styrofoam but it nothing worked. The plywood kept warping more and more. Then we tried the contact cement that says right on it that you can use it with foam products.....not SOME foam products....and apparently not styroFOAM products.......brushed it on and watched our 1" styrofoam turn into 1/2" styrofoam...right before our eyes
 We then gave in , and bought 3/4" finished grade poplar plywood and remade all the sides and bottom and lid. Didn't need any adhesive and just slid the styrofoam box inside......it thankfully fit!!!!

This is a picture of the front with the switches mocked in place.

Another picture of the front. The windows are lexan and double pane. Note: Do not use spray adhesive on styrofoam near lexan, even if you think the lexan is COMPLETELY covered....you can't really clean lexan with anything but warm water and mild soap, or a very mild toothpaste - such as AIM. Something with low to no grittiness or whatever you call it......
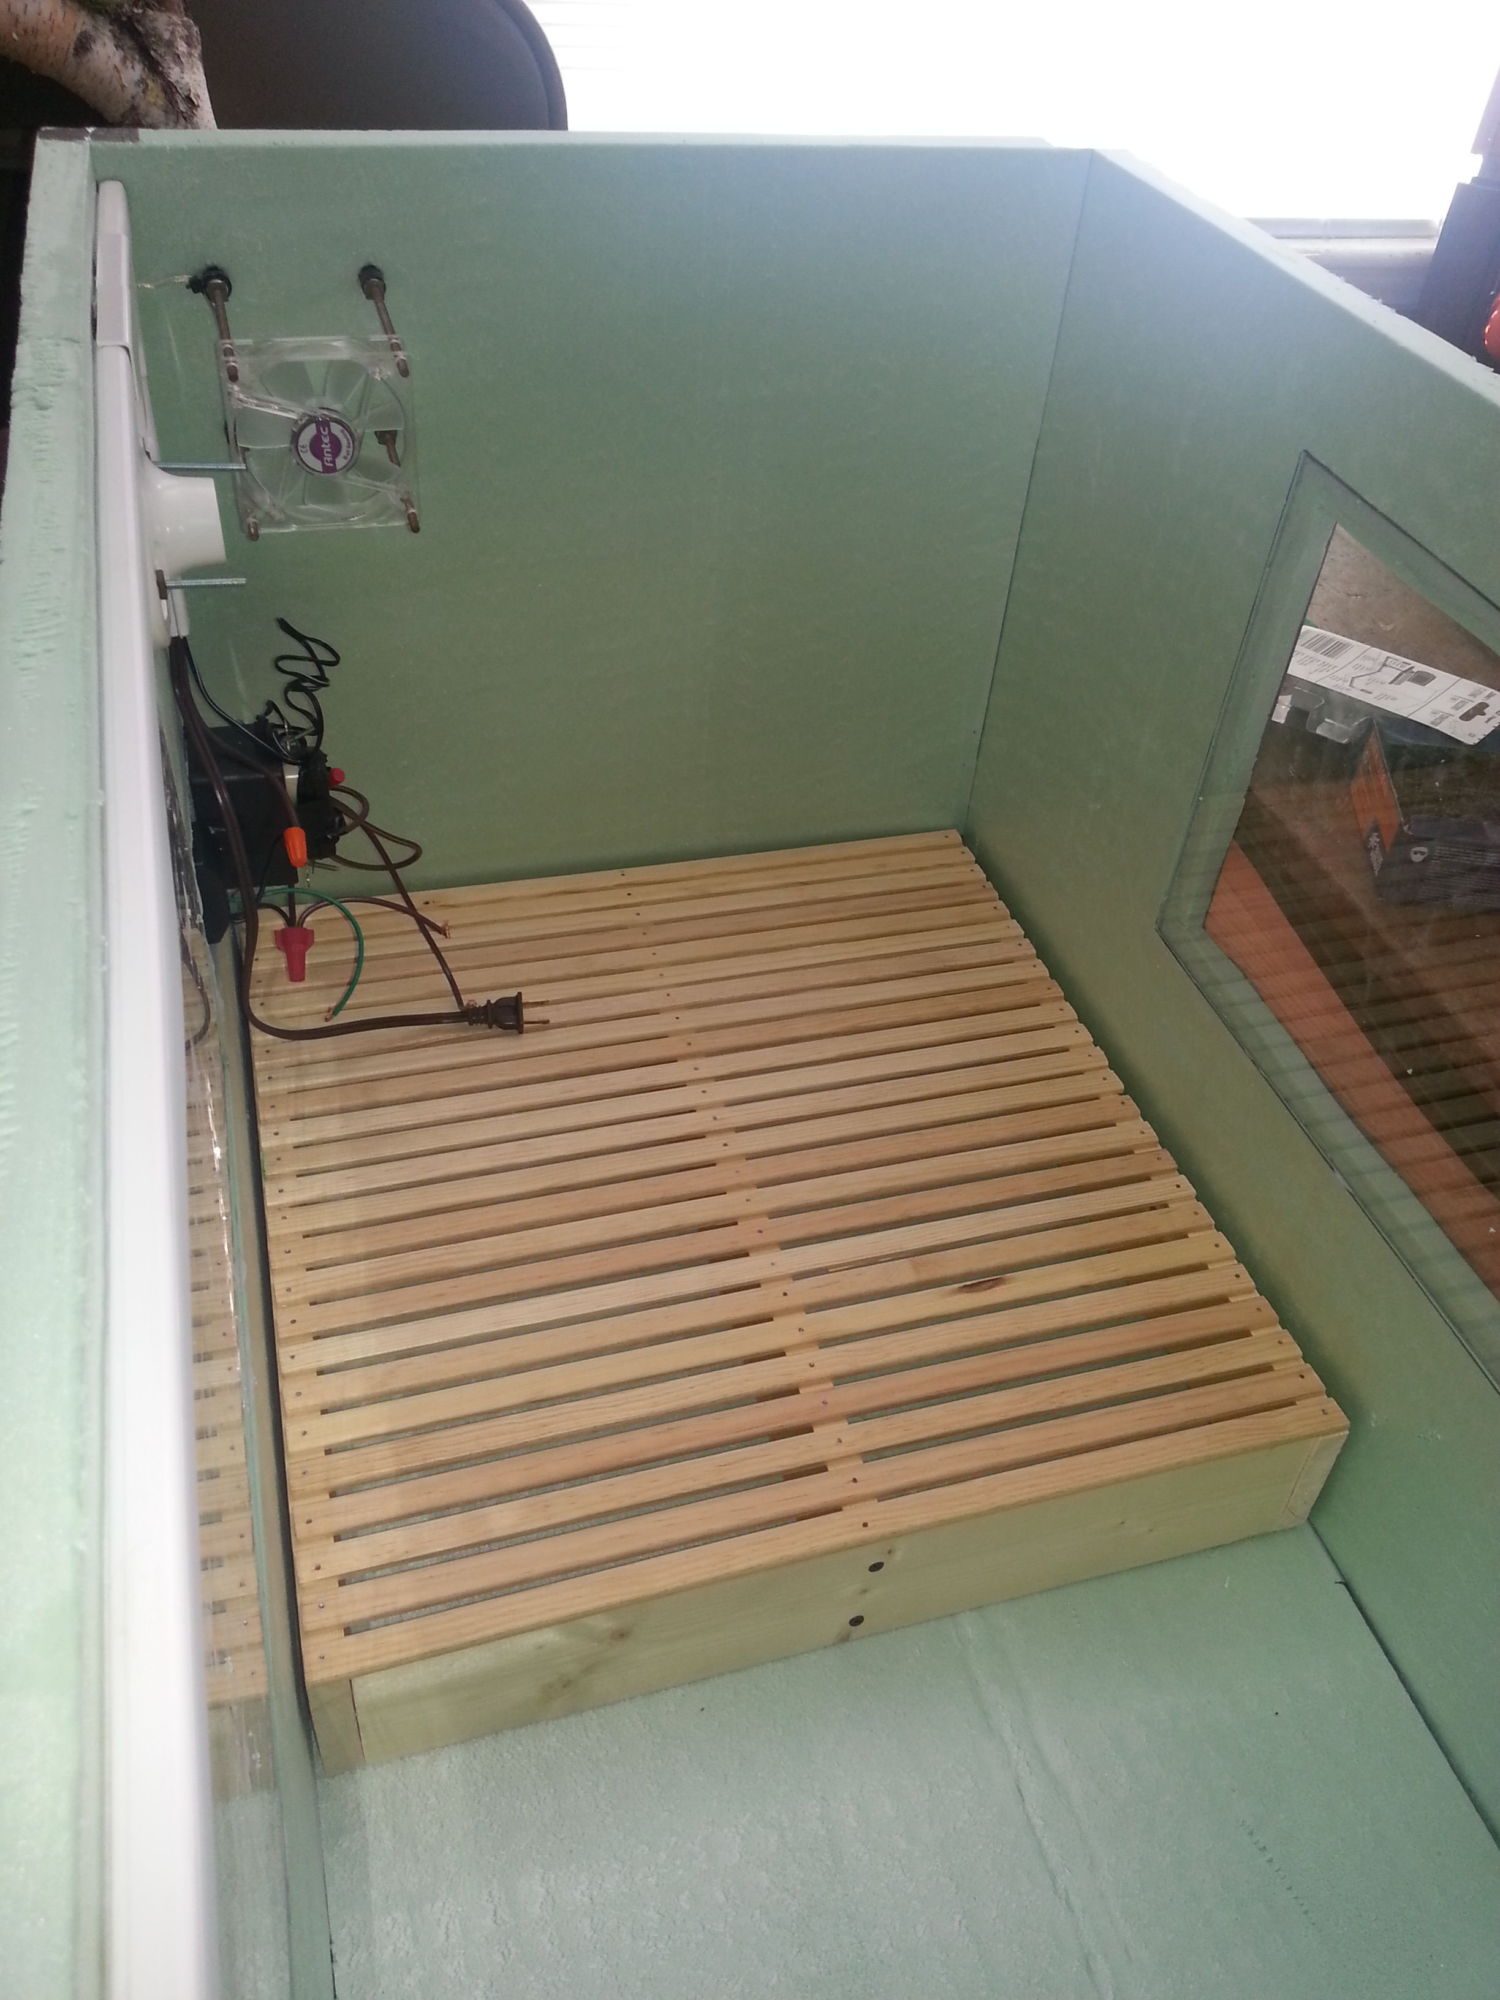
Inside view - back side of switches and view of CPU fan and light fixture - note: drilled 10 - 1 and 1/4" holes in floor brace between both halves of the floor for cross flow of air.

View from other end - note: we used blacklight heat lights as a heat source making it necessary to have a secondary source of light, which is run by the dimmer installed in the switch panel. We replaced the incandescent bulb shown in this picture with a dimmable LED bulb.

Front view with all the plywood and trim installed. There are 4 - 1/4" holes drilled under the switch plates for air flow. Two are drilled above the switch plates which vent into the electrical box that houses PID, switches and the Solid State Relay and heat sink. This housing was made by using the same 1" styrofoam board and taped off inside with the silver duct work tape. The PID is suppose to stay at room temperature and it is said that if it doesn't, that it could read wrong, Ergo the ventilation holes on this side....and you'll see in one of the pictures below, a CPU fan that we can't decide whether to blow in or suck out..... ((sigh))

Here's the end with the small CPU fan to vent the electrical box. Also, another nice addition is a removable power cord and master power switch, that we removed from an old printer.

View of the back with a very nice glare
 It has 4 - 1/4" vent holes drilled into it at the top left corner. Note : some of the holes can't be seen because of being plugged with wood filler buttons. Which is why in some of the pictures you will see some of the holes plugged.... we can't figure out which ones to shut or keep open.

This is our beautiful PID
 Yesterday it was staying between 99.5 and 100. Actually for several days it was staying at that. Now we had to lower the set temp because it was going to high - occasionally up to 101. Which is why we drilled the holes in the housing and also put the extra CPU fan in,,,,that was yesterdays addition. Right now it is reading 98.6, though
We borrowed a glass tube thermomemter from our neighbors hoverbator and it's consistantly reading at 99.5. Sometimes at the 100 mark. All the other thermometers seem to read higher except the PID which reads lower?????? You will notice in one of the pictures that our hygrometer/thermometer is reading WAYYYYYYYY higher than the rest of them for the temperature, that is....I went and did a salt test on it yesterday and it read accuarete for the humidity. The thermometer however has not been calibrated and I don't even know HOW to calibrate it......It says to put it in a 70 degree enviorment and then calibrate up or down after its sat for awhile.....ummmm, ok!!?
Yesterday it was staying between 99.5 and 100. Actually for several days it was staying at that. Now we had to lower the set temp because it was going to high - occasionally up to 101. Which is why we drilled the holes in the housing and also put the extra CPU fan in,,,,that was yesterdays addition. Right now it is reading 98.6, though
We borrowed a glass tube thermomemter from our neighbors hoverbator and it's consistantly reading at 99.5. Sometimes at the 100 mark. All the other thermometers seem to read higher except the PID which reads lower?????? You will notice in one of the pictures that our hygrometer/thermometer is reading WAYYYYYYYY higher than the rest of them for the temperature, that is....I went and did a salt test on it yesterday and it read accuarete for the humidity. The thermometer however has not been calibrated and I don't even know HOW to calibrate it......It says to put it in a 70 degree enviorment and then calibrate up or down after its sat for awhile.....ummmm, ok!!?
 Where would you find a 70 degree evniorment without a working thermometer or knowing which thermometer is accurate??? Go to Hawaii and calibrate?

This is a view through our access door to where our water trays are. We added 4 smaller tupperware trays with water to it last night because the 4 - 12 inch shoe boxes seem to not be enough to give our incubator humidity......and then that didn't really help so we added ANOTHER 12 inch shoe box to the inside of the actual incubator and also put in a wash cloth........why does 9 containers filled with water make the inside of my incubator stay at only 28% humidity???????????????

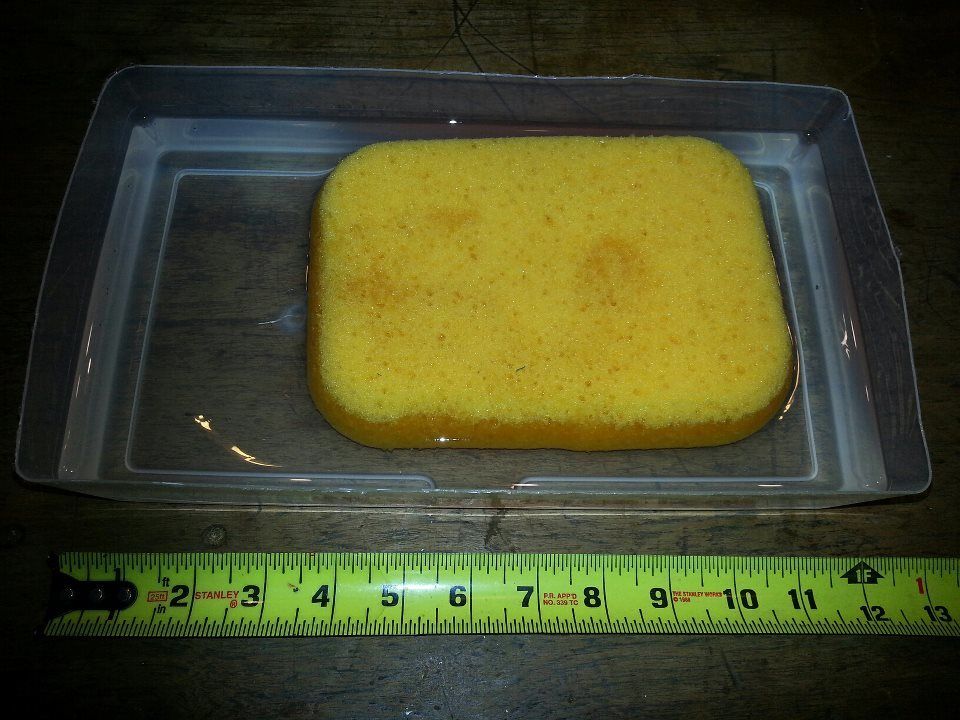
Yep, 12 inches like I said......Oh btw, they all have very large sponges in them....I'm gonna say about 7 or 8 inches long by what the the tape measurer reads above.......The small containers however don't have anything in them except water...

Vent holes under switch plates.

This was another addition to increase air flow. These 3 vent holes are 1/4" and are located directly behind the CPU fans that blow across our heat lights.

These 2 vent holes are on either side of our water tray access doors.

Close up picture of the vent holes that you couldn't see because of the glare
 Oh, btw, isn't the trim pretty? Long story on that one......I'll make it short, though. Went and bought the lid trim, 2 - 8 foot x 3" - pieces. Stained them.....went to cut and install, we did install one board length and then noticed that the pattern was backwards on the remaining one, and they both came from the same store, out of the same bin.
 Went and returned and got another one with the pattern going the right way (which we did a lot of returning things on this project......more buying, though, than returning) LOL!!!

Picture of CPU fan and heat source on one end. Also, to the bottom of the picture is our egg turner motor. It is out of a Little Giant egg turner which can be used in a Hoverbator...We ordered it off Amazon, which came from Incubator warehouse. The reason why we bought the brand new replacement motor was because we couldn't find a telescope clock motor that was suggested in the original design. The only ones we could find, their rpms were too fast.

Oh look, another water tray!!!!
 Ok, there is quite a bit to explain in this picture .First to the left is the box that contains all of our wiring, You can see it is pretty close to the heat light, so the top side is covered with the silver metal ductwork tape to reflect the heat and light away. There is two glass tube type thermometers mounted on the near end so they can be seen through the side window. On top of the box you will see a piece of the styrofoam sticking up. That is to shield the camera from direct heat. The white bottle (which is a small armorall spray bottle, cleaned up nicely) is filled with extra virgin olive oil as a shield for the thermocouple. We were told by shielding it in a white container with cooking oil, that doesn't go rancid, that we would get a more accurate reading out of a thermocouple. A science guy from a labratory told us this. I called to find out about getting a glass tube mercury thermometer, and told him about our project and he was full of knowledge about the PID and how to get it more accurate. They can't ship mercury thermometers to CT. Behind the heat light, there is another CPU fan situated like the one in the previous picture.
So.......what do we do? PLEASE HELP!!!! How do we know which holes to keep open, to keep shut? How do we keep humidity in here? I can't seem to understand why with all this water and air movement in our incubator, that the humidity is SO low. There probably is between 3 - 4 gallons of water altogether in here. Theres plenty of vent holes, I would think? Perhaps not? I know vent holes go and cause the humidity to go down if they are open...but when its closed, the humidity still doesn't go up and the heat, does. How will I get it up to 75-80% for humidity if I can't get it up to 40%? Put a swimming pool inside? The other part of the equation is that we heat with a wood stove. Our house it extrememly dry. The humidity inside of our house right now is at 30%. Please, someone, please please please help us........
This is a picture of the front with the switches mocked in place.
Another picture of the front. The windows are lexan and double pane. Note: Do not use spray adhesive on styrofoam near lexan, even if you think the lexan is COMPLETELY covered....you can't really clean lexan with anything but warm water and mild soap, or a very mild toothpaste - such as AIM. Something with low to no grittiness or whatever you call it......
Inside view - back side of switches and view of CPU fan and light fixture - note: drilled 10 - 1 and 1/4" holes in floor brace between both halves of the floor for cross flow of air.
View from other end - note: we used blacklight heat lights as a heat source making it necessary to have a secondary source of light, which is run by the dimmer installed in the switch panel. We replaced the incandescent bulb shown in this picture with a dimmable LED bulb.
Front view with all the plywood and trim installed. There are 4 - 1/4" holes drilled under the switch plates for air flow. Two are drilled above the switch plates which vent into the electrical box that houses PID, switches and the Solid State Relay and heat sink. This housing was made by using the same 1" styrofoam board and taped off inside with the silver duct work tape. The PID is suppose to stay at room temperature and it is said that if it doesn't, that it could read wrong, Ergo the ventilation holes on this side....and you'll see in one of the pictures below, a CPU fan that we can't decide whether to blow in or suck out..... ((sigh))
Here's the end with the small CPU fan to vent the electrical box. Also, another nice addition is a removable power cord and master power switch, that we removed from an old printer.
View of the back with a very nice glare
This is our beautiful PID
This is a view through our access door to where our water trays are. We added 4 smaller tupperware trays with water to it last night because the 4 - 12 inch shoe boxes seem to not be enough to give our incubator humidity......and then that didn't really help so we added ANOTHER 12 inch shoe box to the inside of the actual incubator and also put in a wash cloth........why does 9 containers filled with water make the inside of my incubator stay at only 28% humidity???????????????
Yep, 12 inches like I said......Oh btw, they all have very large sponges in them....I'm gonna say about 7 or 8 inches long by what the the tape measurer reads above.......The small containers however don't have anything in them except water...
Vent holes under switch plates.
This was another addition to increase air flow. These 3 vent holes are 1/4" and are located directly behind the CPU fans that blow across our heat lights.
These 2 vent holes are on either side of our water tray access doors.
Close up picture of the vent holes that you couldn't see because of the glare
Picture of CPU fan and heat source on one end. Also, to the bottom of the picture is our egg turner motor. It is out of a Little Giant egg turner which can be used in a Hoverbator...We ordered it off Amazon, which came from Incubator warehouse. The reason why we bought the brand new replacement motor was because we couldn't find a telescope clock motor that was suggested in the original design. The only ones we could find, their rpms were too fast.
Oh look, another water tray!!!!
So.......what do we do? PLEASE HELP!!!! How do we know which holes to keep open, to keep shut? How do we keep humidity in here? I can't seem to understand why with all this water and air movement in our incubator, that the humidity is SO low. There probably is between 3 - 4 gallons of water altogether in here. Theres plenty of vent holes, I would think? Perhaps not? I know vent holes go and cause the humidity to go down if they are open...but when its closed, the humidity still doesn't go up and the heat, does. How will I get it up to 75-80% for humidity if I can't get it up to 40%? Put a swimming pool inside? The other part of the equation is that we heat with a wood stove. Our house it extrememly dry. The humidity inside of our house right now is at 30%. Please, someone, please please please help us........
Last edited:
 Ultrasonic Humidifier

