lpyrbby
Songster
I've already created a version of a cooler waterer and posted an article on it here.
The topic of this kind of waterer came up in another thread and instead of derailing that one, we want to bring that discussion somewhere where more know about it and can get involved with ideas and additional recommendations

This was our original design, having absolutely NO idea what parts to get or how it would go together to function. This meant we had to use a LOT of silicone to make sure the spigot would stay in place. We also had to cut part of the handle so it would turn in such a small area. This was AWFUL.
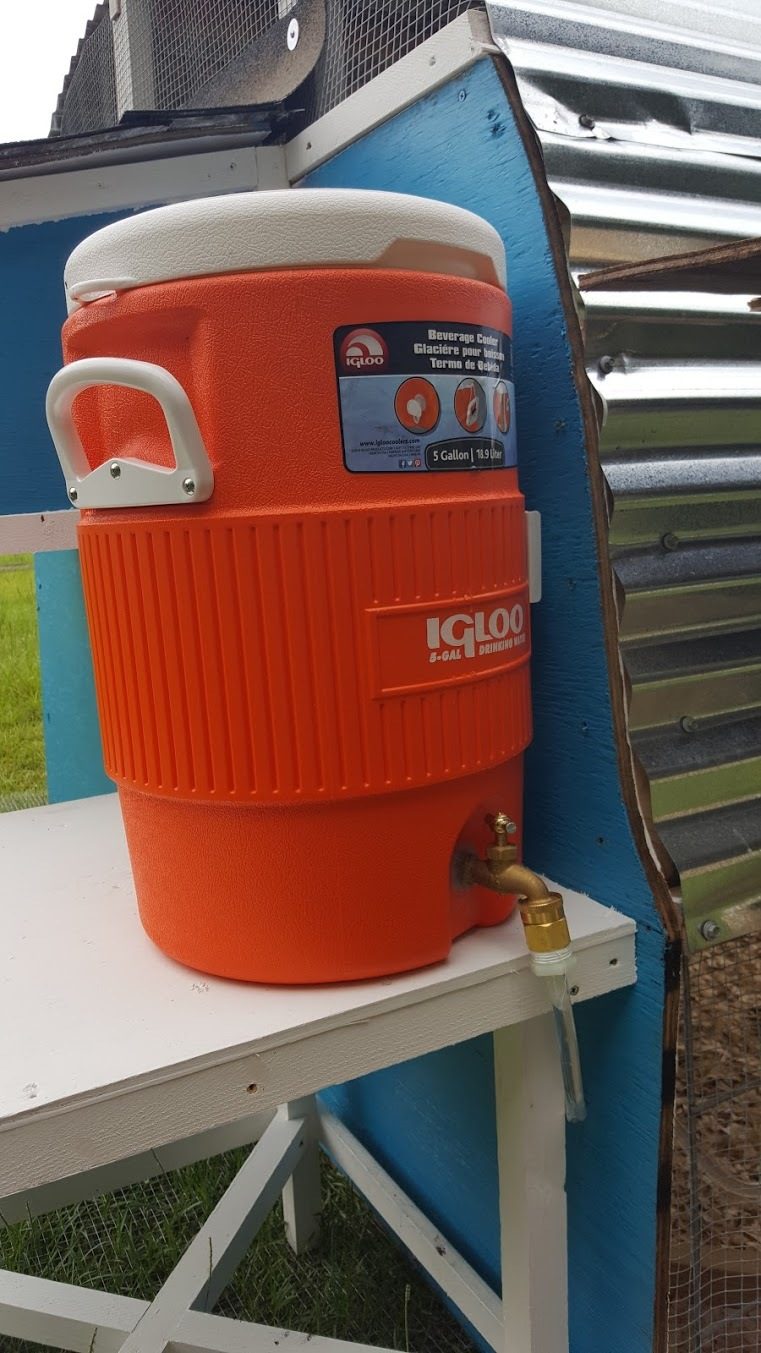
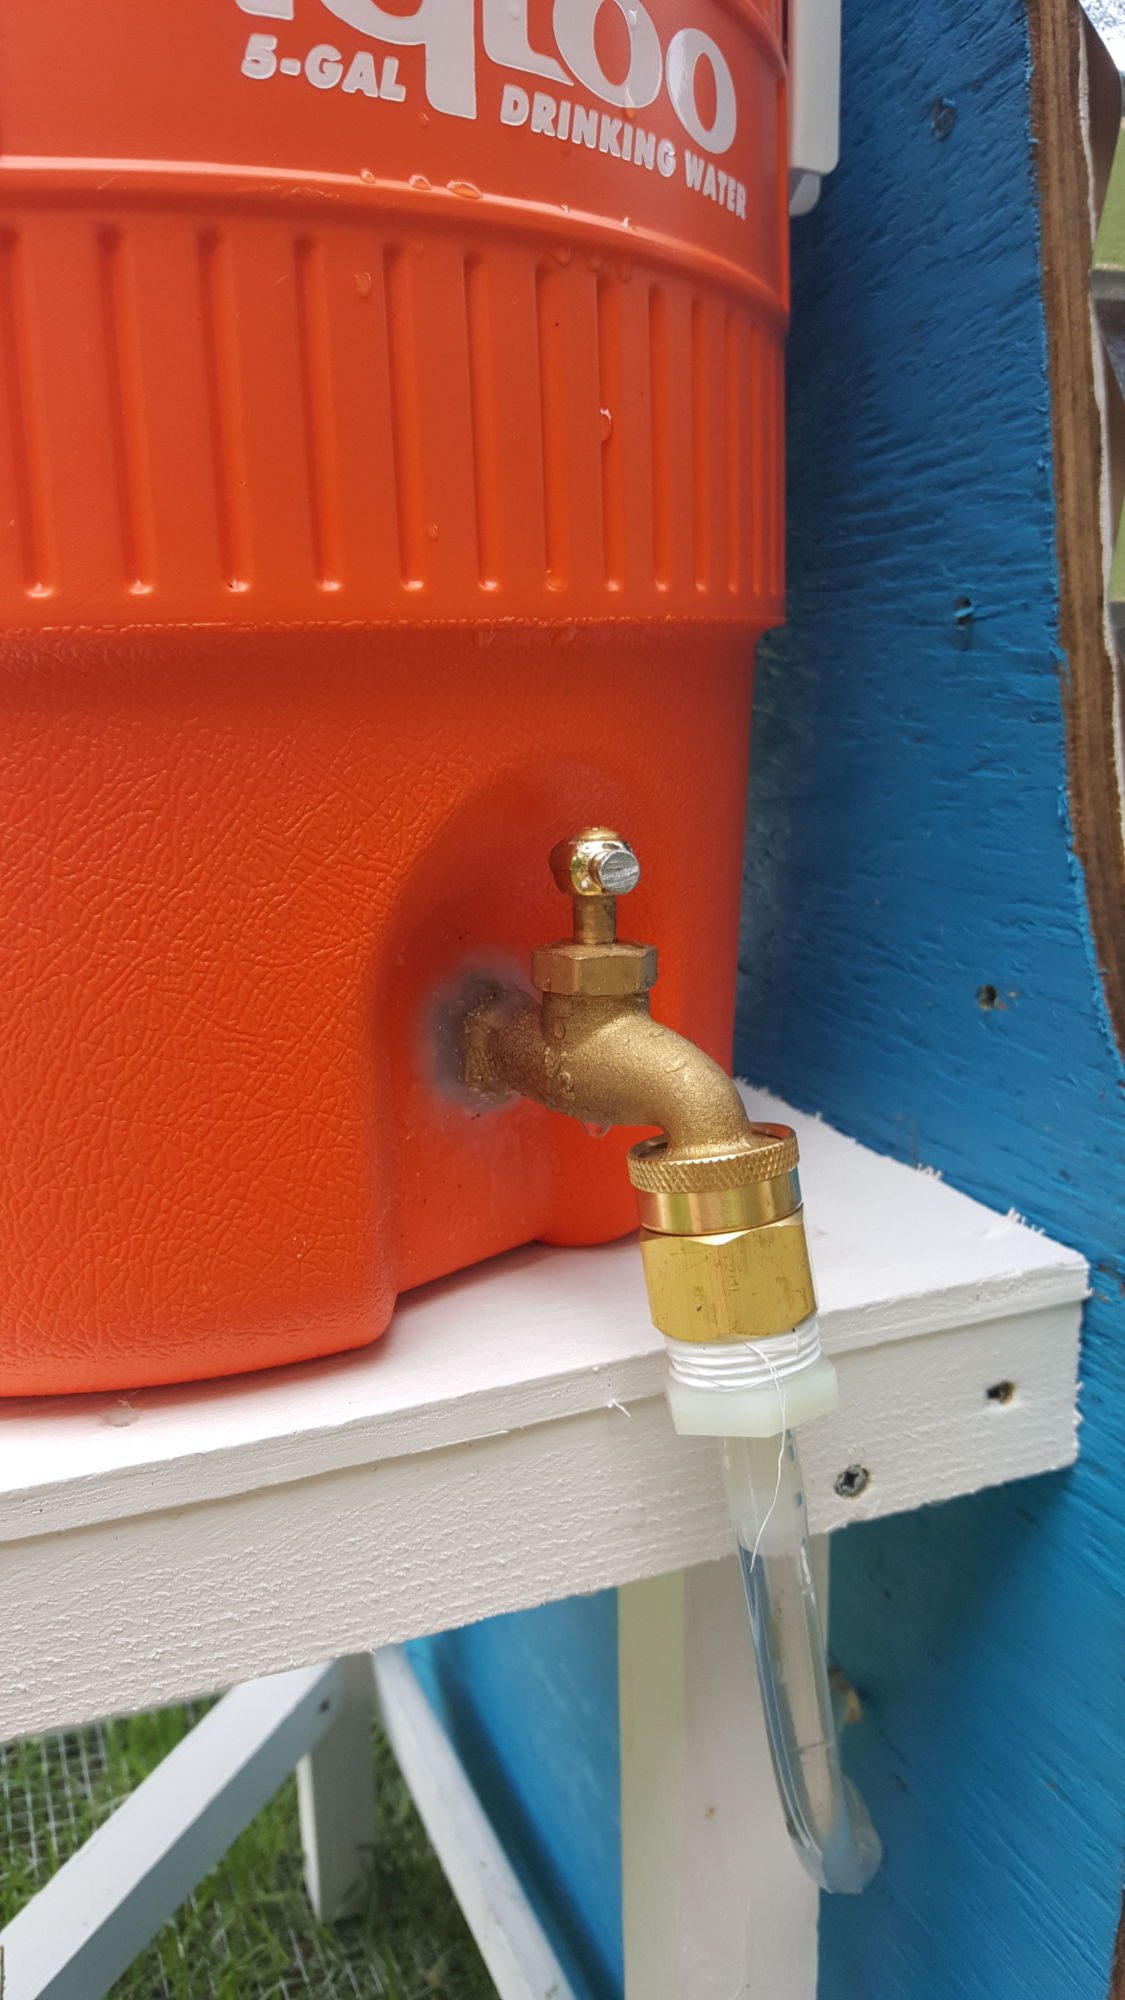
Now, our bucket looks more like this, and is a dream to shut the water off to the coop for cleaning.

I don't have a how-to yet since husband put this all together while I was at work, but we have our old cooler to modify (yes, a second Igloo cooler because we love this that much!) so I'll have a chance to put together real build photos on the next one, with specific instructions for what we had to do and where we found some of the harder to find pieces for this.
My husband likes to brew beer and it's a regular thing for those that brew to modify coolers to make "mash tuns" to handle the grains used in beer making. He had a good head start on getting things figured out and/or knowing where to look for the information this second time around. That said, here is where he generated our parts list from and here is the basic set of instructions for putting it together.
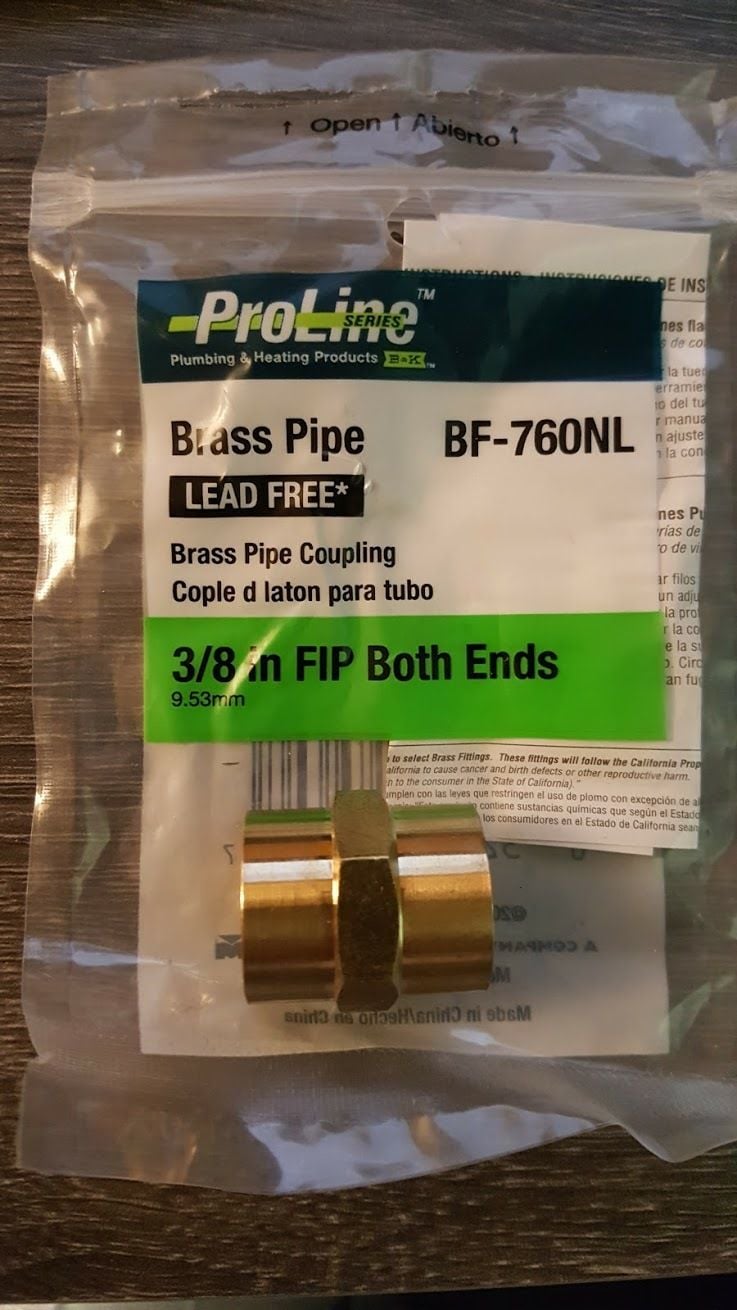
In the parts list section, #8 isn't really necessary for this part, nor the filter at the bottom. Under the MISC section in the first link also, #1, he used a fiber washer from NAPA instead and filed the inner hole of the washer to fit the piece through.
Here are photos of the parts we used, starting from inside the cooler and moving to the outside:
This is basically the pathway of water in the cooler to make its way to the tubing that goes into the coop, into PVC to feed their cup waterers.
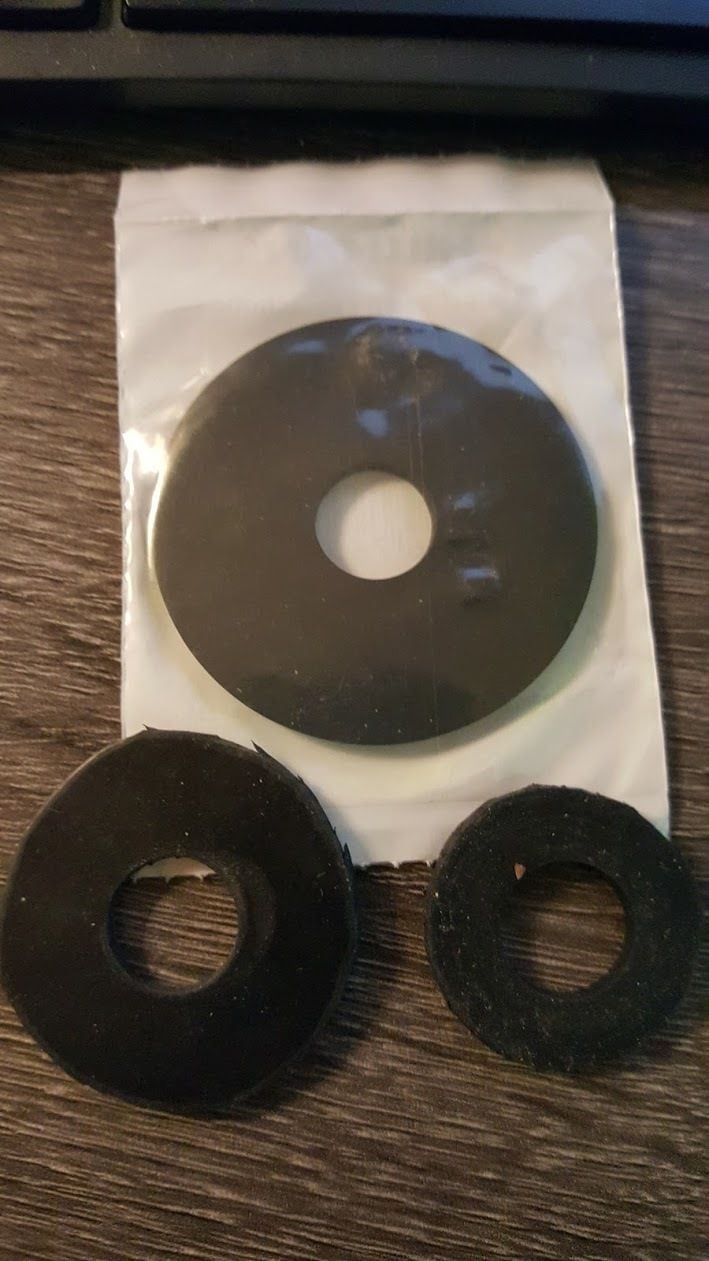
This was traced out from the larger washer in the baggie
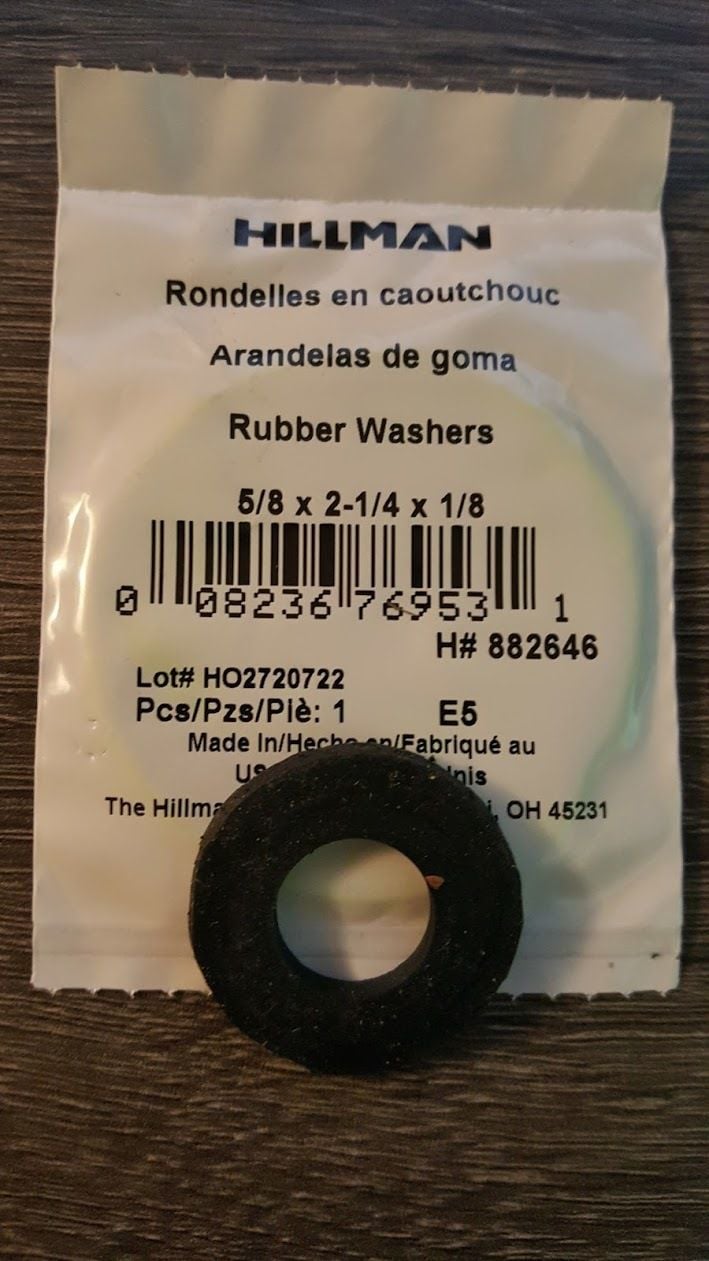
The white piece is part of the cooler spigot assembly. The black washer is actually a fiber drain plug gasket that you can find at NAPA. I think he said this one was 5/8 and fit perfectly inside the white piece for the cooler. I think he said he had to take a round file to the inside hole of this gasket to fit on the double male brass pipe (pic below).

This piece butts up to the opening in the cooler to help seal from leaks.
This piece is what is actually in the opening of the cooler itself. So, all the pieces above will be on the inside part of the cooler. Husband noted that it IS going to be a tight fit when all put together and you will NOT be able to get more than a few thread turns in when connecting them all. Just FYI. Also, use some teflon tape on this piece!

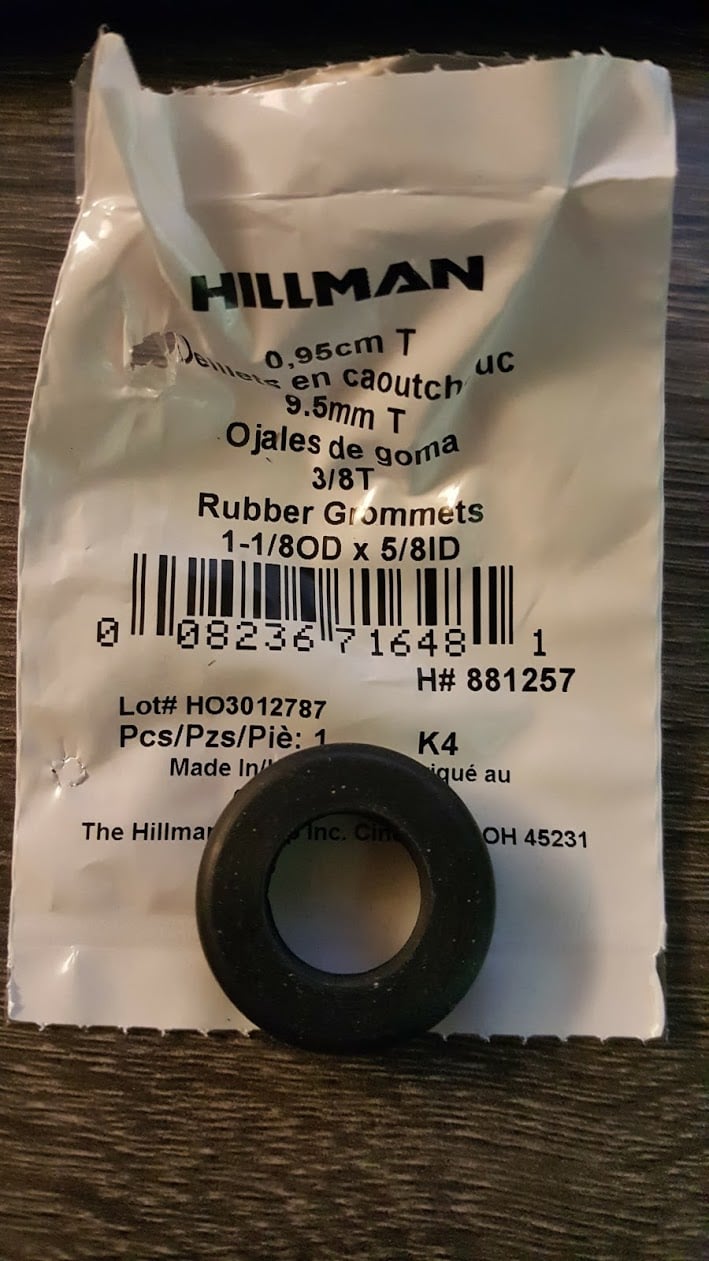
We are now on the outside of the cooler with this washer. This one was also cut to "fit" to match up with the fender washers (see below) we got for the outside. This piece is acting as an additional gasket.

This is just a pic to show that both of the black washer pieces above were cut out of this size.
These are the flat zinc washers in 5/8 that are next in line.

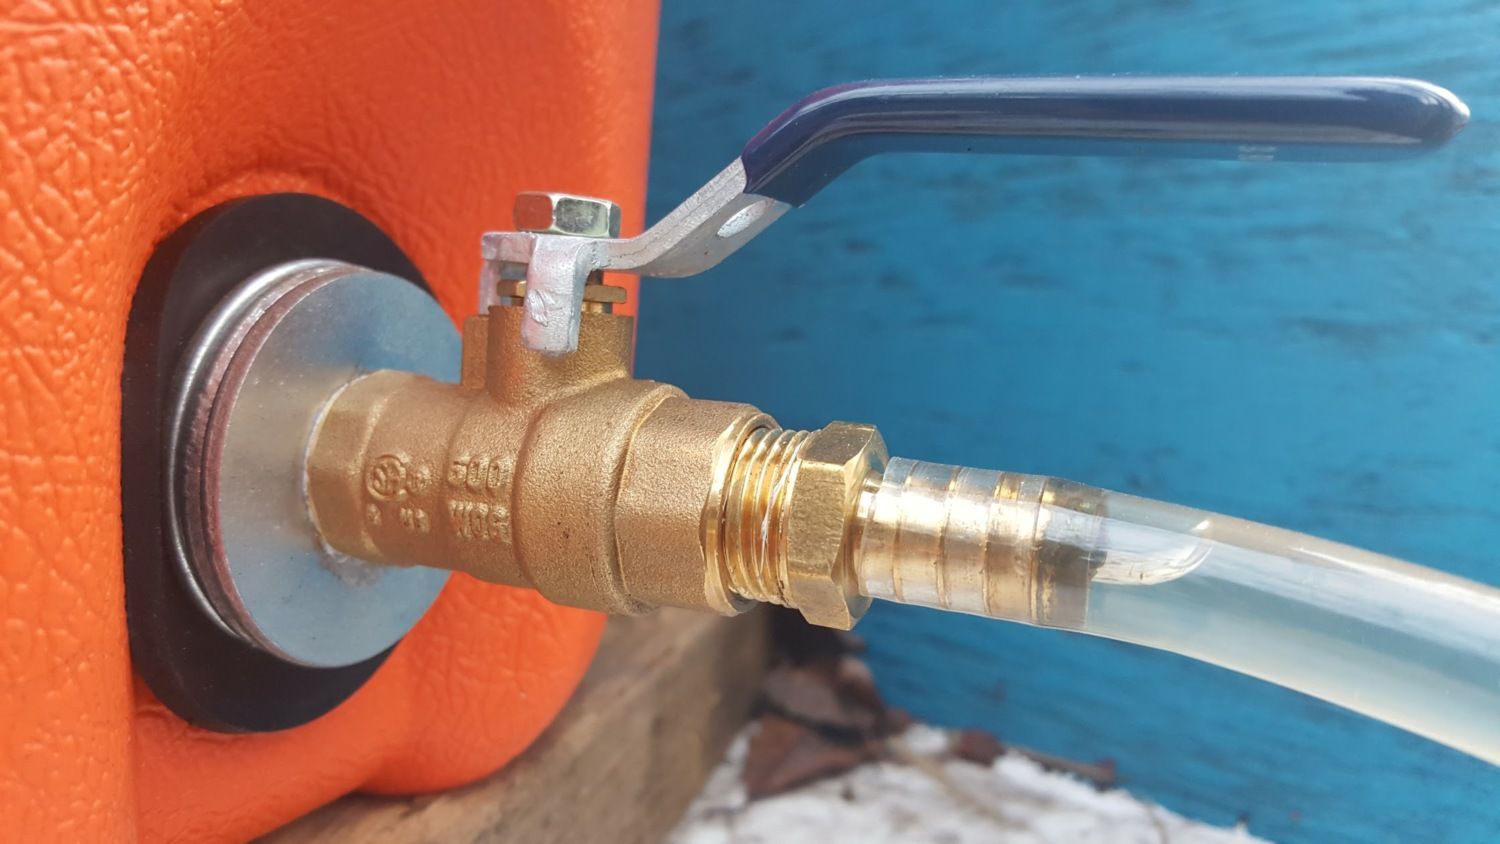
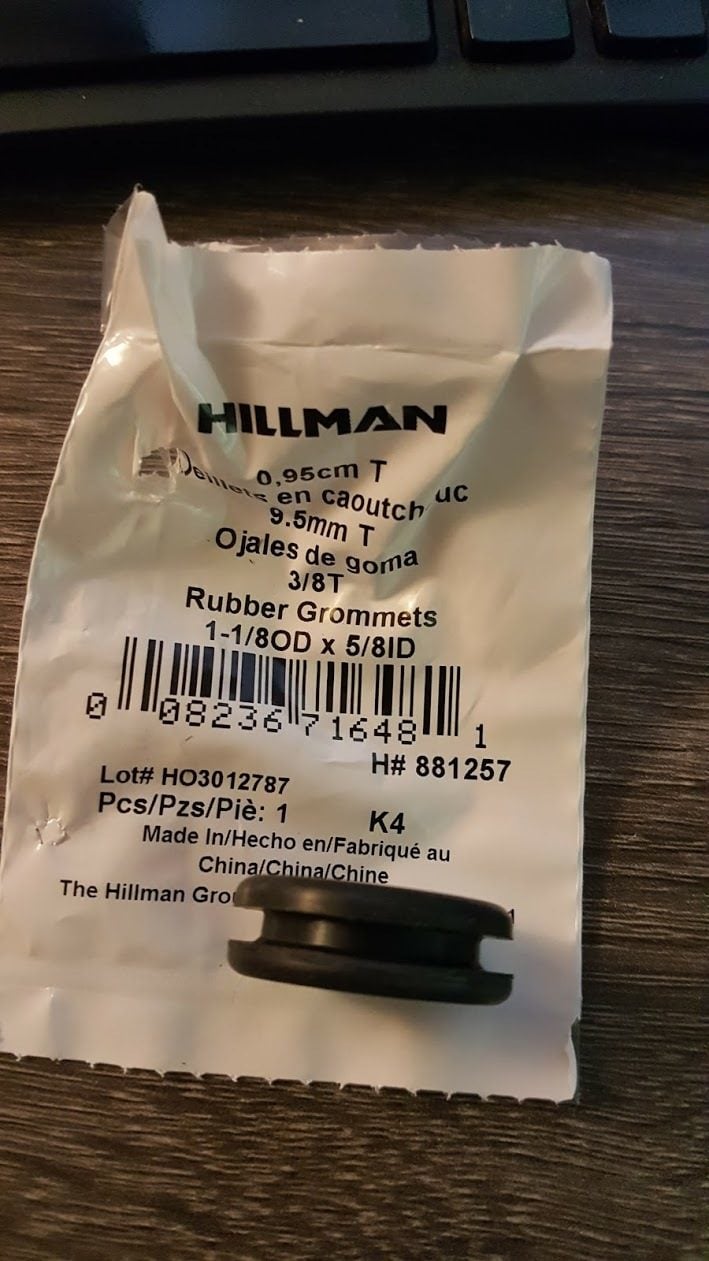
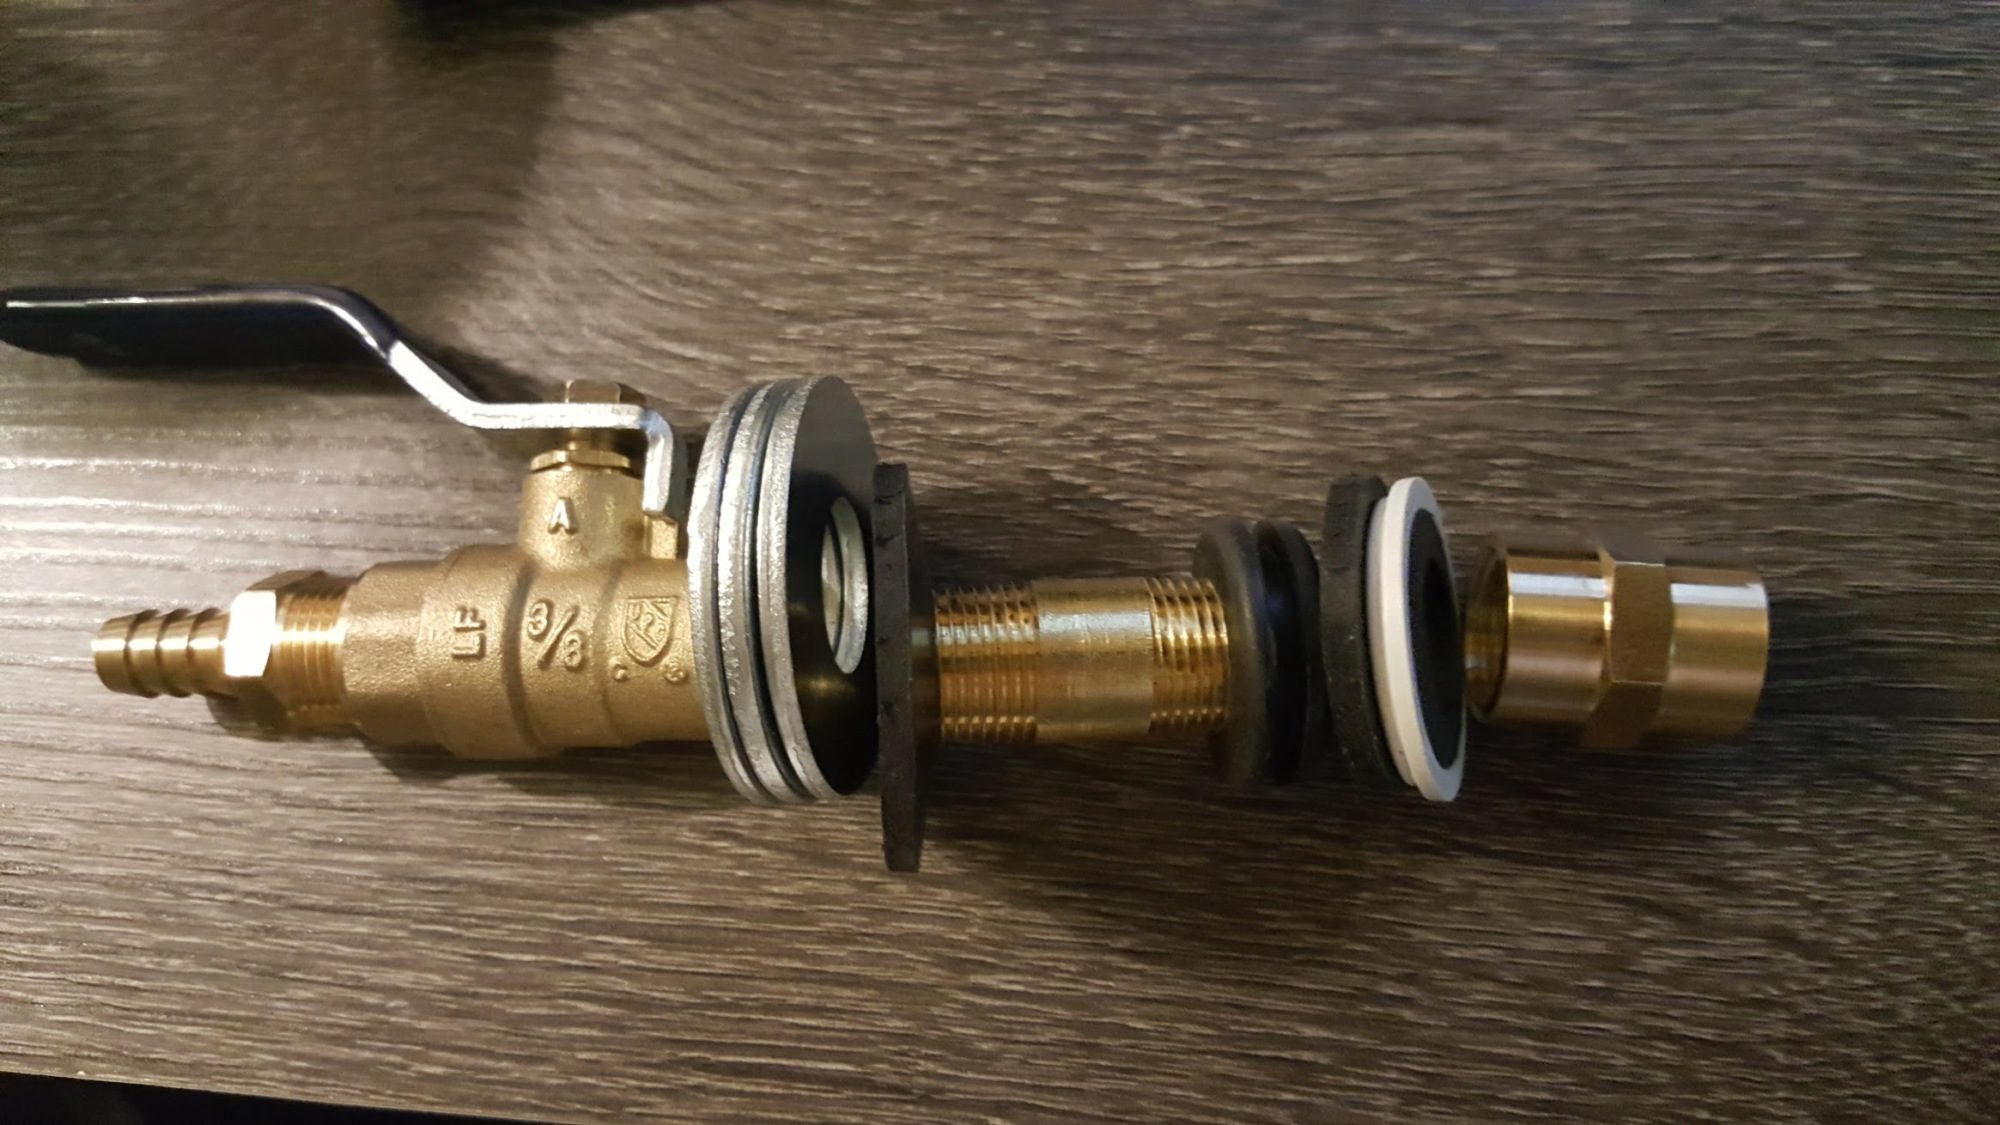
Ball valve this time, instead of a hose bibb.
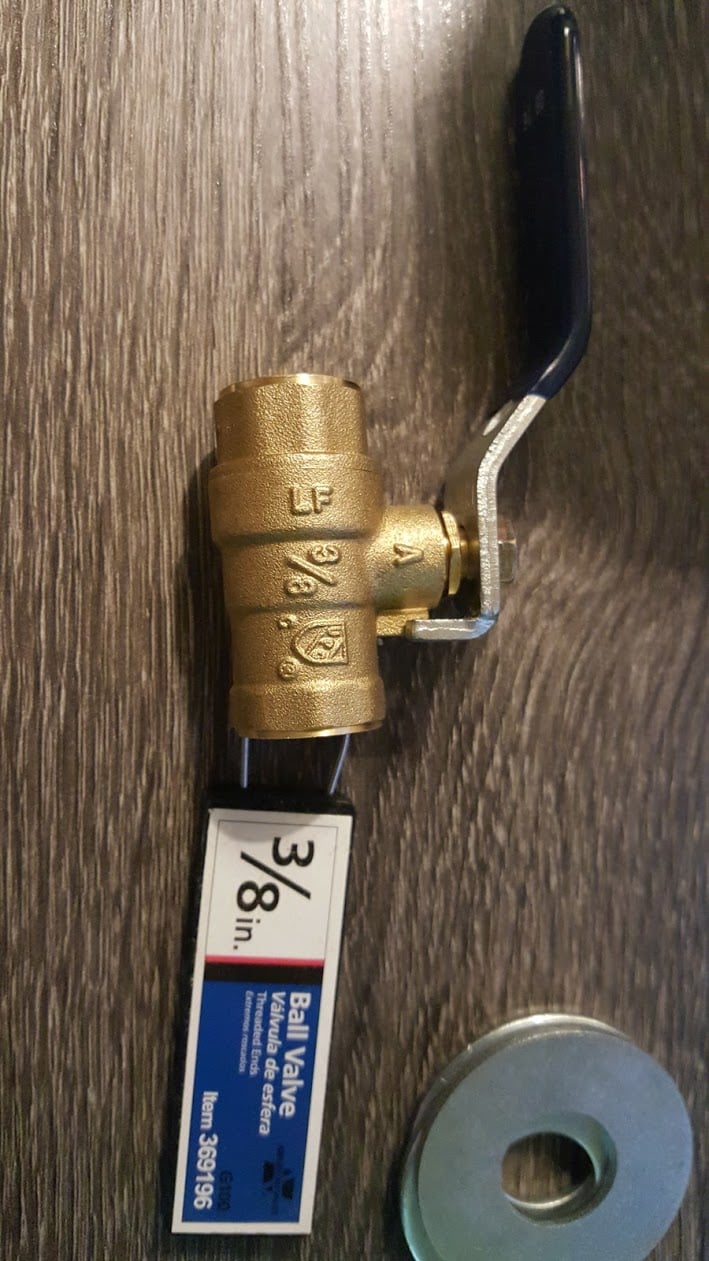
The hose barb is used to attach the plastic tubing to, and screws into the end of the ball valve above.

In line view of all those pieces to kinda demonstrate how it's supposed to go together.
*phew!*
Let's discuss!
The topic of this kind of waterer came up in another thread and instead of derailing that one, we want to bring that discussion somewhere where more know about it and can get involved with ideas and additional recommendations
This was our original design, having absolutely NO idea what parts to get or how it would go together to function. This meant we had to use a LOT of silicone to make sure the spigot would stay in place. We also had to cut part of the handle so it would turn in such a small area. This was AWFUL.
Now, our bucket looks more like this, and is a dream to shut the water off to the coop for cleaning.
I don't have a how-to yet since husband put this all together while I was at work, but we have our old cooler to modify (yes, a second Igloo cooler because we love this that much!) so I'll have a chance to put together real build photos on the next one, with specific instructions for what we had to do and where we found some of the harder to find pieces for this.
My husband likes to brew beer and it's a regular thing for those that brew to modify coolers to make "mash tuns" to handle the grains used in beer making. He had a good head start on getting things figured out and/or knowing where to look for the information this second time around. That said, here is where he generated our parts list from and here is the basic set of instructions for putting it together.
In the parts list section, #8 isn't really necessary for this part, nor the filter at the bottom. Under the MISC section in the first link also, #1, he used a fiber washer from NAPA instead and filed the inner hole of the washer to fit the piece through.
Here are photos of the parts we used, starting from inside the cooler and moving to the outside:
This is basically the pathway of water in the cooler to make its way to the tubing that goes into the coop, into PVC to feed their cup waterers.
This was traced out from the larger washer in the baggie
The white piece is part of the cooler spigot assembly. The black washer is actually a fiber drain plug gasket that you can find at NAPA. I think he said this one was 5/8 and fit perfectly inside the white piece for the cooler. I think he said he had to take a round file to the inside hole of this gasket to fit on the double male brass pipe (pic below).
This piece butts up to the opening in the cooler to help seal from leaks.
This piece is what is actually in the opening of the cooler itself. So, all the pieces above will be on the inside part of the cooler. Husband noted that it IS going to be a tight fit when all put together and you will NOT be able to get more than a few thread turns in when connecting them all. Just FYI. Also, use some teflon tape on this piece!
We are now on the outside of the cooler with this washer. This one was also cut to "fit" to match up with the fender washers (see below) we got for the outside. This piece is acting as an additional gasket.
This is just a pic to show that both of the black washer pieces above were cut out of this size.
These are the flat zinc washers in 5/8 that are next in line.
Ball valve this time, instead of a hose bibb.
The hose barb is used to attach the plastic tubing to, and screws into the end of the ball valve above.
In line view of all those pieces to kinda demonstrate how it's supposed to go together.
*phew!*
Let's discuss!


 ) so freezing is a concern, but not a daily one. I haven't really resolved that aspect with the pvc section because the heat would need to be applied to the cups instead of the cooler.


