- Jun 23, 2010
- 34
- 0
- 32
I took the basic design found on BYC and along with what I learned on BYC built my first coop for four birds. When placing the floor on the uprights I screwed a block on each upright 18 inches from the bottom to hold the floor assembly in place while I screwed it to each of the uprights. Also added a pressure treated 2x4 runner on the bottom of the uprights to make it easier to move. If doing again would use non PT wood for the uprights. The siding is a masonite like panel called redwood from Home Depot. Looks nice but the inside has a "knurled" finish making it rough for cleaning. A couple coats of semi gloss white made it smoother for cleaning. The peg board is a temporary cover for the 2 nest boxes to be built. I offset it to the left to give more space under and away from the roost
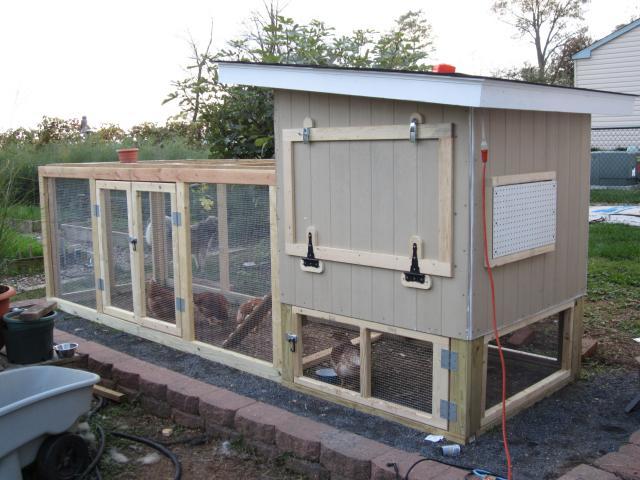
Hardware cloth all around, 1x1 inch welded cage wire ontop of the removable run cover, galvanized chain link fence fabric buried along the perimeter
 [/img]
Found a company on the web that happened to be in my home town that sells shed windows. I took out the spring loaded stops to enable the window to be used sideways without going inside to release the stops to open the window and without installing upside down. Of course the bottom channel does not have a rain drain.
 [/img]
2x4 framing held with pocket screws and treated with water seal for natural greying without having to paint around hardware cloth in the future
 [/img]
free vinyl flooring scrap. it was easier to paint in pieces than when assembled. The higher pop door enables use of the DLM. Still need to add a pop door.
 [/img]
hardware cloth screen in lieu of factory screen
 [/img]
power strip with 15 watt bulb on timer and thermo cube to be added for water heater
 [/img]
Hardware cloth all around, 1x1 inch welded cage wire ontop of the removable run cover, galvanized chain link fence fabric buried along the perimeter
Found a company on the web that happened to be in my home town that sells shed windows. I took out the spring loaded stops to enable the window to be used sideways without going inside to release the stops to open the window and without installing upside down. Of course the bottom channel does not have a rain drain.
2x4 framing held with pocket screws and treated with water seal for natural greying without having to paint around hardware cloth in the future
free vinyl flooring scrap. it was easier to paint in pieces than when assembled. The higher pop door enables use of the DLM. Still need to add a pop door.
hardware cloth screen in lieu of factory screen
power strip with 15 watt bulb on timer and thermo cube to be added for water heater
Last edited:

