
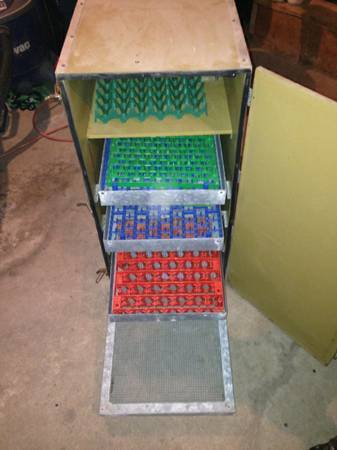
I had the good fortune to purchase a dead GQF 1402 over the summer. It isn't dated, but I believe it was manufactured around 1997. The turner didn't work, the incubator wouldn't heat up, and the electronic controller had overheated and scorched the inside top of the cabinet and warped the thermostat housing. It was rusty, crusty, and cheap. It came with all the trays, and an active rodent nest as well. It was just what I was looking for.
I was really glad I took the truck by the time I got home with it. Rodent mess stinks. The bed of the truck smelled.
I left it outside, and pulled the fiberglass insulation that had been packed into the fan tunnel and on the water shelf by the busy rodents. I scraped and wiped and sprayed it until it only smelled a little. I pressure washed the egg trays and shelves, and brought it all inside.
A little time with my ohmmeter showed that the egg turner switch worked, and the voltmeter told me I had power to the switch and from the switch to the motor. But the motor showed no signs of life, so I ordered a turner motor and "clock" motor from GQF. An hour or so of fighting rusty hardware later, and the turner was up and running. I left it for a couple of days to ensure it turned reliably. A visual inspection had shown that the resistance wire used in the heating element had broken, so I installed a new heating wire. Hurrah, it heats!
Neither of the indicator lights, for heat and for turner, worked. Oh well.
I set the secondary wafer thermostat to the recommended 102F. It stayed stable at 102.
I then adjusted the solid state controller to 100F as recommended. Now the incubator remained at 100F as if the dial was stuck...it didn't move!
I ran a set of turkey eggs through and the incubator did a fine job turning and maintaining temperature.
Incubation season is over for me, so I figured I'd do a full cleaning and restoration of this old beast so that it will be nice and clean for spring hatching.
More to follow.


