Never give up on that big, nice looking, functional coop and run. Even if it takes you a while to get there lol
When we first started this adventure over a year ago, we researched chickens and everything they needed for being outside. as seen in some photos, it may look like we have a large backyard, we do not. We had talked about a shed coop but that was out of our range and location in yard.
We had an (accidental) inside rooster, our avatar, Rocky aka PrettyBird, so we knew basics, and absolutely loved Rocky. He was an old man when he passed and he is dearly missed.

On to new chicks... Well, we decided to get a pen(8ft x 8ft) and build a coop raised off the ground. All good. We even had it built before we got our chicks- Black Australorp for their color, demeanor, and eggs.
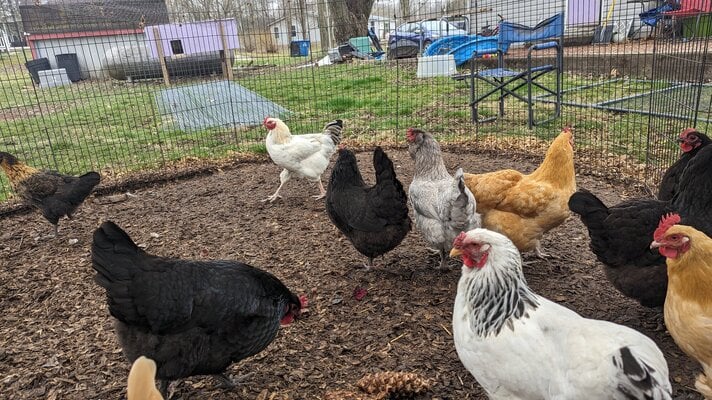
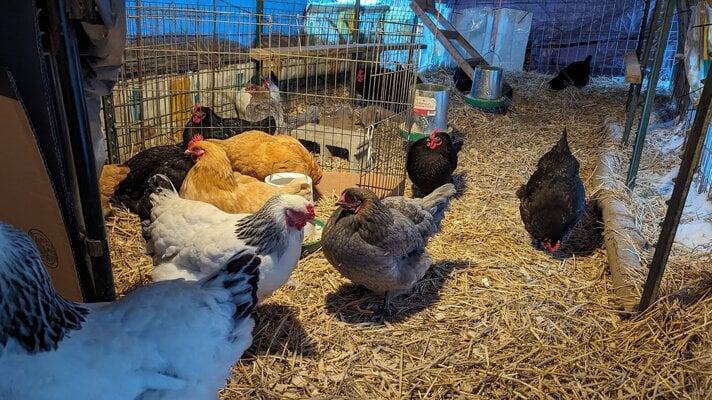
The inmates

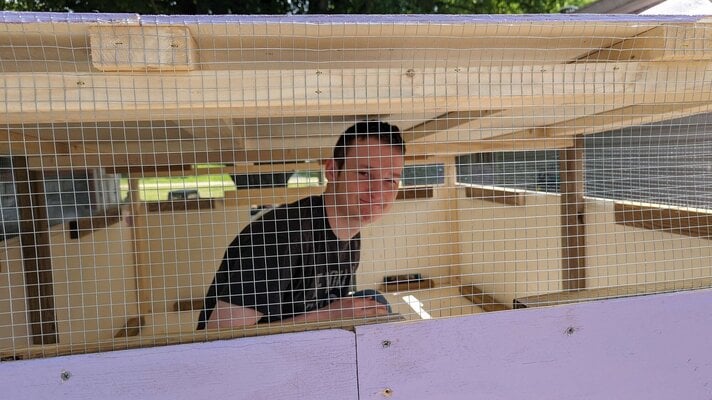
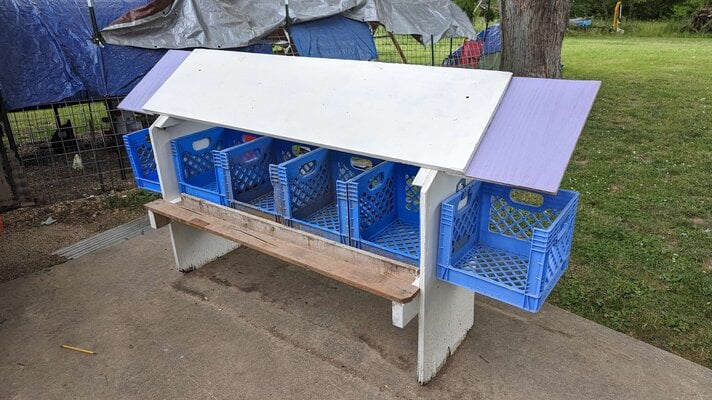
I present Cell Block F. It's not quite finished, we added more vents. It also had hinges to prop it open, not seen here.

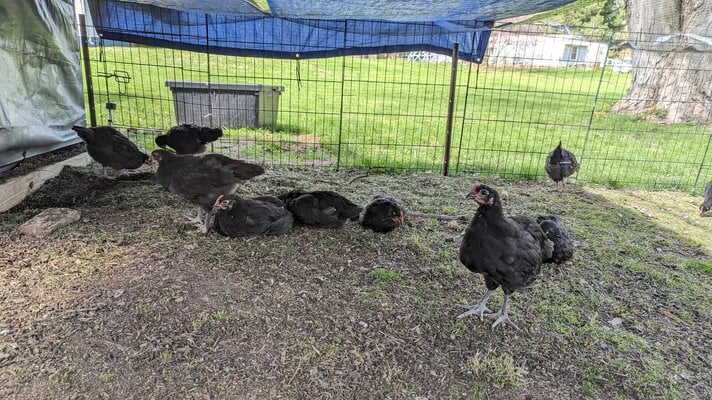
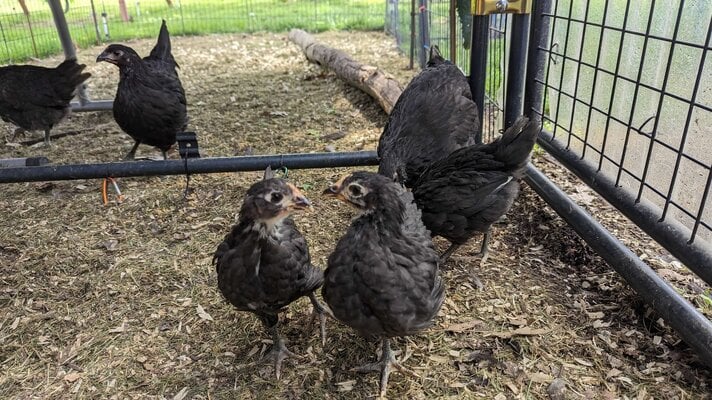
Chicken math is real! And unless you are going to butcher your own birds, just our two cents, don't get straight run haha out of a total of 32 Black Australorp, we ended up with 9 pullets...
We used what we had for their extended run, which they enjoyed, but obviously made cleaning difficult as we couldn't easily access it lol
inside The Pen once we got them used to going inside Cell Block F
We had tried for roosts in the pen but couldn't work something out that gave the girls optimal space.
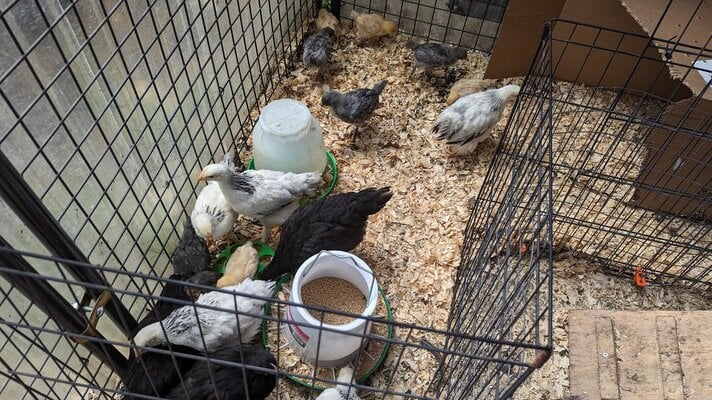
We did find more pullets and added color to our growing flock!
Then came time for moving new chicks outside while debating how to fix the run lol
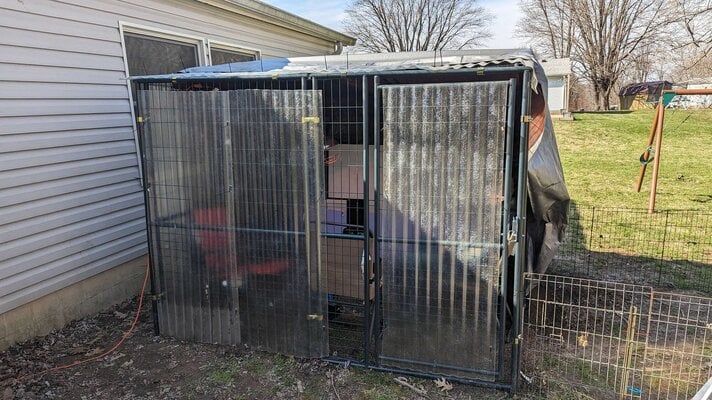
My dad had some extra goat panels, 4in by 4in holes, 4ft x 16ft, and I had seen photos of a hoop style coop. we already knew we'd want to upgrade it, so we used repurposed rebar t-posts and dog play pen panels, and had a few oops along the way, but we got stable! for the moment! lol (FYI, there was a lot of cursing and grumbling...) we used 5 panels so it was 8ft x 20ft
So while we knew our coop wasn't big enough when we found more pullets, we had begun planning, knowing we had time but not lol
Using a free design we adjusted it to fit us. It's not perfect, it's built by amateurs lol but it works, and has space inside and underneath. We already knew that would just be for sleeping, so we were able to play with space.
Cell Block F got upgraded. we reused old pieces from a hammock swing, spares from my dad, and some new.
*4x4, 2x4, plywood (if redid would use thicker OSB), and deck screws, hardware cloth (priced and found cheaper on Amazon at the time)
***I also did a cleaning/reach simulation before we decided on 8ft instead of 6ft like planned. Once I knew I could reach to scrape out coop we left it 8ft x6ft and added the four sanded 2x4 roost bars
The poly sheets my step mom found super cheap somewhere and my dad had leftovers and we were able to use them--we did find later on that they turned it into a heat box(duh, but we were trying to block our freezing March wind here in Indiana, lol)
*That entire pen panel was removed to place coop to it for most space
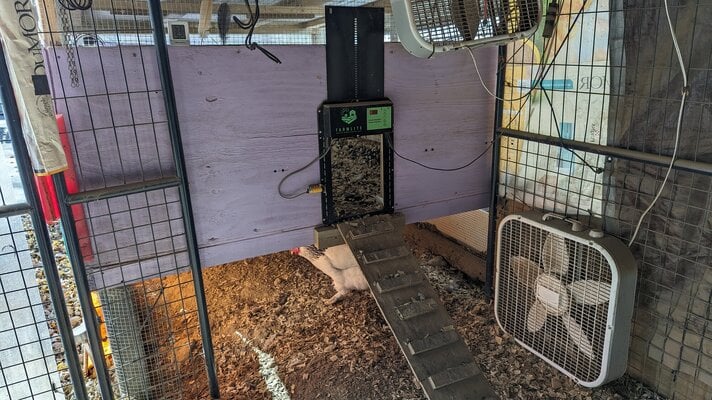
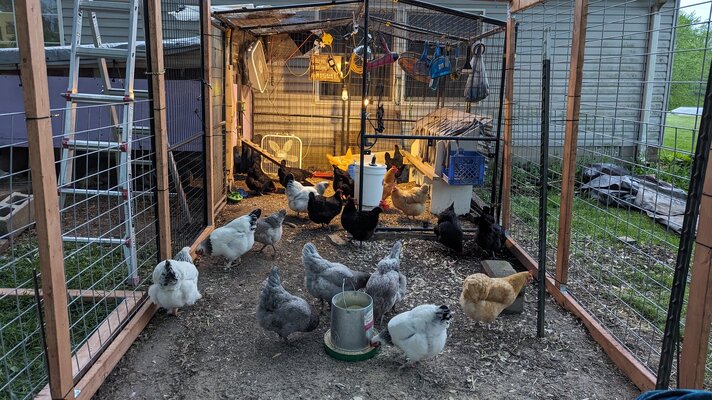
New coop done! Yay! 6ft x 8ft with 4 roost bars, automatic door and a large backdoor for cleaning.
the underneath of run is 6ft x 6ft, and we've had to add top soil and peat moss and sand several times, they love it under there for dirt baths!
Cleaning... When the wind board isn't underneath, the totes fit right under and no mess!

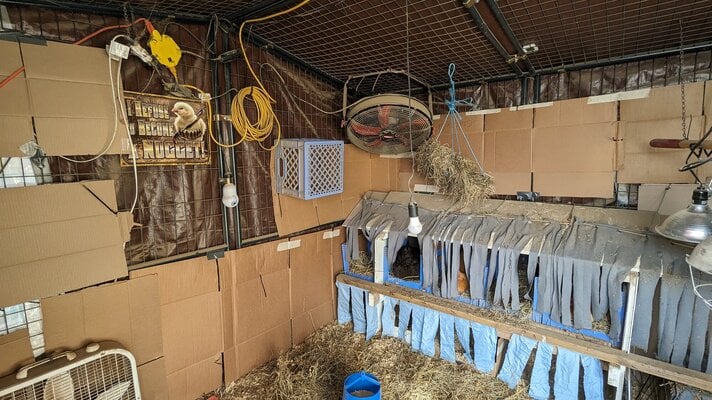
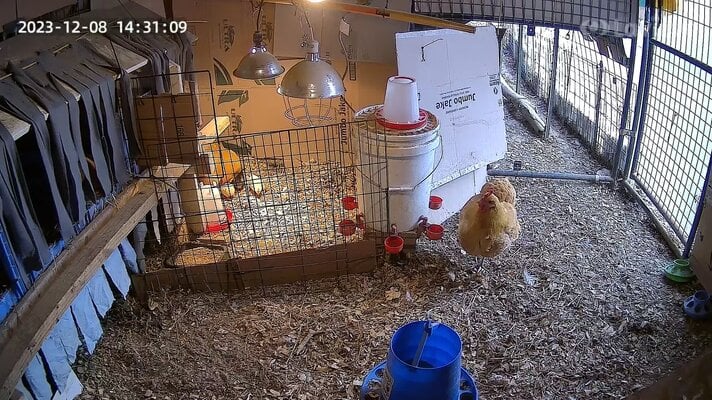
Added tarps for shade in The Yard, and nesting boxes in the Infirmary(which are getting an upgrade soon, and that photo is around December, so they had been using it for a few months before we added boxes as insulation to block wind)
*Now, yes, we didn't "need" to insulate it as we did but I spend a lot of time out with the girls, sitting, talking and visiting and I needed the insulation more than they did lol
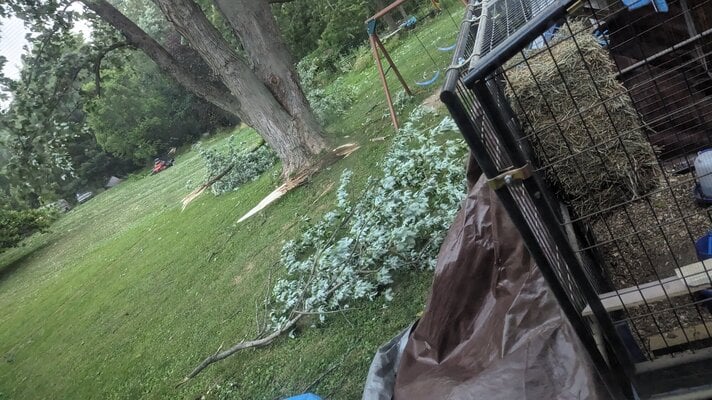
Had a couple more whoops due to severe weather, and I had forgotten to re-tie the roof panels down on the pen, my bad, but the girls survived and hung out under the coop- score!
*Oh, and the hoop helped to bounce tree limbs off
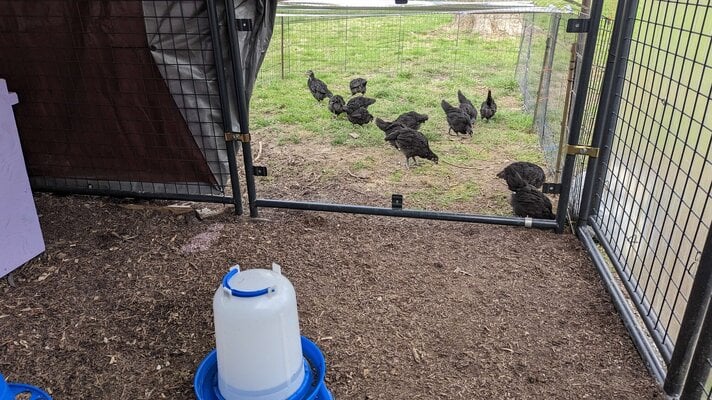
using dog panels we had from our front porch, we created an extra area for the girls to explore, and so i could see them from the kitchen lol I have a milk crate in the pen to sit and chat with them : ) and on days I'm home all day I sometimes open it up more. we have too many dogs loose to free range
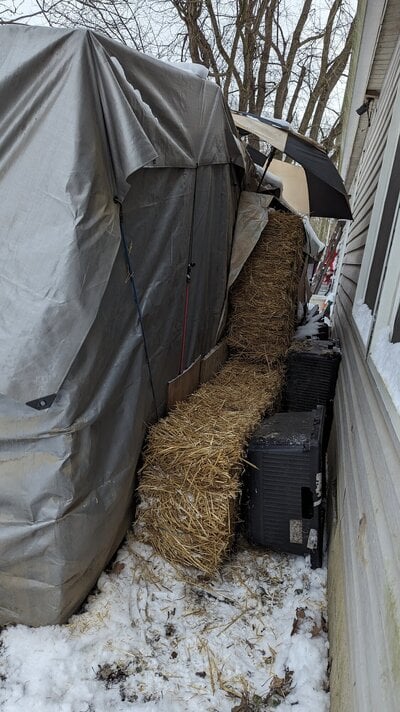
our first idea for winterizing had been straw bales and plywood, well, crap happens and we ended up using cardboard boxes from work(free and plenty) and empty feed bags! it isn't pretty but it worked. Live and learn.
*while some photos show a large open yard section, it isn't all ours, just past the tree is ours, so we opted to make the coop next to the house for security purposes. *privacy fence is end goal lol
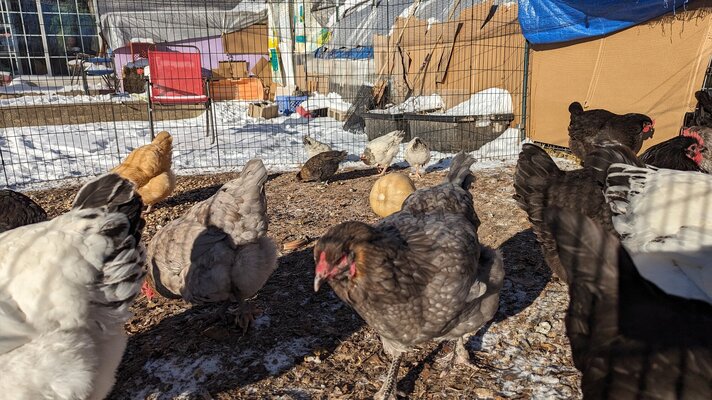
the only snow we got... we received a few dustings lol
so, it works. I can clean and walk around just fine, my husband and sons, not so much. we ended up with more chicks! and our broody hatched more too, so YAY!
Our first thought was to just put goat panels(4ft tall x 16ft long) around the hoop part like a popout square with a panel over half the top, but I'm 5 foot... my husband and sons are over 6 foot tall. So we decided to make a "real run" lol... after lots of planning, we decided on a design.
I guess I should also add, we hadn't upgraded when we had first wanted to do to lack of transport, but we're finally able to make it happen
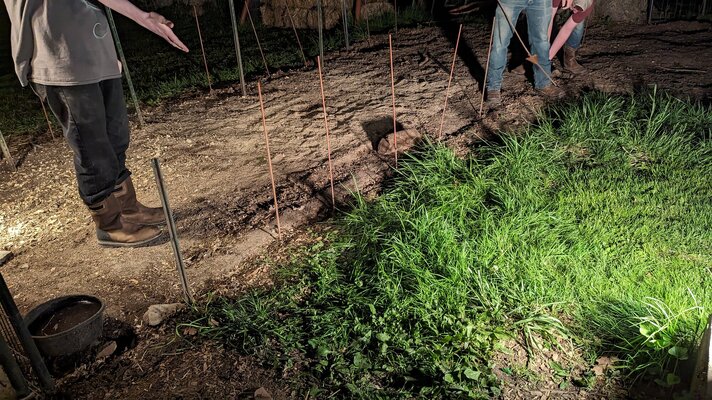
My son and I went to get lumber and supplies to prep for the big renovation super early one morning- I work second shift so it was a long day lol.
*2x4s -8ft and 12ft, strong tie right angle brackets and mending plates, u nails, and exterior screws. And since we already had 5 panels we measured out how many more we'd need and got 4 hog panels and 2 more goat(utility) panels
Since the entire hoop would have to come down and we'd have to section the girls off in the pen while we worked, we fitted pieces we could assemble first and went from there. So we would make it a day project- once everything was premade where we could do so.
Yet before we could do that we had to cut pieces, do a rough sanding, and we water sealed/stained the wood. Only got half of it done because it decided to rain for a week and we don't have a covered area to work.
But the girls enjoyed watching me stain! Lol the canopy was to cover it from the light rain we were expecting that night... And it was dried l by the time it stormed the next night and all covered. Extra step but hoping to save wood for the next few years.
Finally the time had come to assemble! We took the day before and all worked on cutting zipties and wires and removing bags, cardboard and tarps we didn't have to have right at that moment. *We did get a larger tarp from Amazon to cover pen and run! No more leaks haha (which was totally my fault from the storm that took the roof panel and tarp off. It wasn't a terrible leak, and I ended up putting a water bowl under it lol!)
During the day, as hubby and I work different shifts at the moment which sucks, but change is coming! Anywho, I assembled the side braces on a nice day in hopes to put it together over the weekend. Because we have to take down the hoop and put everything up at once we were trying to do everything we could before the time came.
We had a few hiccups, weather turned nasty and had a coccidiosis outbreak with our 5 week orders, so... It's been slow...
Took a half day from work with a break in the weather and took about 3 hours to disassemble and reassemble to at least be able to start working in the morning once the girls woke.
Early morning
And then the process... We had to run to town for one thing, so that's not too bad lol everything else we had one hand and ready!
It's pretty much finished. As we have a few tarps to fix and some branches to add, and even fix the doors we made on the end walls, but that's easier to do since everything is in place. As well as some tidying to do but exhaustion had caught up lol
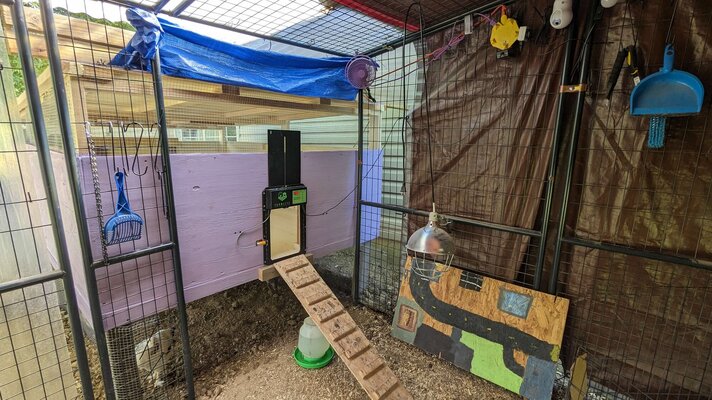
*And we even have a four by four section not in the run where we can make a hospital/isolation/broody pen-- hubby's idea!
We will also redo the Infirmary to make there be more boxes as Prime Real Estate gets crowded.
It may still have some quirks, it isn't perfect, but we like it and best yet, everyone can enjoy it!
Editing to add our first winter wrap! We bought OSB 4'x8' and drilled small holes and zip tied it to panels. We also got some clear tarping, after trying shower curtains. Marine vinyl will be next but pricing and figuring things out at first was first priority.
The South East wind is generally our concern. We did get snow dump this year, haven't in few years, and out slight slope wasn't enough but we already had contingency plan!
All in all, still happy. Plan on extending other side later this spring/summer.
When we first started this adventure over a year ago, we researched chickens and everything they needed for being outside. as seen in some photos, it may look like we have a large backyard, we do not. We had talked about a shed coop but that was out of our range and location in yard.
We had an (accidental) inside rooster, our avatar, Rocky aka PrettyBird, so we knew basics, and absolutely loved Rocky. He was an old man when he passed and he is dearly missed.

On to new chicks... Well, we decided to get a pen(8ft x 8ft) and build a coop raised off the ground. All good. We even had it built before we got our chicks- Black Australorp for their color, demeanor, and eggs.
The inmates

I present Cell Block F. It's not quite finished, we added more vents. It also had hinges to prop it open, not seen here.

Chicken math is real! And unless you are going to butcher your own birds, just our two cents, don't get straight run haha out of a total of 32 Black Australorp, we ended up with 9 pullets...
We used what we had for their extended run, which they enjoyed, but obviously made cleaning difficult as we couldn't easily access it lol


inside The Pen once we got them used to going inside Cell Block F


We had tried for roosts in the pen but couldn't work something out that gave the girls optimal space.
We did find more pullets and added color to our growing flock!


Then came time for moving new chicks outside while debating how to fix the run lol


My dad had some extra goat panels, 4in by 4in holes, 4ft x 16ft, and I had seen photos of a hoop style coop. we already knew we'd want to upgrade it, so we used repurposed rebar t-posts and dog play pen panels, and had a few oops along the way, but we got stable! for the moment! lol (FYI, there was a lot of cursing and grumbling...) we used 5 panels so it was 8ft x 20ft


So while we knew our coop wasn't big enough when we found more pullets, we had begun planning, knowing we had time but not lol
Using a free design we adjusted it to fit us. It's not perfect, it's built by amateurs lol but it works, and has space inside and underneath. We already knew that would just be for sleeping, so we were able to play with space.
Cell Block F got upgraded. we reused old pieces from a hammock swing, spares from my dad, and some new.
*4x4, 2x4, plywood (if redid would use thicker OSB), and deck screws, hardware cloth (priced and found cheaper on Amazon at the time)
***I also did a cleaning/reach simulation before we decided on 8ft instead of 6ft like planned. Once I knew I could reach to scrape out coop we left it 8ft x6ft and added the four sanded 2x4 roost bars
The poly sheets my step mom found super cheap somewhere and my dad had leftovers and we were able to use them--we did find later on that they turned it into a heat box(duh, but we were trying to block our freezing March wind here in Indiana, lol)
*That entire pen panel was removed to place coop to it for most space

New coop done! Yay! 6ft x 8ft with 4 roost bars, automatic door and a large backdoor for cleaning.


the underneath of run is 6ft x 6ft, and we've had to add top soil and peat moss and sand several times, they love it under there for dirt baths!

Cleaning... When the wind board isn't underneath, the totes fit right under and no mess!


Added tarps for shade in The Yard, and nesting boxes in the Infirmary(which are getting an upgrade soon, and that photo is around December, so they had been using it for a few months before we added boxes as insulation to block wind)
*Now, yes, we didn't "need" to insulate it as we did but I spend a lot of time out with the girls, sitting, talking and visiting and I needed the insulation more than they did lol


Had a couple more whoops due to severe weather, and I had forgotten to re-tie the roof panels down on the pen, my bad, but the girls survived and hung out under the coop- score!
*Oh, and the hoop helped to bounce tree limbs off


using dog panels we had from our front porch, we created an extra area for the girls to explore, and so i could see them from the kitchen lol I have a milk crate in the pen to sit and chat with them : ) and on days I'm home all day I sometimes open it up more. we have too many dogs loose to free range


our first idea for winterizing had been straw bales and plywood, well, crap happens and we ended up using cardboard boxes from work(free and plenty) and empty feed bags! it isn't pretty but it worked. Live and learn.
*while some photos show a large open yard section, it isn't all ours, just past the tree is ours, so we opted to make the coop next to the house for security purposes. *privacy fence is end goal lol


the only snow we got... we received a few dustings lol


so, it works. I can clean and walk around just fine, my husband and sons, not so much. we ended up with more chicks! and our broody hatched more too, so YAY!
Our first thought was to just put goat panels(4ft tall x 16ft long) around the hoop part like a popout square with a panel over half the top, but I'm 5 foot... my husband and sons are over 6 foot tall. So we decided to make a "real run" lol... after lots of planning, we decided on a design.


I guess I should also add, we hadn't upgraded when we had first wanted to do to lack of transport, but we're finally able to make it happen
My son and I went to get lumber and supplies to prep for the big renovation super early one morning- I work second shift so it was a long day lol.
*2x4s -8ft and 12ft, strong tie right angle brackets and mending plates, u nails, and exterior screws. And since we already had 5 panels we measured out how many more we'd need and got 4 hog panels and 2 more goat(utility) panels
Since the entire hoop would have to come down and we'd have to section the girls off in the pen while we worked, we fitted pieces we could assemble first and went from there. So we would make it a day project- once everything was premade where we could do so.
Yet before we could do that we had to cut pieces, do a rough sanding, and we water sealed/stained the wood. Only got half of it done because it decided to rain for a week and we don't have a covered area to work.
But the girls enjoyed watching me stain! Lol the canopy was to cover it from the light rain we were expecting that night... And it was dried l by the time it stormed the next night and all covered. Extra step but hoping to save wood for the next few years.

Finally the time had come to assemble! We took the day before and all worked on cutting zipties and wires and removing bags, cardboard and tarps we didn't have to have right at that moment. *We did get a larger tarp from Amazon to cover pen and run! No more leaks haha (which was totally my fault from the storm that took the roof panel and tarp off. It wasn't a terrible leak, and I ended up putting a water bowl under it lol!)
During the day, as hubby and I work different shifts at the moment which sucks, but change is coming! Anywho, I assembled the side braces on a nice day in hopes to put it together over the weekend. Because we have to take down the hoop and put everything up at once we were trying to do everything we could before the time came.
We had a few hiccups, weather turned nasty and had a coccidiosis outbreak with our 5 week orders, so... It's been slow...

Took a half day from work with a break in the weather and took about 3 hours to disassemble and reassemble to at least be able to start working in the morning once the girls woke.


Early morning

And then the process... We had to run to town for one thing, so that's not too bad lol everything else we had one hand and ready!


It's pretty much finished. As we have a few tarps to fix and some branches to add, and even fix the doors we made on the end walls, but that's easier to do since everything is in place. As well as some tidying to do but exhaustion had caught up lol
*And we even have a four by four section not in the run where we can make a hospital/isolation/broody pen-- hubby's idea!
We will also redo the Infirmary to make there be more boxes as Prime Real Estate gets crowded.
It may still have some quirks, it isn't perfect, but we like it and best yet, everyone can enjoy it!


Editing to add our first winter wrap! We bought OSB 4'x8' and drilled small holes and zip tied it to panels. We also got some clear tarping, after trying shower curtains. Marine vinyl will be next but pricing and figuring things out at first was first priority.


The South East wind is generally our concern. We did get snow dump this year, haven't in few years, and out slight slope wasn't enough but we already had contingency plan!


All in all, still happy. Plan on extending other side later this spring/summer.