General Information
- Brand
- Innovation Pet
- Manufacturer
- Innovation Pet, Inc.
- Model
- 222-08
- Product Price
- $200.00
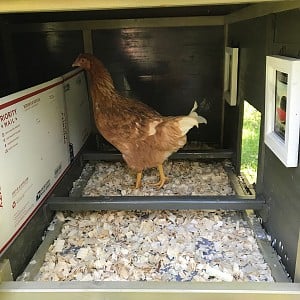
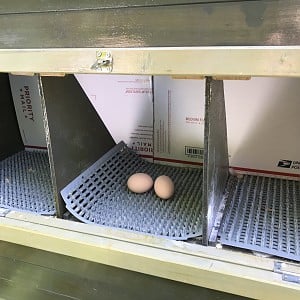
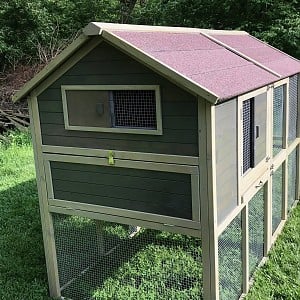
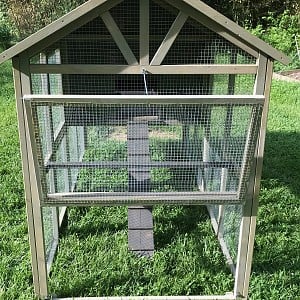
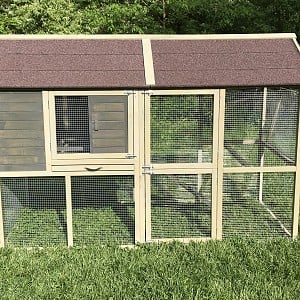
Structure: Description reports that this can house up to 8 hens comfortably but I would say 4 at best. The company is not following the recommended guidelines by Hatcheries that suggest 2-4 sq. ft. per bird in the coop and 5-10 sq. ft. per bird in the run. Having 4 chickens will allow 2-3 sq. ft. per bird in the coop and about 5 sq. ft. per bird in the run max. This leaves no room for expansion if your plan is to increase in the future. The current space feels busy and cramped after placing in small flock feeder and water fountain. To maximize space a hanging feeder placed on one wall would be recommended and the ½ inch chicken wire will not hold more than a Fleets Farm 5 inch rust resistant galvanized feeder. This is plenty for the day’s feeding amount if feeding ¼ lb. feed per bird per day for 4 birds. A hanging water fountain may tip or spill when bumped by the chickens due to reduced space and create a wet ground below. It also may collect mulch from hens scratching and kicking mulch out of coop into water fountain, which is in the line of fire so place one under coop. Mine, is hanging from forefront of the coop lower edge. I plan to transition to peck and drip watering system in the future supplied by a rain barrel or urn to reduce chlorination of water and cost. This will help give back more ground space. Coop weatherproof from rain mostly but does occasionally leak in a little wetting mulch with a hard rain but mostly dry. The run does get wet and puddles with hard rains even with roof so check out articles on BYC for muddy run. I will be honest when my husband was out of town and front window stuck while open, I did have to go to harbor freight to purchase tarp for a while. The structure has the advantage of easy quick clean up without entering coop but bending is stress on back to clean. This coop is good for temporary structure till new structure is built, chicken hospital, or integration pen for new flock members. I don’t see this as my long-term coop but a good starting point.
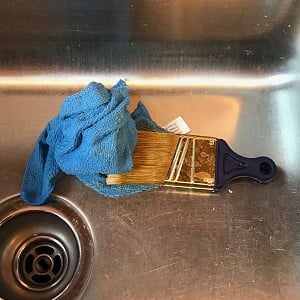
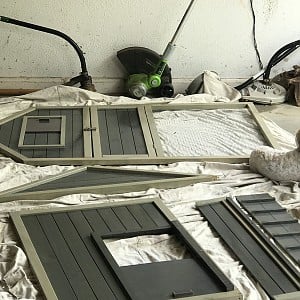
Prepping includes Weatherproofing: It does recommend to weatherproof first and this takes two coats over two days to apply marine varnish and 2 ½ quarts. Thompson’s Water Seal works here as well. I let dry 24 hours between coats and 48 hours at completion to dry and air out. This is for best weather protection for wood structure. Others who did not do this suffered faster deterioration of wood. When applying the varnish, need to lay out pieces on surface of painter’s cloth so will not stick. I used box it came in as well. Varnish is sticky. You will also need Mineral spirits to wash out brush and remove from hands if didn’t use gloves. Use gloves! Do not use paint sponges as this will break down with first application. I applied in garage with door open for ventilation and filled a two bay area.
Assembly: Takes an hour with drill due to pre-drilled holes and complete instructions. Easy if second person holding pieces when drilling together.
Cost: The cost to me was $200 during a spring sale at Tractor Supply Company (TSC) and free shipped to store for pick up. Regularly it is about $270.00 not including shipping. The dock will load it for you. It does fit in back of SUV with back flat and will need two people to lift out once at home in garage. There is a reason TSC uses a forklift. I set mine on side in garage as easiest to handle and slide pieces out one at a time.
Future recommendations would include:
1) The ramp was not pre-drilled and I drilled mine in. In the future would use hook and eye set up so easily removable for cleaning or moving the coop. Observed this in other set ups and works well.
2) After a few months the front window no longer slides easily due to heat/rain exposure and ½ inch chicken wire has required repair with stapler on hatch door to reattach several times. Prefabricated coops use chicken wire or hard wire when hardware cloth 19g ½ inch is most recommended for predator proofing. So I would not use sliding doors in the future on a coop design and would use hardware clothe in future.
3) Would have full size adult door for entry in future to reduce bending and stress on back.
4) Research predator proofing before assembly because will need even if in the suburbs particularly at base of structure (e.g.: 24-inch hardware cloth 19g ½ inch apron around base of coop/run with structure on pavers to block digging predators). Leave run space ground in center to use for mulch, straw, sand, etc. for easy clean up of run.
Overall the product is suitable but expect repairs and slight warping of wood as it is thin structure after first months of use. If I had it to do over again, would build own or purchase shed to modify for needs using maximum space recommendations for maximum numbers of chickens you intend to purchase or higher if expanding in the future. Hope this helps!
