I know with Spring right around the corner, and chick fever setting in there are a lot of people out there looking to purchase their first incubator, or maybe you're still looking for that incubator with a better hatch rate that doesn't cost you an arm and a leg, so I wanted to share my experience!
I did a lot of research before purchasing an incubator and there are good and bad reviews for even the most expensive incubators out there so taking my budget into account and what I wanted from my incubator I am SO happy with the results I got from my new Harris Farms Nurture Right 360! If you do your own research on the incubator most of the bad reviews you will find are on a couple of design flaws in the older models where the holes covering the fan were too large and it needed a cover on the digital readout to prevent it from shorting out from the high humidity at hatch time. In the newer models, these issues have been resolved but if you get an older incubator you can email the company and they will send you the appropriate parts to fix it.
So back to the PROS of this incubator, at least for me!
- It comes with an automatic turner! I found that the most reasonable incubators often require manual egg turning and if you purchase the accompanying auto turner you find yourself around the same price as this incubator or more.
- It also has an egg candler built-in to the top of the incubator. It worked well for the sake of testing it but I will admit that I didn't use it much because I prefer my little high lumen flashlight.
- The visibility all the way around the incubator was a HUGE selling point for me! I could say it was for my daughter to be able to learn from the experience but if I'm being really honest, I most definitely spent the most hours sitting in front of the incubator in awe as the chicks hatched. lol
- The temperature and humidity stayed stable throughout the entire incubation process as long as you add distilled water daily.

- You add water from outside of the incubator so you don't disturb the temp and humidity.
- The company calibrated the thermometer and hygrometer well and I didn't have to go through the headache of trying to adjust it myself.
- This is thanks to the visibility as well but I was able to clearly see that all of the chicks hatched with zero issues. The eggs zipped cleanly and chicks were healthy! Yes, some of this is from genetics but it makes a big difference when the temp and humidity stay stable for the chicks ease of hatching.
- Because I was incubating different breeds my smaller eggs hatched earlier and I didn't want to leave the chicks in too long. Since the larger eggs hadn't pipped yet I took the risk of quickly opening the incubator and removing the hatched chicks. While I don't recommend doing that, what I was pleasantly surprised to find is that the humidity returned to normal in seconds and the rest of the chicks hatched without issue.
CONS
- The top is a bit cumbersome to open and close but once you get used to it it's not so bad. I have also seen where someone used the adhesive plastic hooks and attached them to the sides upside down so that it was easier to hook their fingers under and open.
- The incubator holds 22 eggs but I feel like it would be very cramped in there if all of the eggs are viable at the time of hatch. I had quite a few infertile eggs because they were the first eggs of the season (8 infertile eggs to be exact) and 2 were quitters early in embryo development (it's impossible for me to know if the 2 quitters were due to the incubator or something else but I feel with my experience that it's less likely to be related to the incubator). All but one of the developed chicks hatched successfully and I candled right before lockdown and didn't feel good about that egg prior to closing the lid. It was also a poopy egg that I was hatching for a friend, I typically only use clean eggs as the bacteria can enter the porous shell and may have been responsible for the late embryo death. So my first run with the incubator gave me approximately 80% hatch rate (not including the infertile eggs). I anticipate having an even better hatch when I'm pickier about the eggs I set to begin with. - I'll update this later.
***I promise all of these pictures were taken through the plastic. I did not open the incubator to take pictures. lol
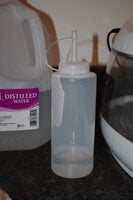
For anyone that reads this far through the thread I would assume you're actually interested in the incubator. So the best tip I have is that I used a condiment bottle to add the water and I left the vent open all the way through the entire incubation because I felt the ventilation was important and it didn't effect my ability to keep the humidity where I wanted it.

So my experience was great! I'd love to hear about your experiences with the Nurture Right 360!
I'll be participating in the Easter Hatch-A-Long with the same incubator so I will update my opinion if it changes.


