

The journey to our chicken adventures was a fast and furious one. We weren’t planning on getting chickens until next year when our new house will be complete and we move. We will have 20 acres and no close neighbors.
2020 is my 40th birthday year. We were supposed to go whale watching on Brier Island for the weekend (of June 13th), something I had been looking forward to and trying to make happen - literally for 10 years.
And then Covid happened.
After a very depressing day in May of canceling birthday plans, my husband said what do you want to do instead, I said I just want chickens. Just like 2 chickens and a little coop. This was of course all by text, by the time he got home from work, in his mind, 2 had increased to 4 (cause why not, already a victim of chicken math even though he had no clue what that was) and he asked what I wanted for a coop. What an amazing guy.
So fast forward to a week later, we had 5 chicks in our living room and a coop to build.
The basic design for the coop was inspired by Monks Coop.
Our cost was very minimal, as I said we are building our new home and had lots of lumber, metal roof left, screws, and other material left over.
The overall size was determined by how much metal roofing we had to work with.
Basic specs of the coop:
- Floor footprint: 5'2 x 3'8
- High side of the coop measures 4ft'10" at the front and 4ft at the back
- 2 Windows (1 opens, 1 does not)
- 2 Nest Boxes on the right side. Nest boxes are each 16"w x 19"h x 17.5" deep
- Access door on left side
- Vents run along the front and back of the coop and are also open along sides where the roof is attached
- Hardware cloth covers all the vents and the large window that opens.
Insulated floor to help keep cold from traveling up through the floor in winter.
The legs measure 2ft'3
The base is in place behind the garage (below our deck as we live above the garage)
The chicken door opening is 14" x 14"
I'm pretty proud of these windows and have my father-in-law to thank. We made the large window from the glass from an old shower door we removed last winter. It measures 4ft5" x 1ft6"
The smaller window is made from the glass from an old patio table. Upcycling!!
We didn't even have to buy paint, we had paint leftover from me painting the bathroom last winter (I also did our bathroom in a Star Wars theme
All the doors have latches which I have locked with a carabiner
The roost and poop board measured 4ft long, the poop board is 18in deep. There are 20 inches from the top of the poop board to the bottom of the lowest vent. The bottom of the poop board is about 15in above the floor
Vinyl flooring was put on the floor and in the base of the poop board, hoping this makes cleaning much easier!
Decorations!!
Thermometer
Mirror
and some Star Wars/chicken-themed pictures
Pitbull approved by Corona
The chicks moved in on Friday, June 12th, they were 5 weeks old at the time.
The nest boxes have been blocked off for the time being. One with a board, one with hardware cloth - so I can use this to introduce the next batch of chicks we are supposed to be getting.
Outside with the run attached and some more Star Wars-inspired decor
The run measures 15ft5" x 5ft8" (including the space under the coop
It is 7ft2" on the high side and 5ft8" on the low side
The door is an old screen door my inlaws were scraping from their house. It's on spring hinges and we have turn-buckles to keep it closed
Roof panel from above (looking down from our deck)
I have planted a little garden with herbs that I will be able to give to the chickens
-Chocolate Mint
-Lemon Mint
-Spearmint
-Oregano
-Comfrey
-Thyme
One of my hanging baskets has tomatoes in it which will be chicken treats as well. I also threw some pepper seeds in the little garden, I don't know if they'll grow but if they do, the chicks will see those too
The ladder in the coop is an old bunk bed ladder for them to roost on
The bin is a dust bath mixture of soil, sand, ashes, and DE. The bin has a lid for rainy days.
The backside of the run also shows my chairs on the other side. I love just sitting there watching the chickens do chicken things. It totally mellows me.
Since we used so much material we had leftover from building our house the actual cost for the coop was low. We bought:
- 4 smart siding panels at $25.64 ea, but we only used 3 panels so we are returning one.
- 3 roof panels at $31.88 ea and 21 strips to attach them at $1.79 ea
- Hardware Cloth 100ft roll at $210.56
Things we are wanting to add to the coop are:
- PVC feeders
- Digital thermometer with receivers so we can monitor the temp from the house
- Surveillance camera
- Electrical plug, in case we need to hang a light in the winter for additional warmth
- Hinged panels to close off vents in bad winter weather
Things we would do different/will do next time
- -Walk-in coop with more sq footage
- -Storage in the coop
- -Brooder area in the coop
- -Automatic door
We are already planning the condo coop for when we relocate to the new house, we have a shed which we plan on adding a piece to that will be for the chickens with a very large run area.
This coop will then most likely become a coop for the young chicks during integration.
UPDATES:
July 18, 2020
Well after having the chicks in the coop for the month they are pretty settled in. Once the summer humidity hit I felt the ventilation we had just wasn’t enough. My very understanding husband agreed and we put a couple of new vents in the coop. We decided to remove the stationary window and make it able to open (I suggested this during construction but "he just wanted it done") and we put another plexiglass window opposite it that opens. Both are covered with 1/2in hardware cloth. Very nice airflow in their now and even nice and brighter with the extra window. FYI to those looking to build, it’s true, you really can’t have enough ventilation.
Fall 2020
Sometime in the fall, I found a digital weather station on sale, it came with 3 sensors so I placed one in the coop, one in the run, and one outside the run. They seem to work well and I am pleased with it. It's a TempMinder indoor/outdoor, temperature with humidity. Model# TM22257VP.
Outdoor 1 - Coop
Outdoor 2 - Run
Outdoor 3 - Outside run
November 22, 2020
Winter set up complete! We put panels along the bottom so the birds wouldn't/ couldn't peck and eat the plastic. We also had the plastic higher but <i cut it back on the advice of some members. We decided next year we are just going to add panels and no plastic. We may do 2 rows of panels but at least those we can add and remove each year without them getting wrecked. The plastic will most likely not be re-usable.

December 4, 2020
First Egg!! Thank you, Roberta! It was a beautiful little greenish-blue egg. Now they are more olive. (about 2 days later we got our second egg from Lizabeth)

December 16th, 2020
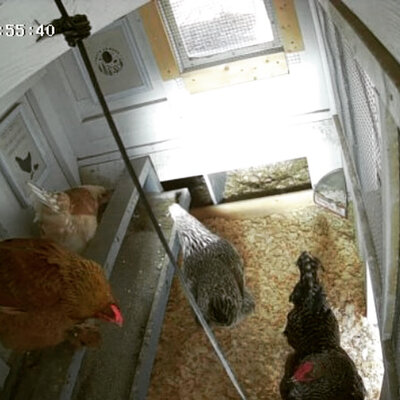
I finally got my camera set up in the coop. I purchased the HemiVision HMD2 off Amazon, I got the solar panel to go with it so I don't have to worry about charging it. It was really to observe who was in the nest box, but I like having this feature, and this year I want to add another to the run. I bought this one on the recommendation of another BYC member (whose name I can not remember to give credit to) but I'm very happy with it. Sometimes the connection to our wifi is a bit touchy but it's probably too far away for a great signal, and I'm thinking maybe the metal roof on the coop doesn't help, but that's just a guess. It seems to work well, even in the cold. The images are in color and it has night vision as well.


January 1, 2021
We made our PVC feeder today. I think it looks pretty good and the birds seem to prefer it over their other feeder. I fill this up about once a week. I might have to move it come spring when we take the plastic down, so rain can't get at it. But we will cross that bridge when we come to it.
I also moved the other feeder out of the coop and hung it at the end of the run. I felt they needed more feeding areas as I noticed Lizabeth was getting bullied away from the food. You can also see the extension cord running down the left side of the coop to power their heated waterer.
Today is also the day our 3rd and final girl laid her first egg! What a way to bring in the new year! Go, Genevieve!
3 Beautiful eggs from the Rebel Base Coop
December 5th, 2021
This was moving day for the chickens, the cats, dogs, and hubby, and I moved to the new property yesterday. I don't have any pictures of the coop being moved, I was incredibly stressed about the coop and run being loaded onto trailers and whistling down the highway. The birds were all loaded into a large dog crate and placed in the back of the SUV. They were all looking at me like "what the heck?" but they did great and were enjoying the new property as soon as they were set free.
My husband had made the run to easily detach from the coop with moving day in mind. With everything strapped down, we did the 7-minute drive to the new house.
The boys got everything unloaded and in place ( I don't have any photos of that either, I went to the store to get lunch supplies to feed the helpers, but I'm glad I wasn't there because I'm told he had to dump the coop off the dump trailer to unload it. That would have pushed my stress level over the edge!)
It's now all in place and reassembled. The chickens are very happy in their new spot. We placed the coop under a few large trees to give it some shade protection, the downside to this is it gets so much shade protection that the run tends to take a long time to dry up after any amount of rain or snow gets in it. Had we realized this area was in a little bit of a flat spot at the bottom of a very small, hardly noticeable downward slope, we would not have placed the coop here. So really look at where you want to place your coop.
After using this coop for nearly 2 years, crawling in and out to scoop the poop board out is starting to get old! I am not getting any younger! I would drop hints like "had I known then what I know now, I would have asked this coop to be a walk-in instead of elevated", "I love my coop but...", "I can't wait until we can build a bigger coop". Well hubby who does not normally pick up on my hints, either that or he is really good at ignoring them, finally one day said "what if we built an 8x8 coop and used the existing run on it". I was happy with that, I could totally make that work. So I started drawing things up, figuring out how I wanted to lay it out and he would look and say, "well do you want storage in it? What if it was 8x10"? So fast forward to the end of about a 2 week period of serious discussion and we have settled on a 10x12 coop (8x10 for the coop and 4x10 for storage) and a new 10x20 run!
We will be moving our shed from our old house to our new house within the next couple of months, and apparently, he doesn't want "my chicken crap" in their anymore

The girls and Phillip should be moving into their new home this fall!
I can't wait until I can post and share the new coop with you all. I will be documenting the process all along the way. It won't get started until later this summer but I am so excited already!!
July 10, 2022
Remember when I said I wasn't getting any younger? My days for cleaning my poop board are usually Wednesday, Friday, and Sundays. As I said, crawling in and out of this coop was getting old, but our building of the new coop is getting pushed back a bit due to other things that need to happen first around the yard so I made the decision to remove the poop board from the coop today.
Now let me say, I love the functionality of a poop board. I recommend you have a poop board in your coop, it makes cleaning up so much easier and contains the majority of the poop to a specific easy-to-clean spot. Having said that I personally feel that in these smaller coops they are just harder to manage. In a walk-in coop where you can stand there and sift without crawling through other mess on your hands and knees a poop board is/would be fantastic. So out it came! I wasn't sure how the birds would react to this change but they didn't seem to care at all. and by doing this we actually made the roost slightly longer, as the old one wasn't the full width of the coop. It also gave them a bit more floor space, they could get under the poop board but there wasn't much headroom.
Now I will just top up my shavings once a week. I really wish I could find some hemp bedding to try.


 I think we are going to do 20". We have all the wood we need to get started and scored some free vinyl flooring (to line the boards) from our local flooring place today!
  If all goes well we will be moving our chicks in this weekend. They are 5 weeks old and nearly all feathered and are up to 6-7 hours a day in their run!