
Hey there everybody! I got the opportunity to process a young Easter Egger cockerel for my boss several days ago. Usually I only process my own cockerels out of necessity, but I took this guy off my boss' hands because he's a big ol' softie who does not like to process birds (totally understandable). Now, this bird was by no means a good bird - most of the genuinely nice cockerels which come into my workplace we'll attempt to rehome before turning to slaughter, and we are actually pretty successful in this. This male, however, who was brought to us by a young man who'd accidentally received an Oops rooster when purchasing Easter Egger pullets. He'd attempted to keep him, but it wasn't working out - the bird was not only a shin flogger, but also a very aggressive mater, and had "scalped two hens in the past week!" So at the behest of my boss, I took the little brat home one night after work, and I processed him the next morning when I had some free time before class. I'm finally making this because 've had a request for pictures of my rooster slaughtering methods and I've been meaning to make a guide to my style of butchering for about 6 months now (shoutout to @cherryblossom for getting me to sit my butt down and do it!).
This method is ideal for birds such as roosters, old laying hens, other old/male poultry, and any small birds such as partridge or quail. It is significantly faster than standard plucking methods and while a skinned bird tends to be "uglier" than a plucked bird, unless the bird is for roasting or presentation purposes, it works just as well yet is twice as fast. I hope anyone reading is able to get good information from this, be they beginners or seasoned processors. Be warned that it IS graphic and includes detailed photos of the killing, skinning, and gutting process. Enjoy.
---------------------------------------------------------------------------------------------------------------------------------------------------------------------------------------------------
Step 0 of any slaughter is to gather your tools. I used to spend 20+ minutes getting all my supplies together to butcher a bird, then another 10+ double and triple checking everything. Now, after four years of processing, I just sharpen my knife, fill a bowl with water, grab a plastic grocery/small trash bag, and head outside. That's all that's strictly necessary for this method.

Step one is to get your bird and hang him. Or you can get an axe and lay him down on a stump; I don't use that method and can't give any practical advice on it; I'll be covering slitting the throat instead since it has been the best method I've found. I use baling twine to hang them by. in this case I wrapped it directly around the legs; for a more permanent option, you can tie a caribbeaner to the end of the baling twine and zip tie the legs together before clipping him up. It prevents you from having to spend five minutes untying him or simply having to cut the twine each time. I hang my birds off the back porch when killing them; if I hang them between two support beams, they are suspended in midair and unable to damage themselves on anything when bleeding out.
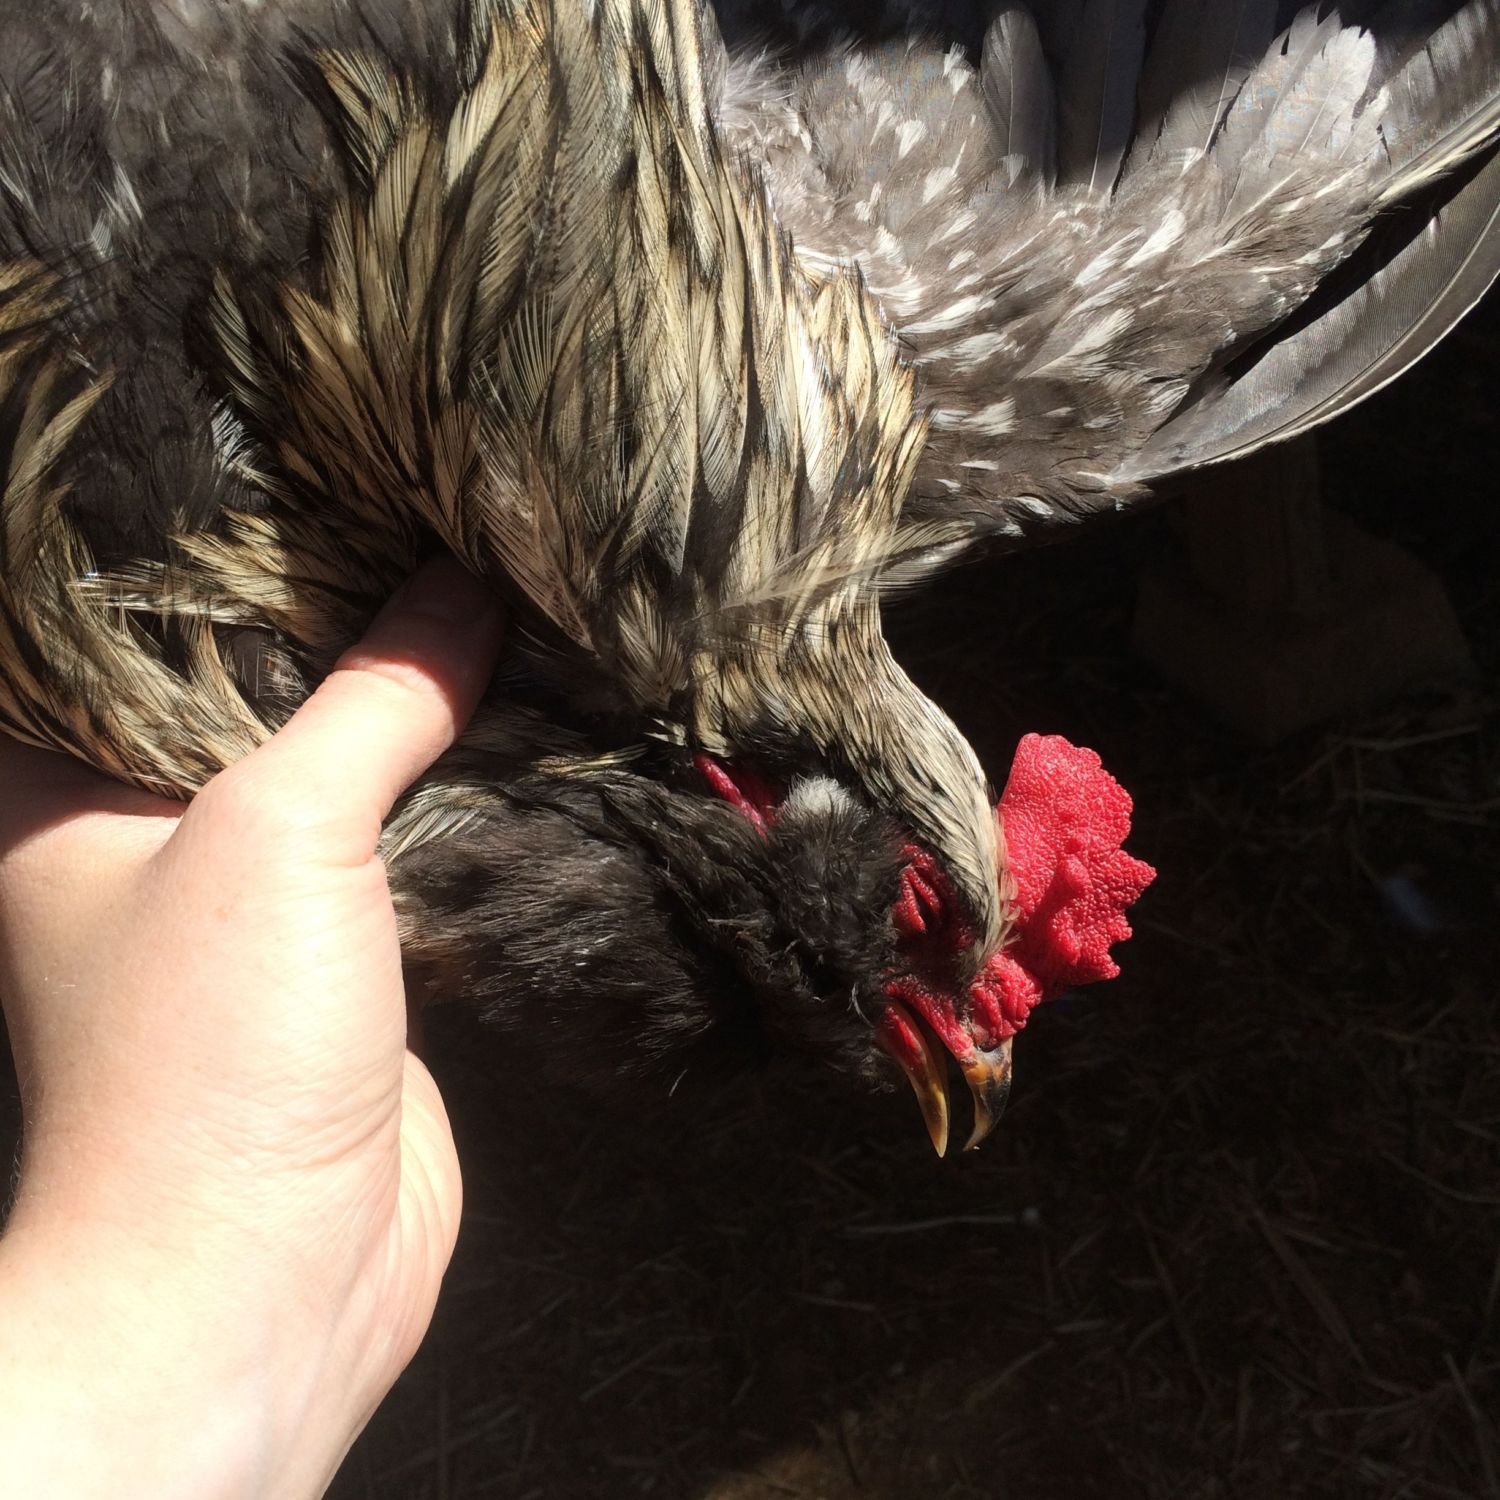
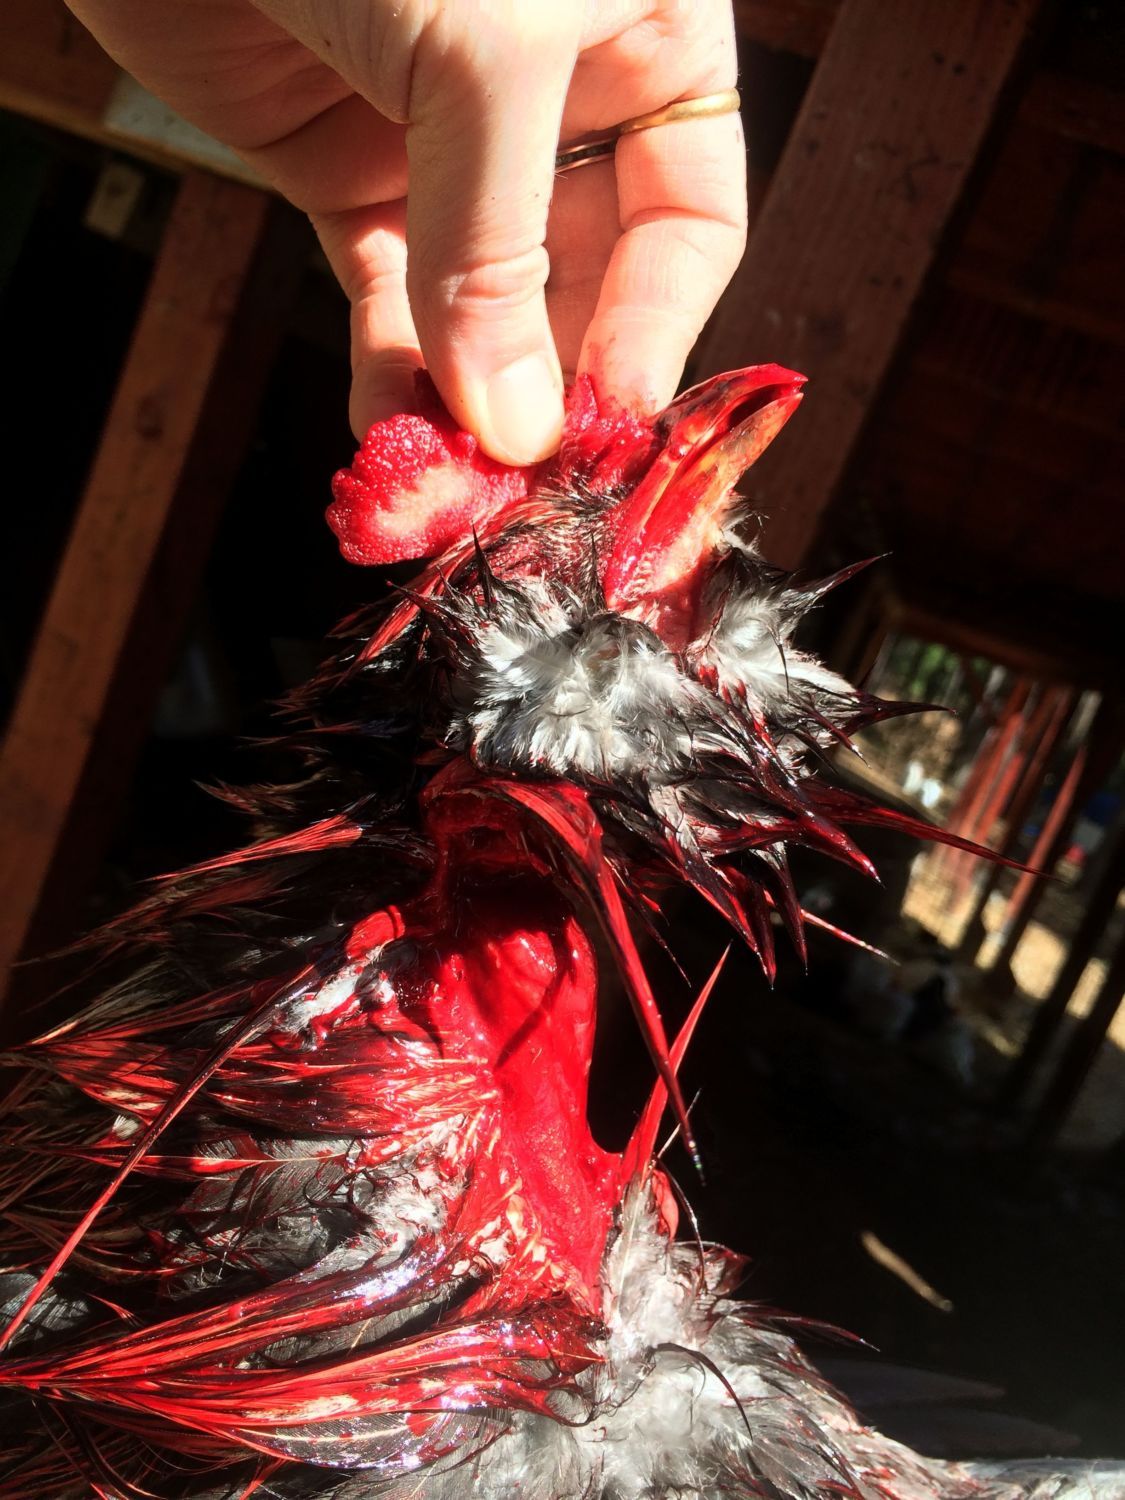
The best way to grab the head. Yes, this is uncomfortable for the bird; the grip has to be firm enough that he can't jerk his head away. It's best to only grab the head just before cutting, to minimize discomfort.
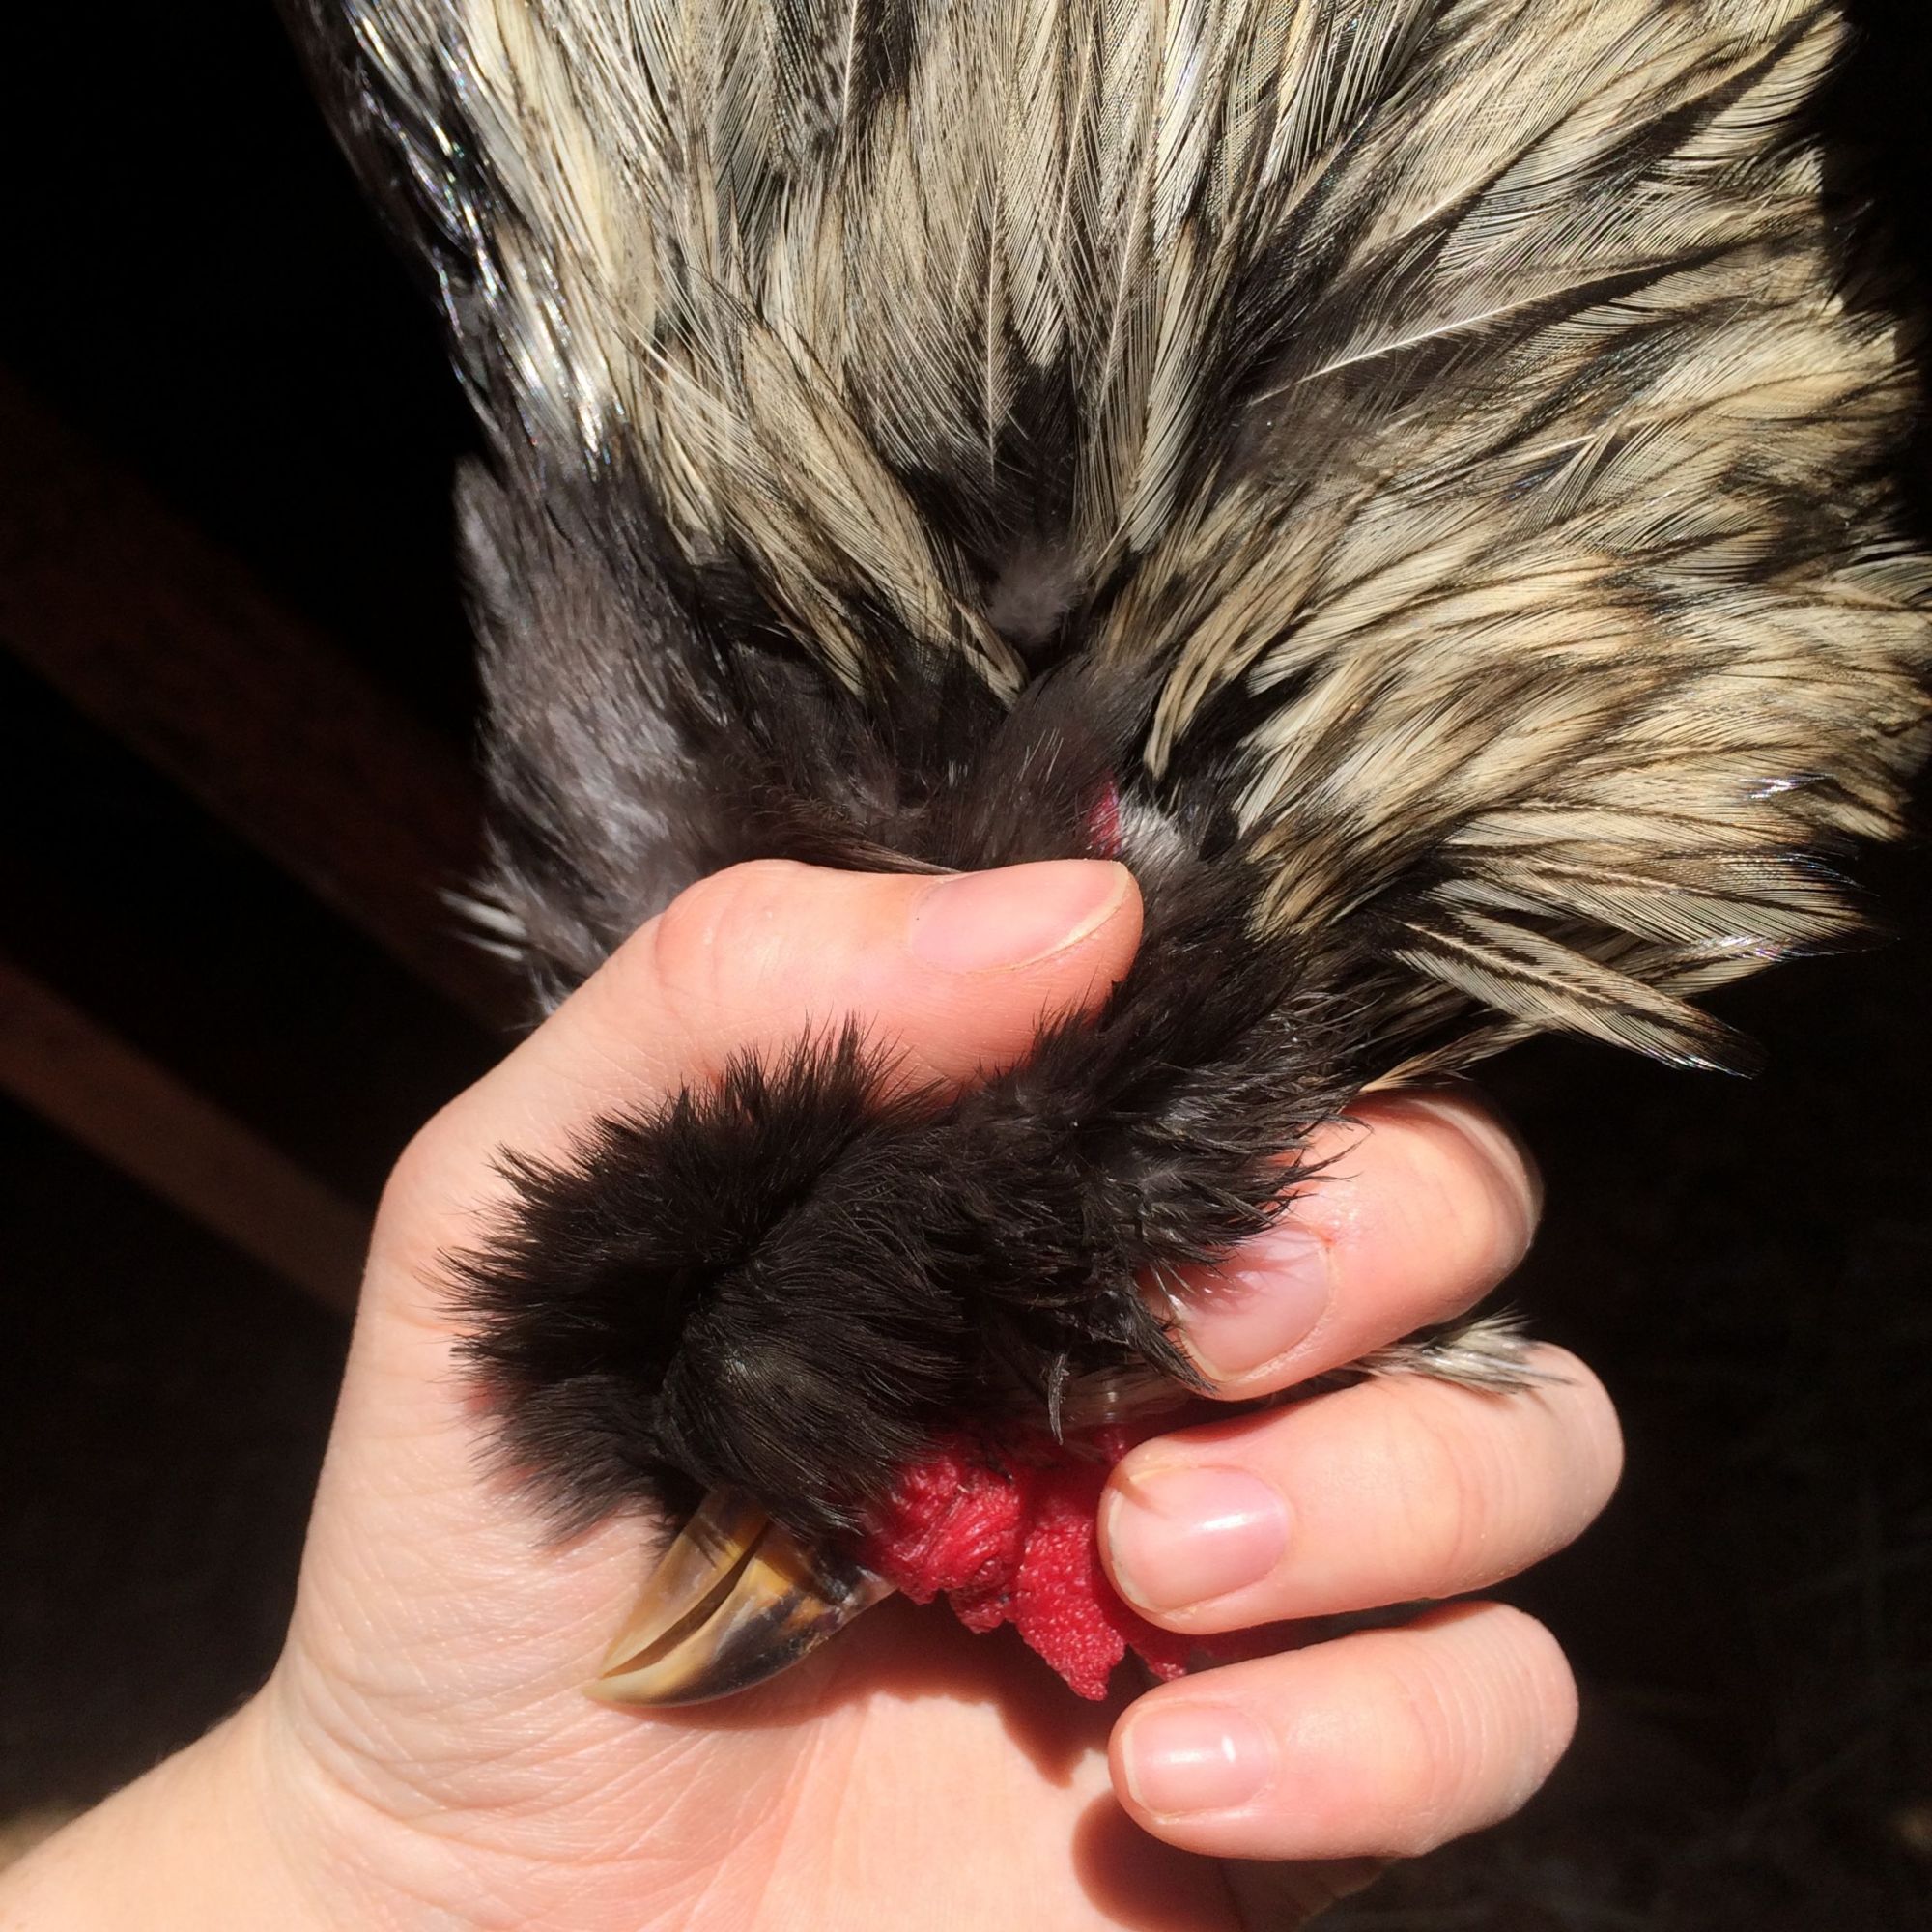
Side-shot showing where to cut. In hindsight it would have been better to do this guide using a non-bearded bird, but oh well.
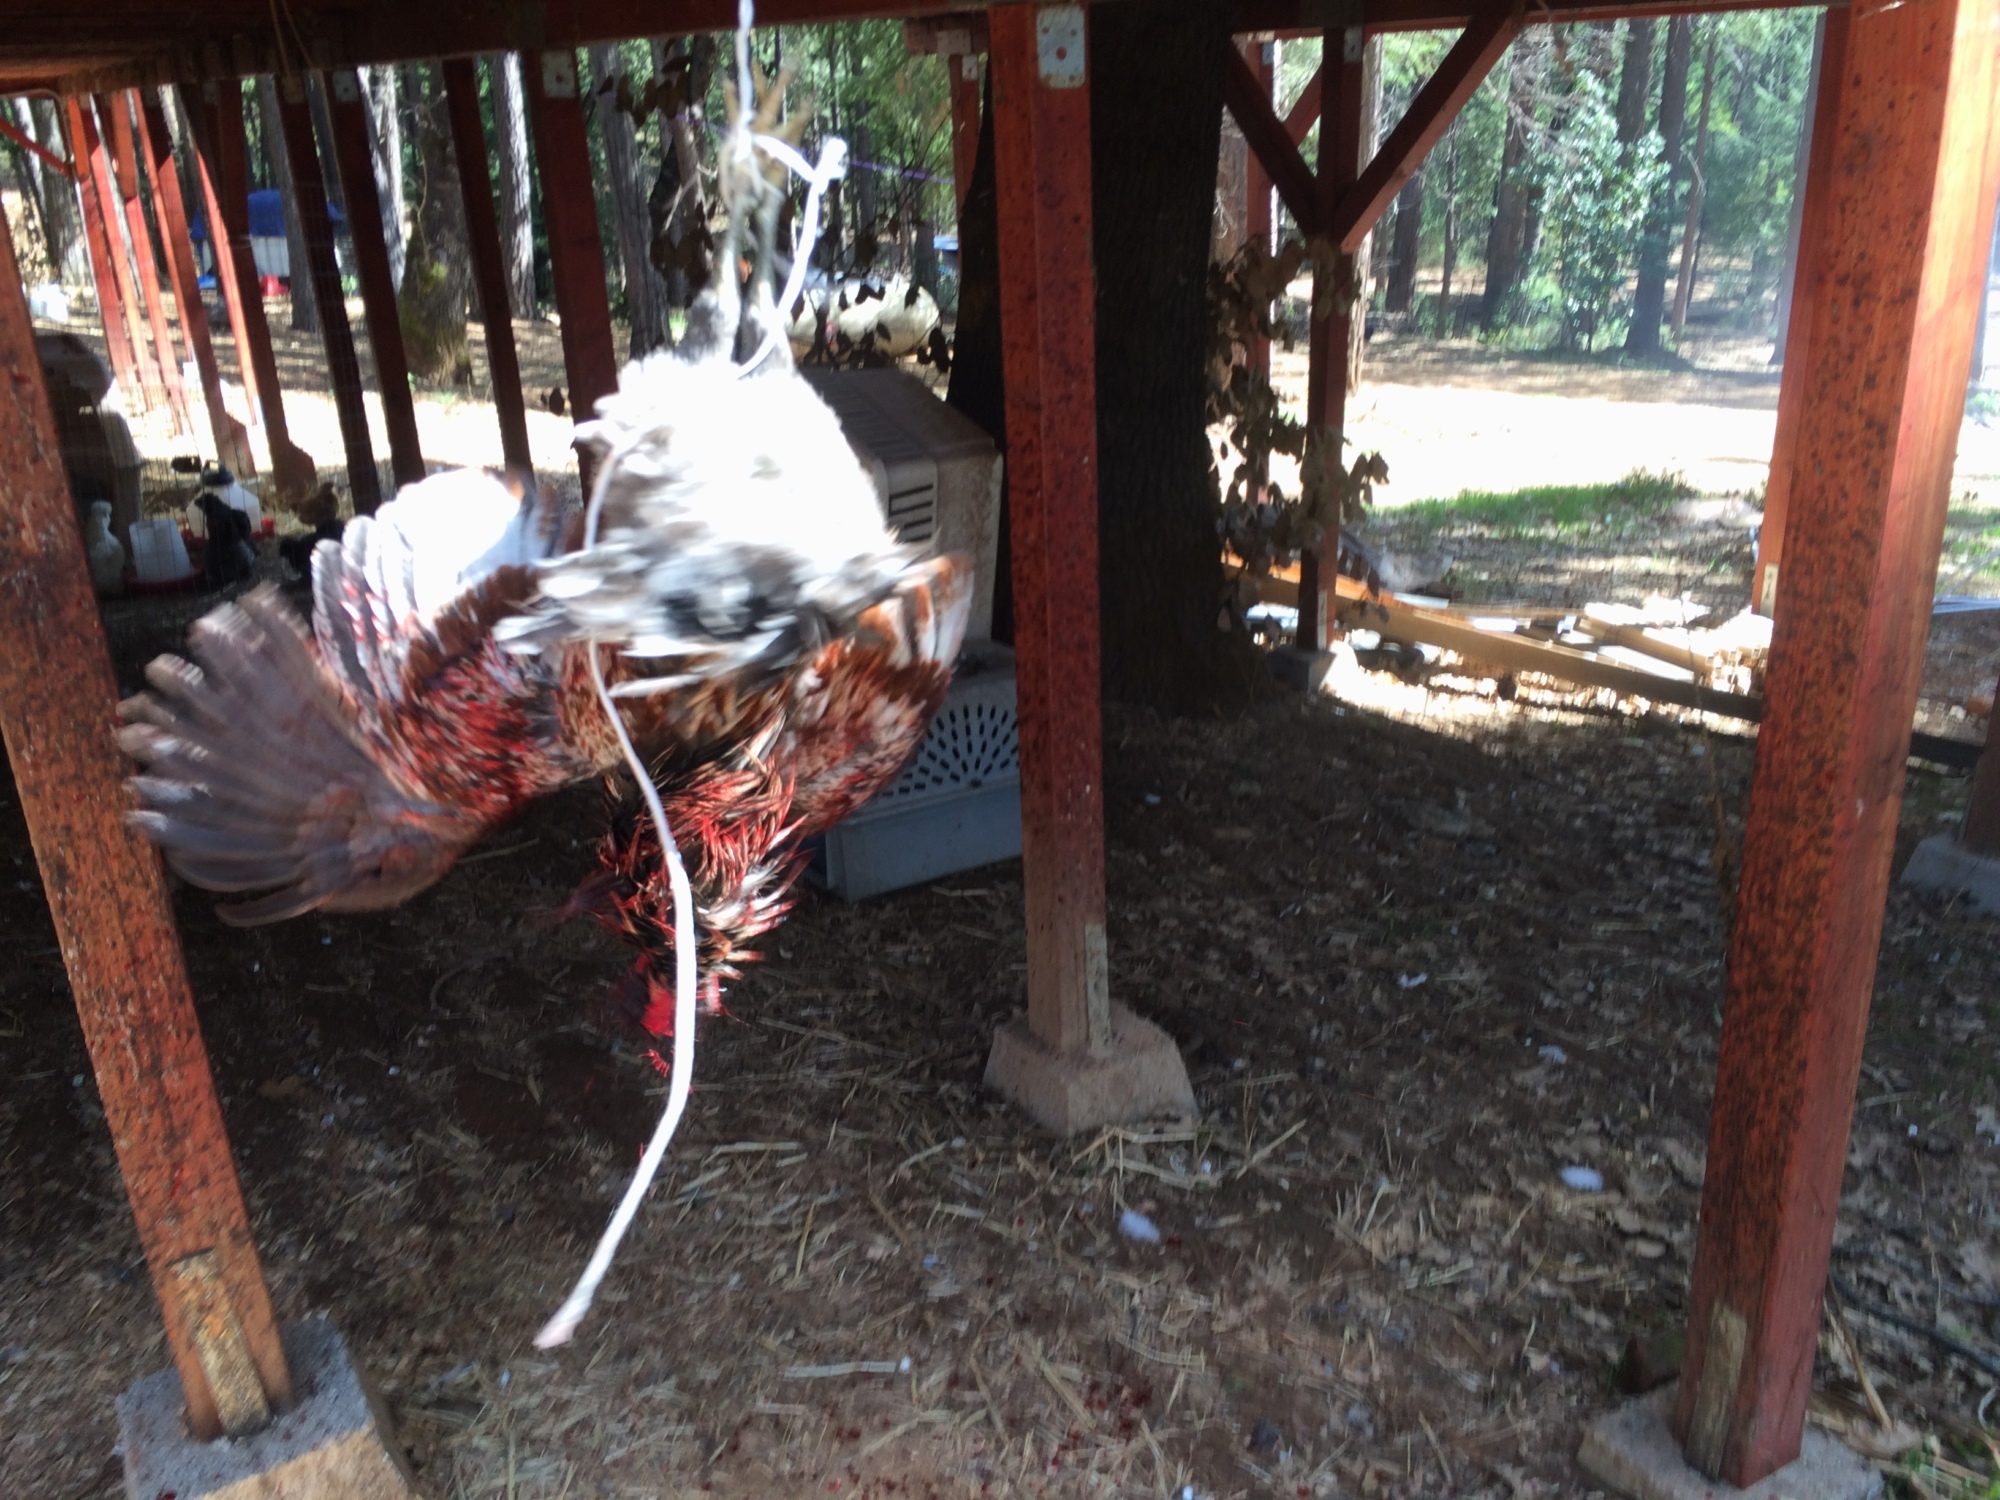
Post-cut flapping. Expect about 2-4 minutes of this, though birds usually lose consciousness in less than a minute. You can be sure the bird is dead if the eye doesn't blink when poked.
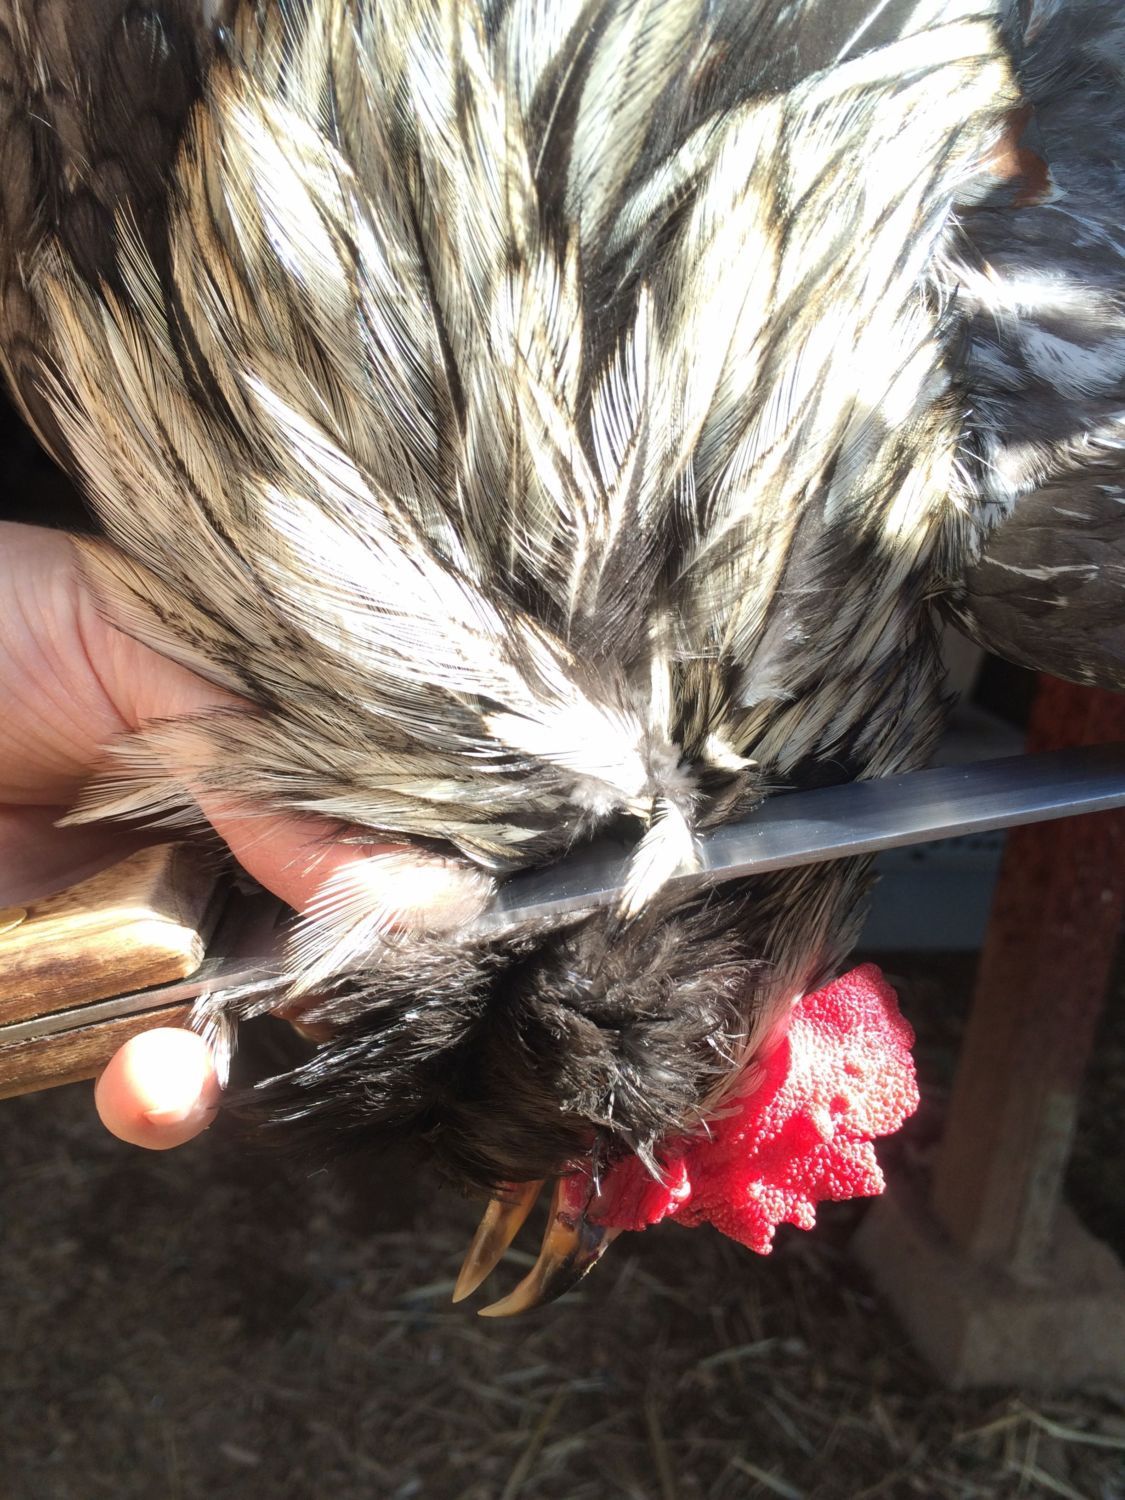
The cut. I am not shy about cutting. Some folks do a neat slice on either side of the head; I do quick heavy sawing and cut back to the bone. If done hard with a sharp blade it won't take more than a few seconds to get a cut like this, and it guarantees you won't be missing any arteries.

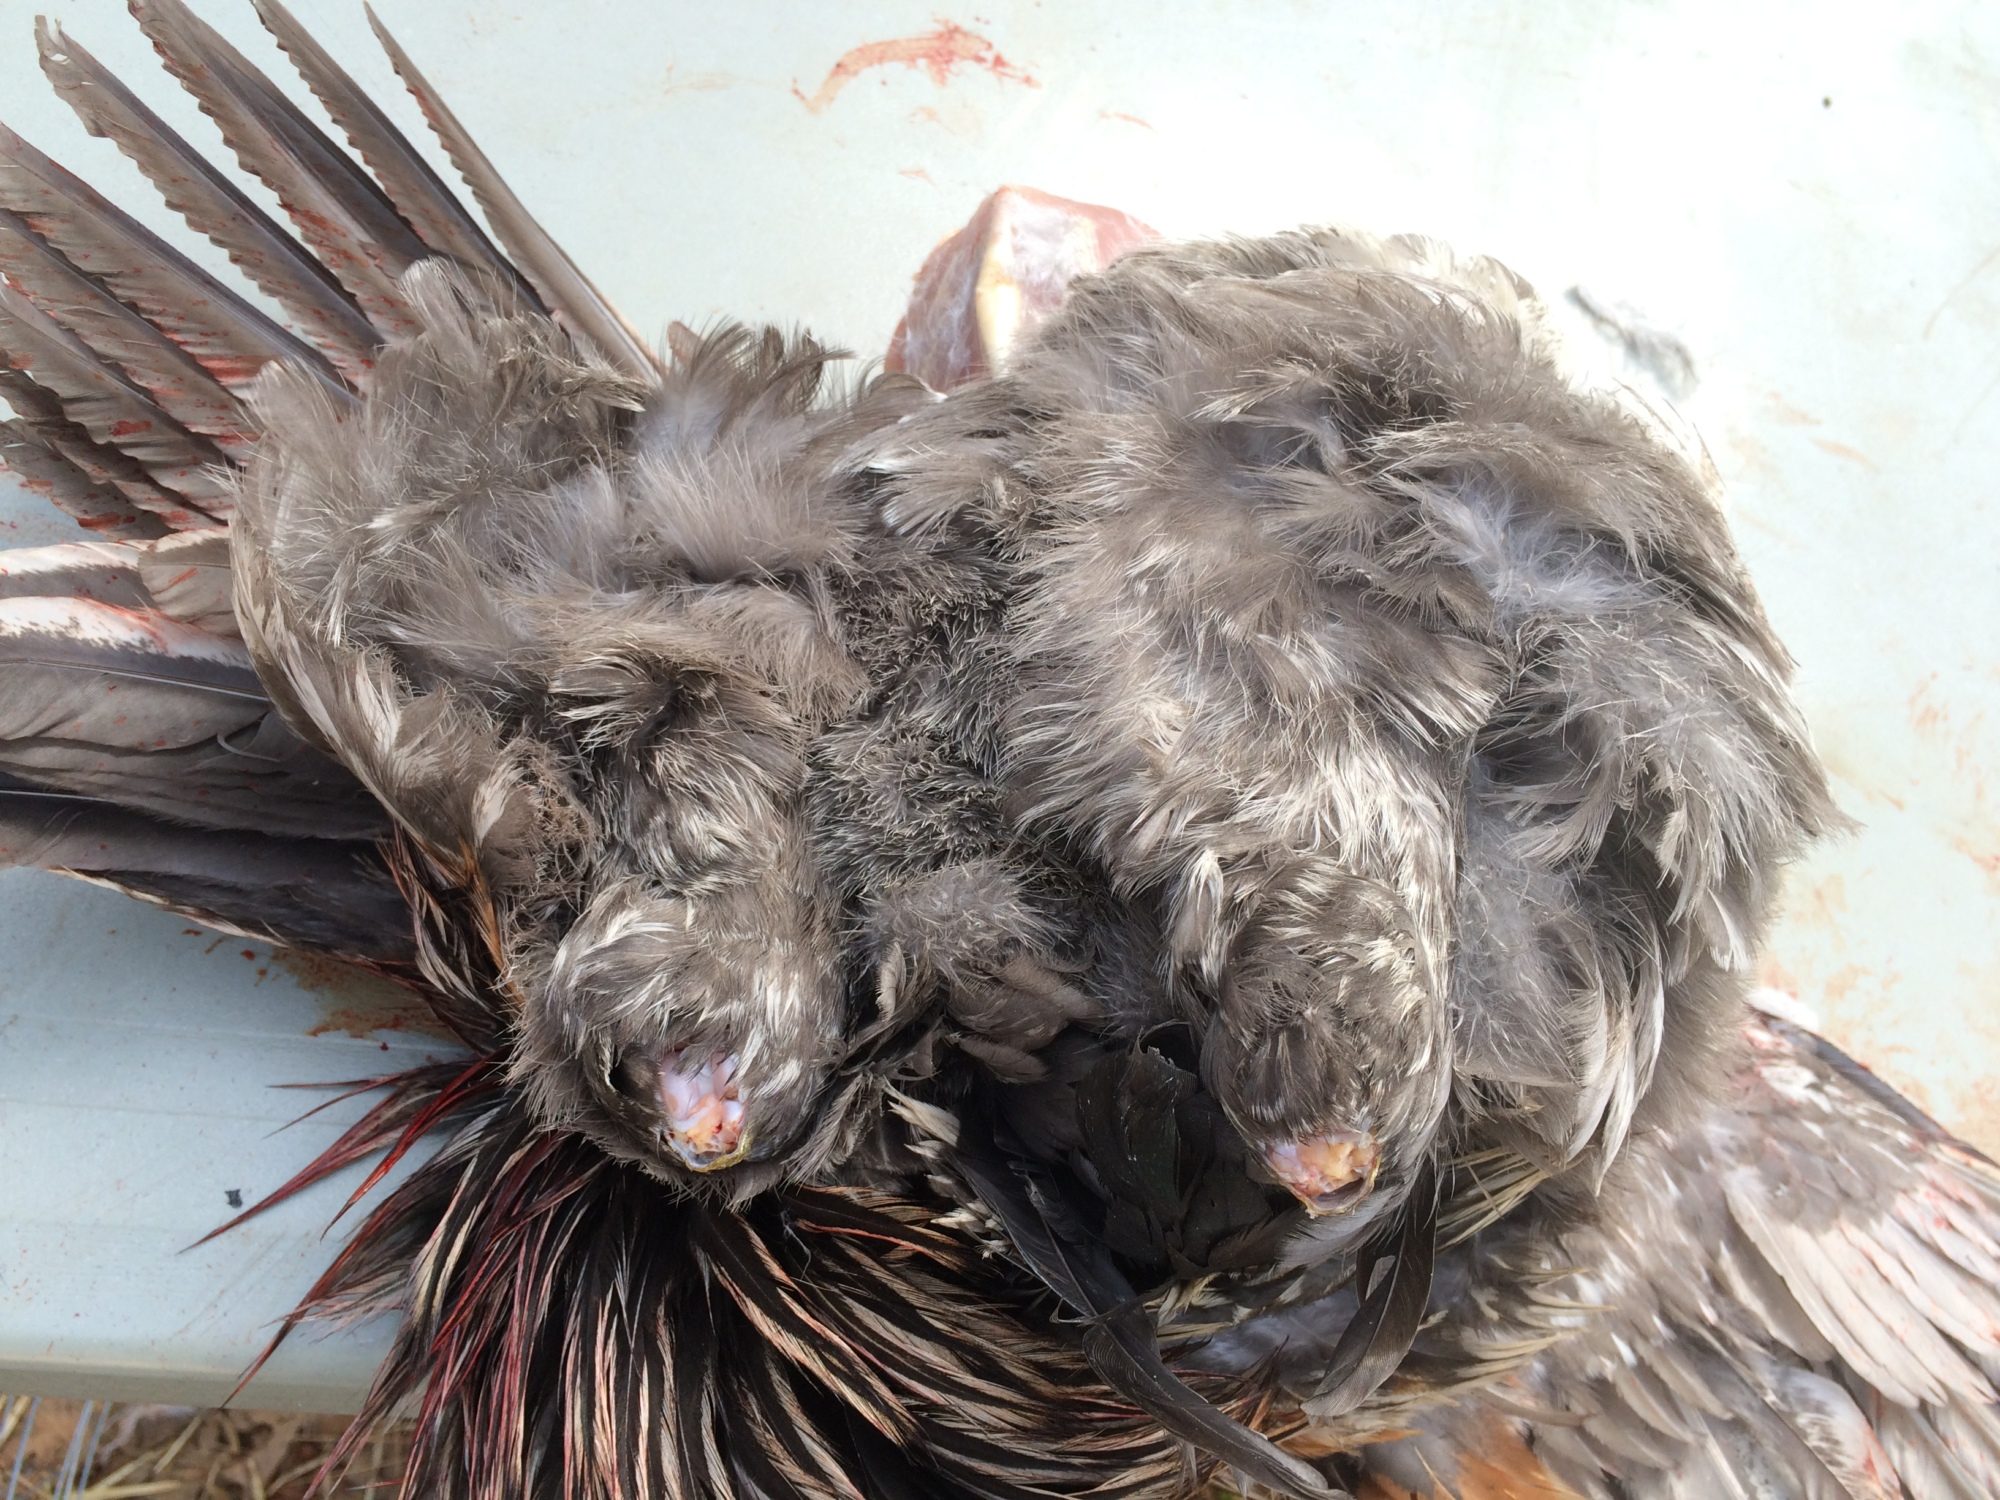
Place the bird flat on its back on a clean surface.
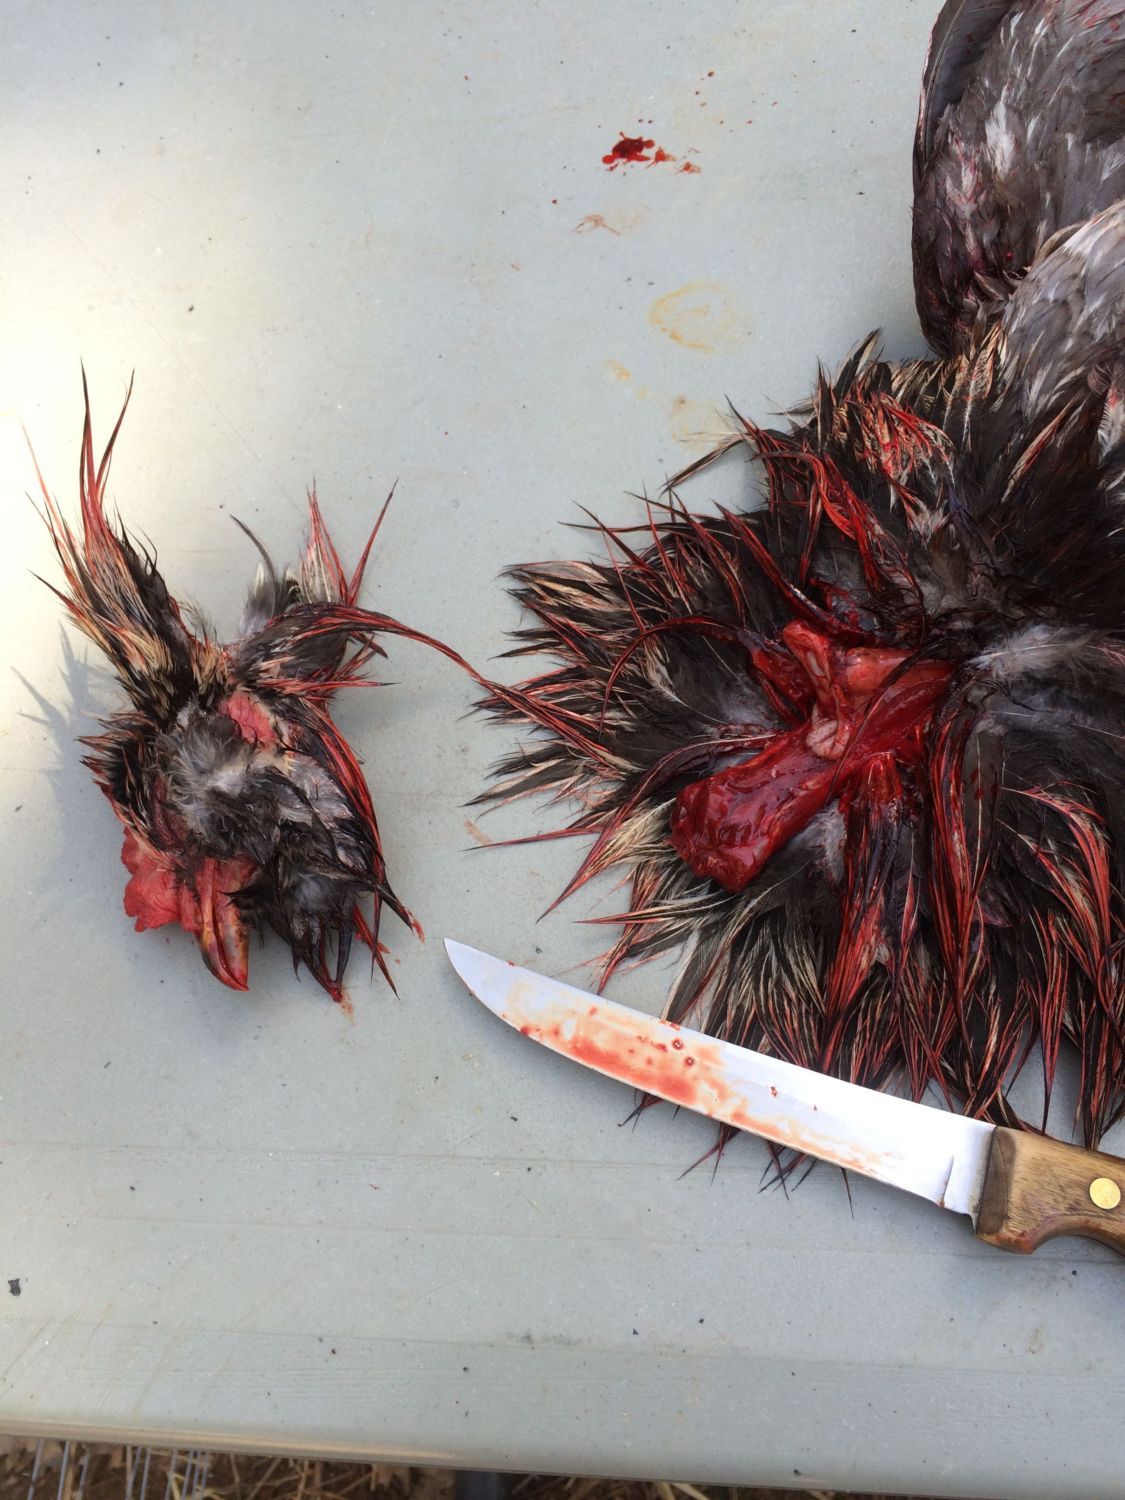
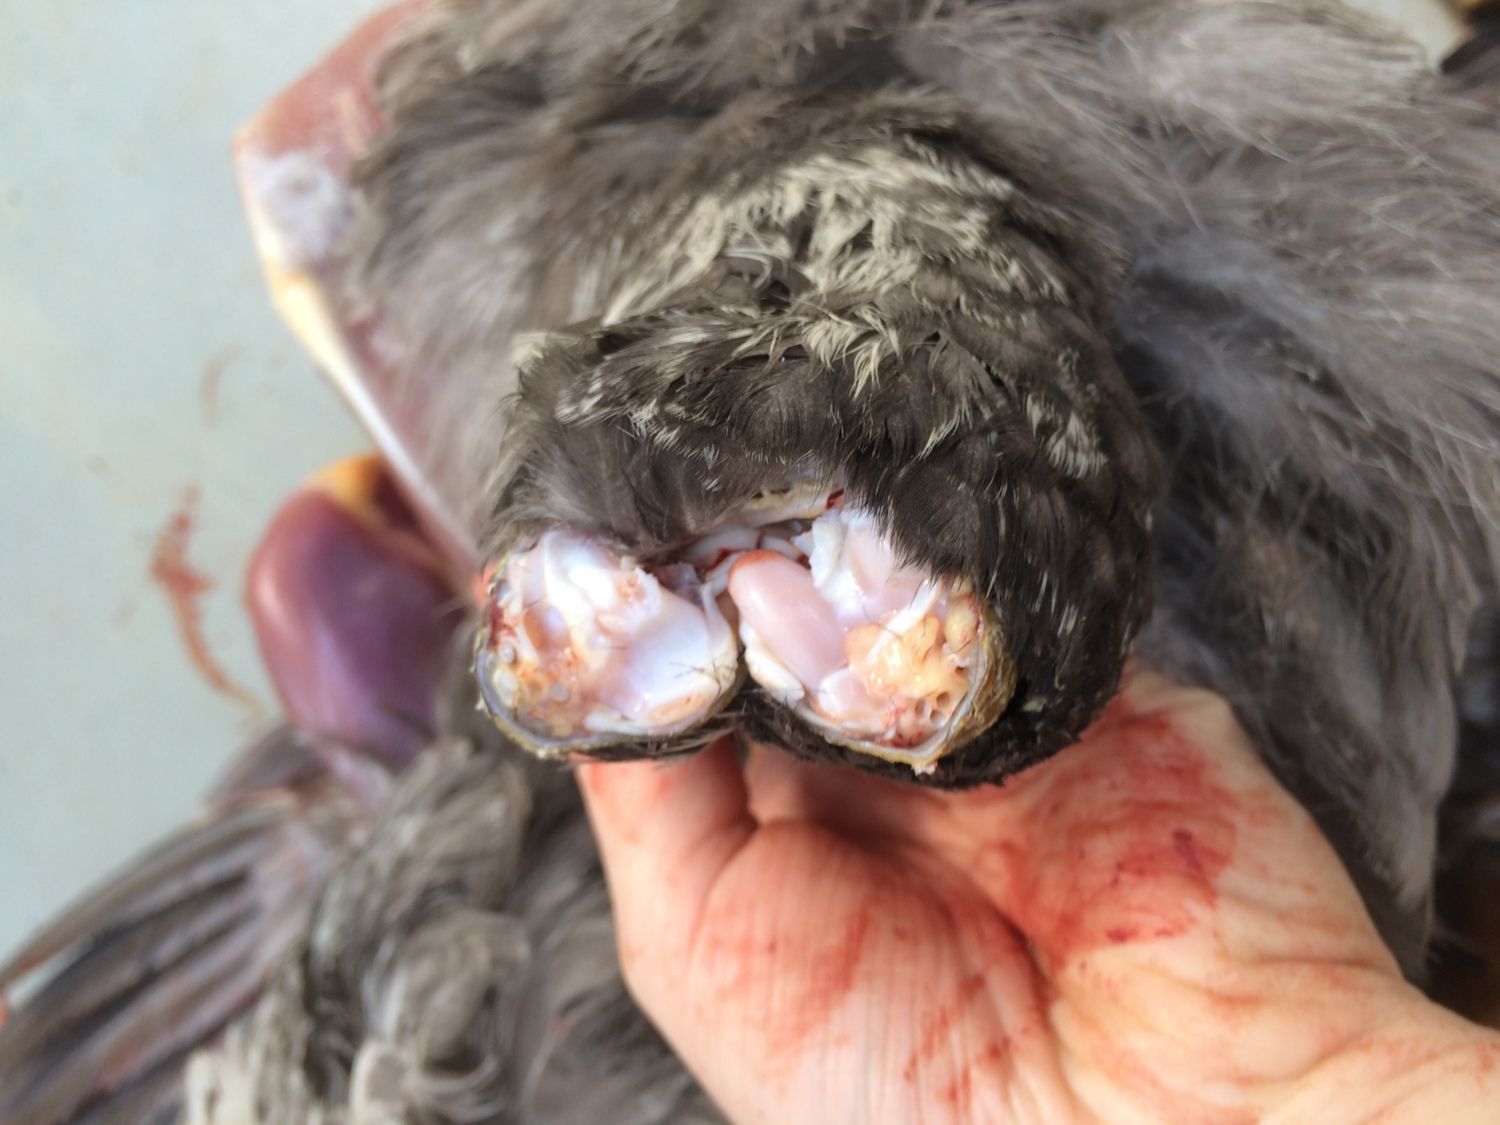
Head off. I find it easiest to grab and twist to break the neck, then cut the remaining tissue with the knife.
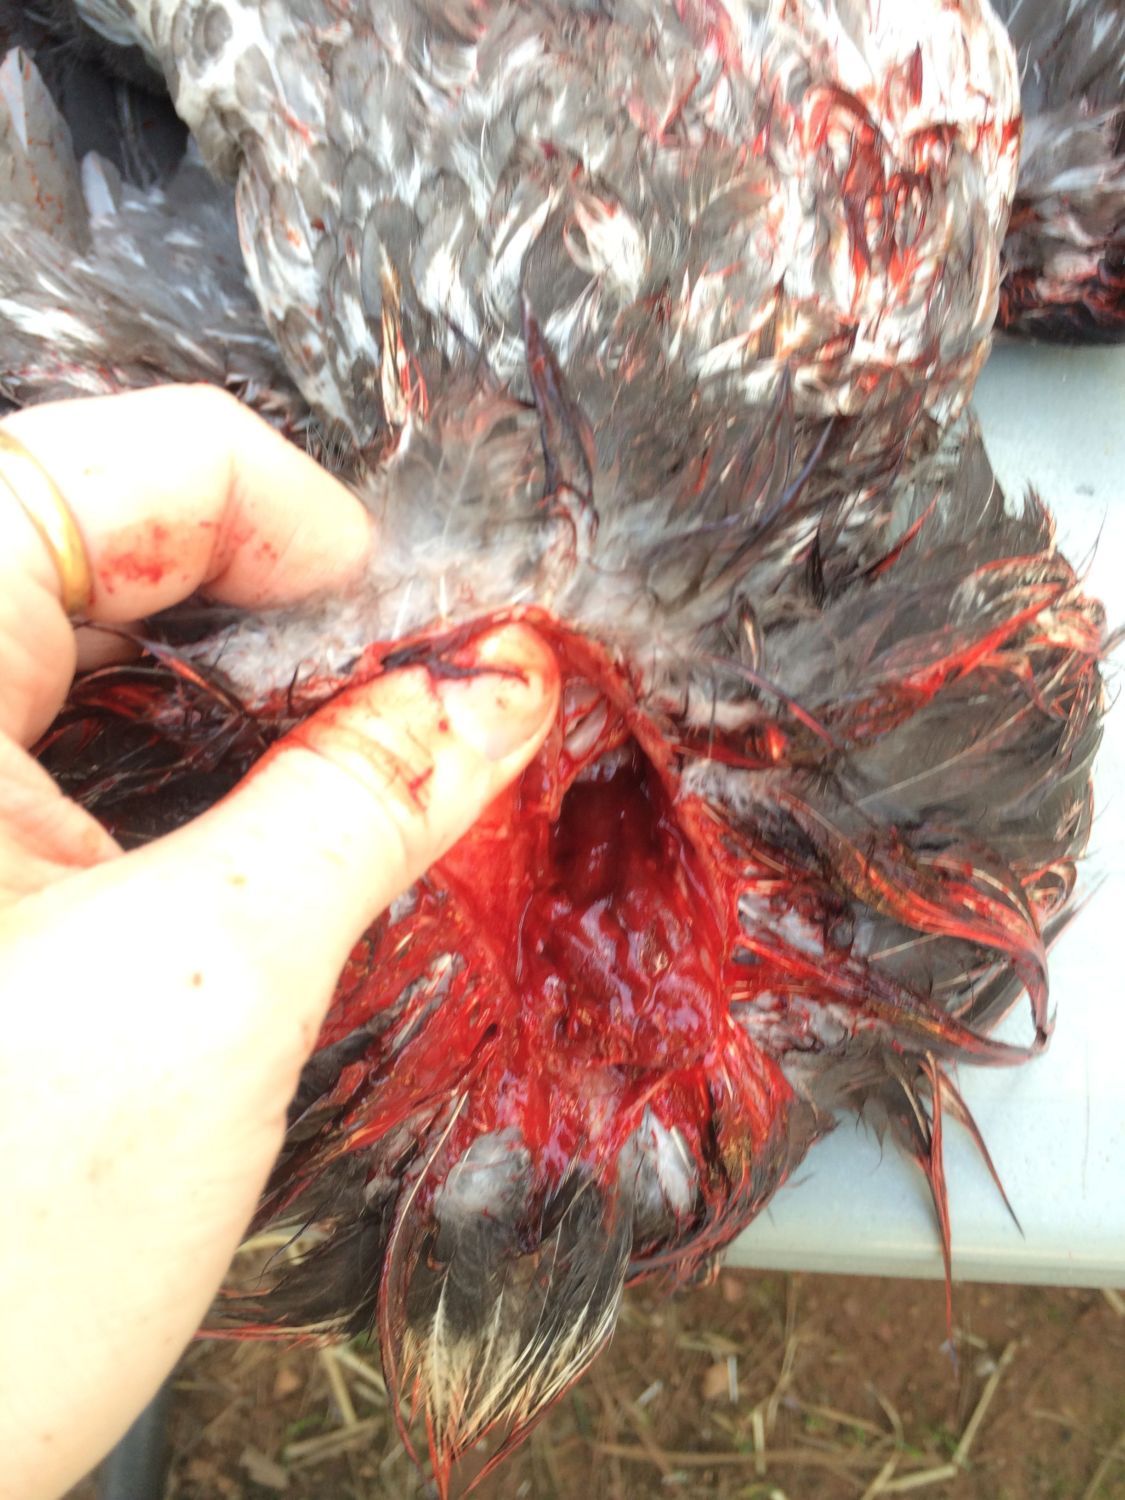
Lift the skin around the top of the neck.
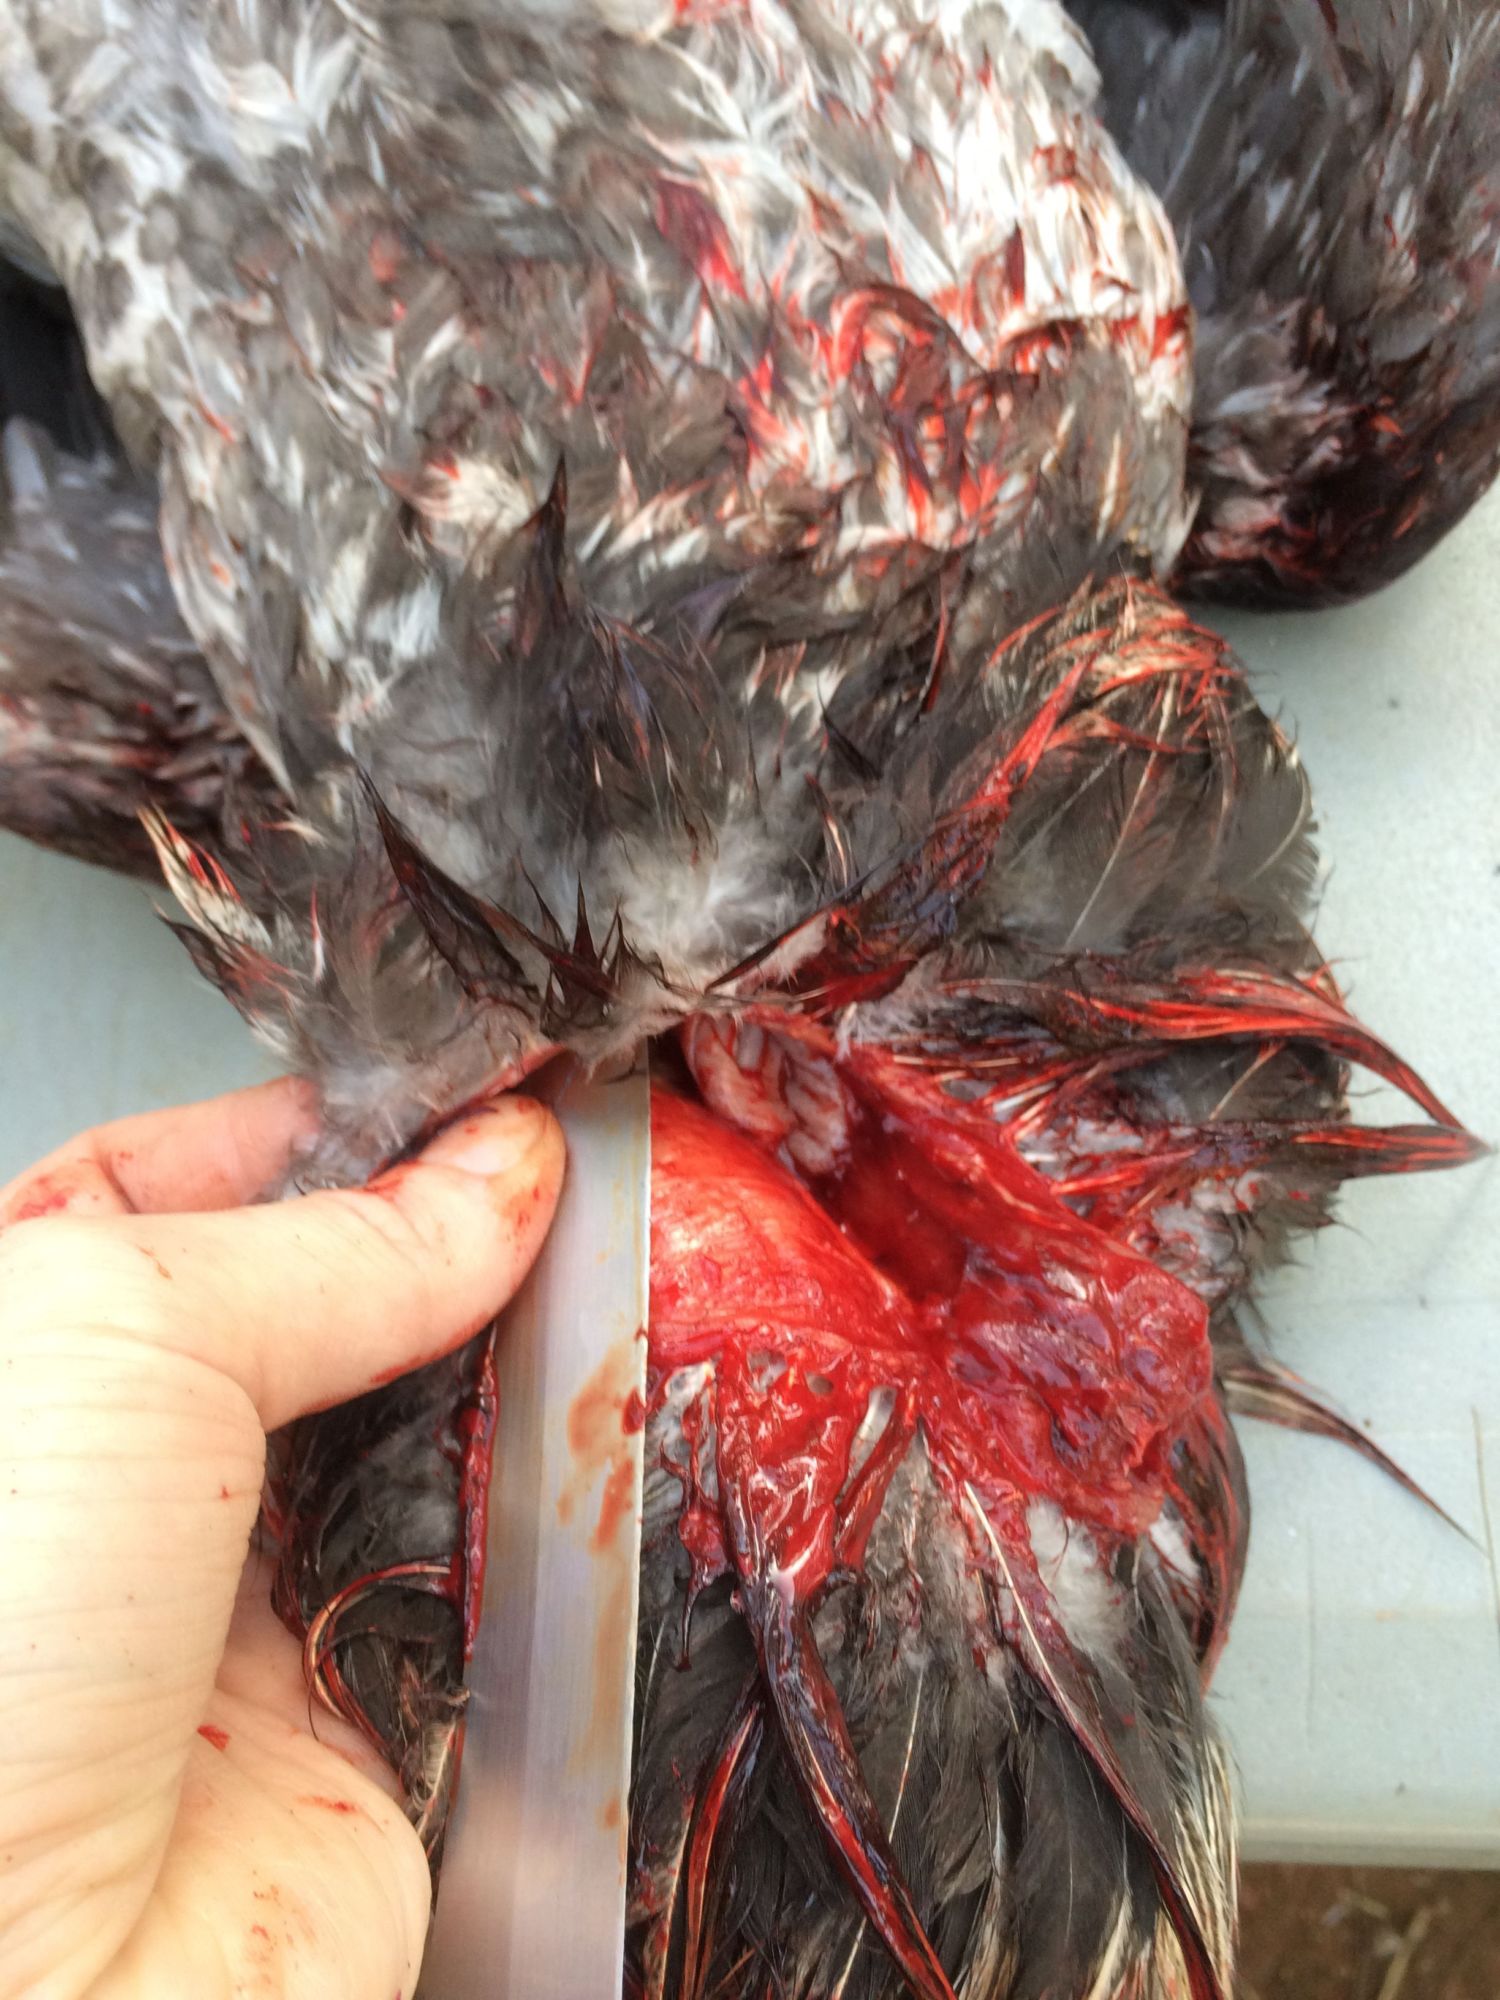
Slide the knife in, facing upwards against the skin. Split down the middle.
A good even split.

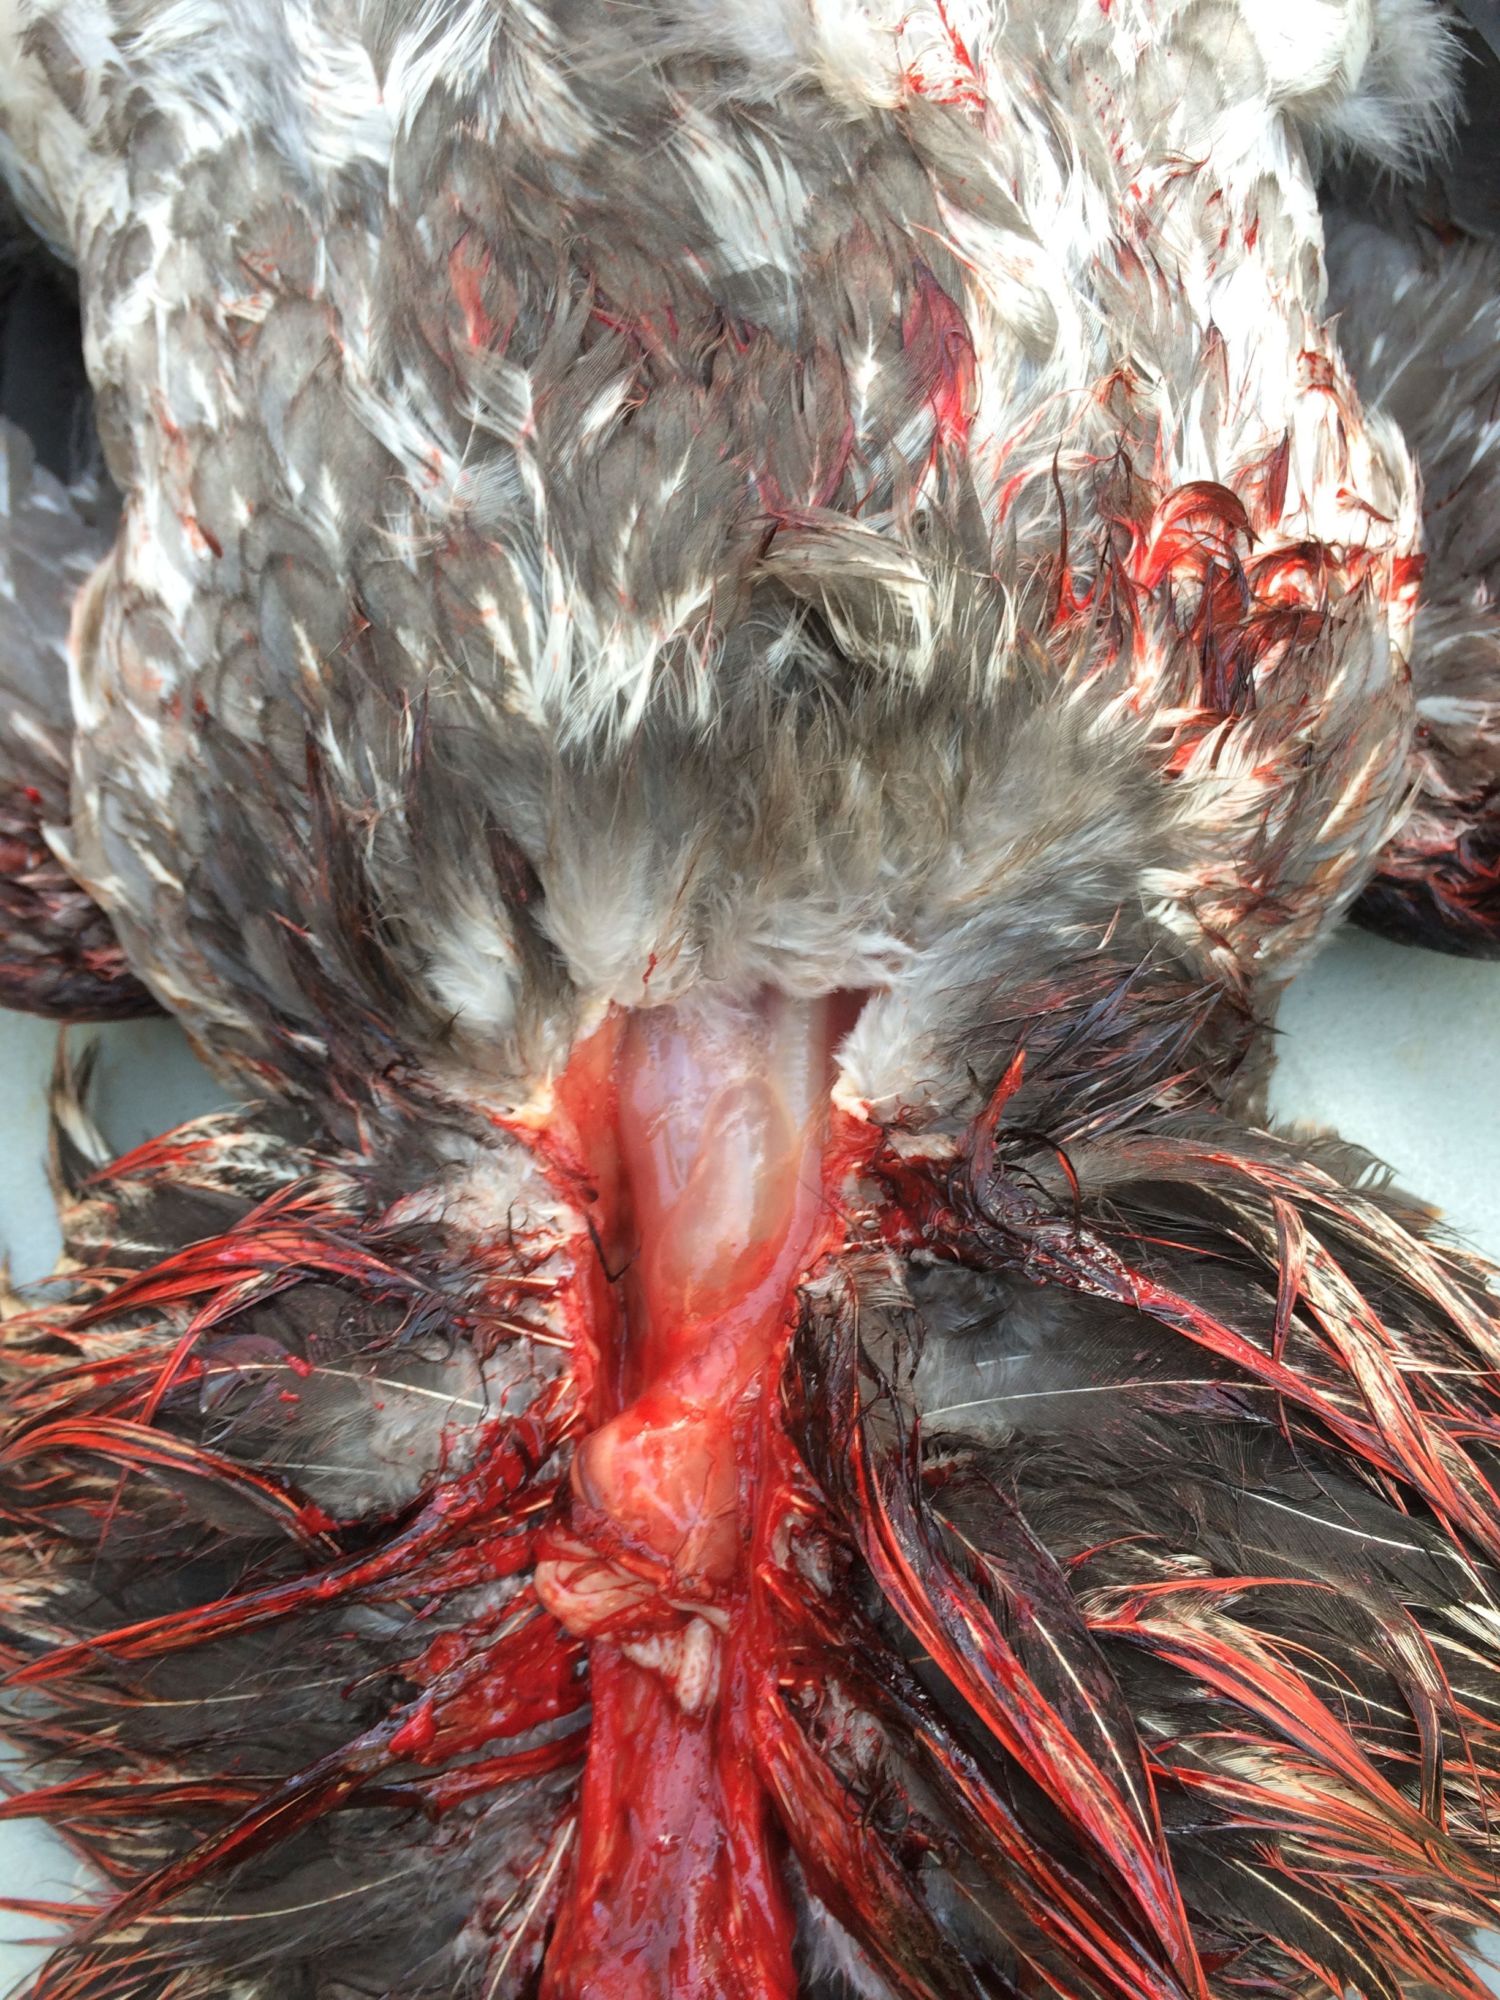
Continue splitting little by little, here you can see some of the breast emerging.

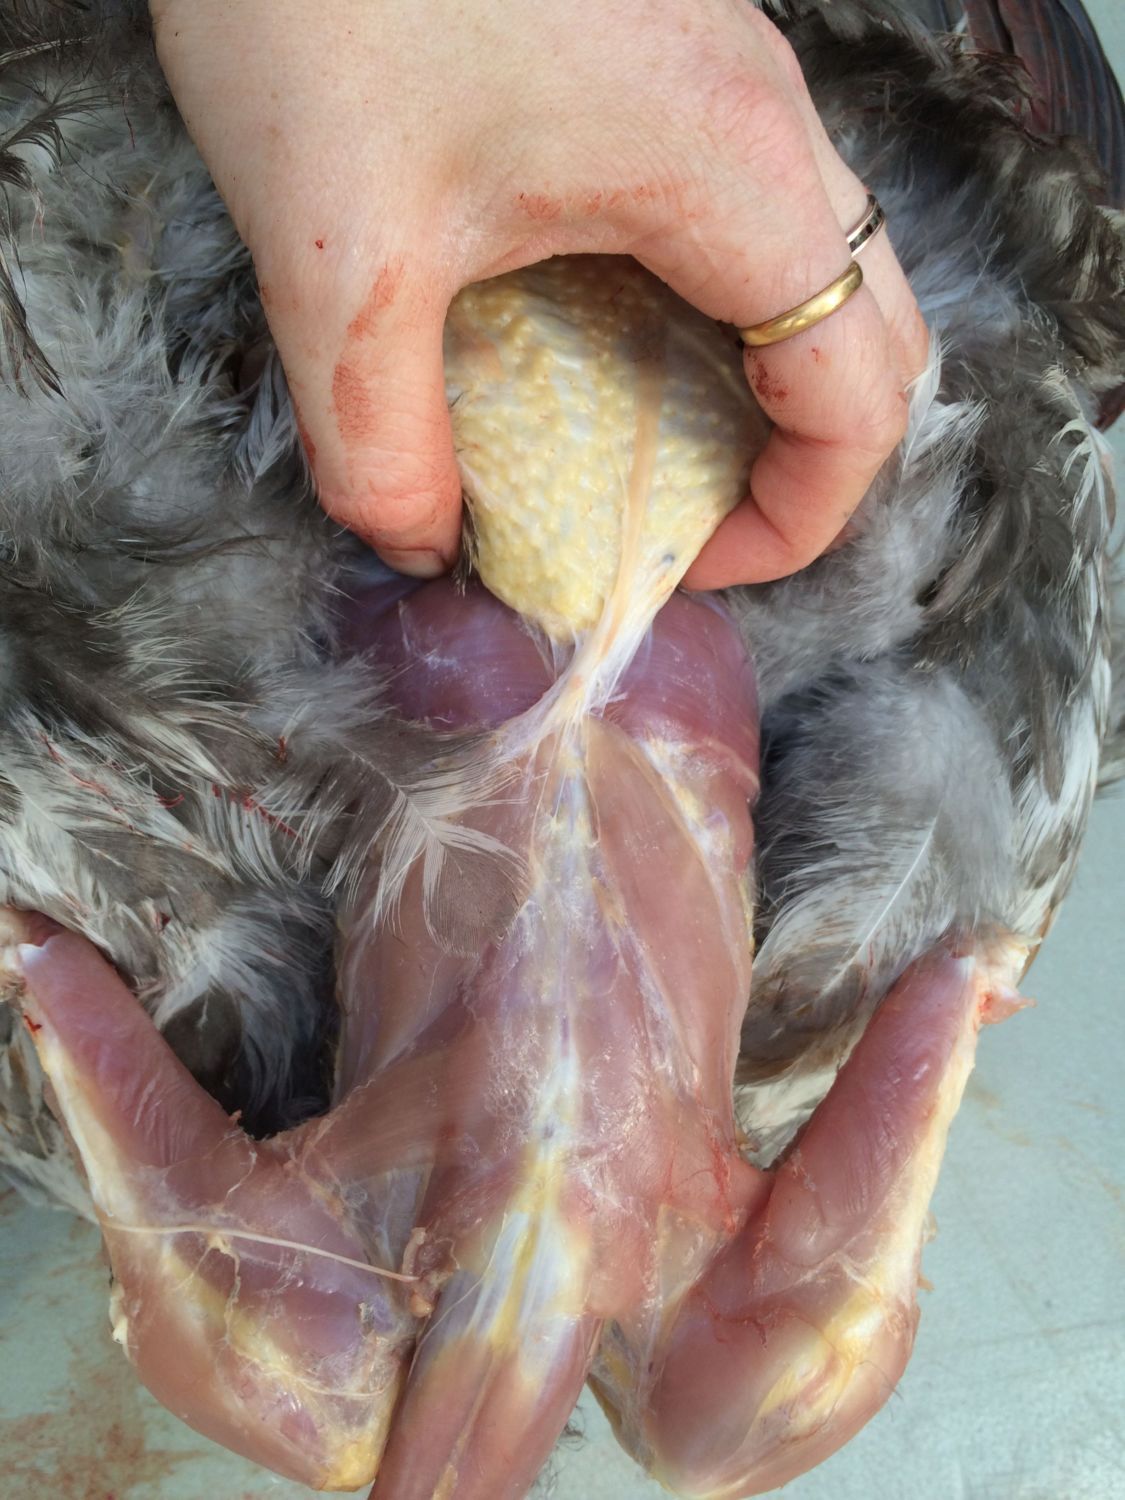
The upper breast can be seen here; that bulgy whitish thing to the right is the crop, in this case empty except a bit of air.

The crop can be peeled off with relative ease.

Follow the crop up the neck and you will find the esophagus and trachea. Slide your fingers between them and the meat of the neck, as is shown here, then slide them up the neck, separating the tissues.

Separated trachea/esophagus and neck.
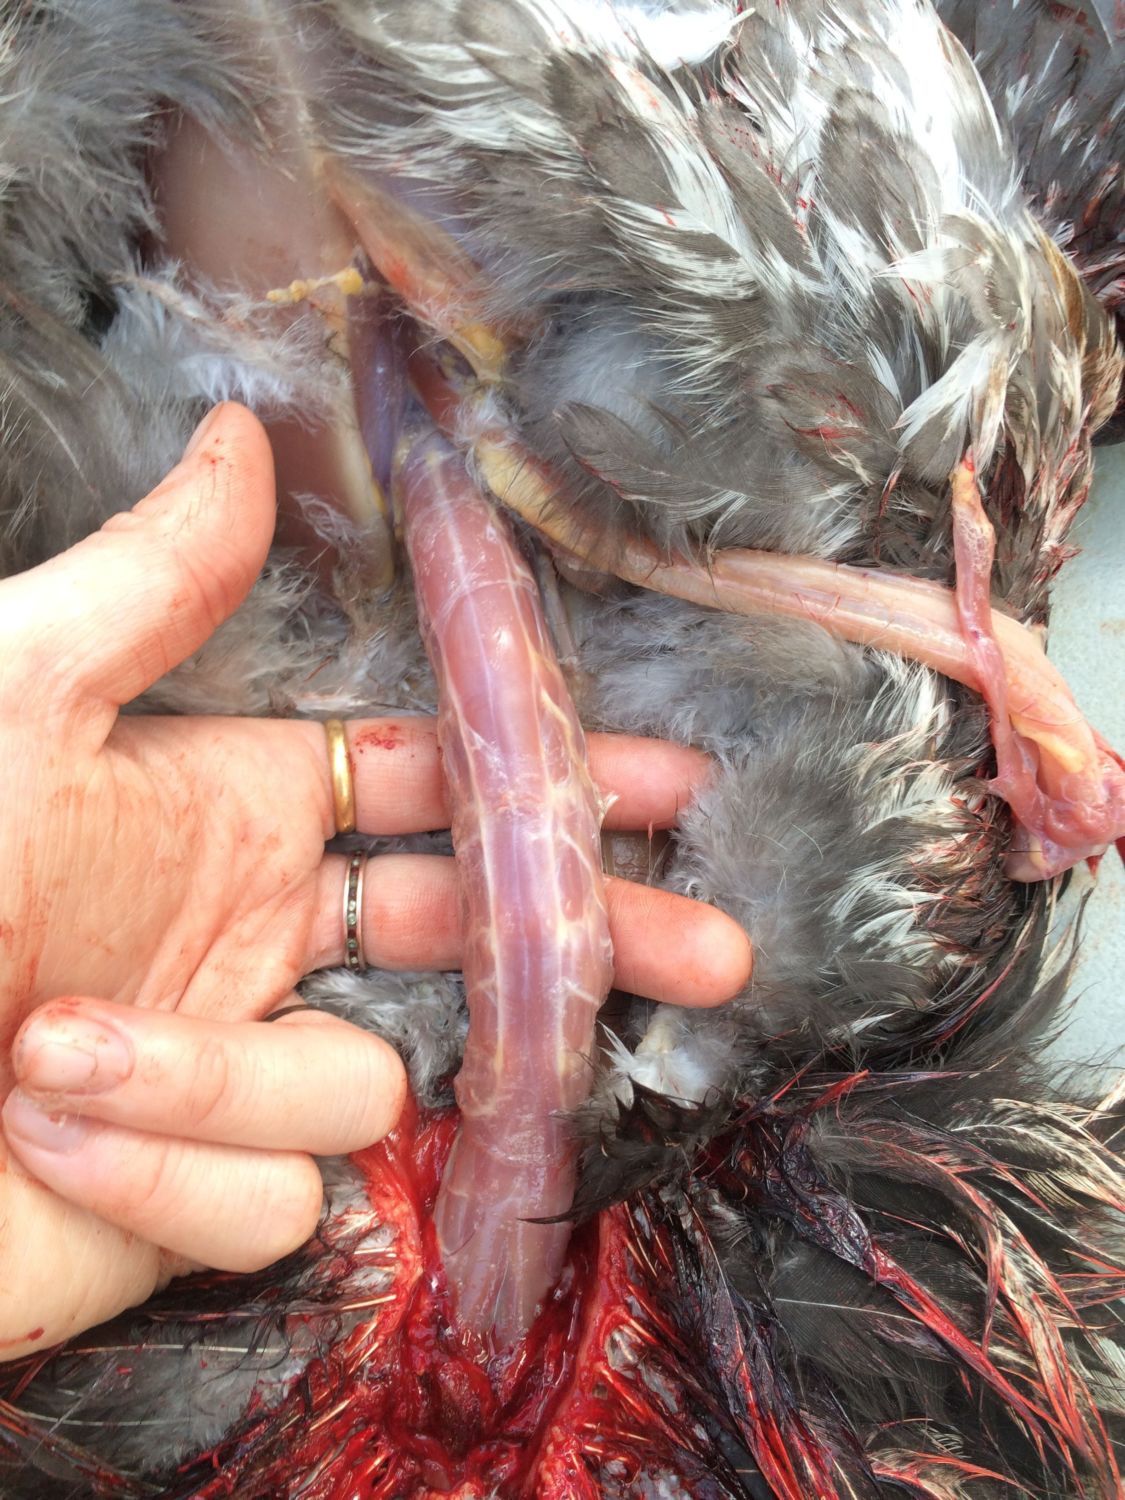
Now you'll be performing the same process, but with the neck and the skin; wiggle your fingers between them and slide up.
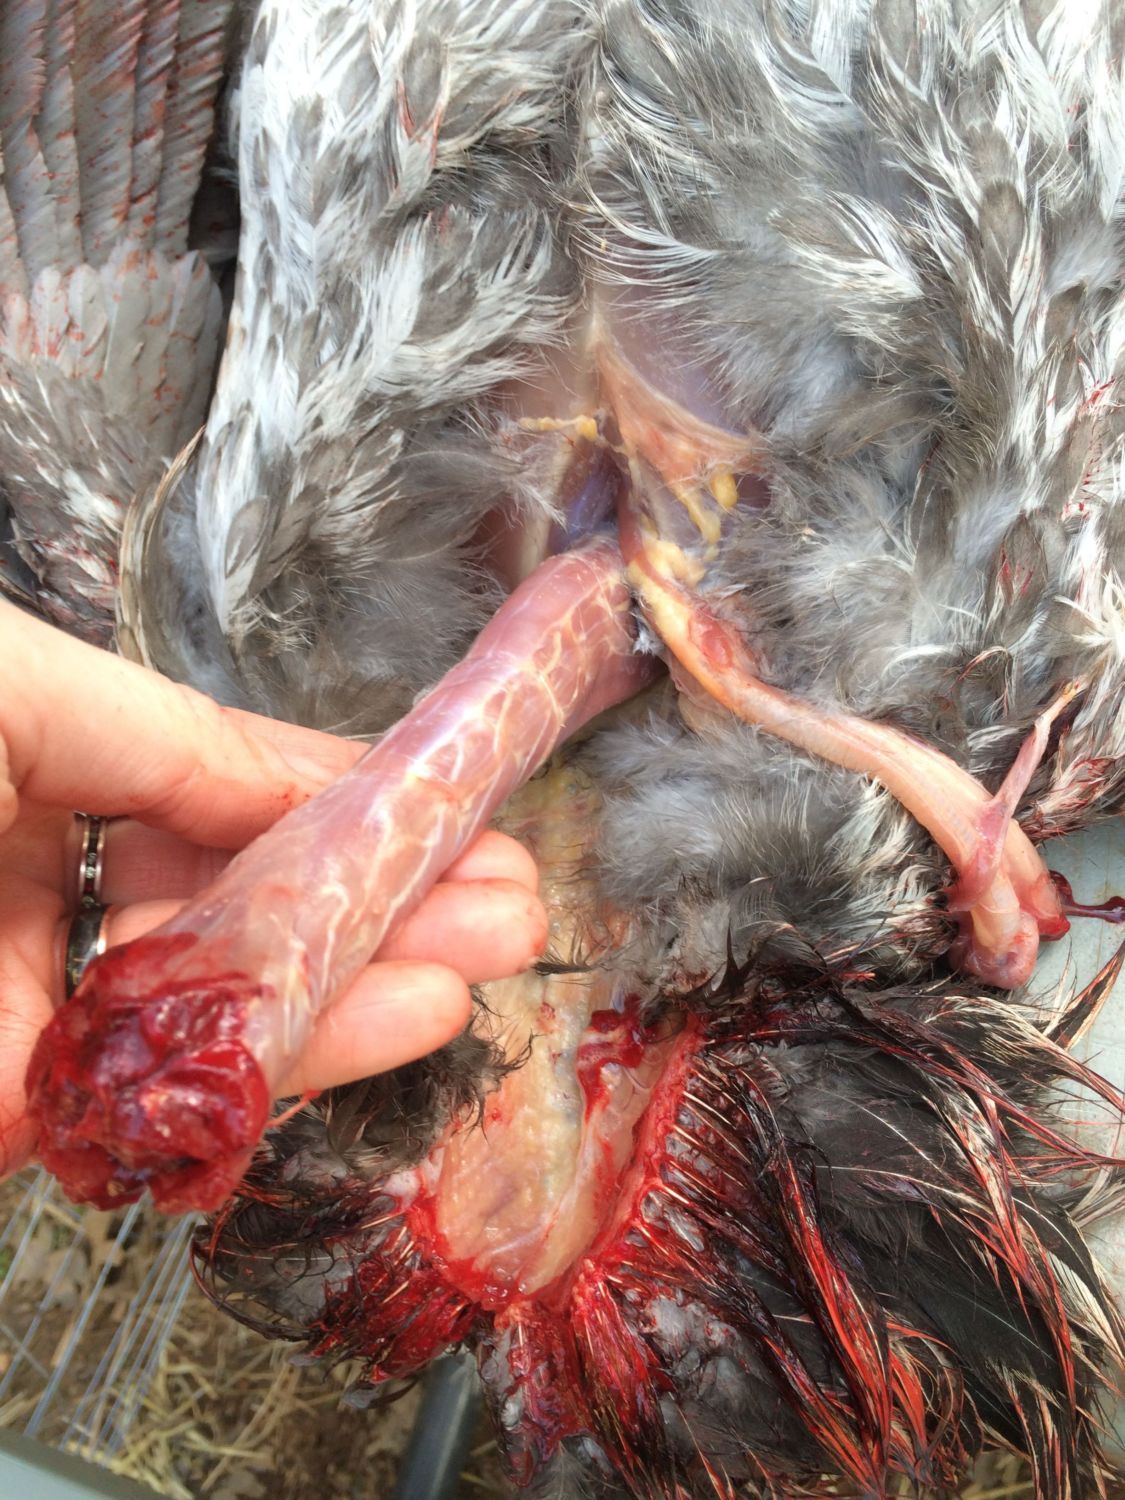
Neck separated.
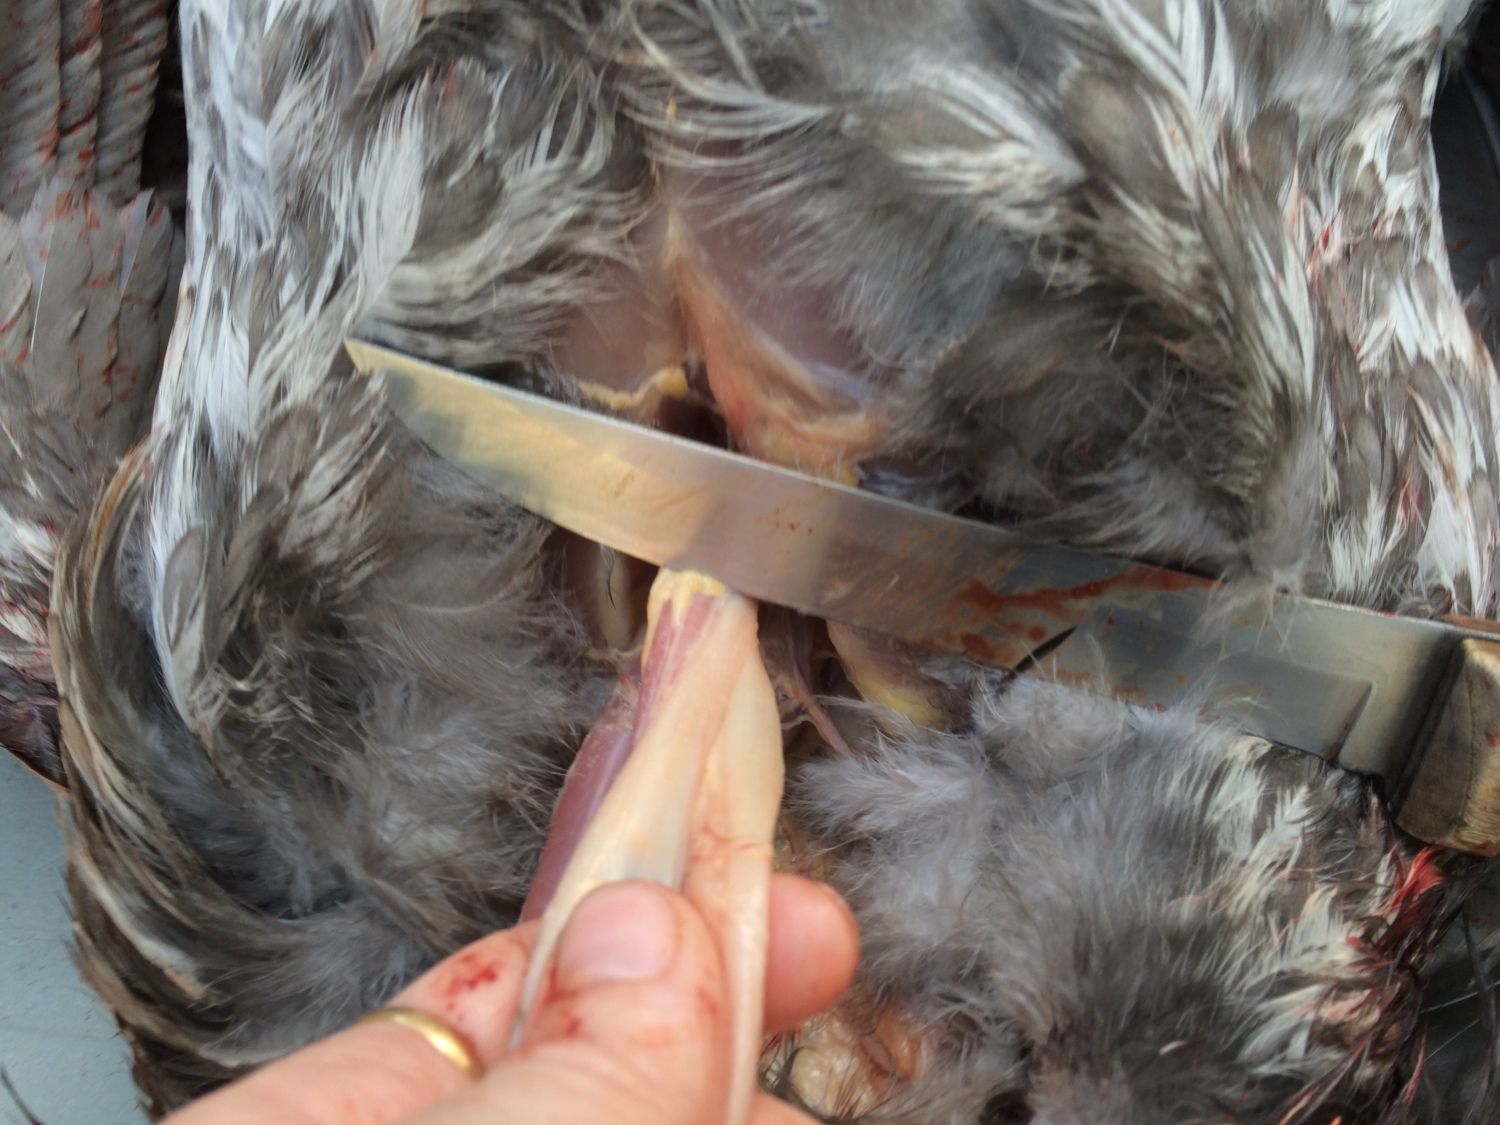
Time to cut the upper esophagus and trachea and crop away. Only do this if the crop is empty; if the crop contains food, you will want to separate it much later in the process.
Flip the bird over.

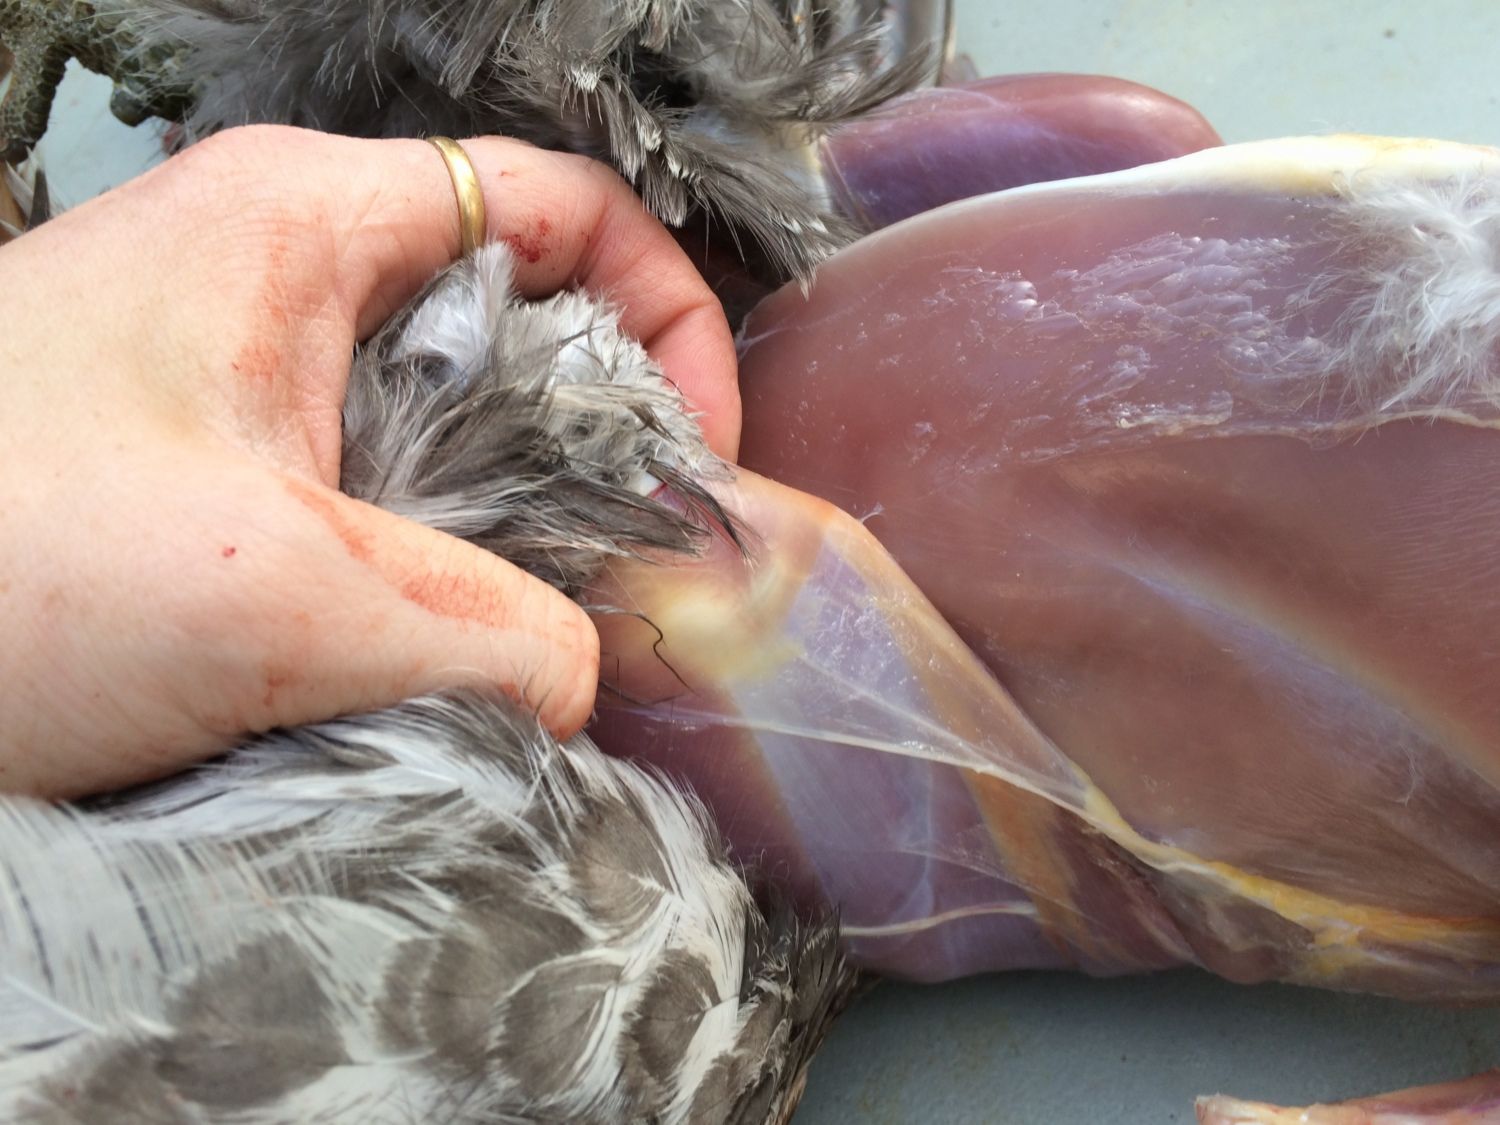
Pull the skin down on either side of the neck. See that white point white in the center? That's the top of the shoulder joint emerging.

Continue pulling the skin down around the wing. The sooner you can poke through the tissue of the armpit and get your fingers fully looped around the limb the faster it will go.

Skinned more.
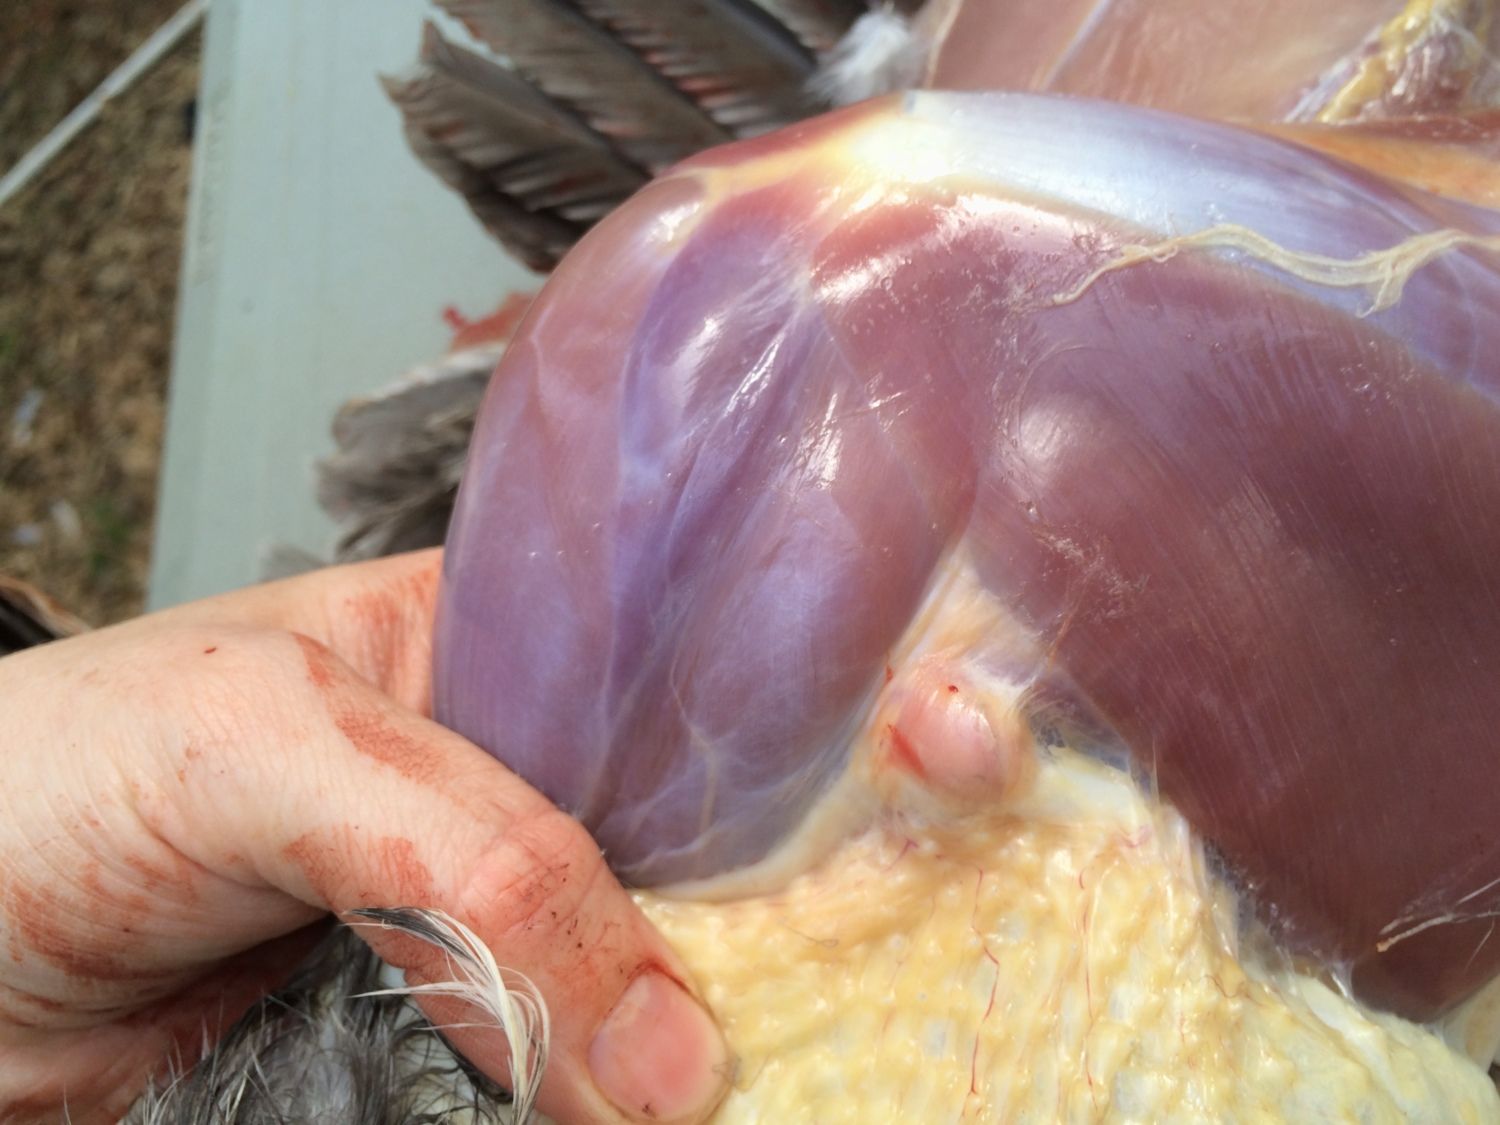
You'll want to cut through the membrane my fingers are pinching.
Showing where to cut though the joint.

Partially cut through.
Most of the joint severed.

Success! Now repeat on the other side.

Half-way skinned.
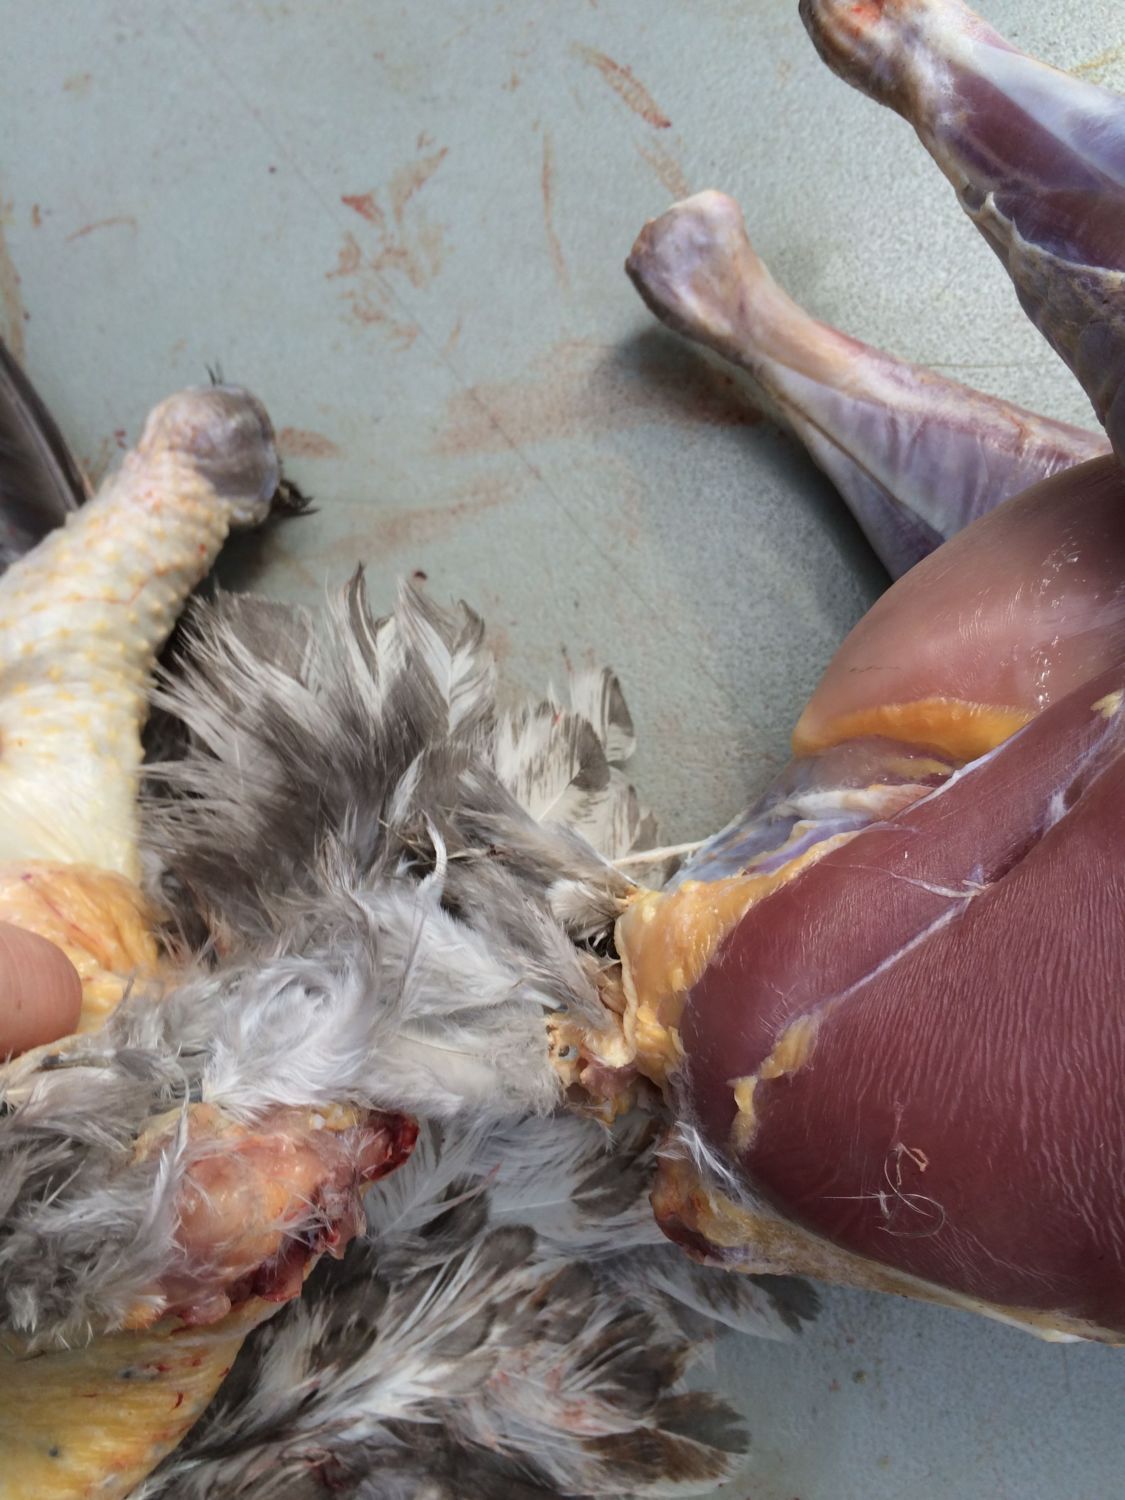
Grab the pelt in one hand and the upper part of the bird in the other, and pull in opposite directions. The skin will peel down the back very easily.
Once you get to the tail you'll meet more resistance. Stop at that point and leave it be for now.

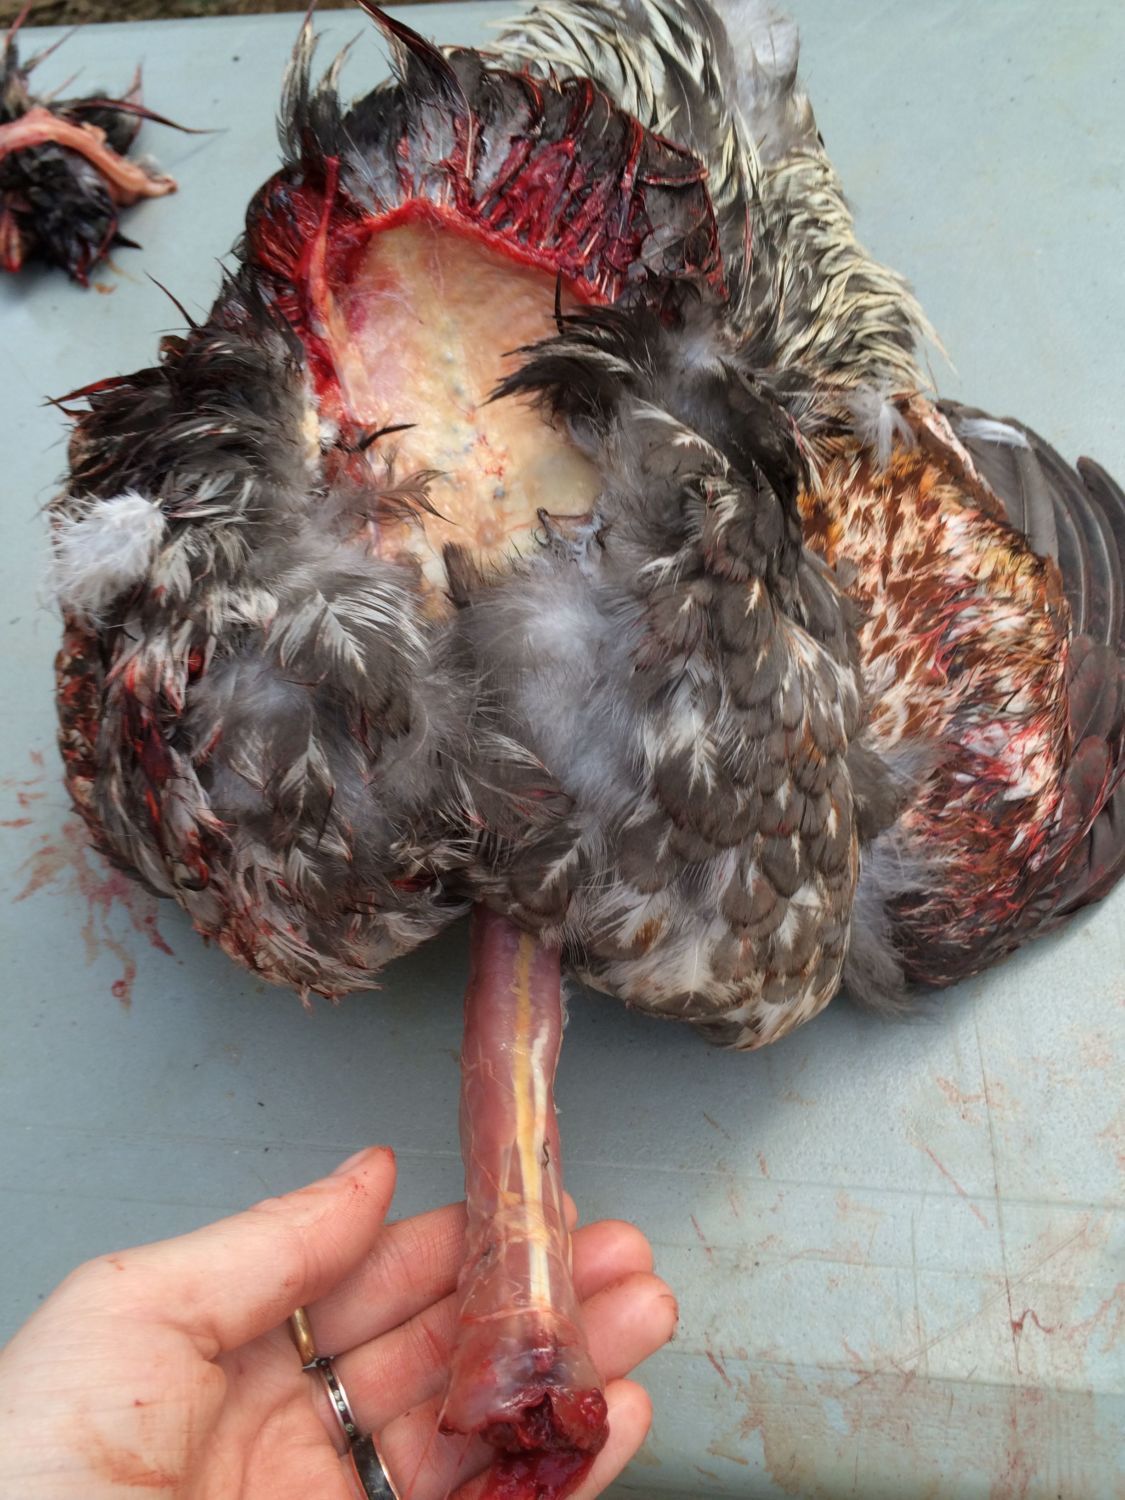
Flip again. Peel further down the breast.
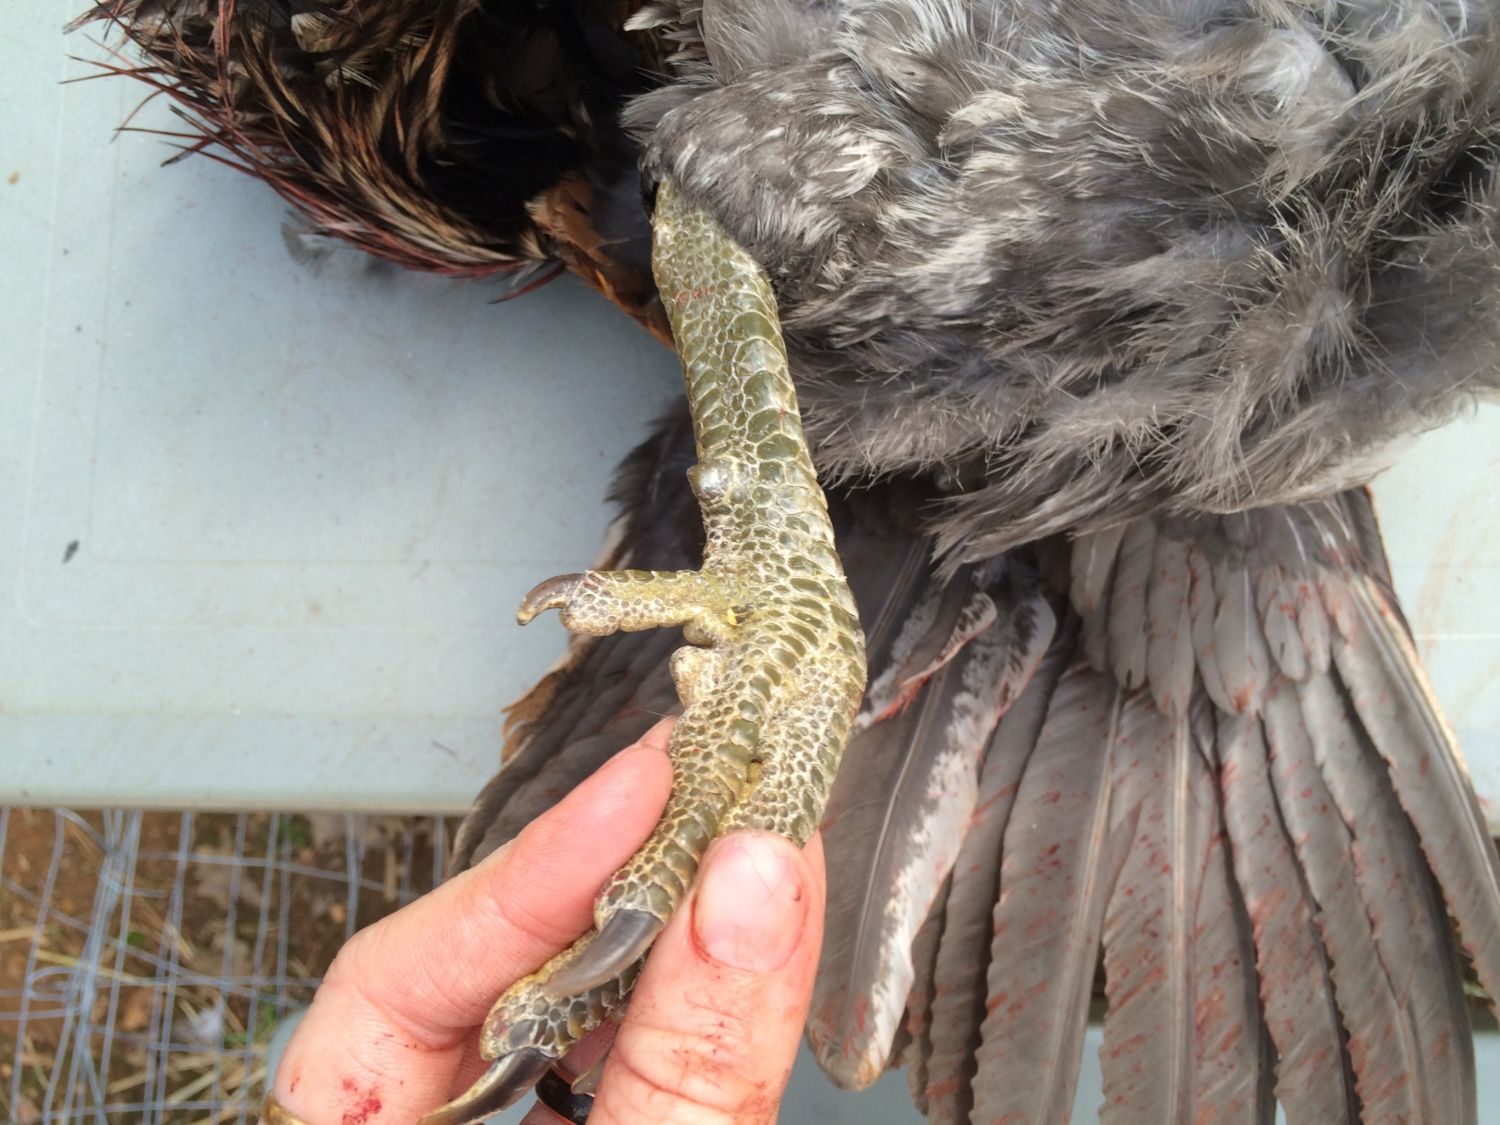
Foot time!
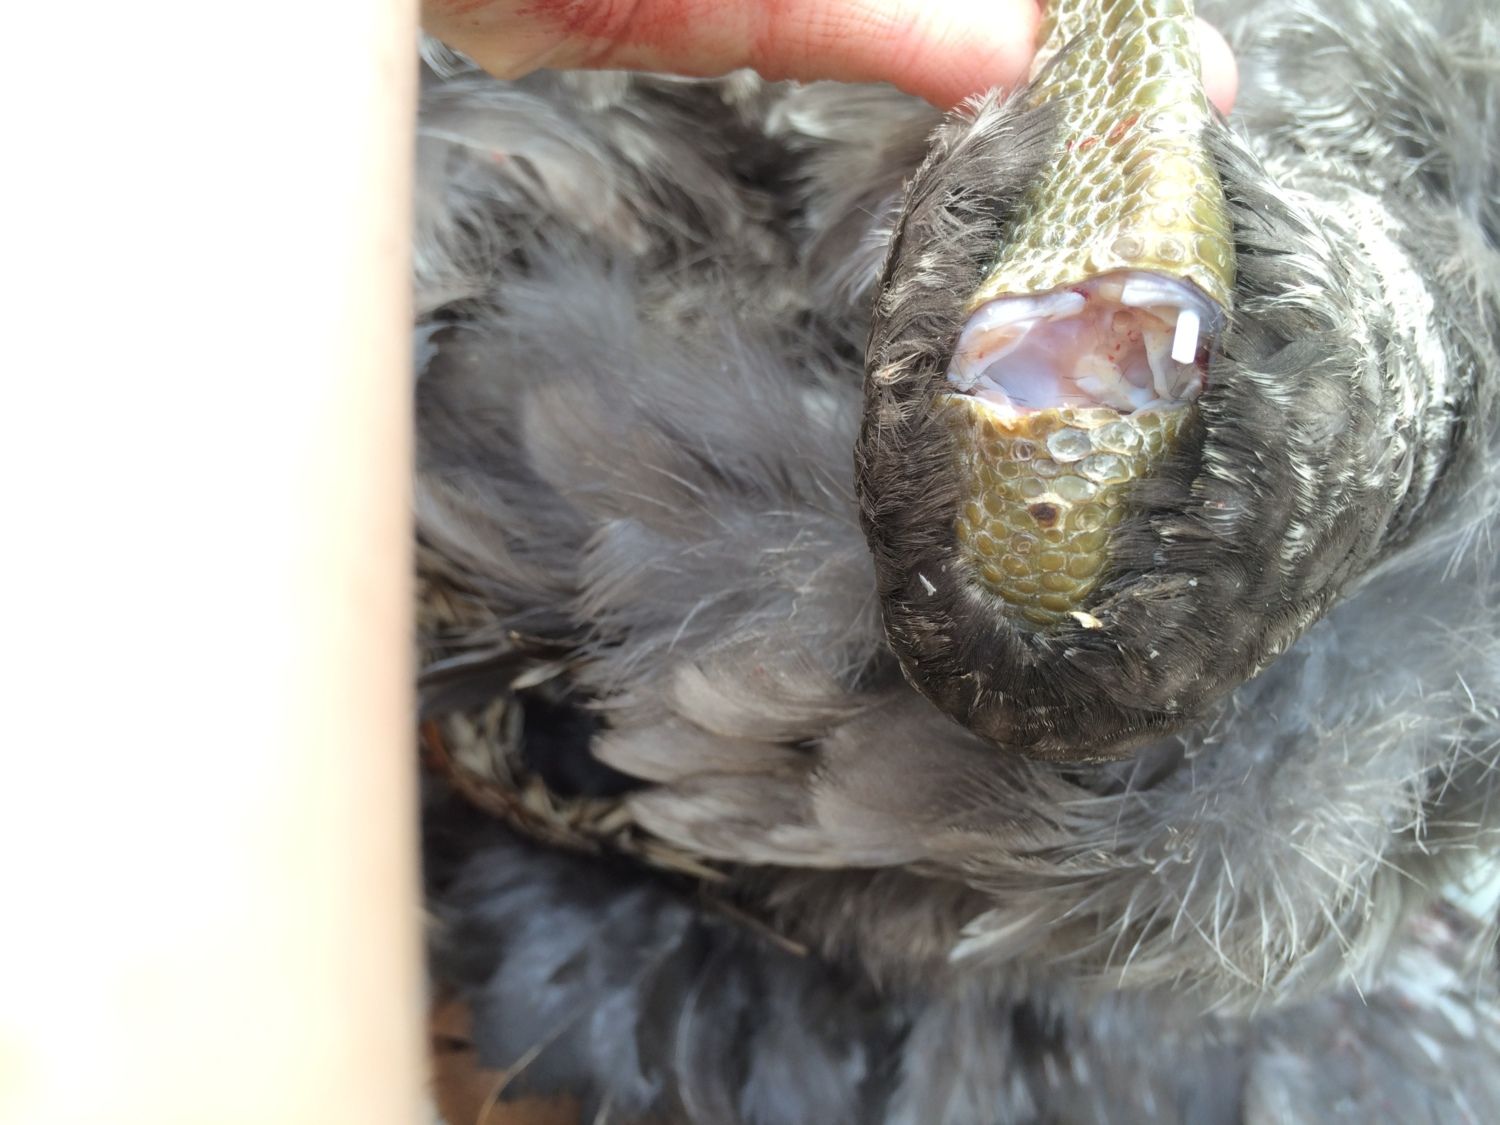
Partially cut.
Almost there...
Perfect.
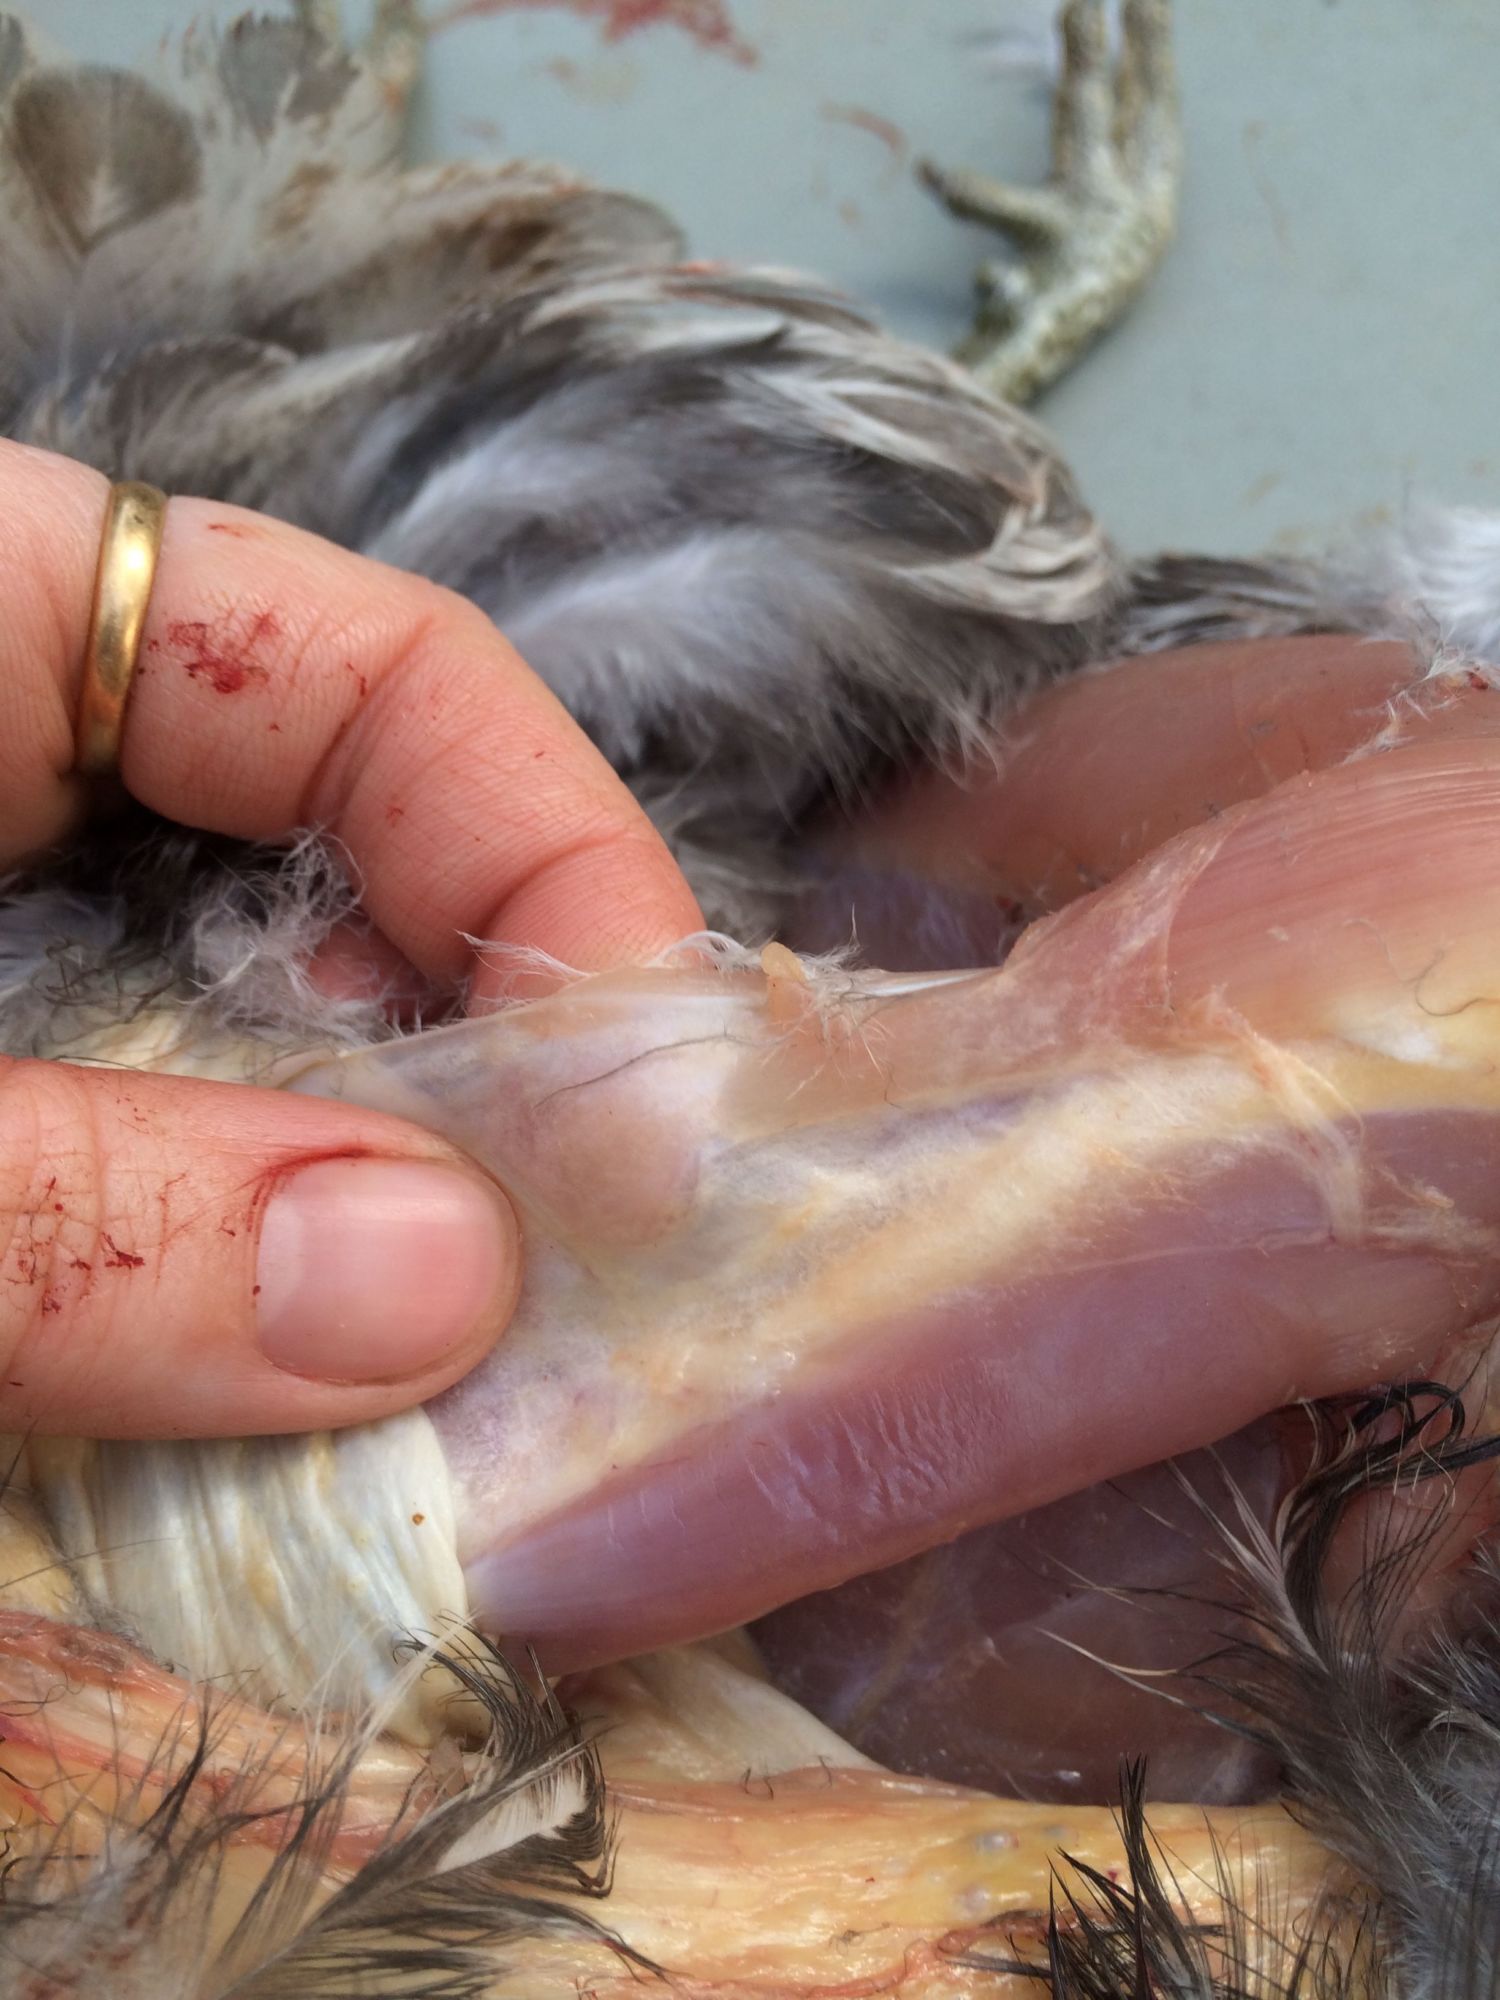
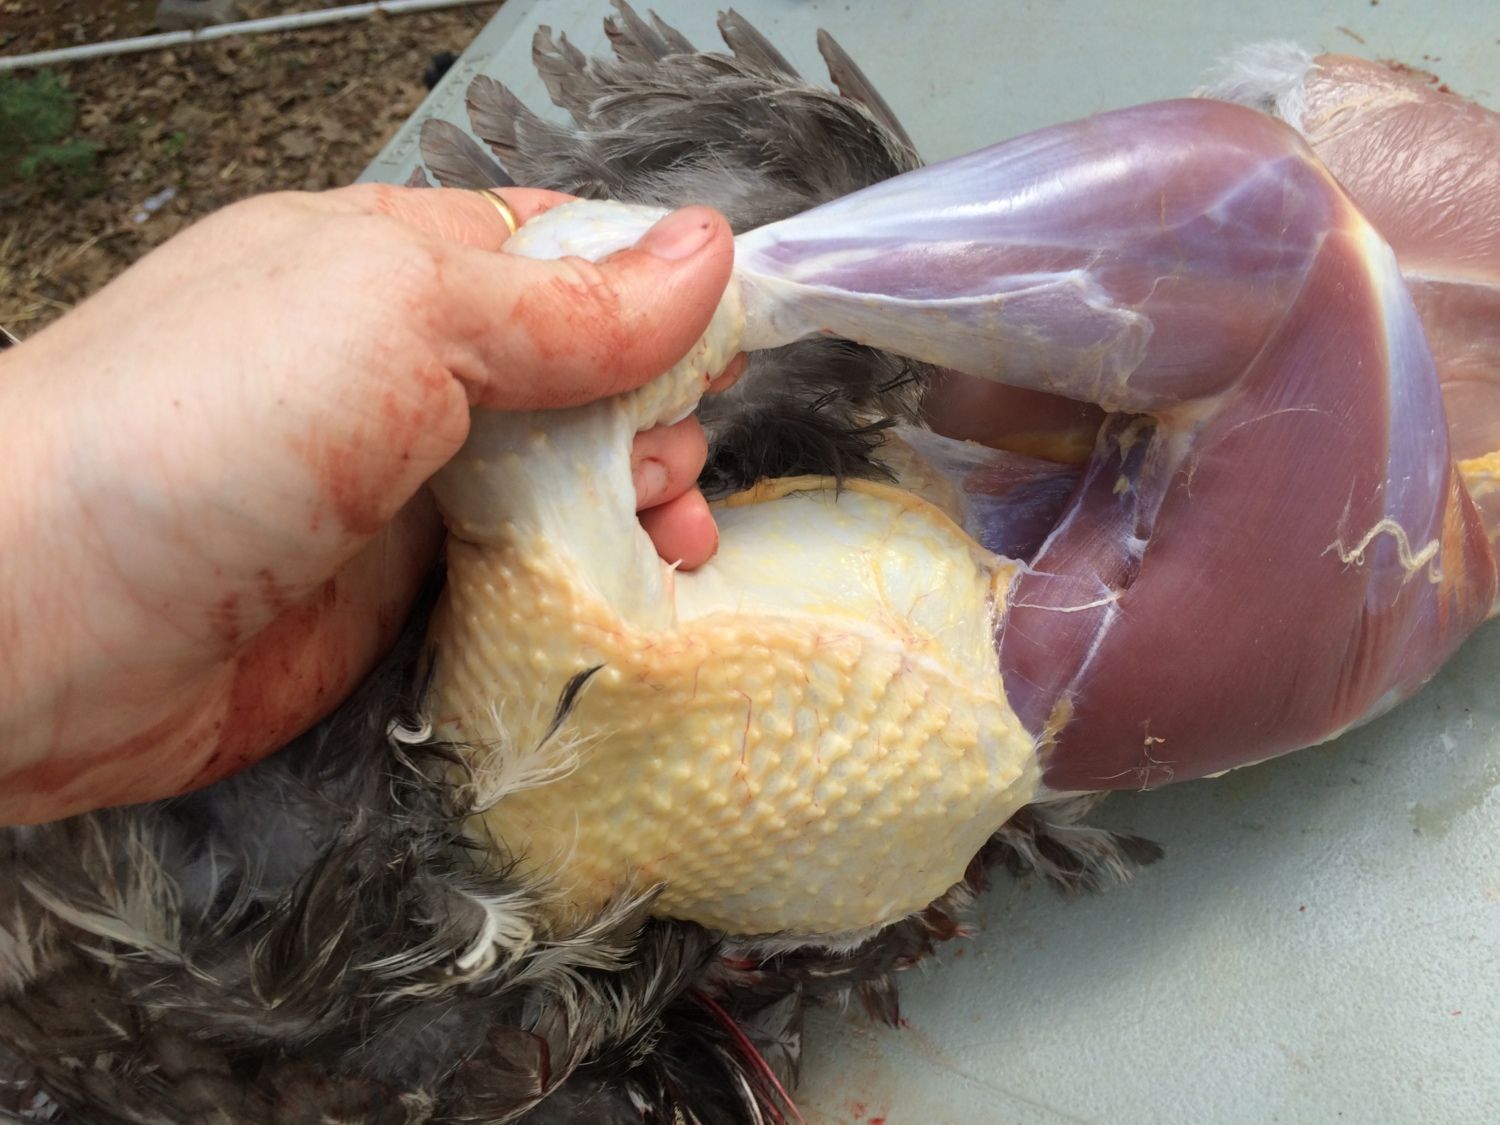
Now grab the leg around the thigh and strip down.
Fine the crevice behind the knee...

And pop your finger through!
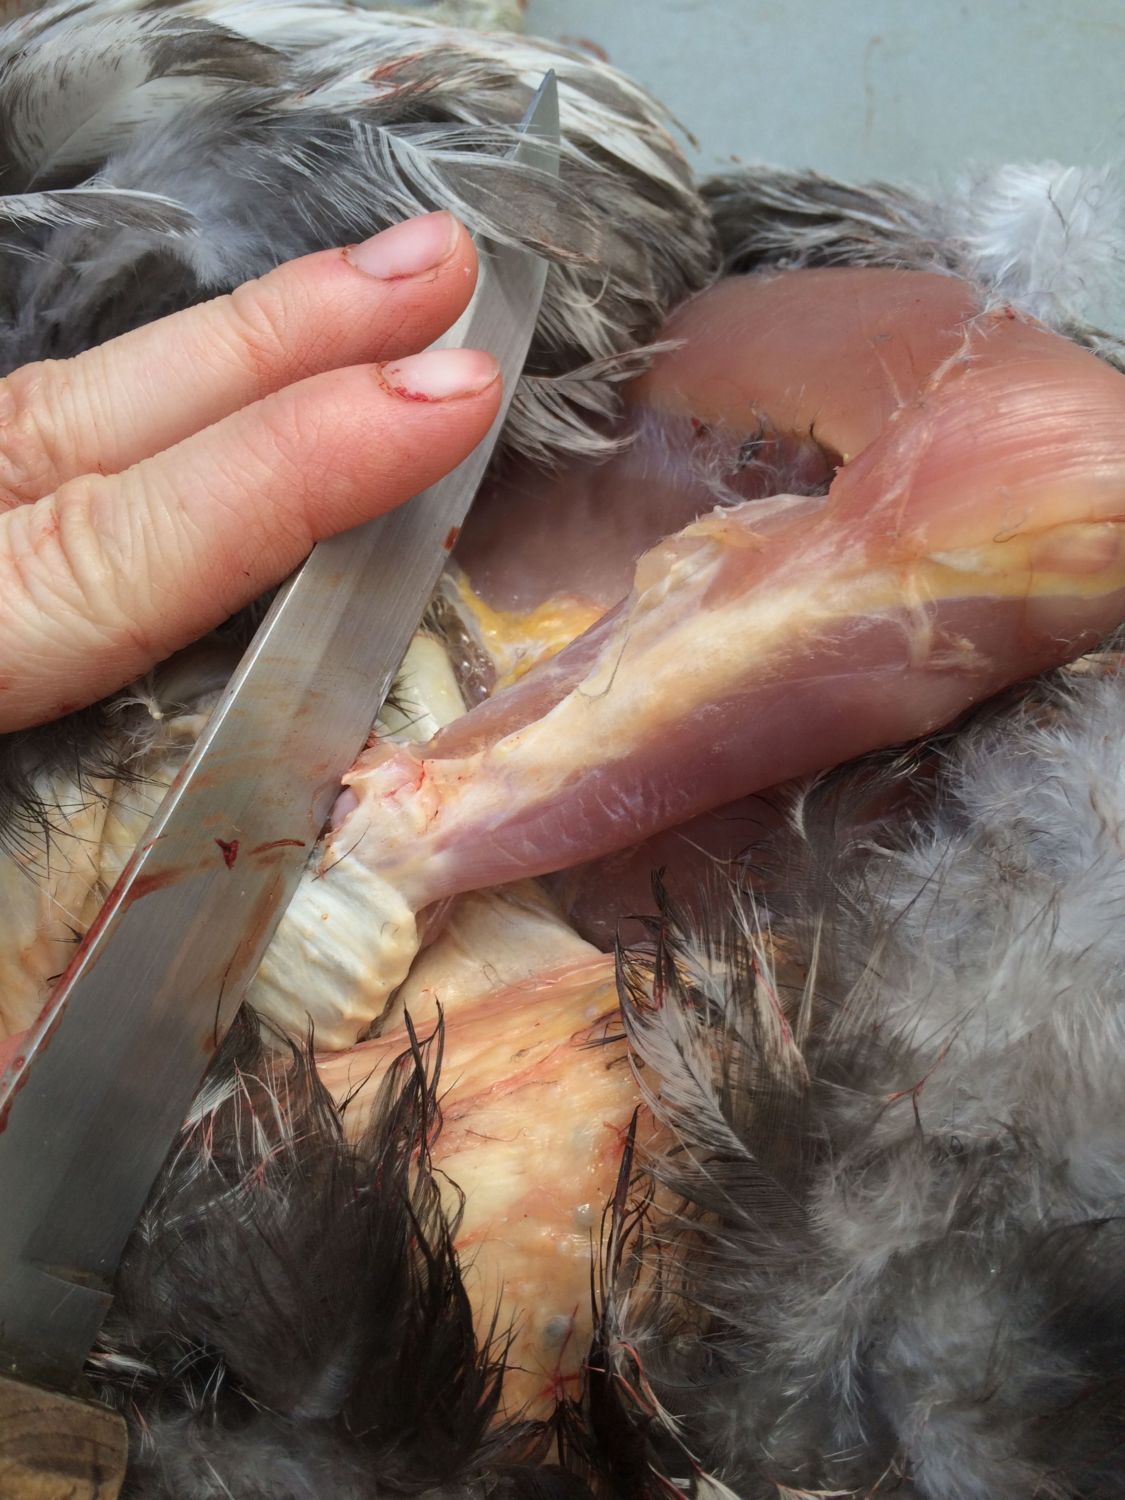
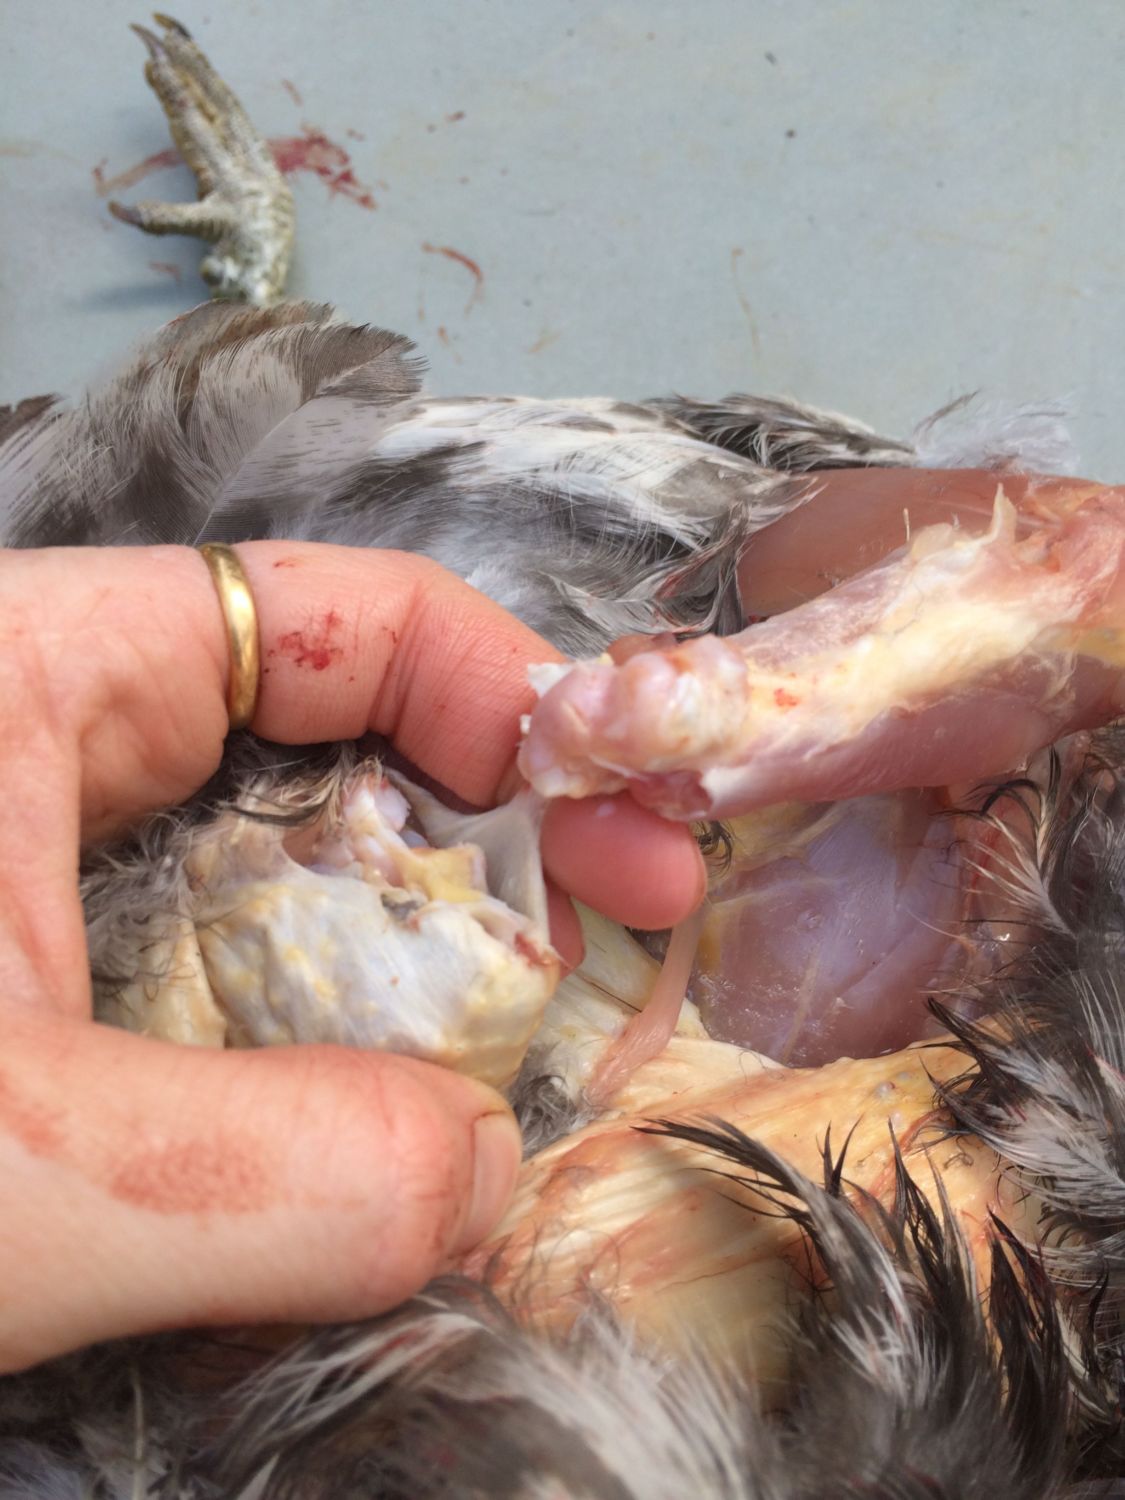
Strip down and pull off the end of the leg.

One leg done.
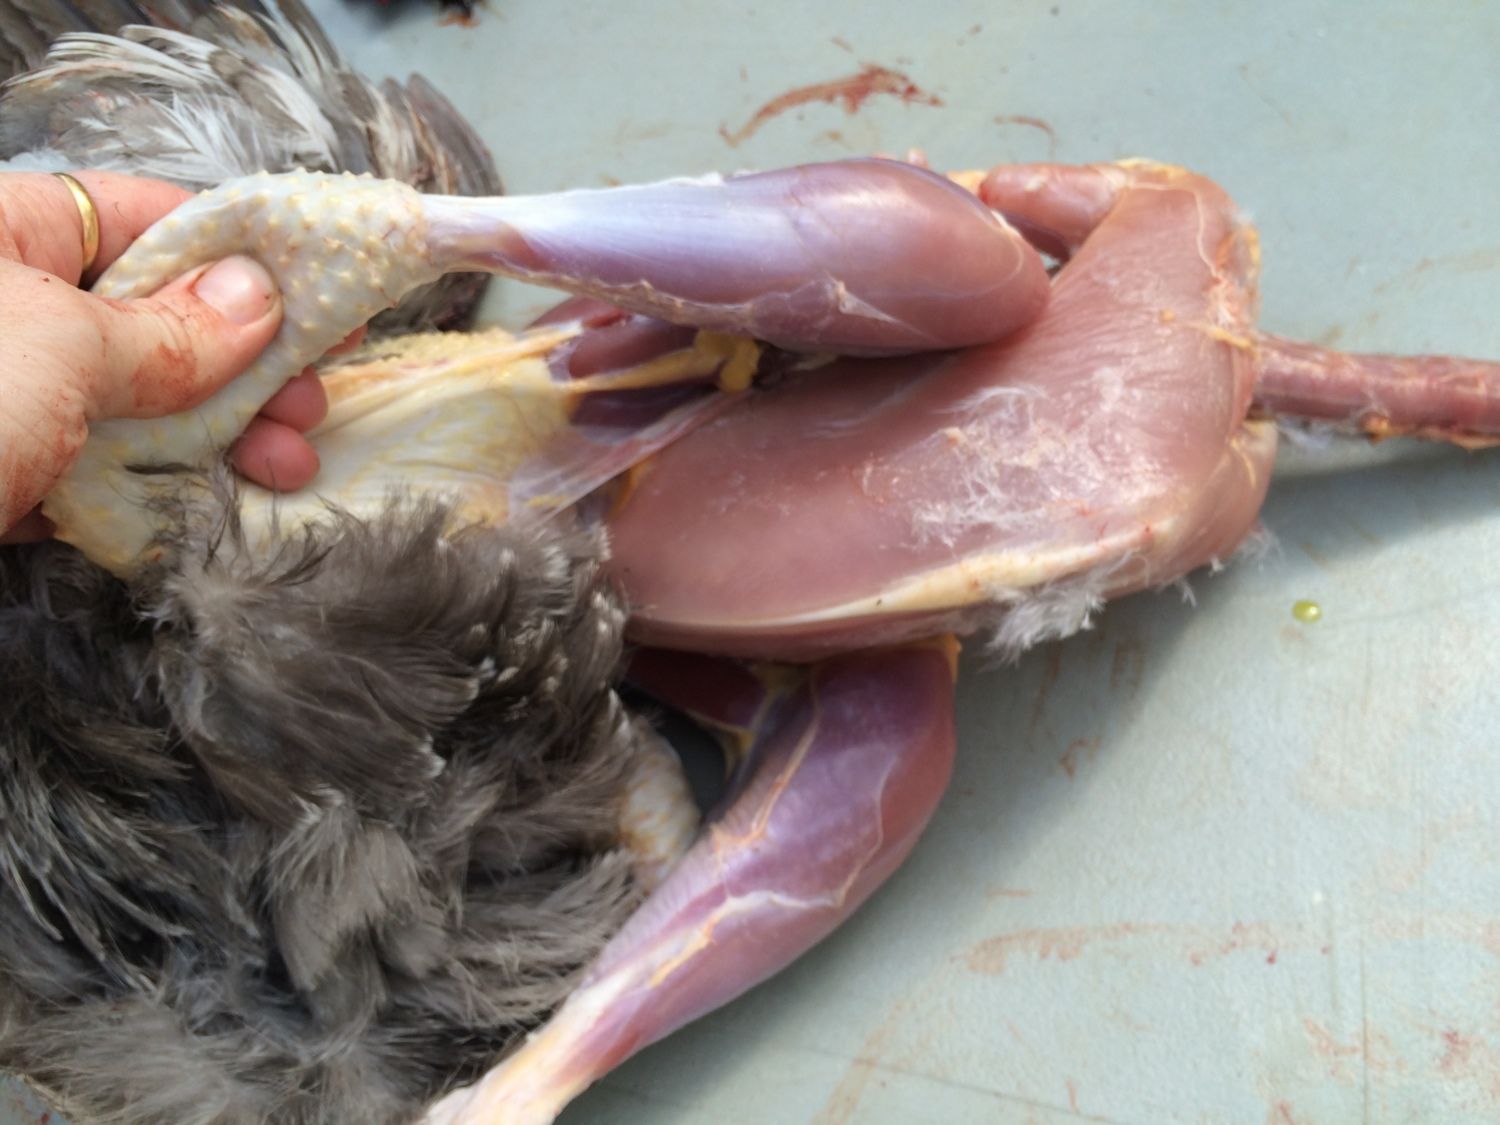
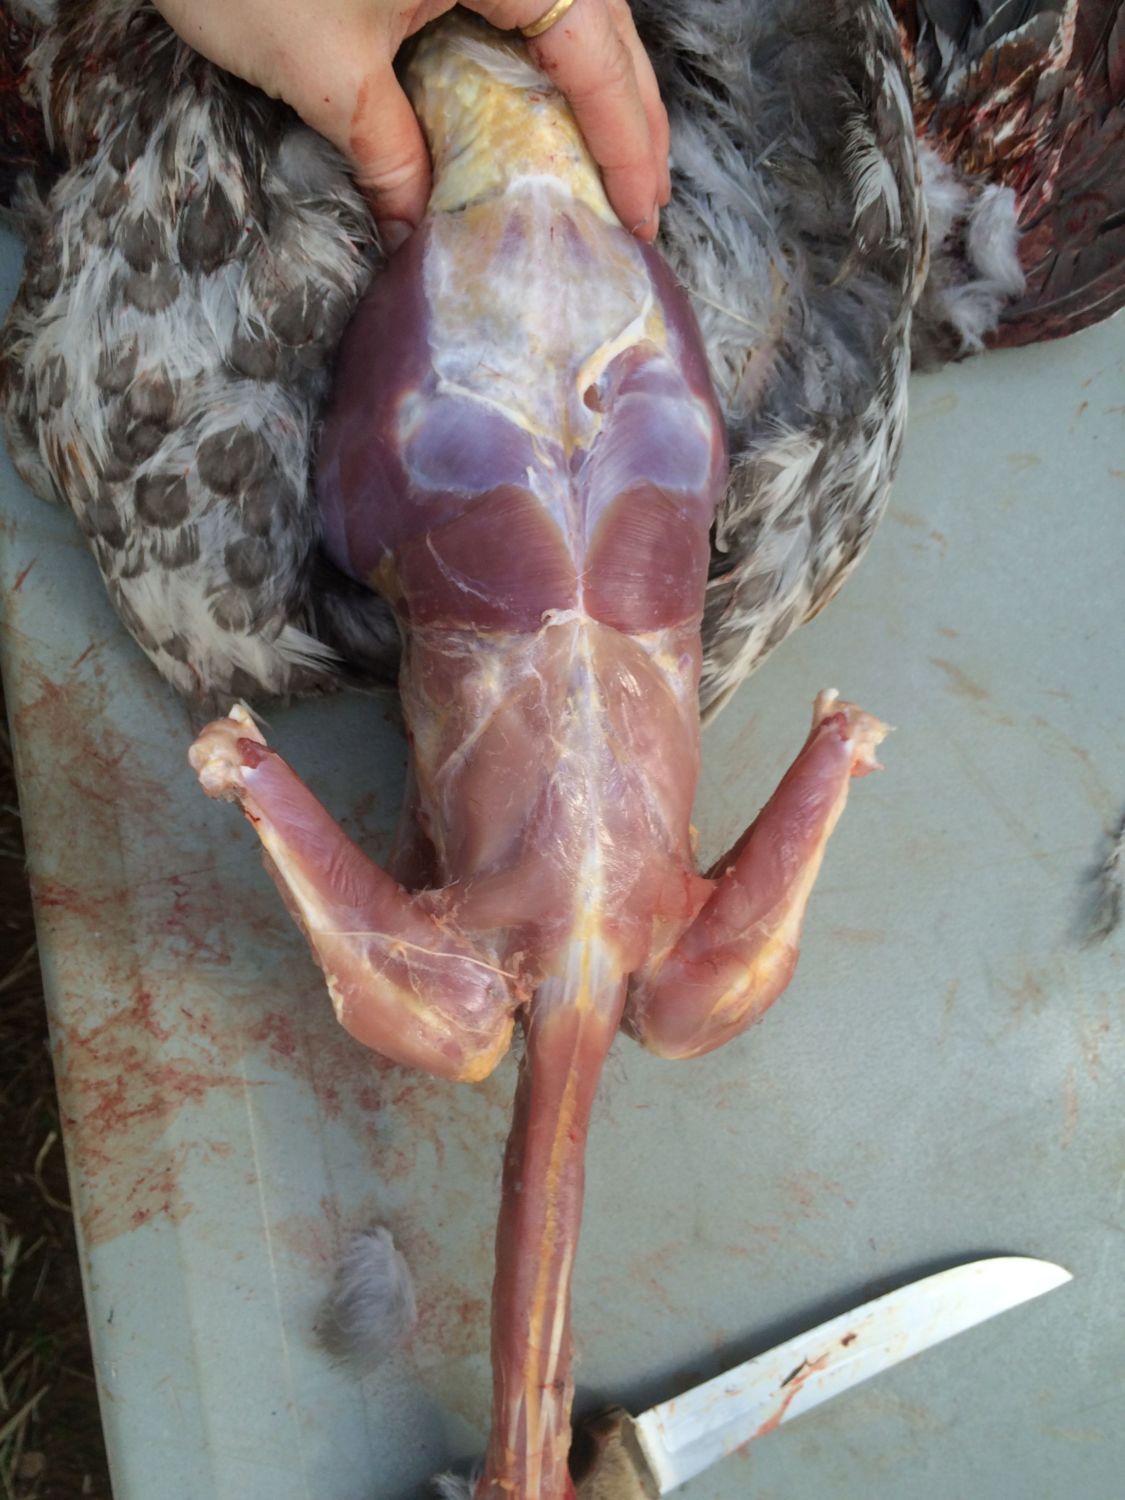
Two legs done (almost).

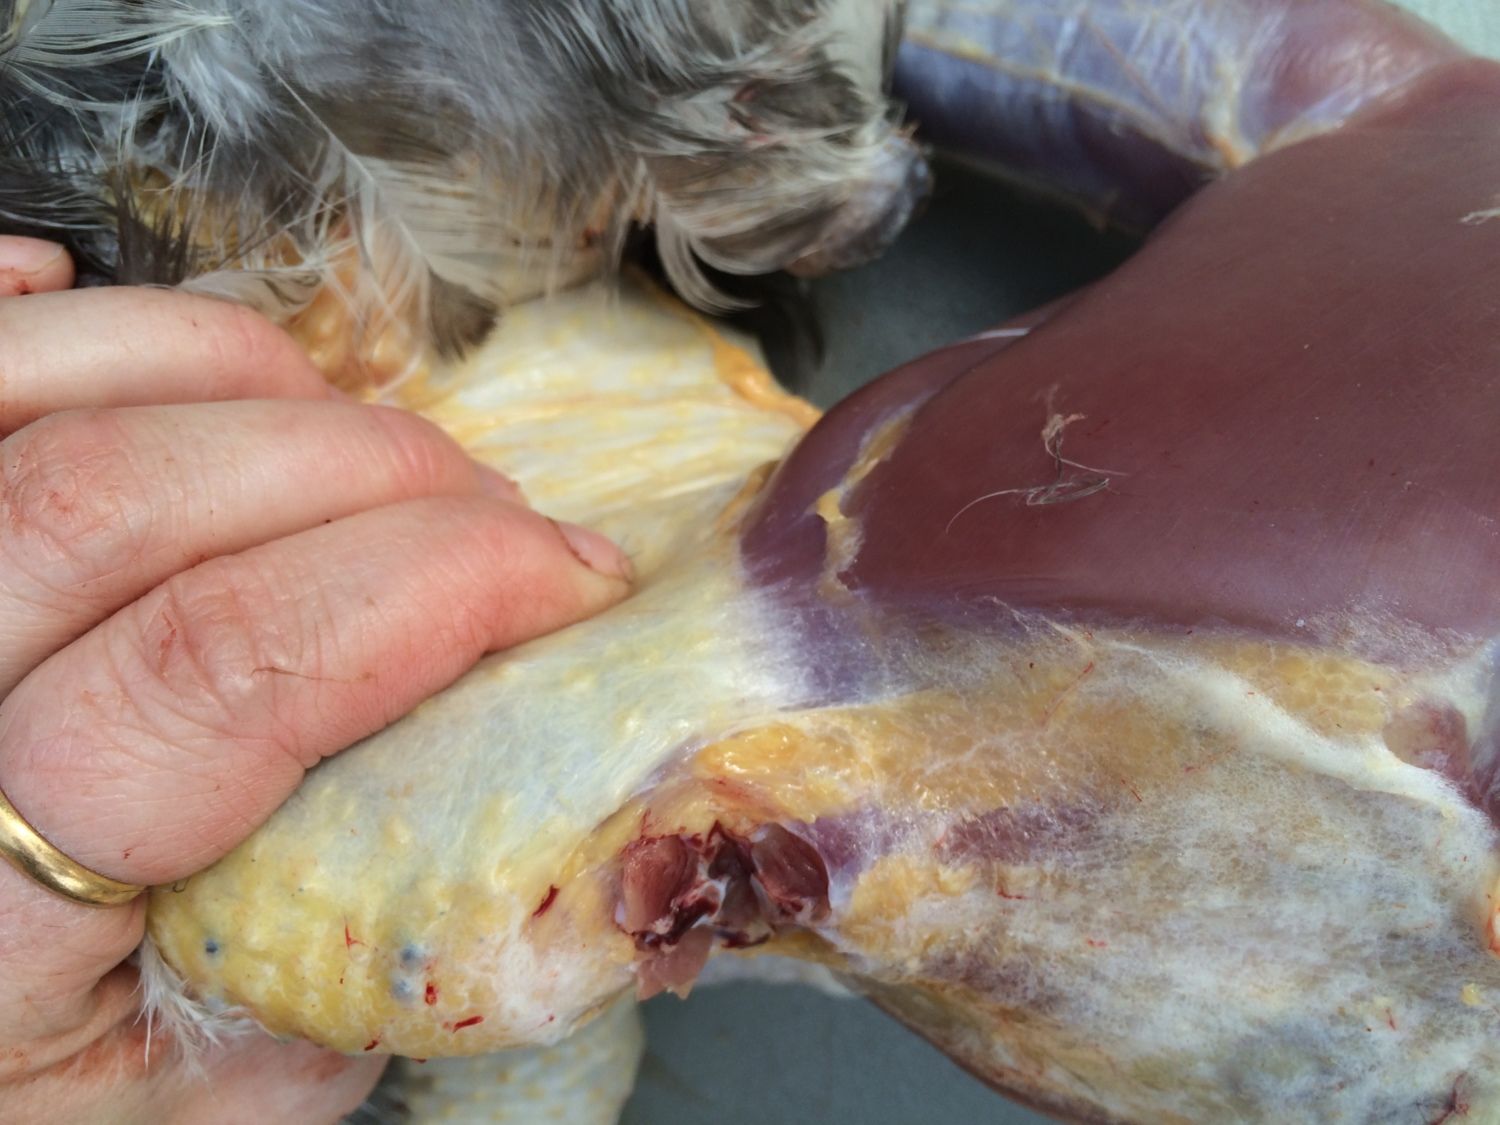
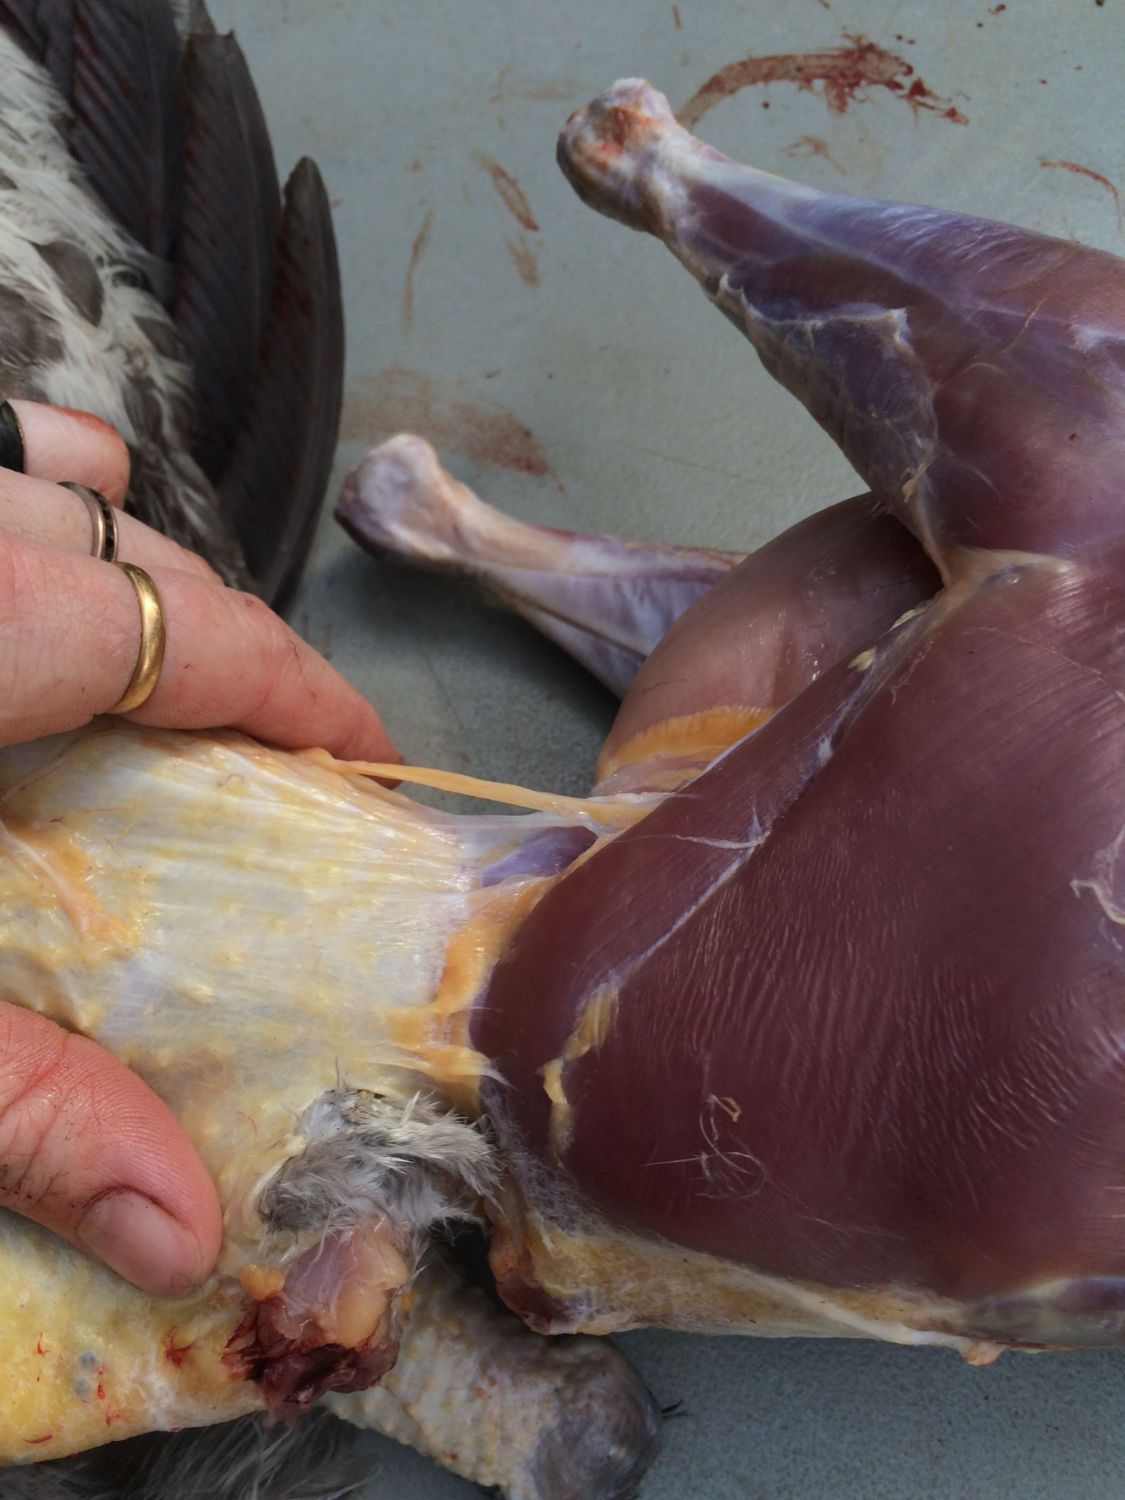
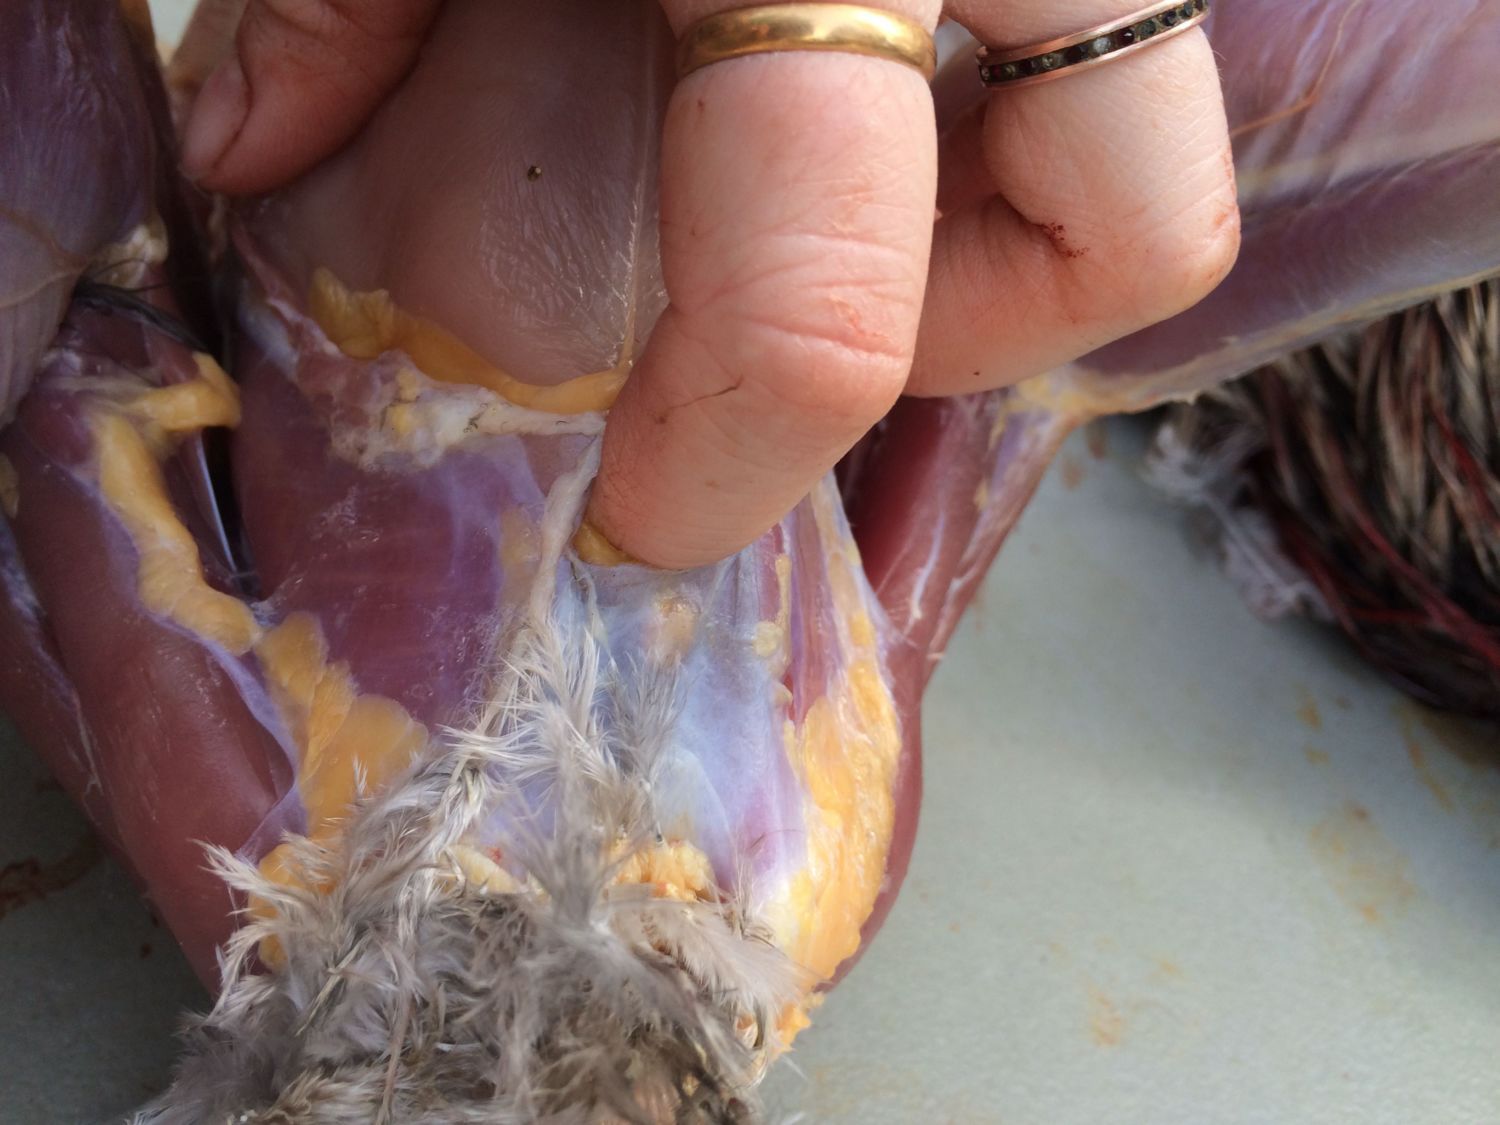
Pull the skin down toward the vent about 1-2 inches beyond the point of the keel, and then flip the bird over.

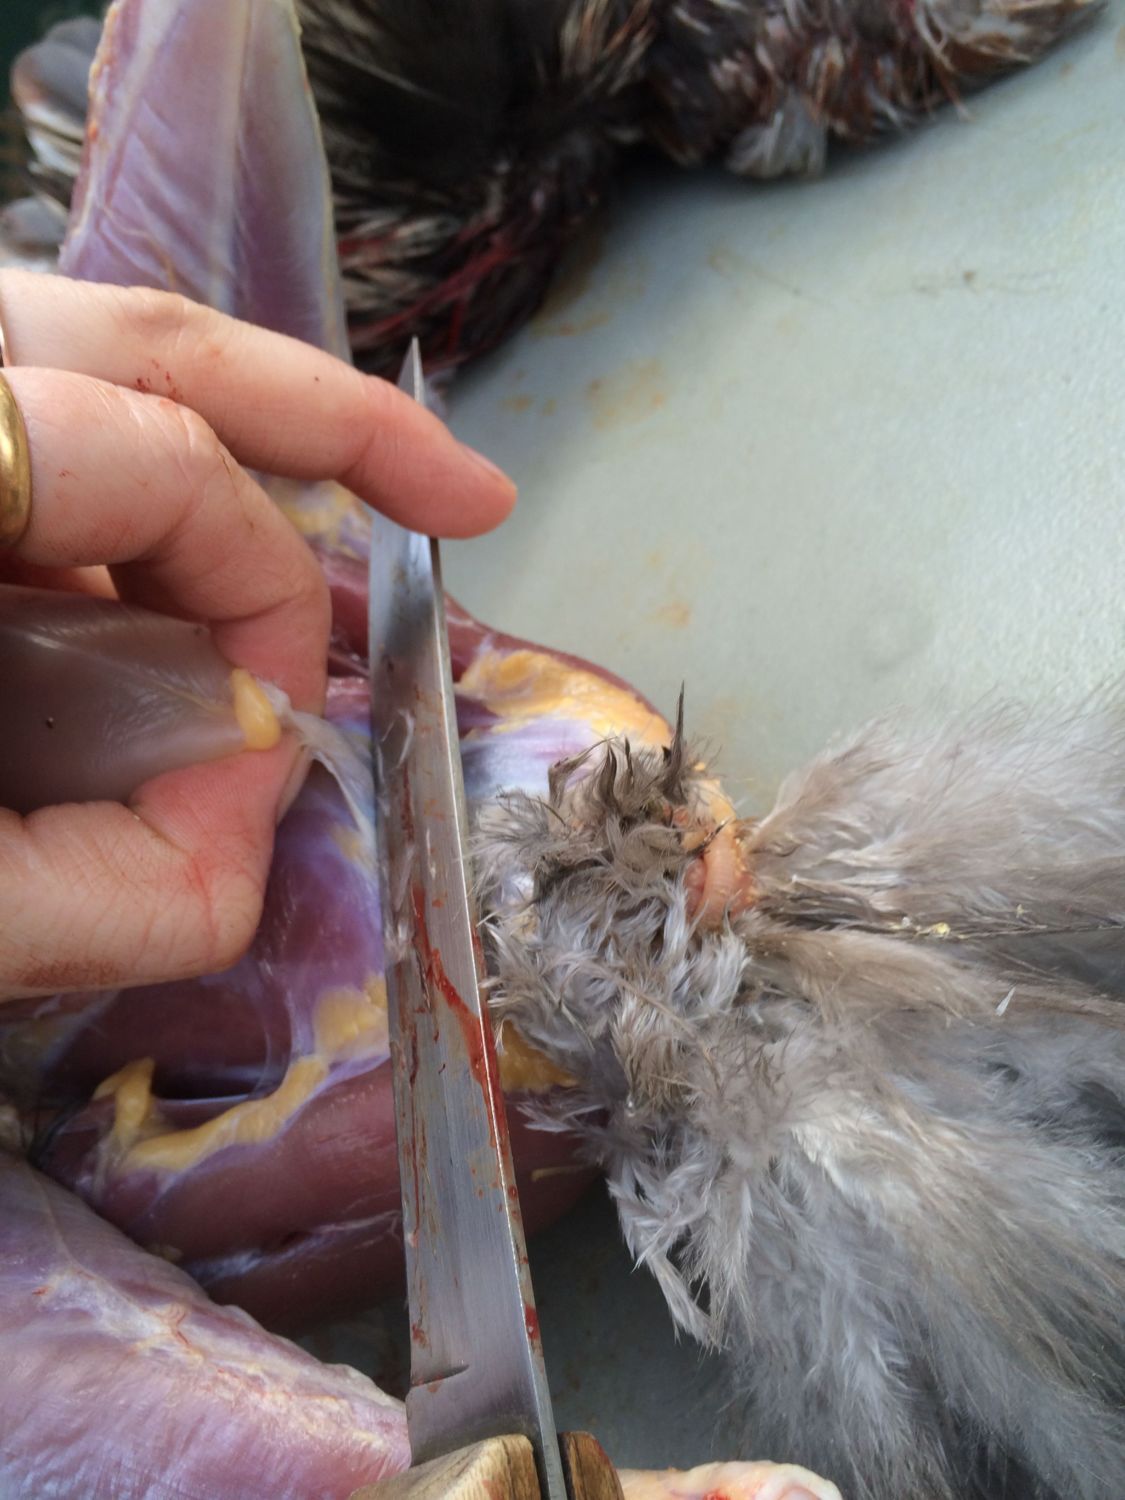
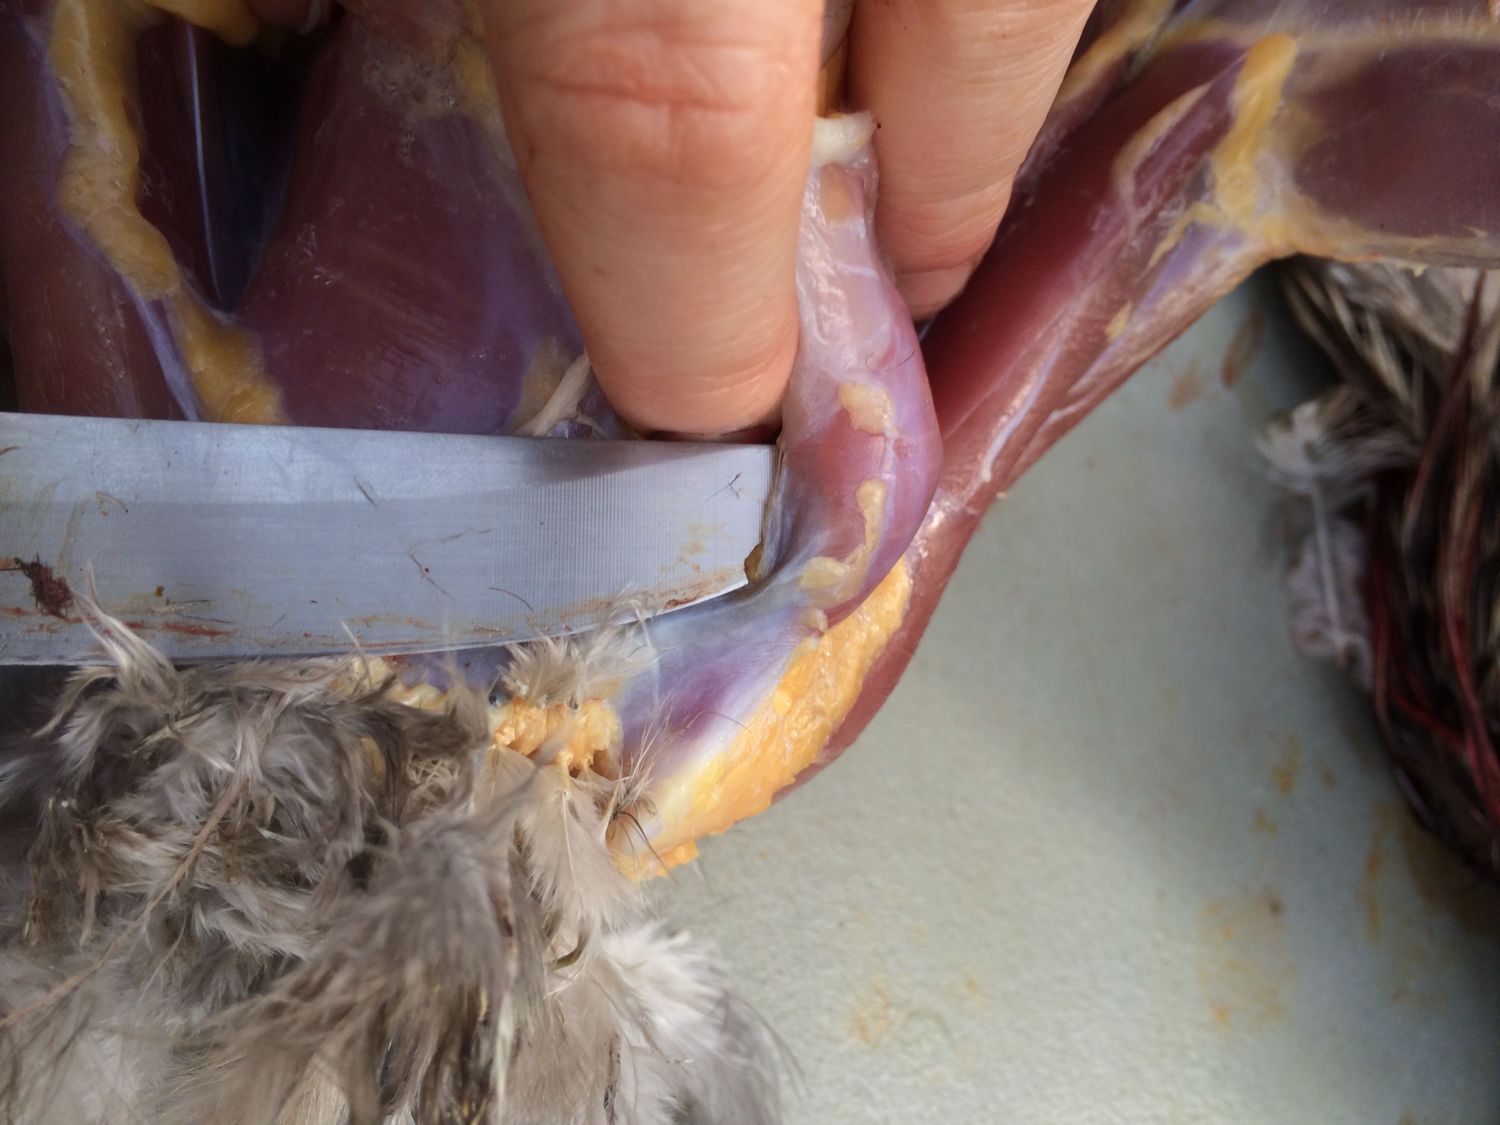
Cut through the joint where the tail meets the body.
Cutting;

The joint is fully cut through, and another 1/2 inch or so of skin is peeling below the tail.

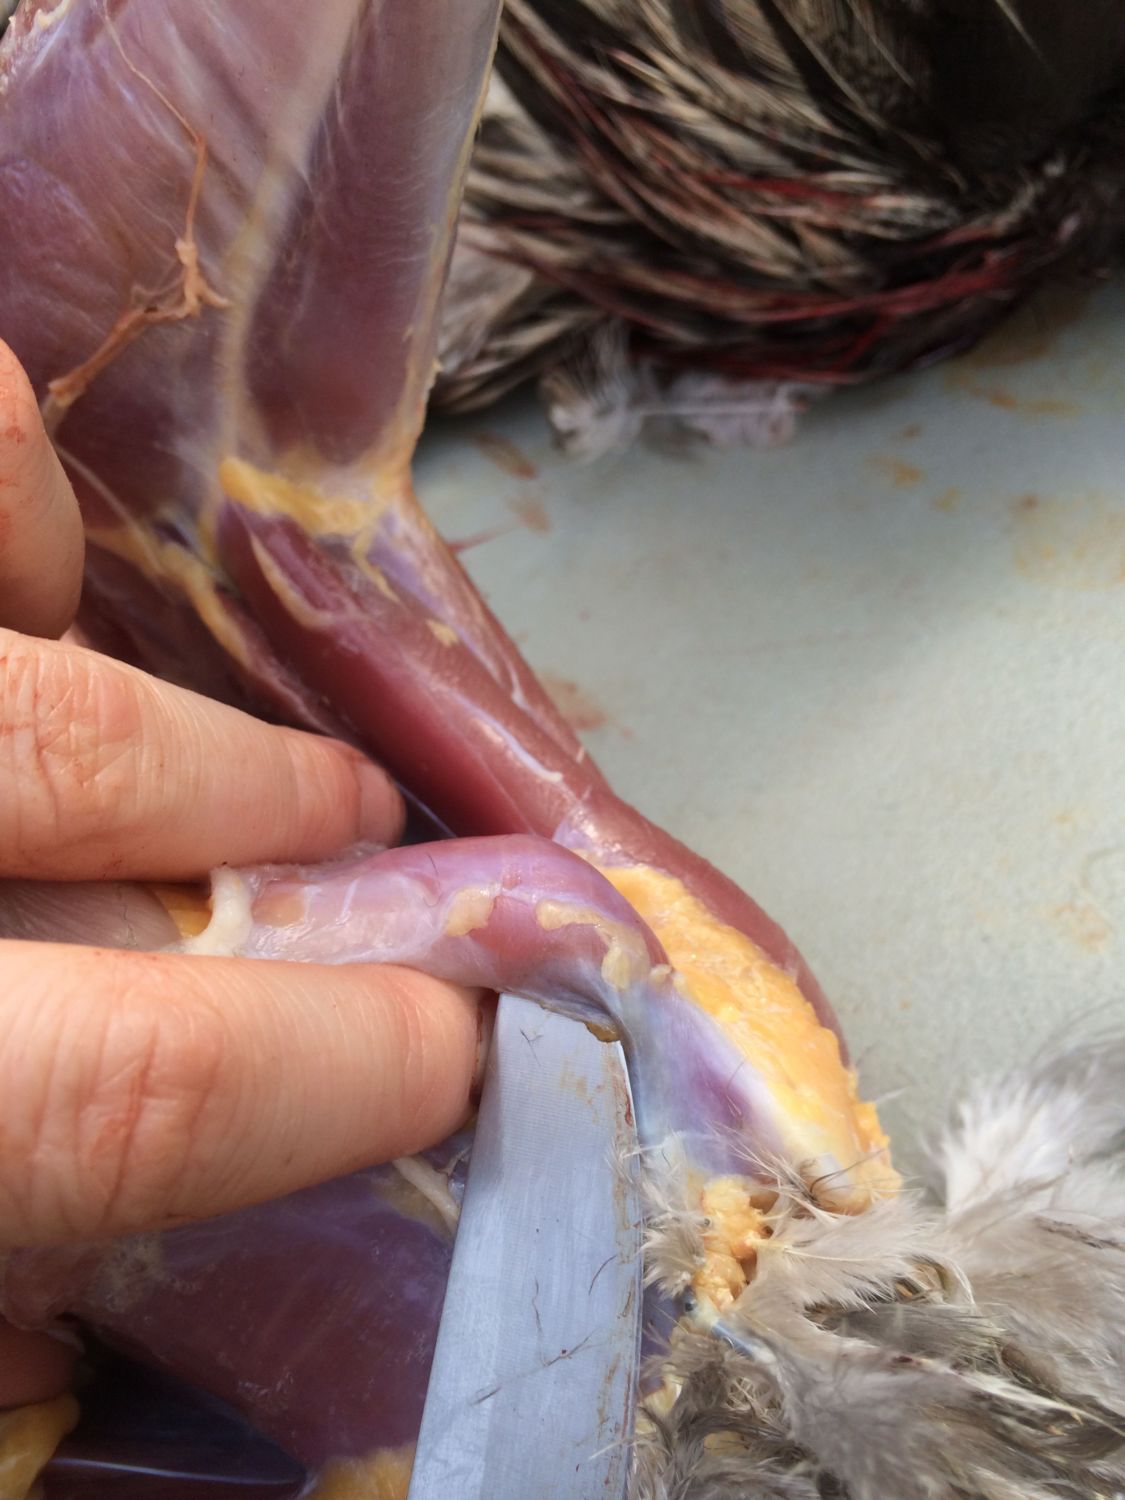
After 1/2 inch below the tail, angle the knife outward and begin the cut away the pelt.
Side view.
Circle around the remaining attached skin, leaving about 1/2-1 inch of skin and feathers on the bird.
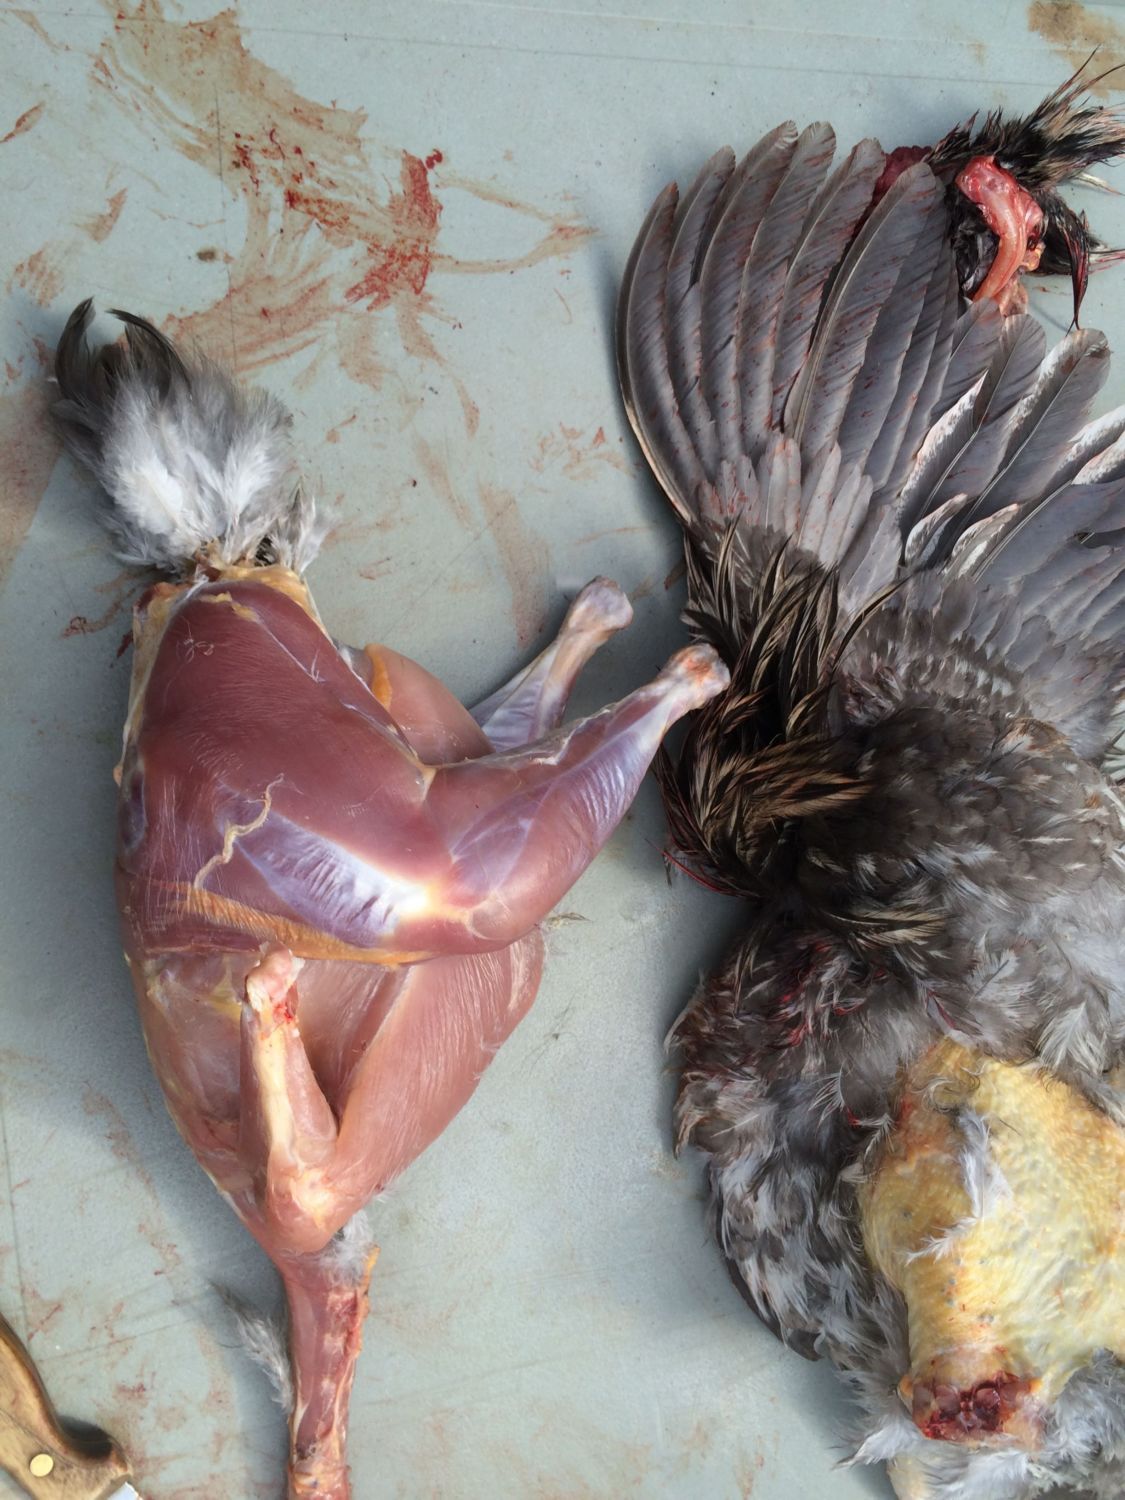
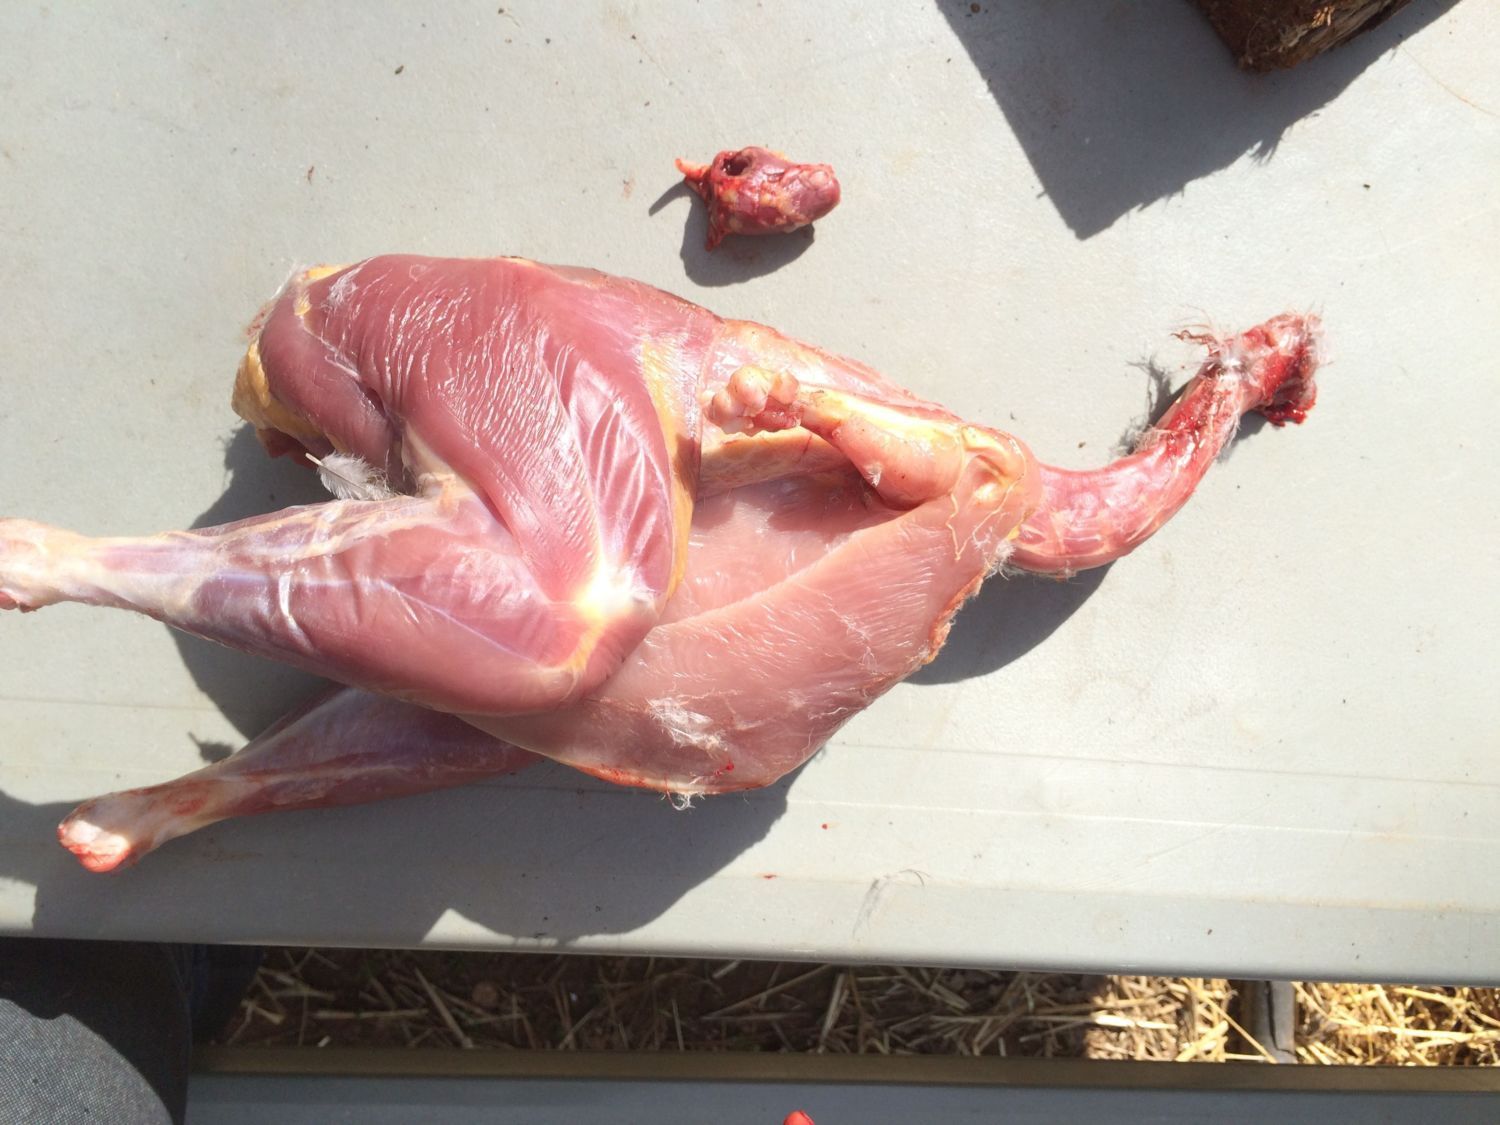
Skinned bird and pelt.

Feathers and skin left around the vent.
Pinch the skin between your fingers and pull it up, placing the knife like this across the belly.
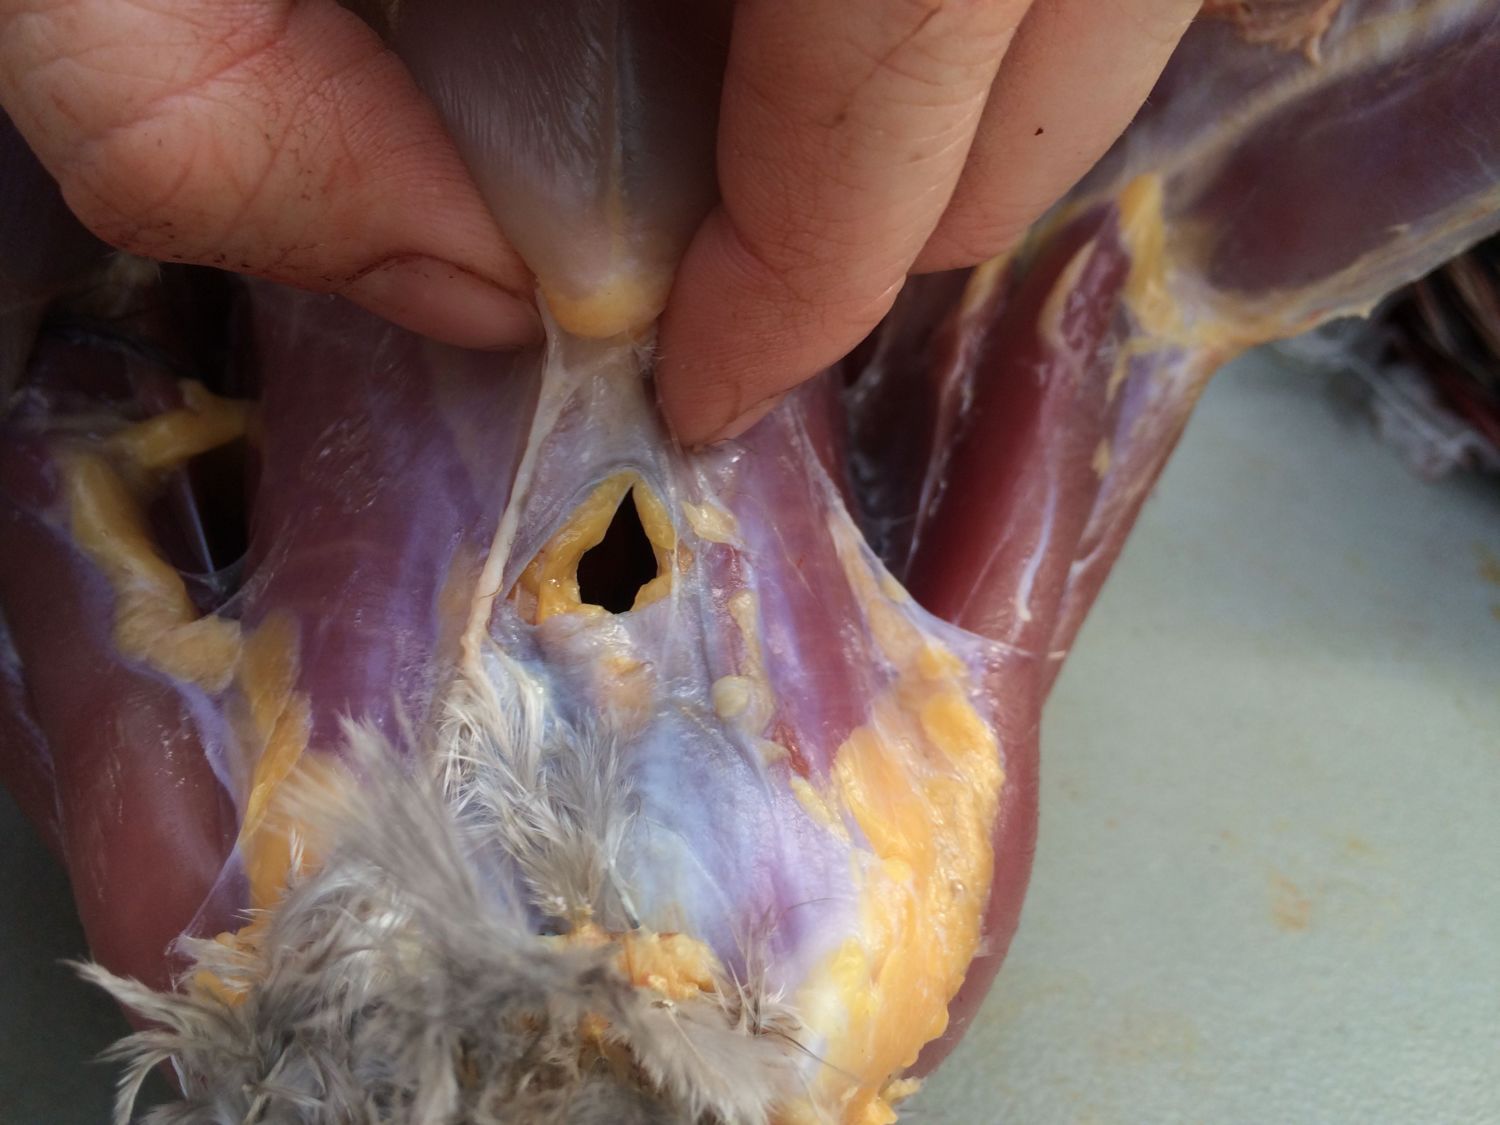
Slice just a little bit downward, enough to puncture the skin like this.
Push your finger into the hole...
And slip the knife in beside it (but be sure not to cut yourself!)
Angle the knife up and make sure to stay directly against the skin.
Cut to both sides.
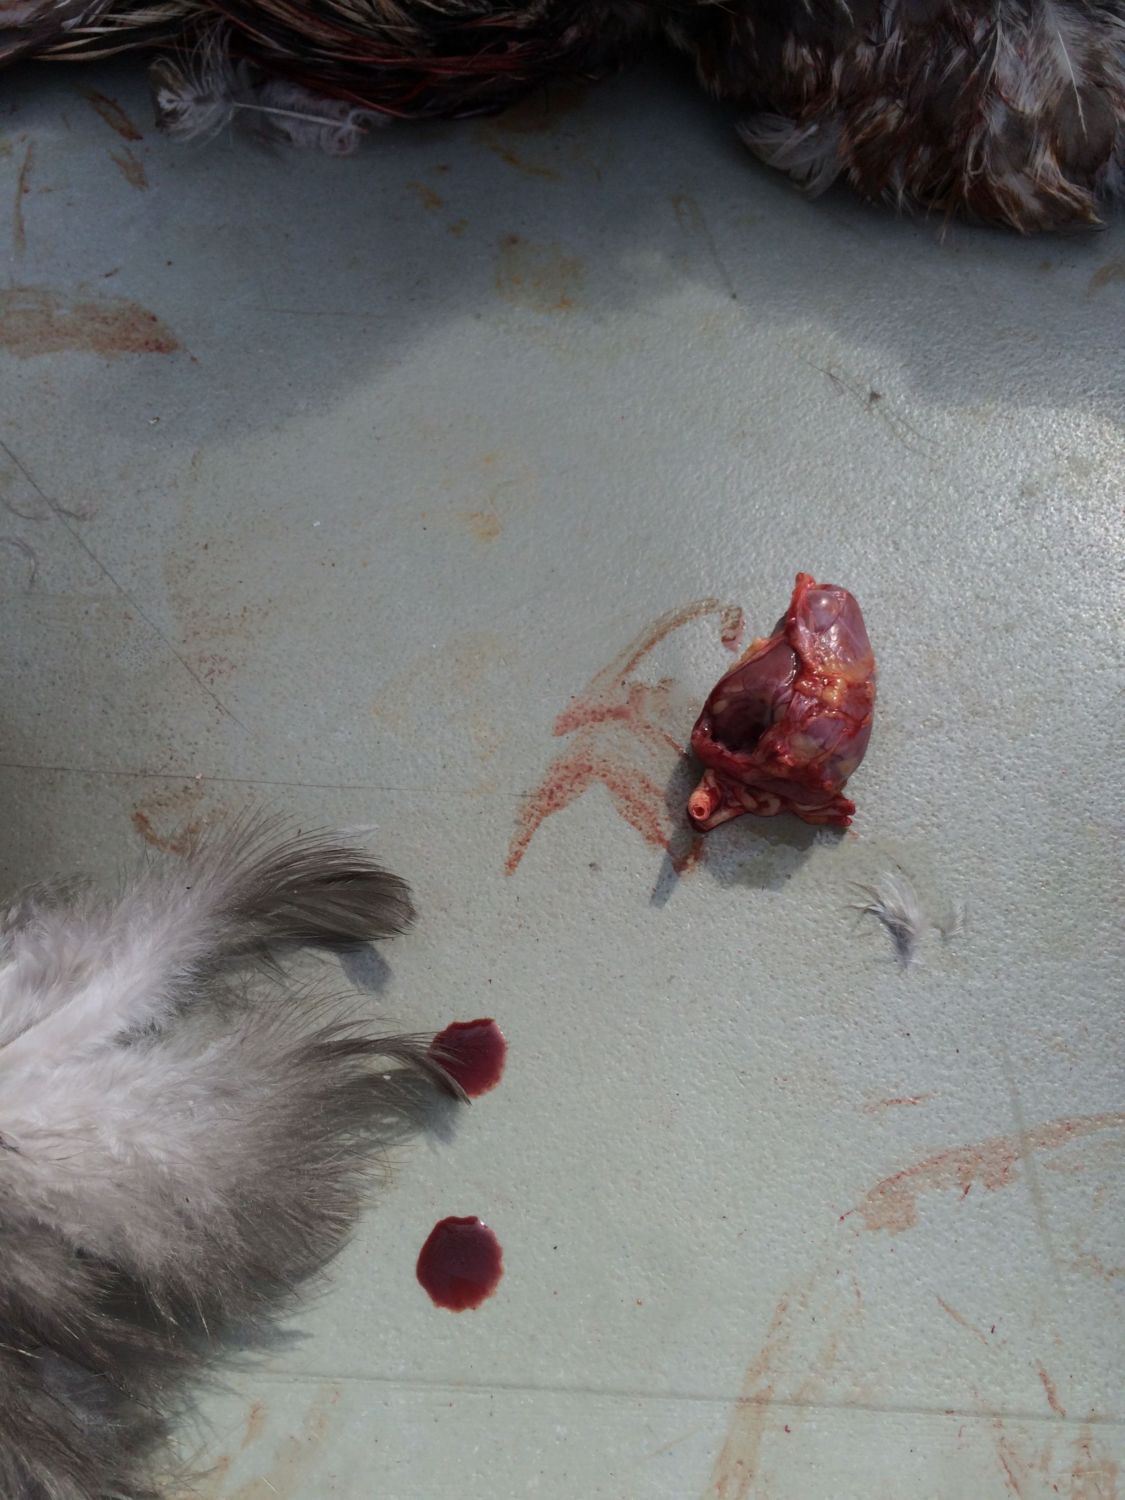
Reach way up into the bird and pull out the heart first;
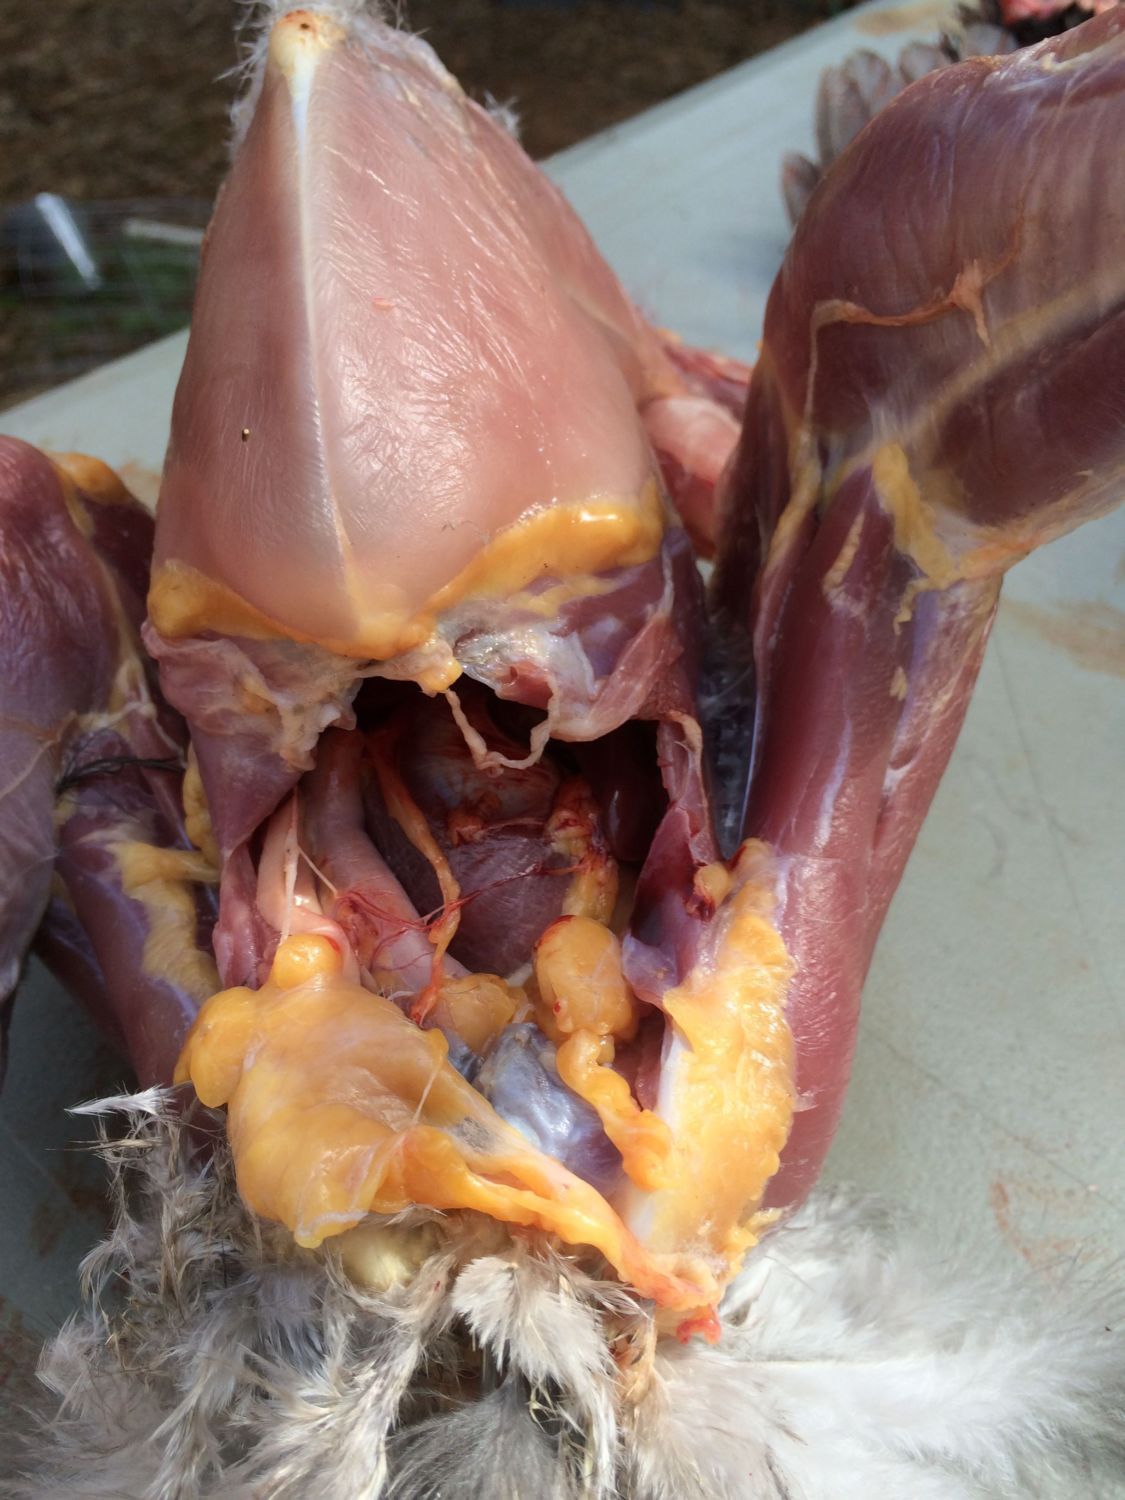
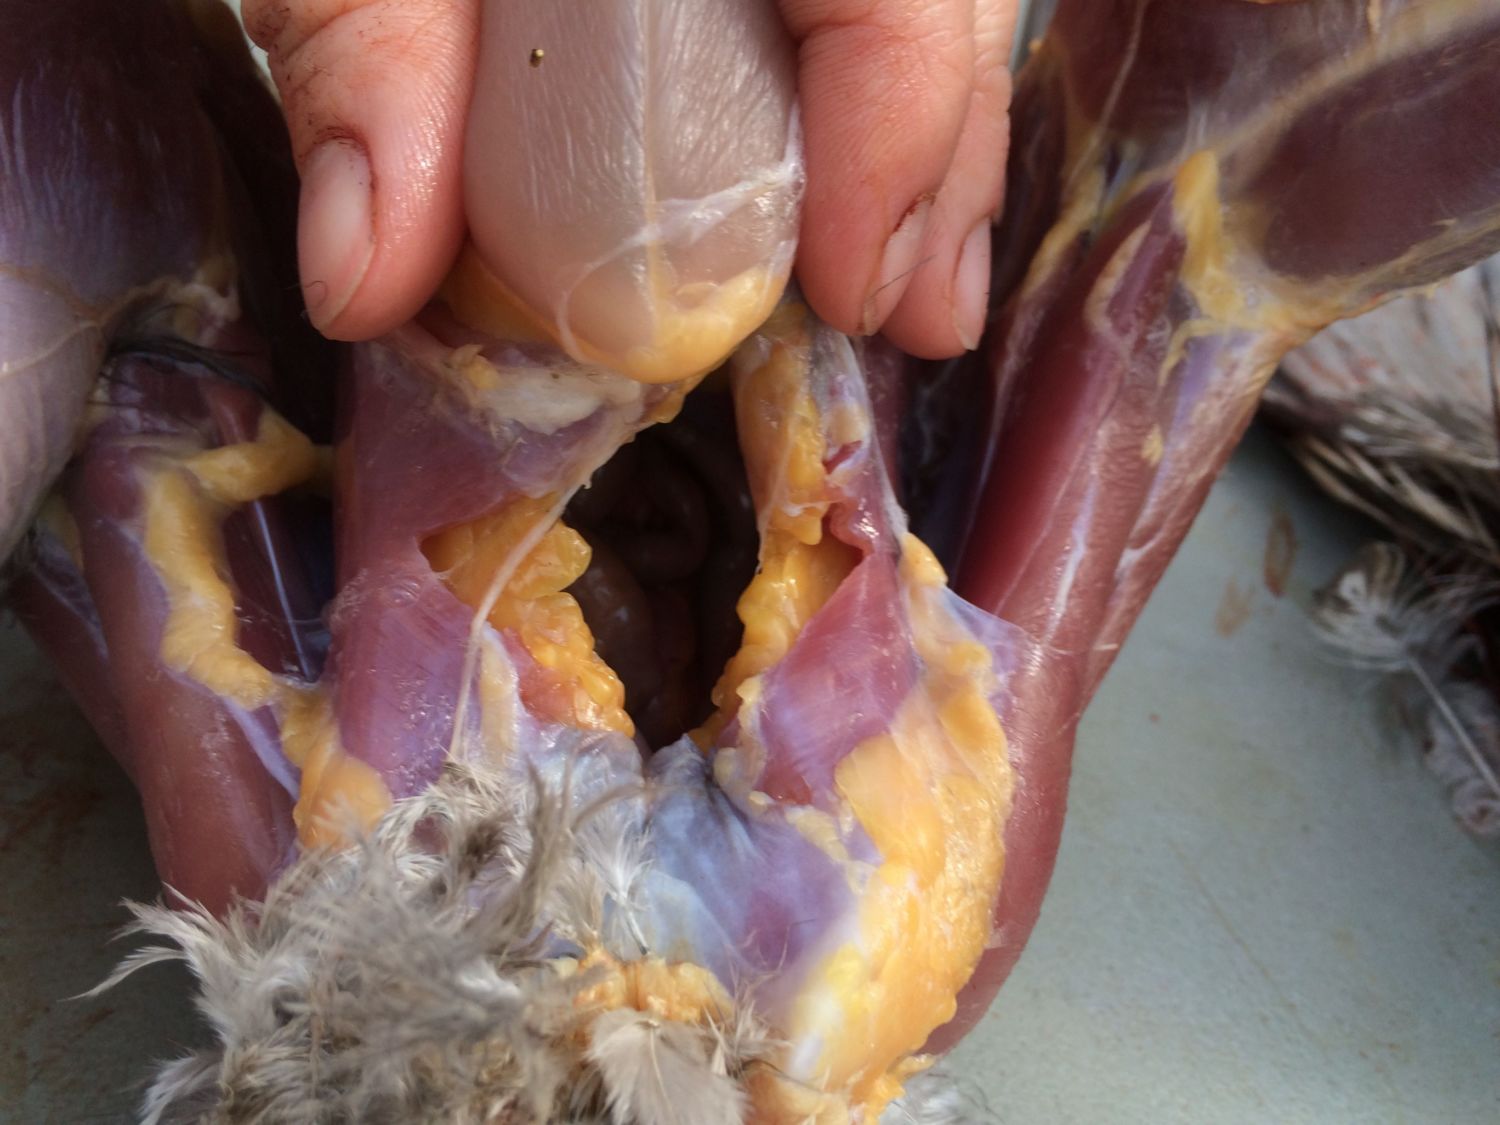
Here you can see the organs inside the bird. The gizzard, at first, will be attached via fat to the inner wall of the breast. The quickest way to detach it is to stick your finger in the bird, curve it around the fat, and pull back out, breaking it.
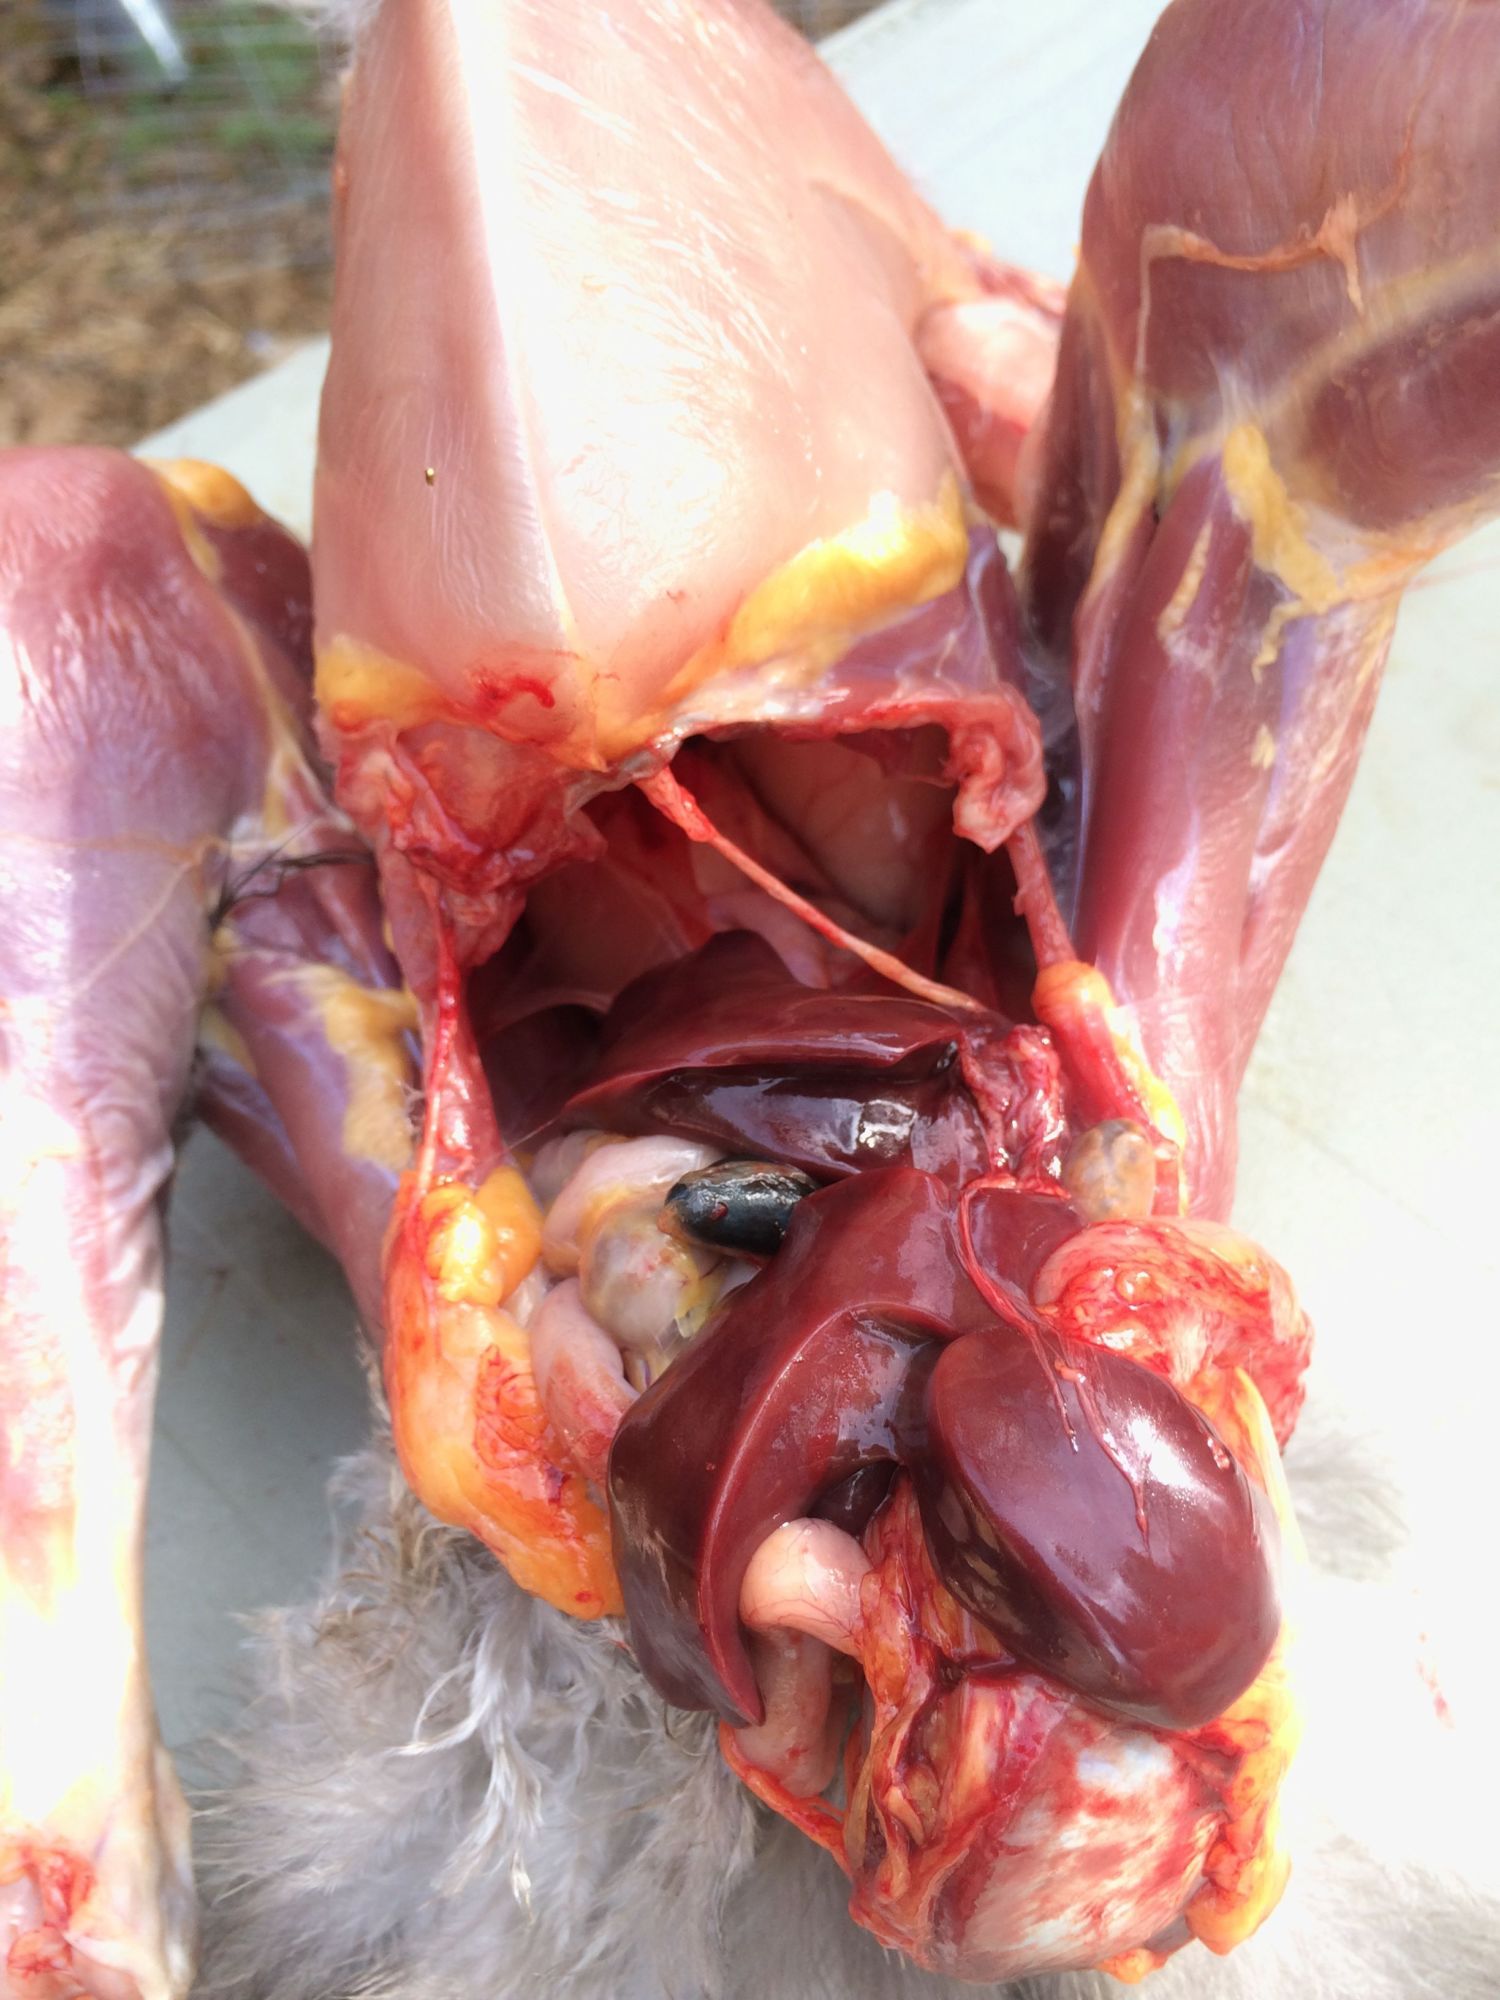
Organs halfway out.
Organs out, attached to the carcass only by fat and the end of the intestines.
Fat cut.

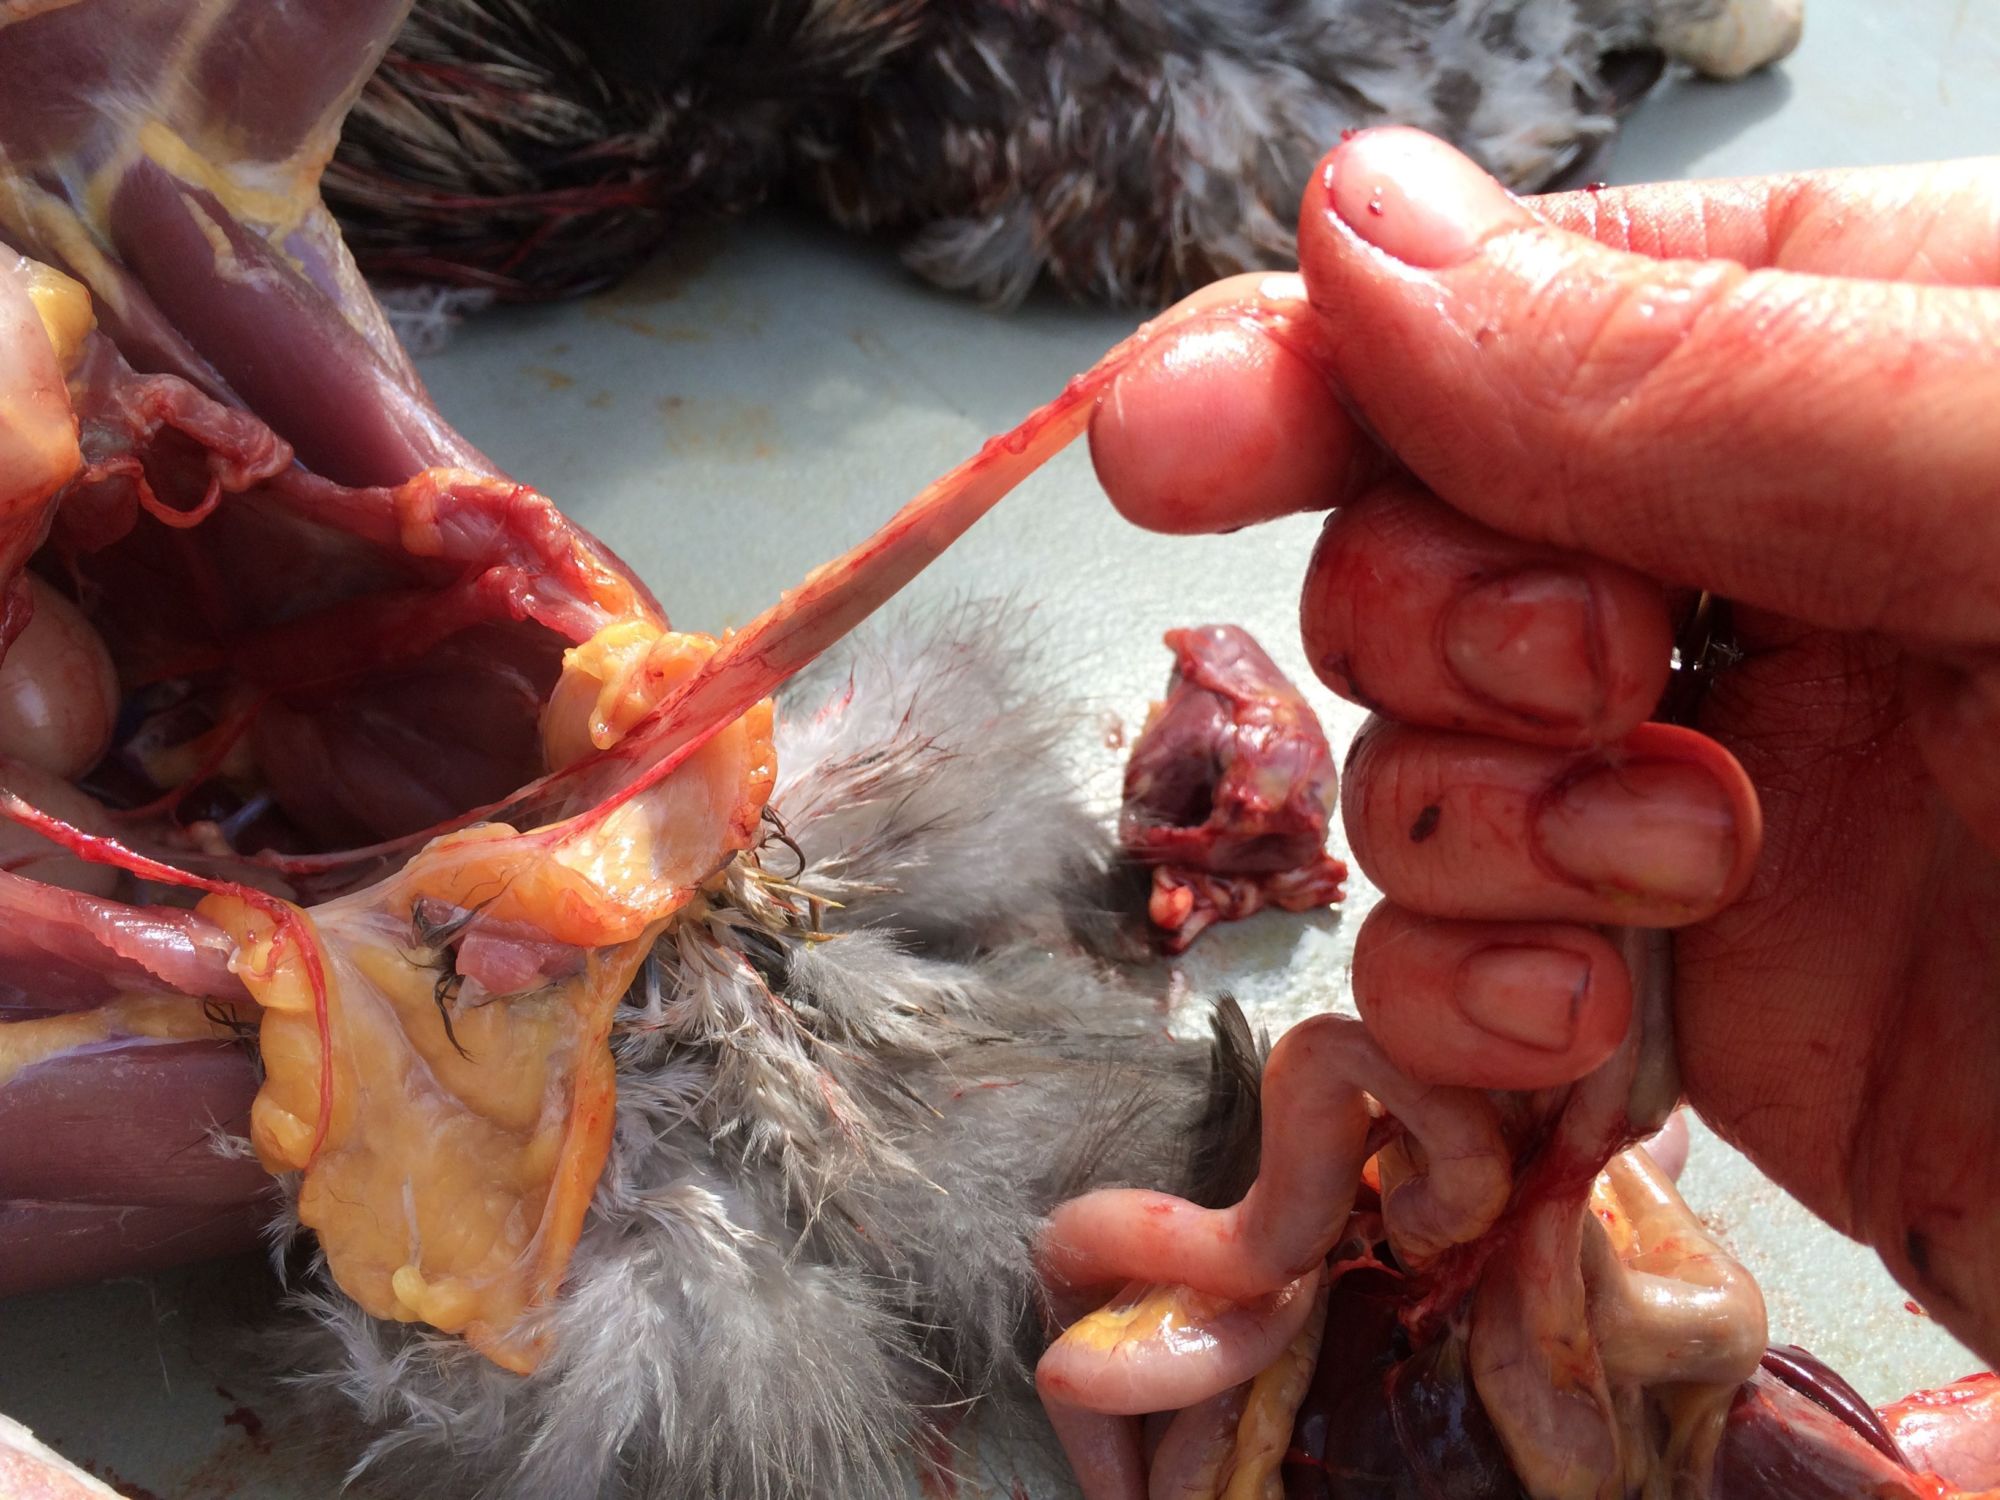
Pull the intestine to the side and make a U-shaped cut around and below the rectum.

Detached.

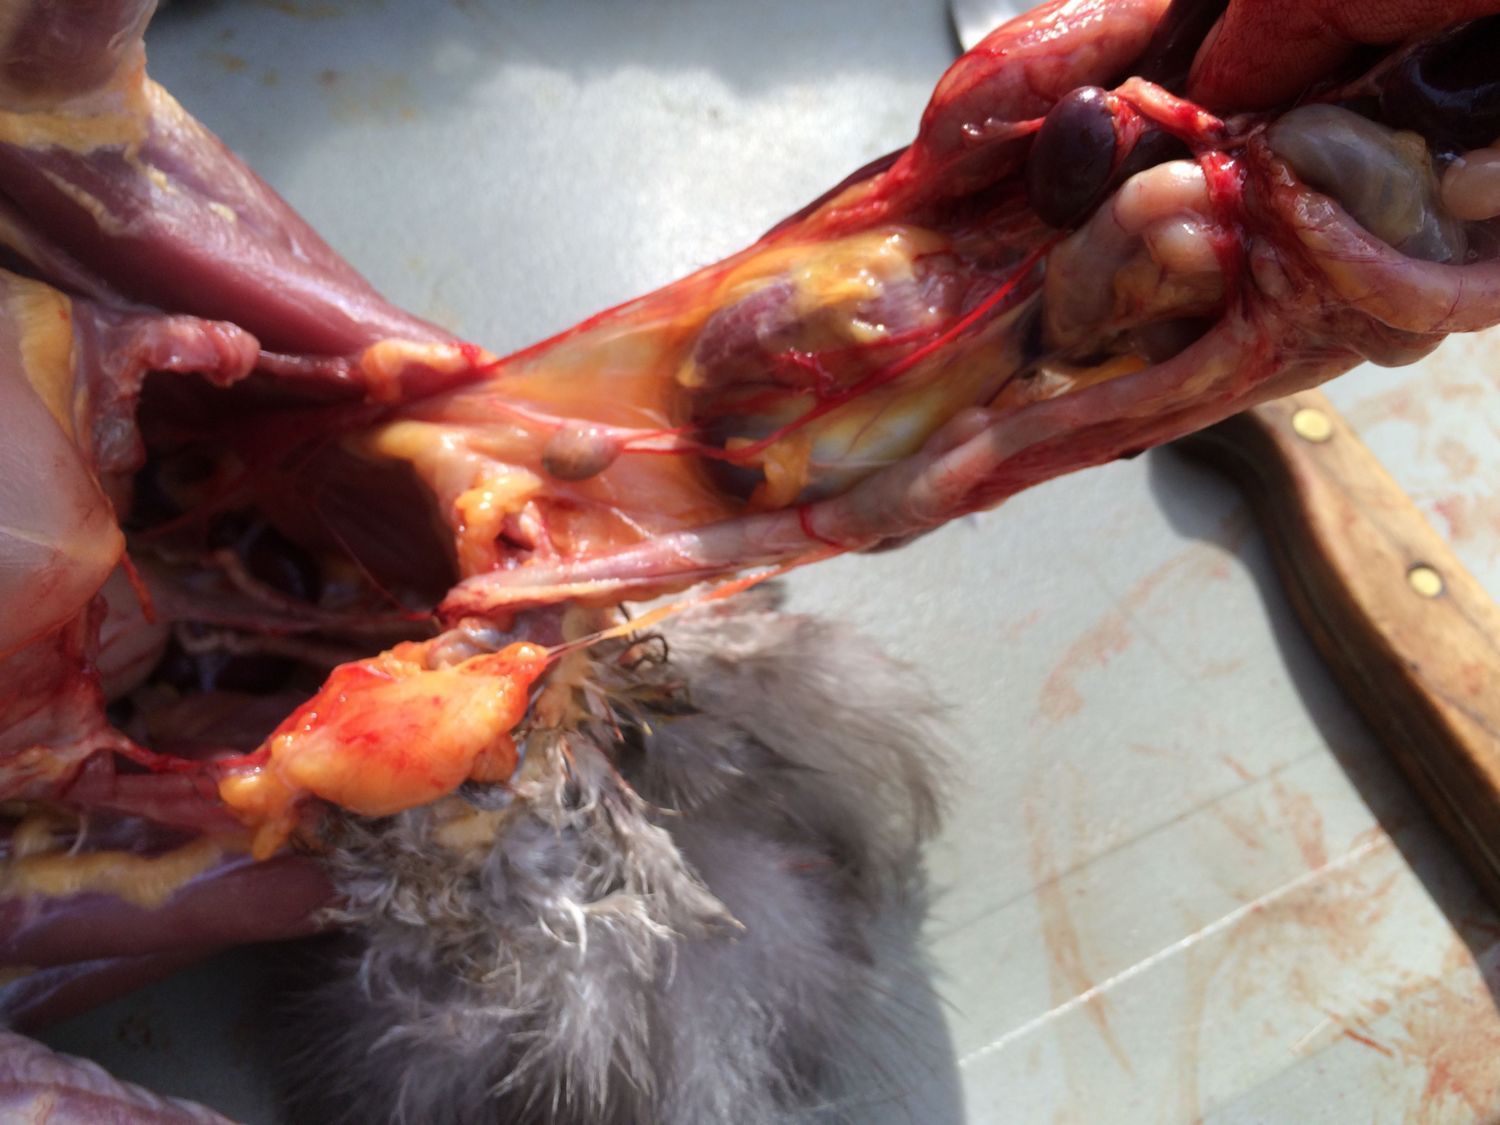
These may just explain how bold and aggressive he was...
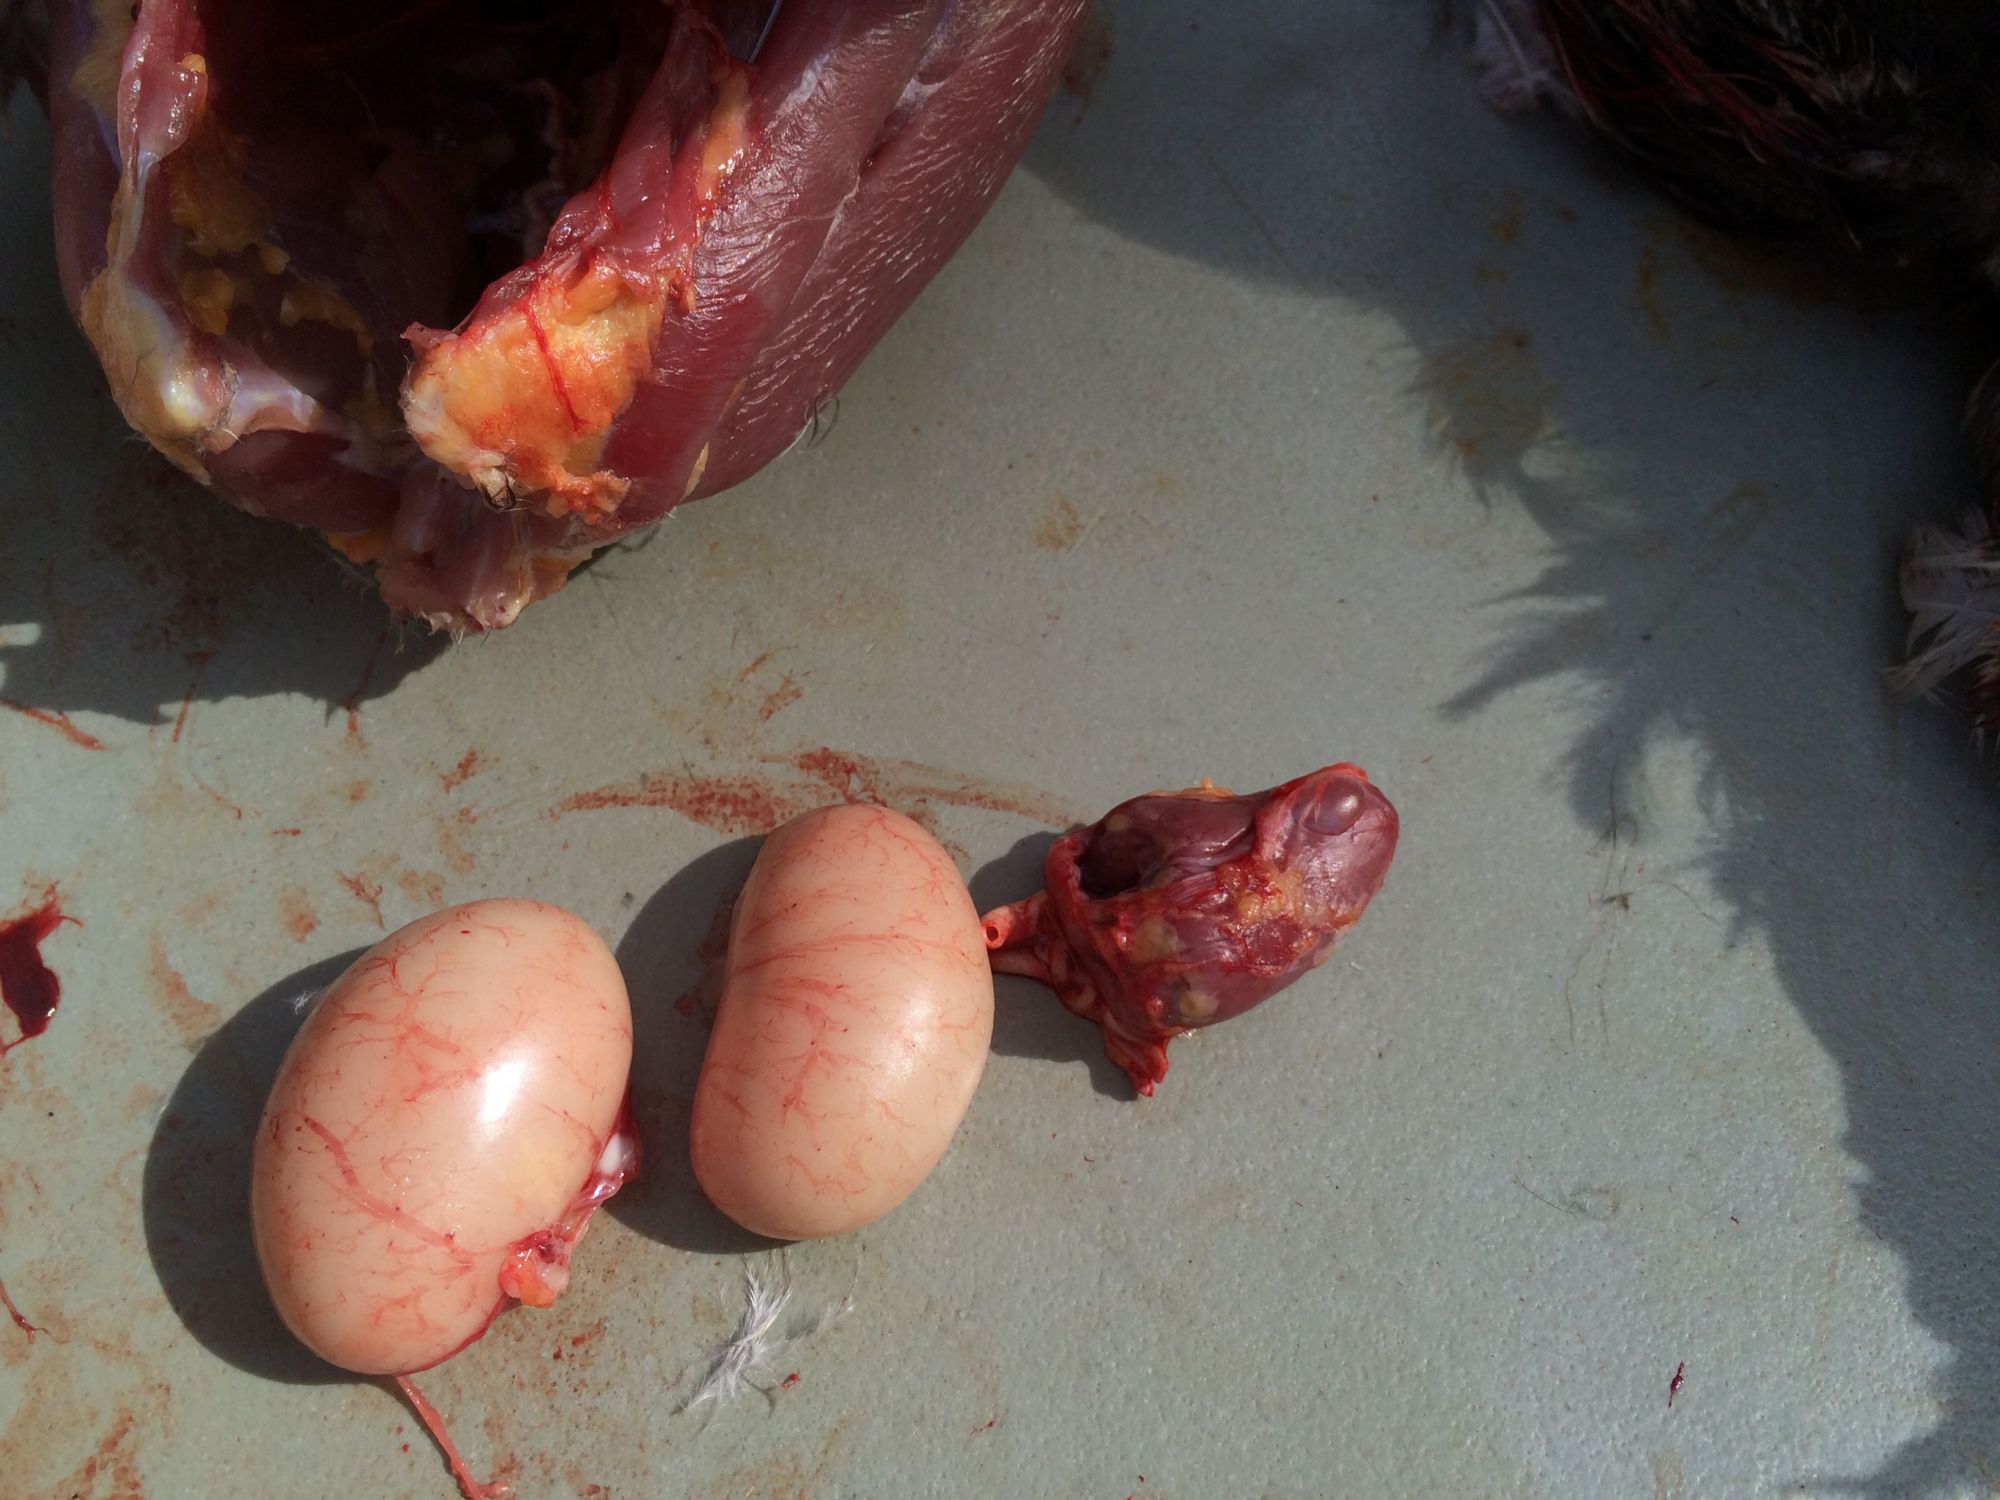
The testes should come out with ease.
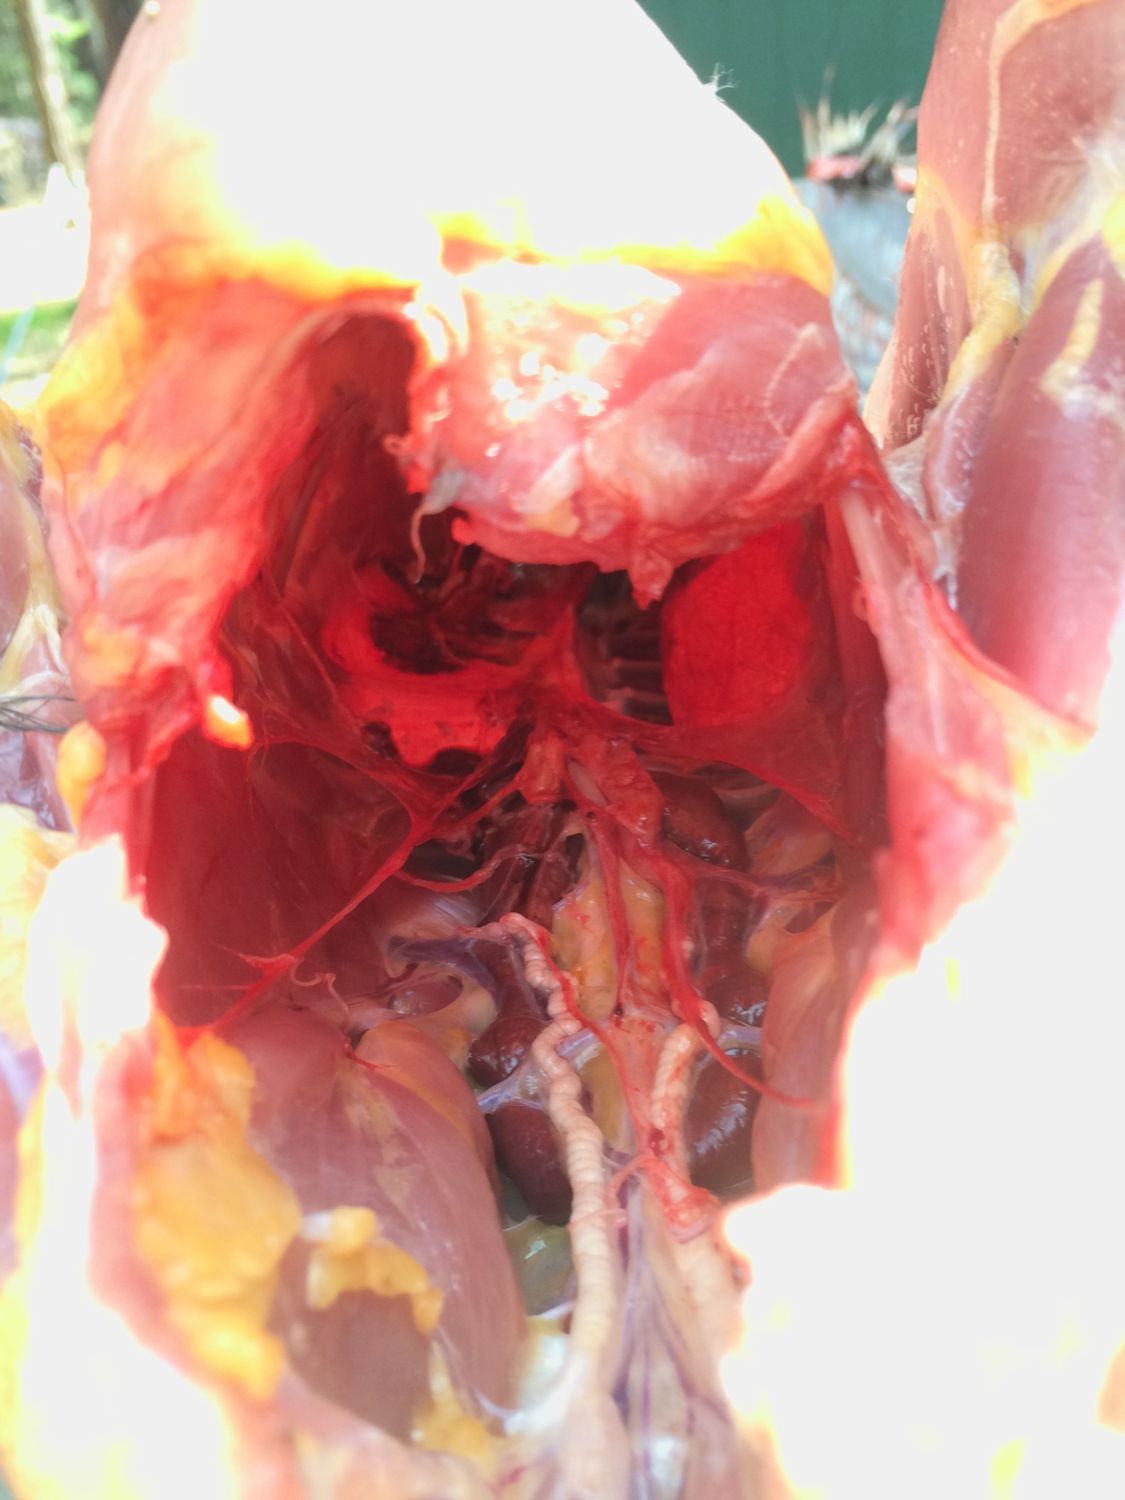
Lungs are still nestled firmly in the ribs.
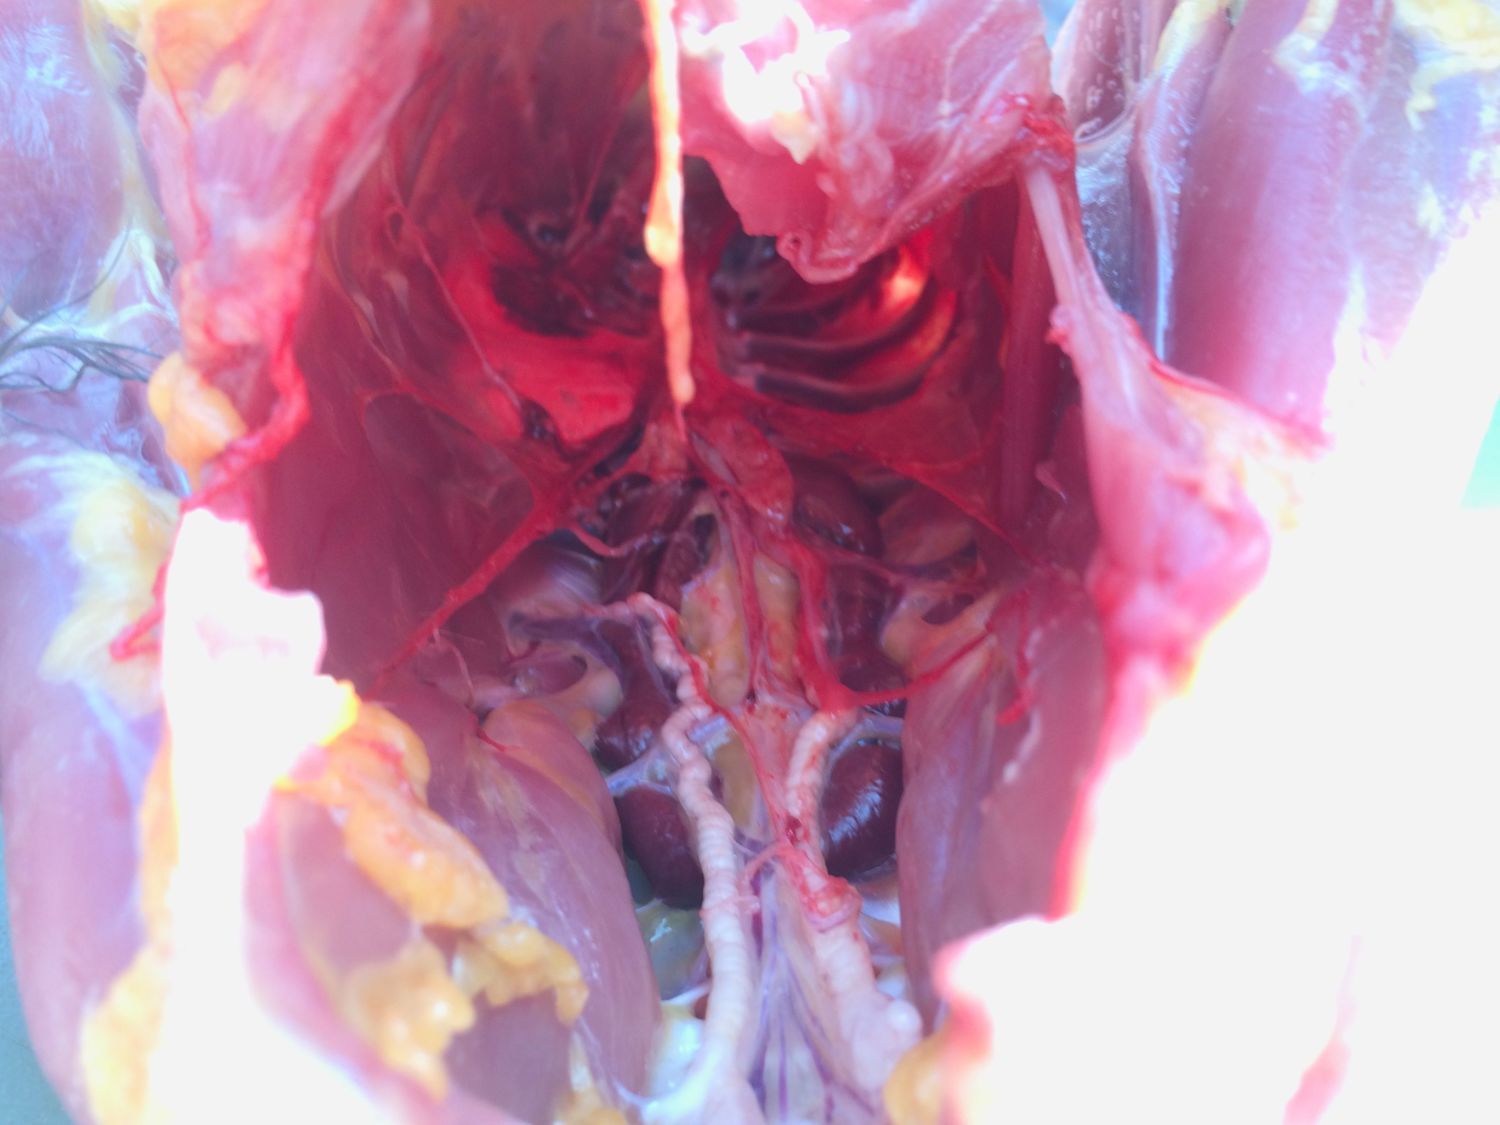
One lung removed.
And the other.

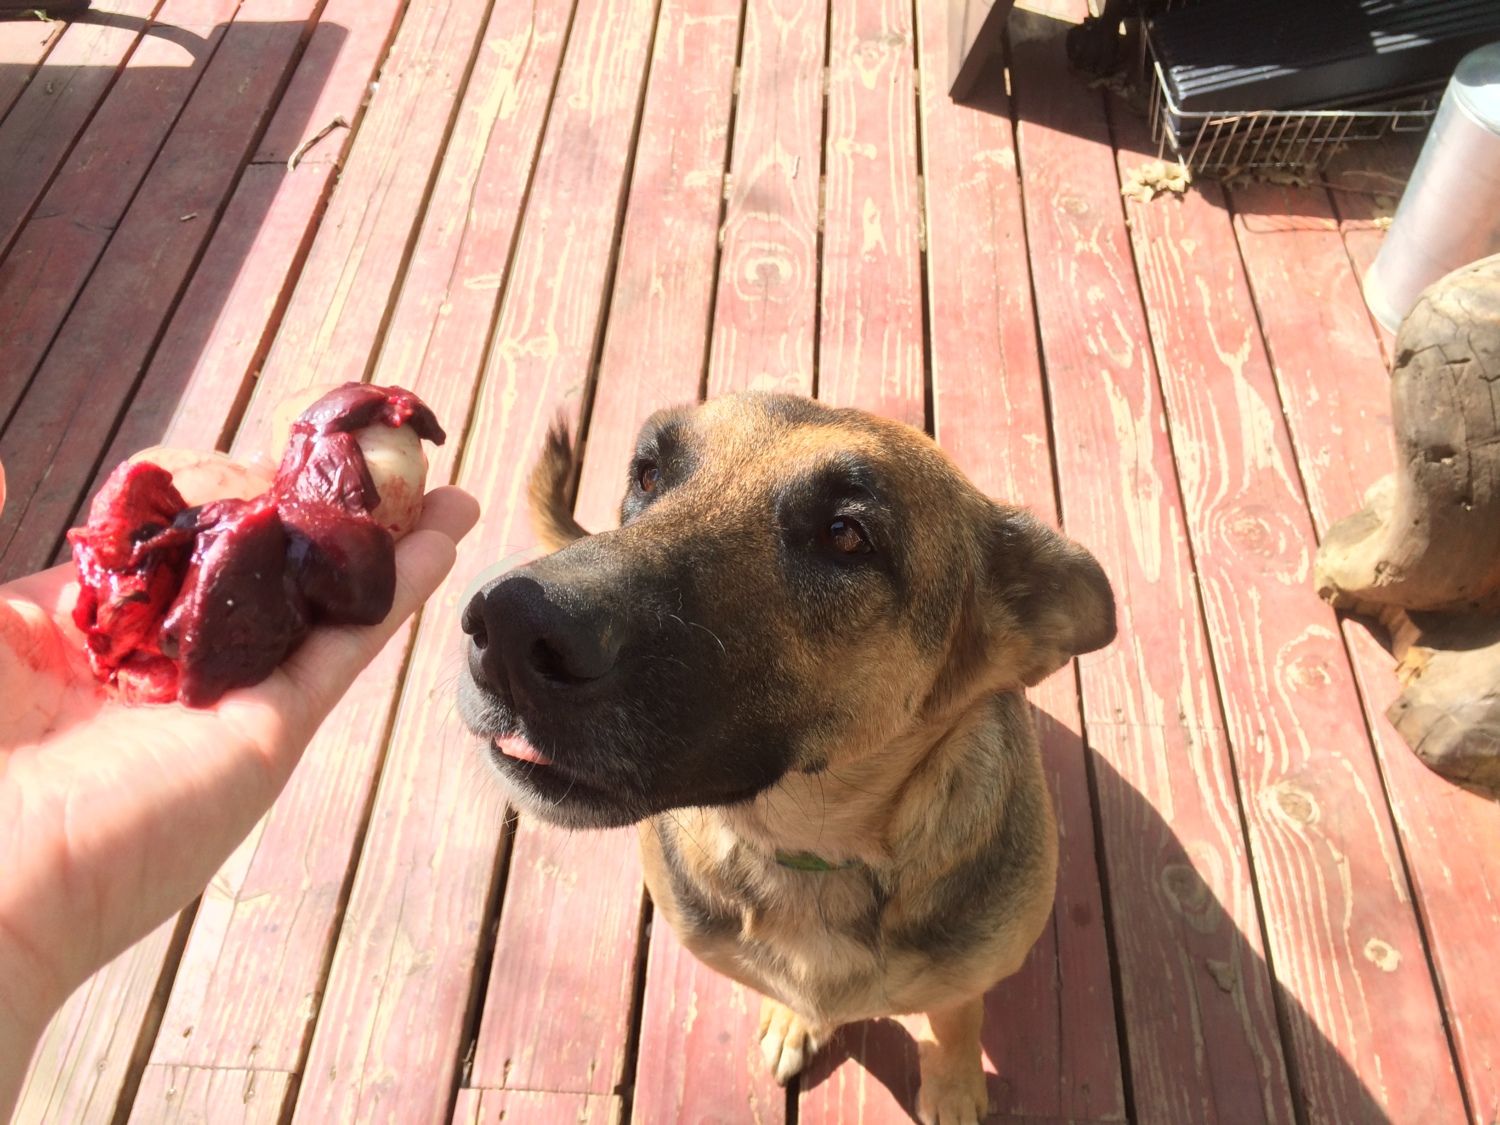
"Dog food" pile (or keep the liver, if you for some weird reason don't find them absolutely horrendously disgusting)

"Trash/burn/bury" pile
The good stuff

Time for a good washing...
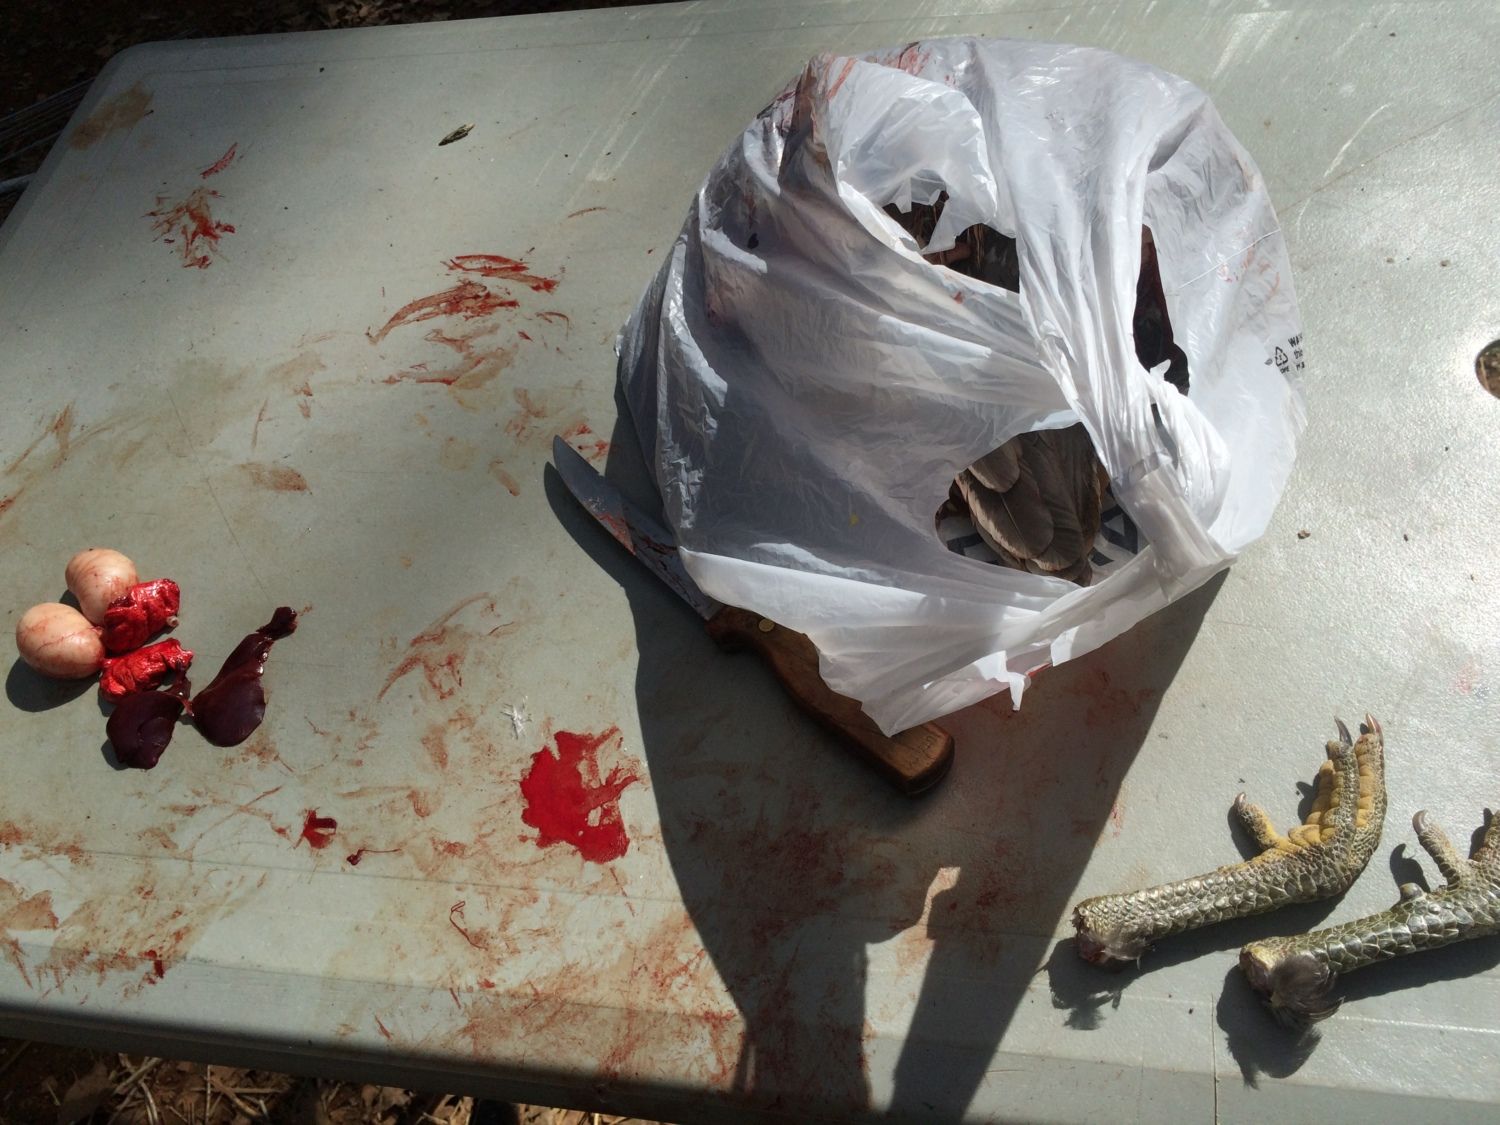
Bagging the trash
Yum!
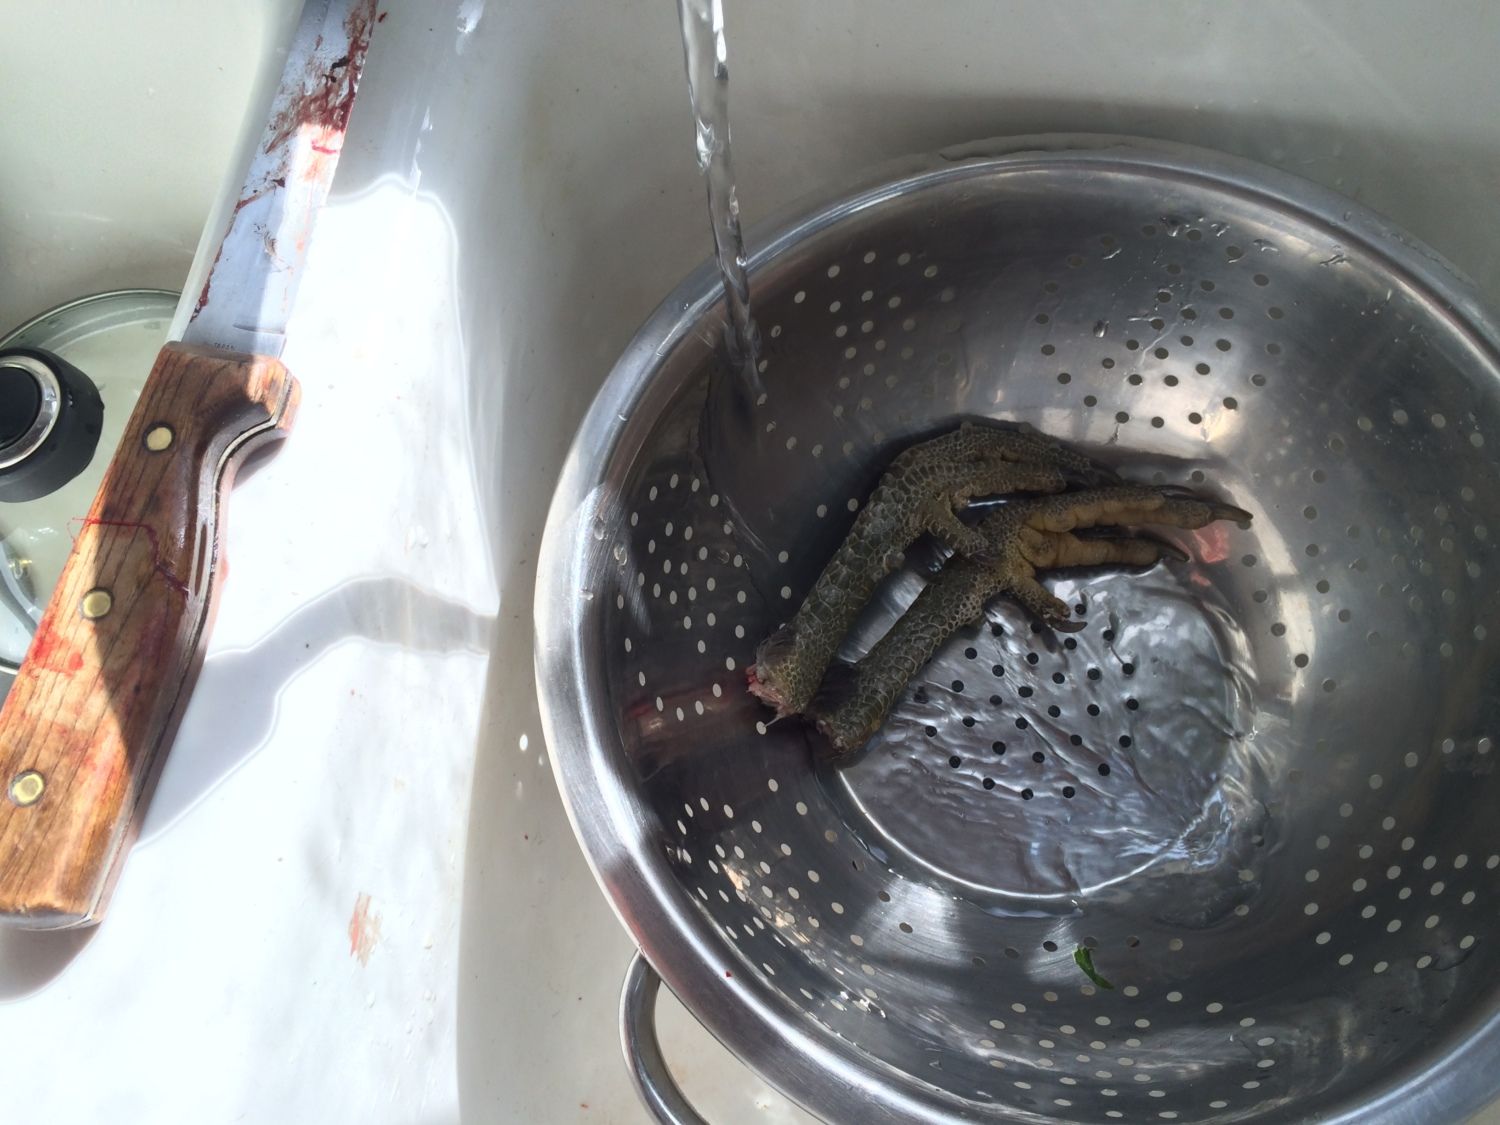
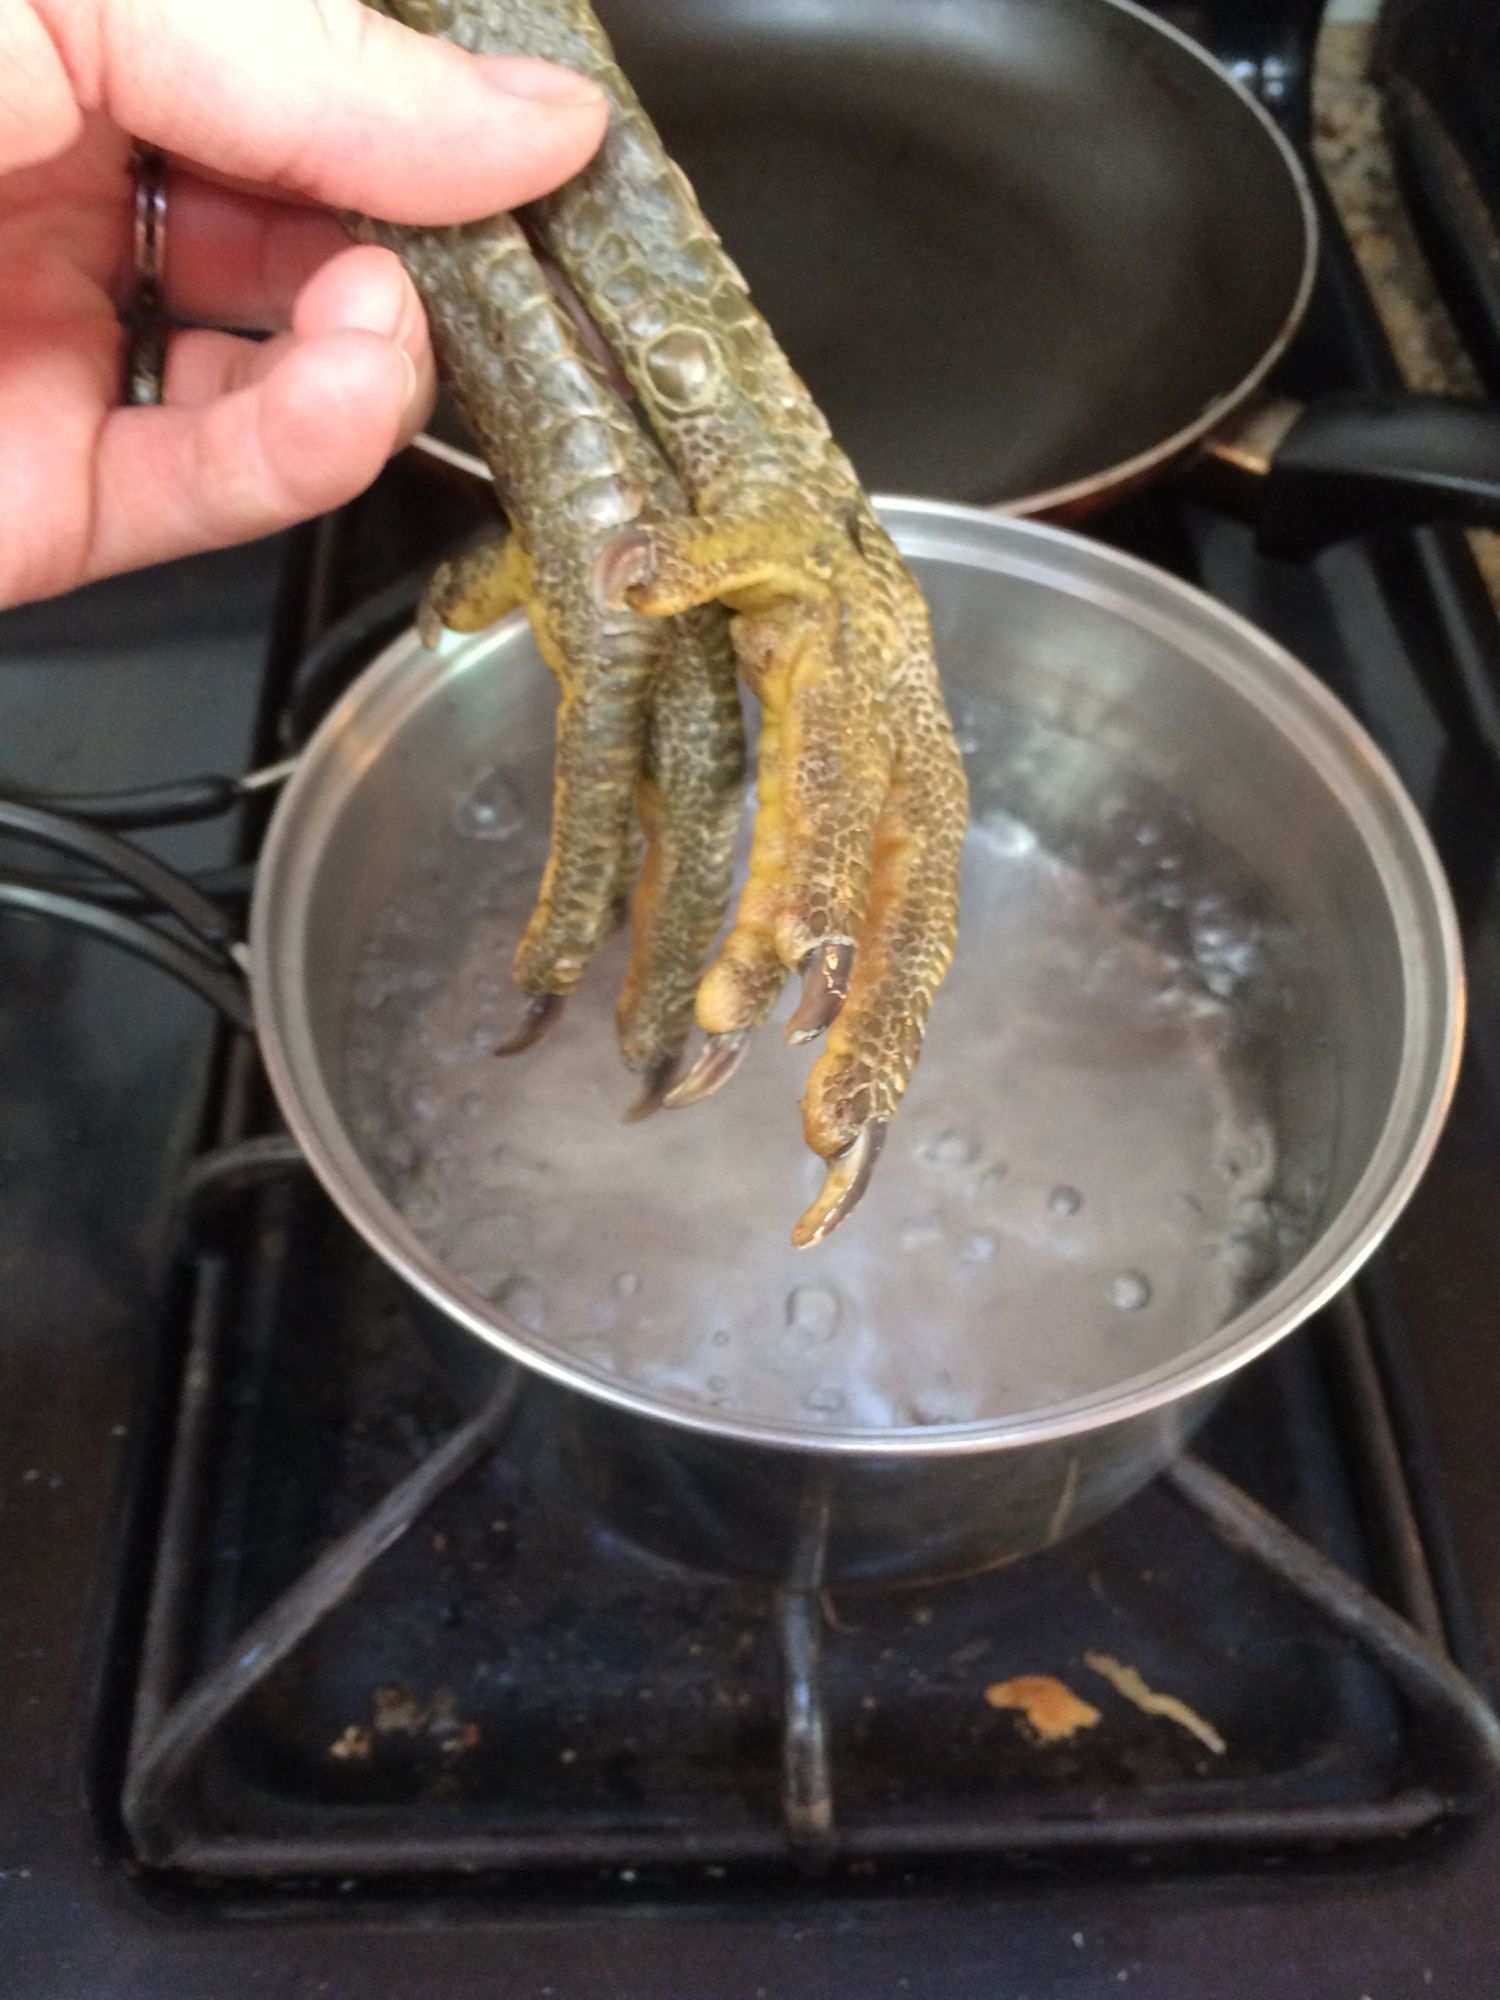
Can't forget about these!

Set that to boil...
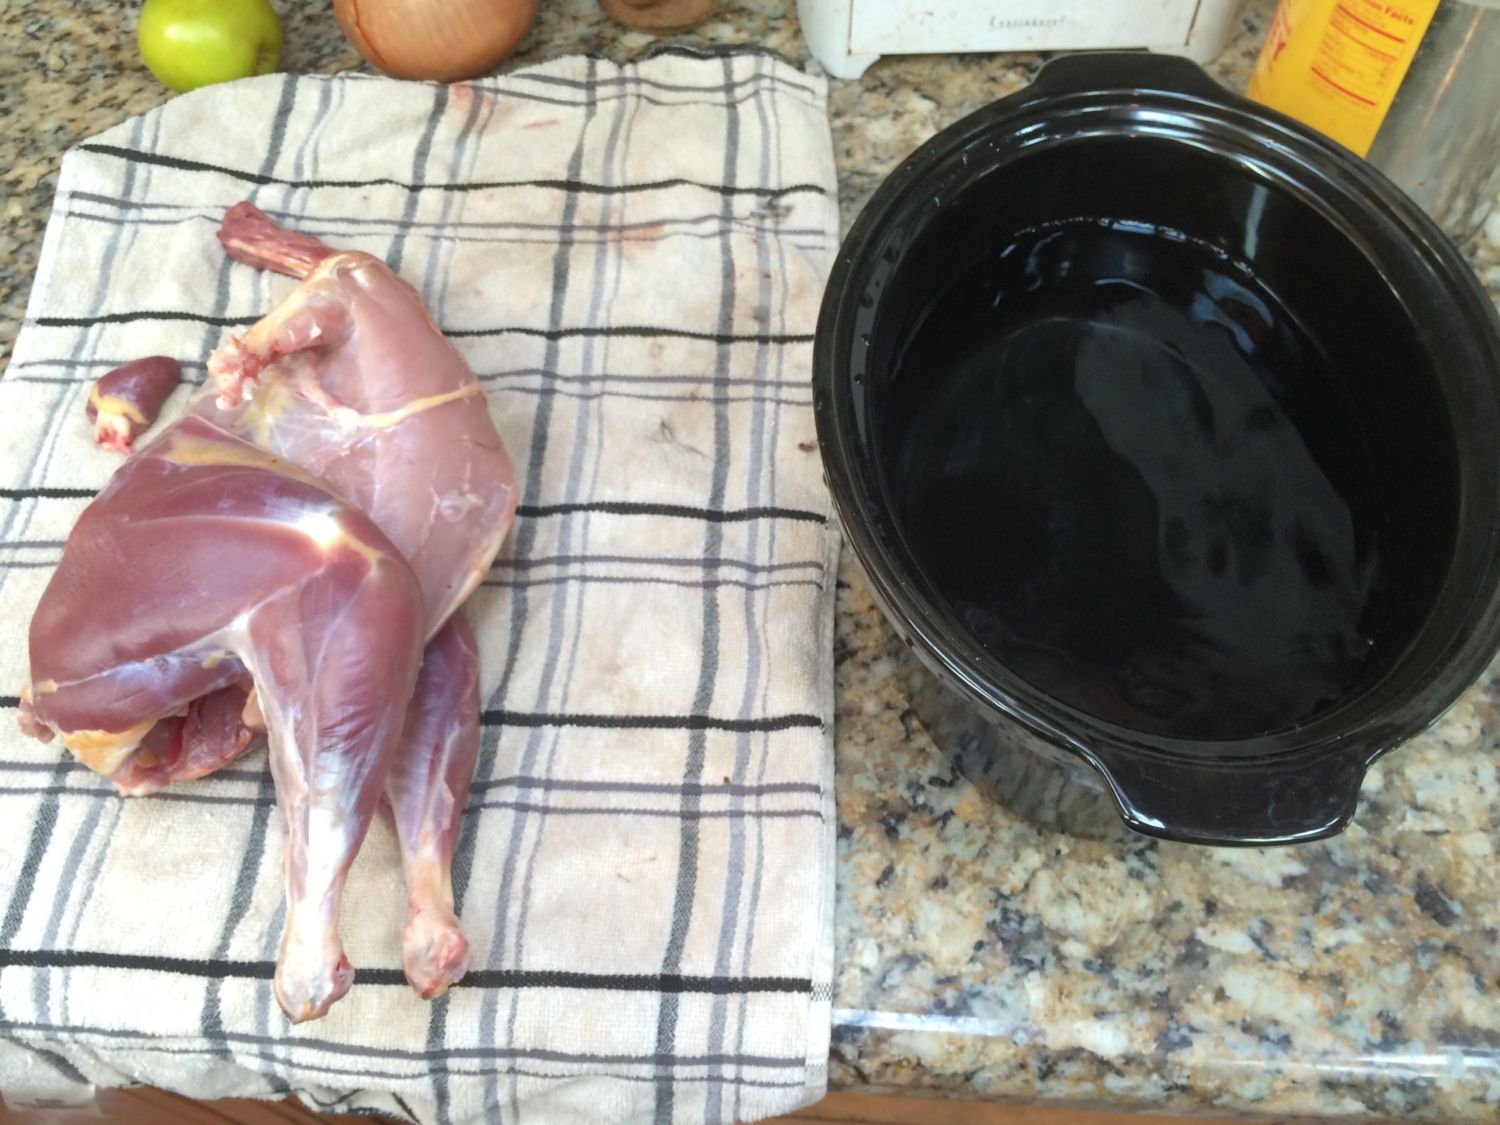
Mm, ready to cook. Crockpot is my favorite method for roosters.
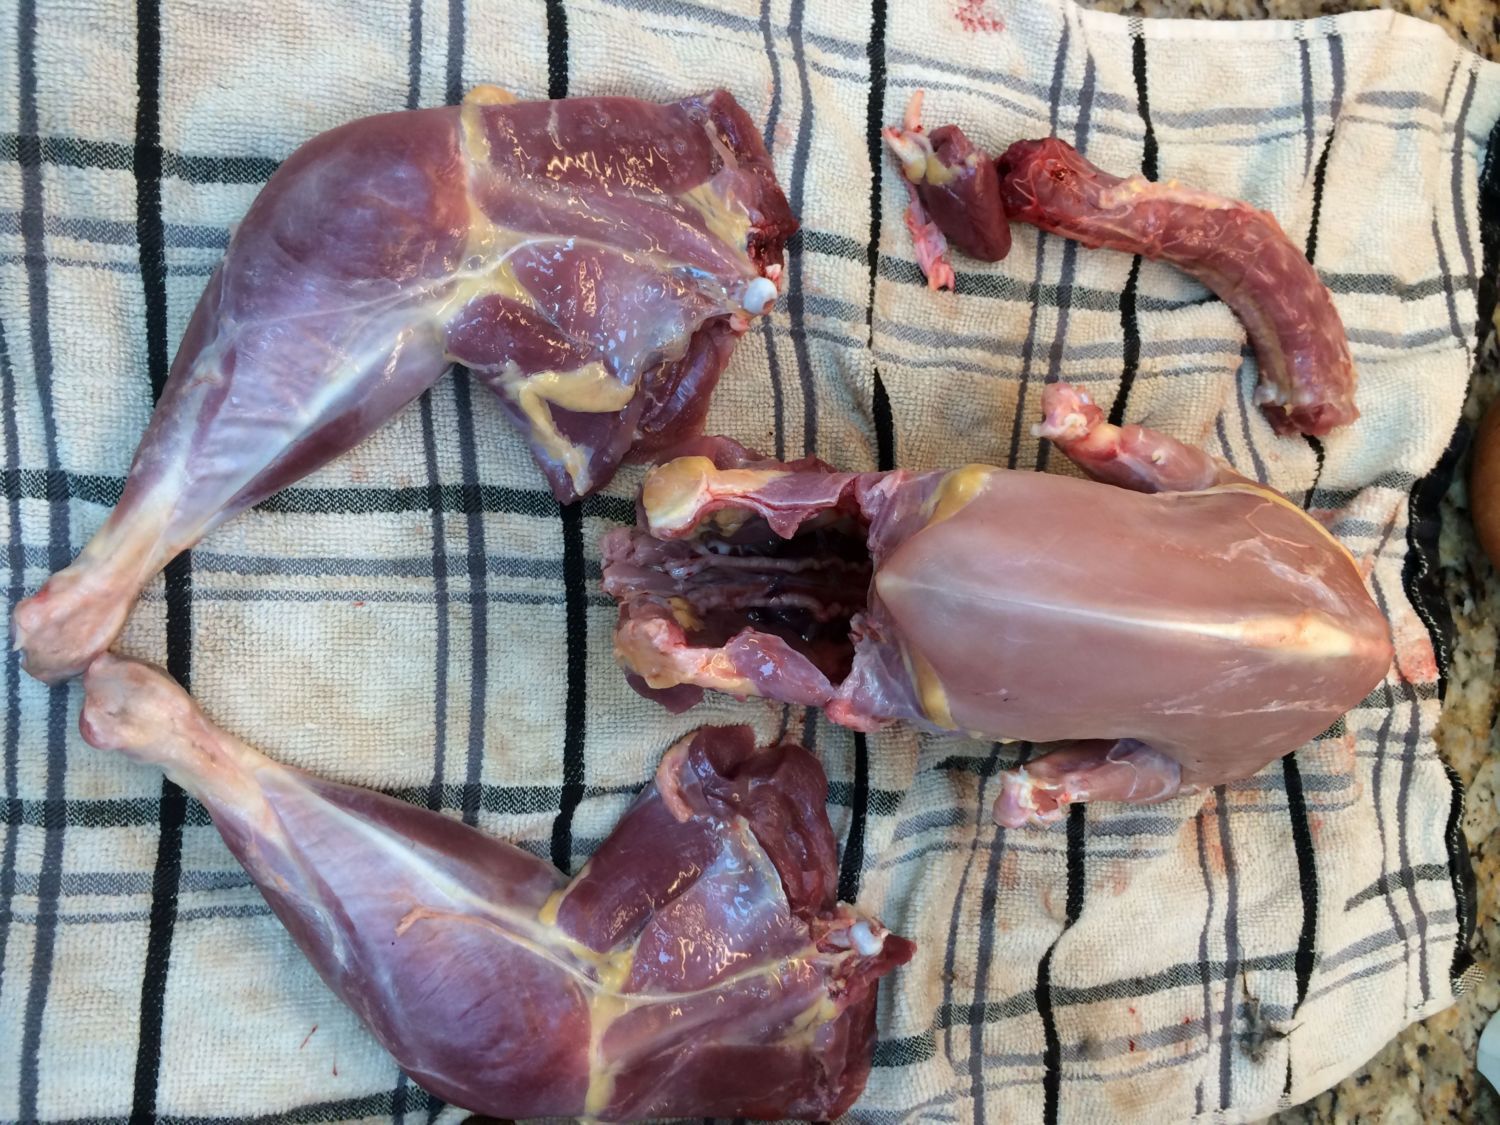
He wasn't fitting in the crockpot!
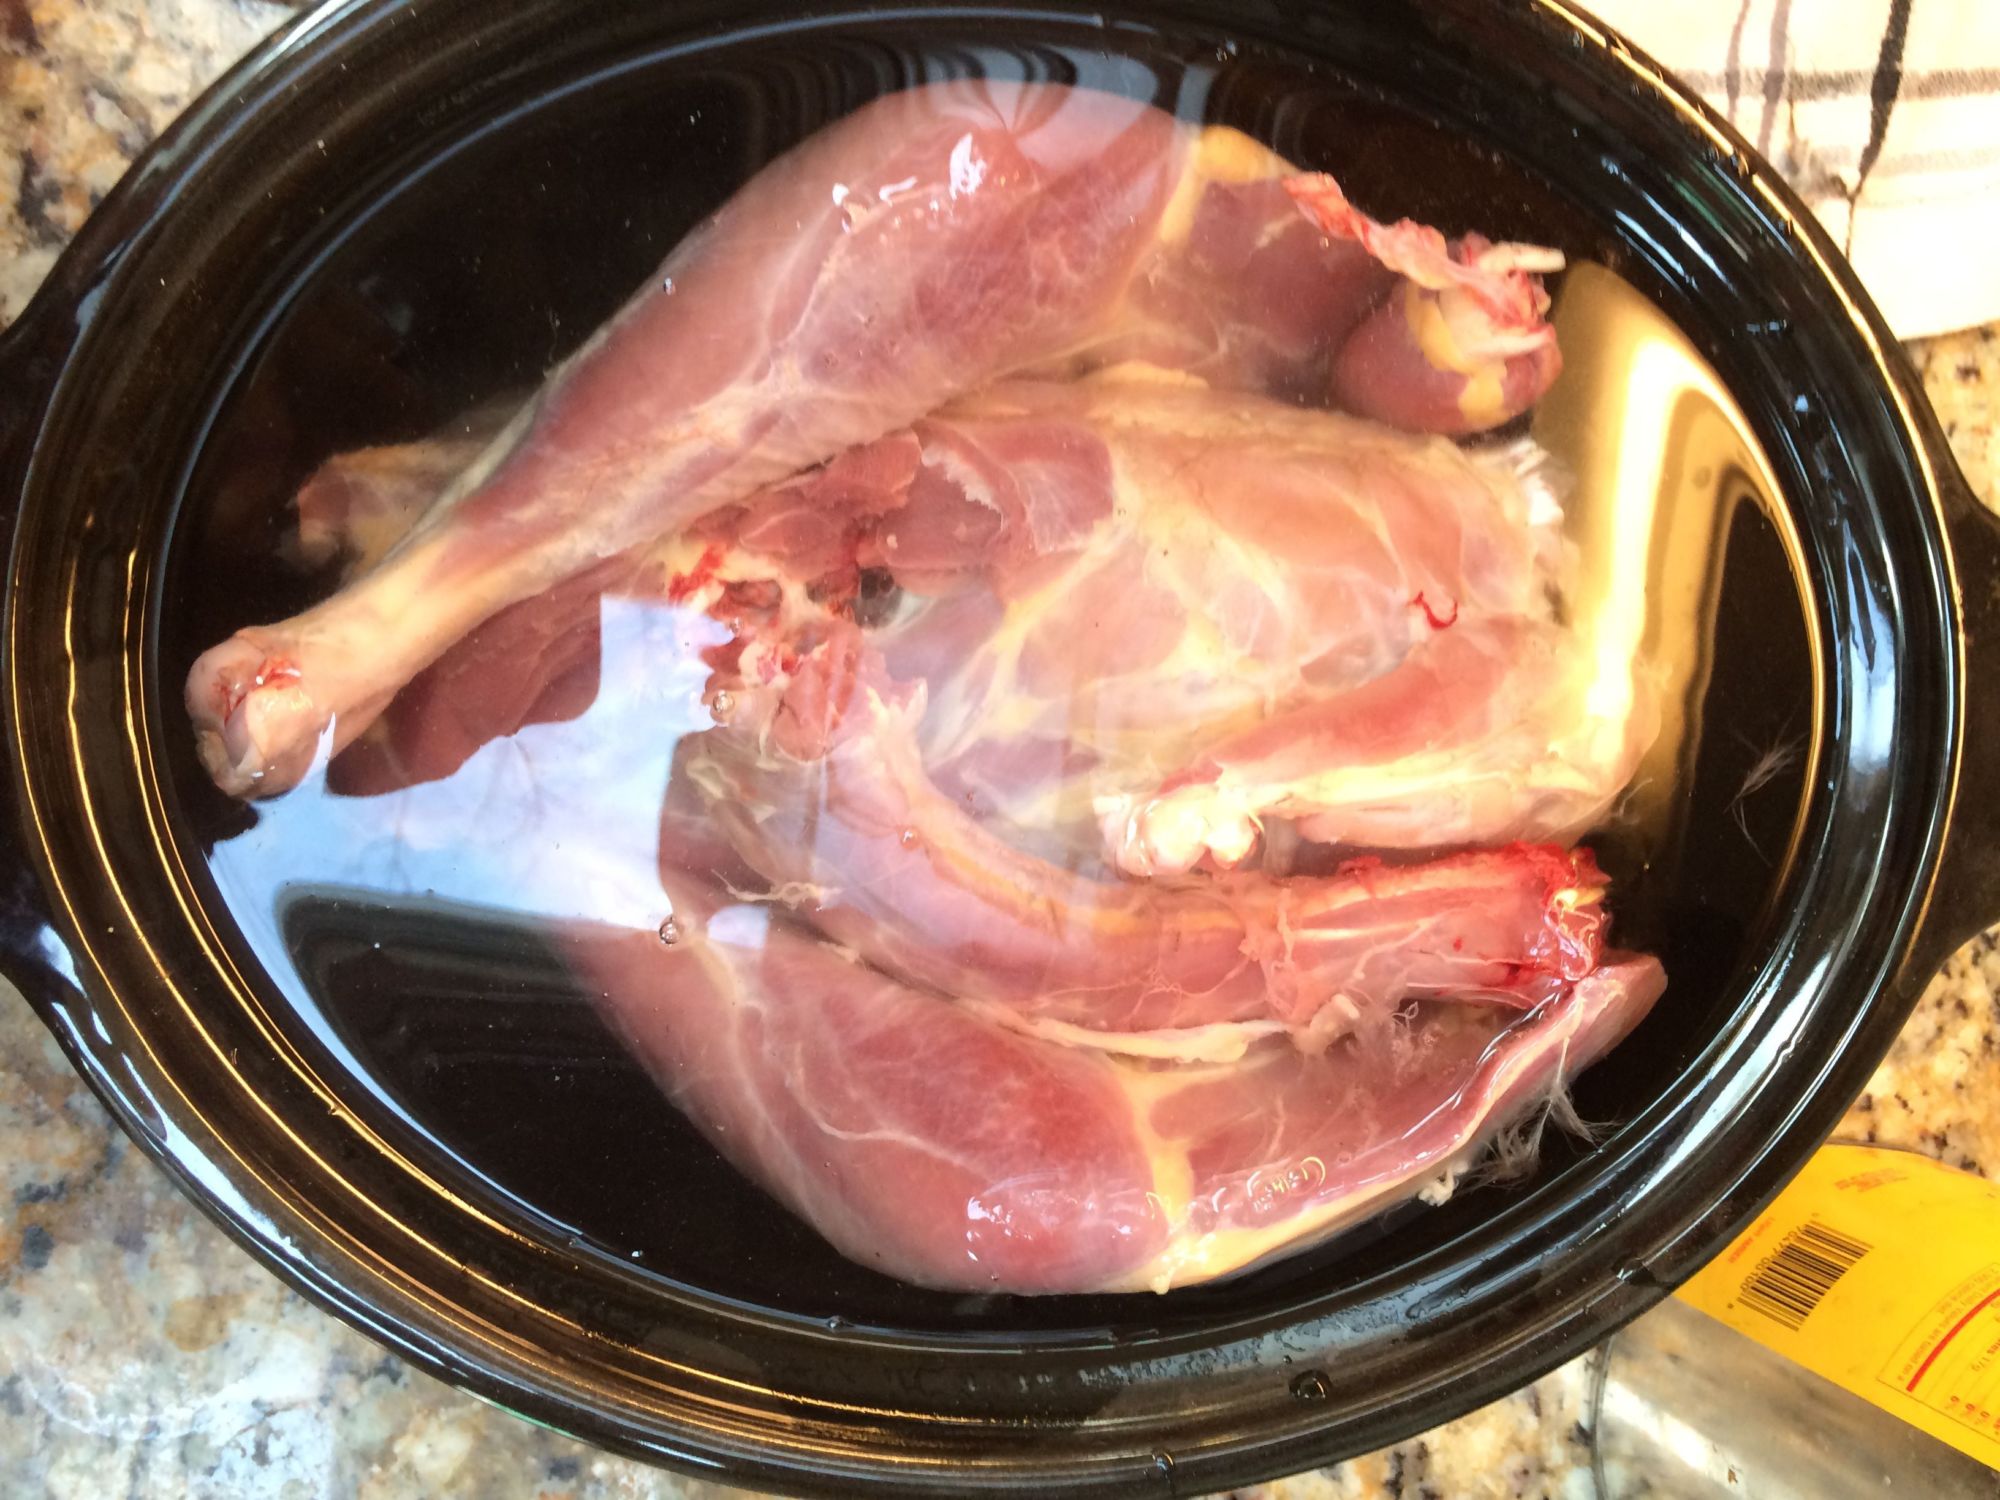
There we go.
10 minutes later...

Twenty or thirty seconds should do it.
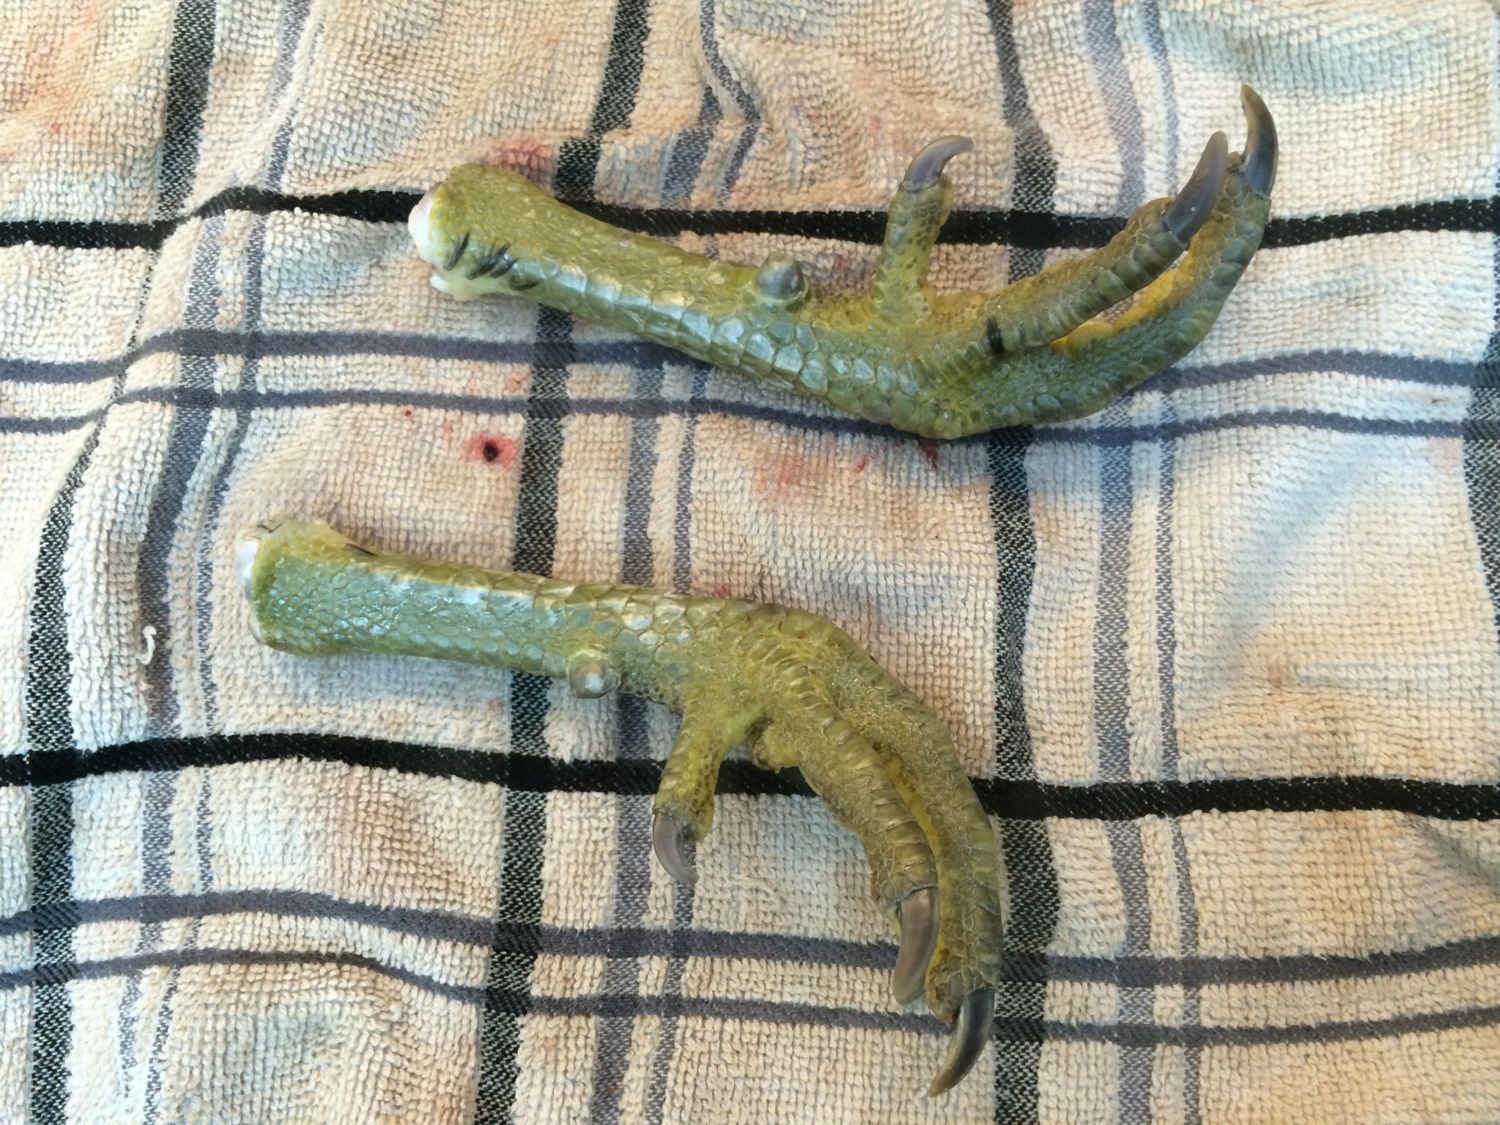
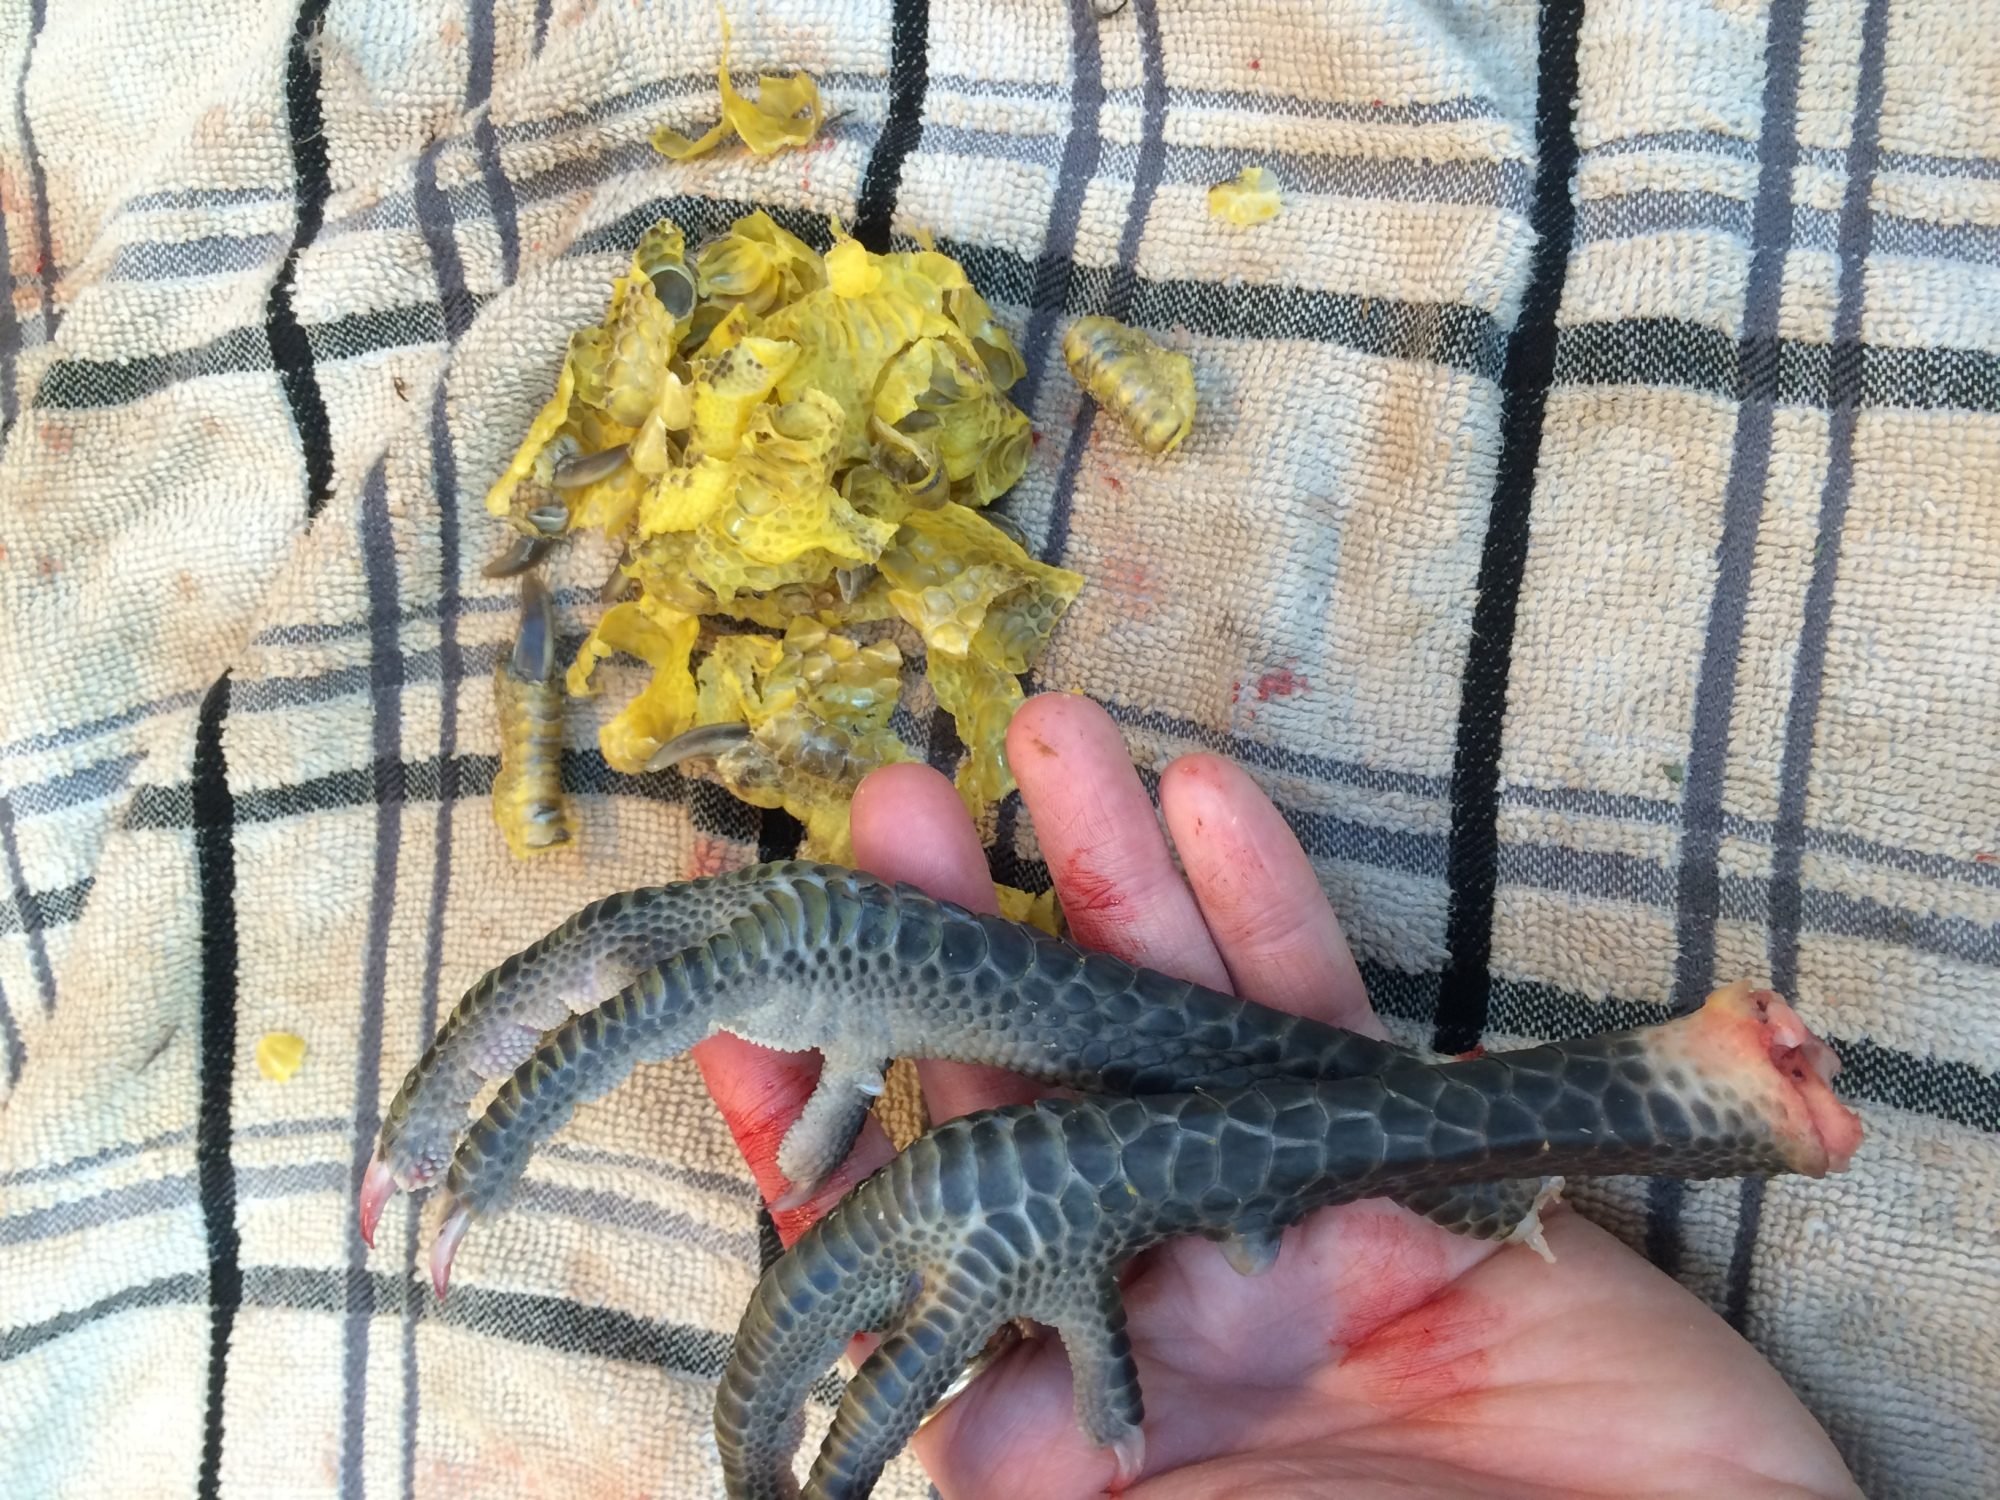
Nice and fresh.
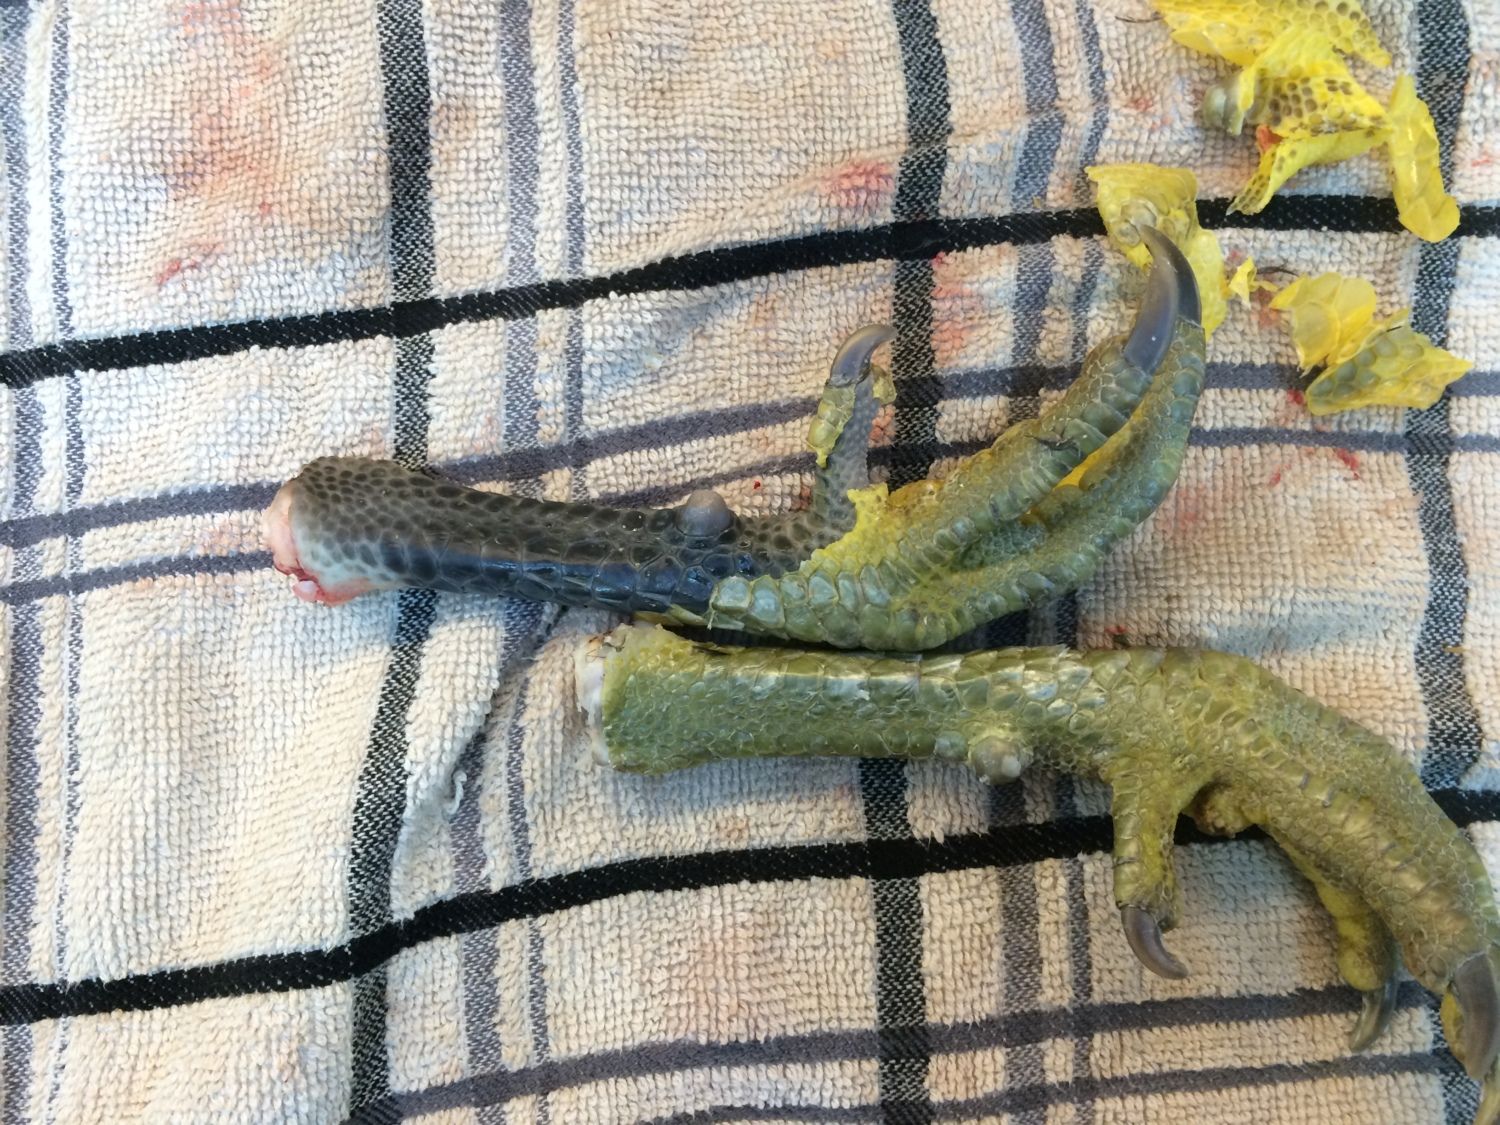
Peeling...
One down, one to go.
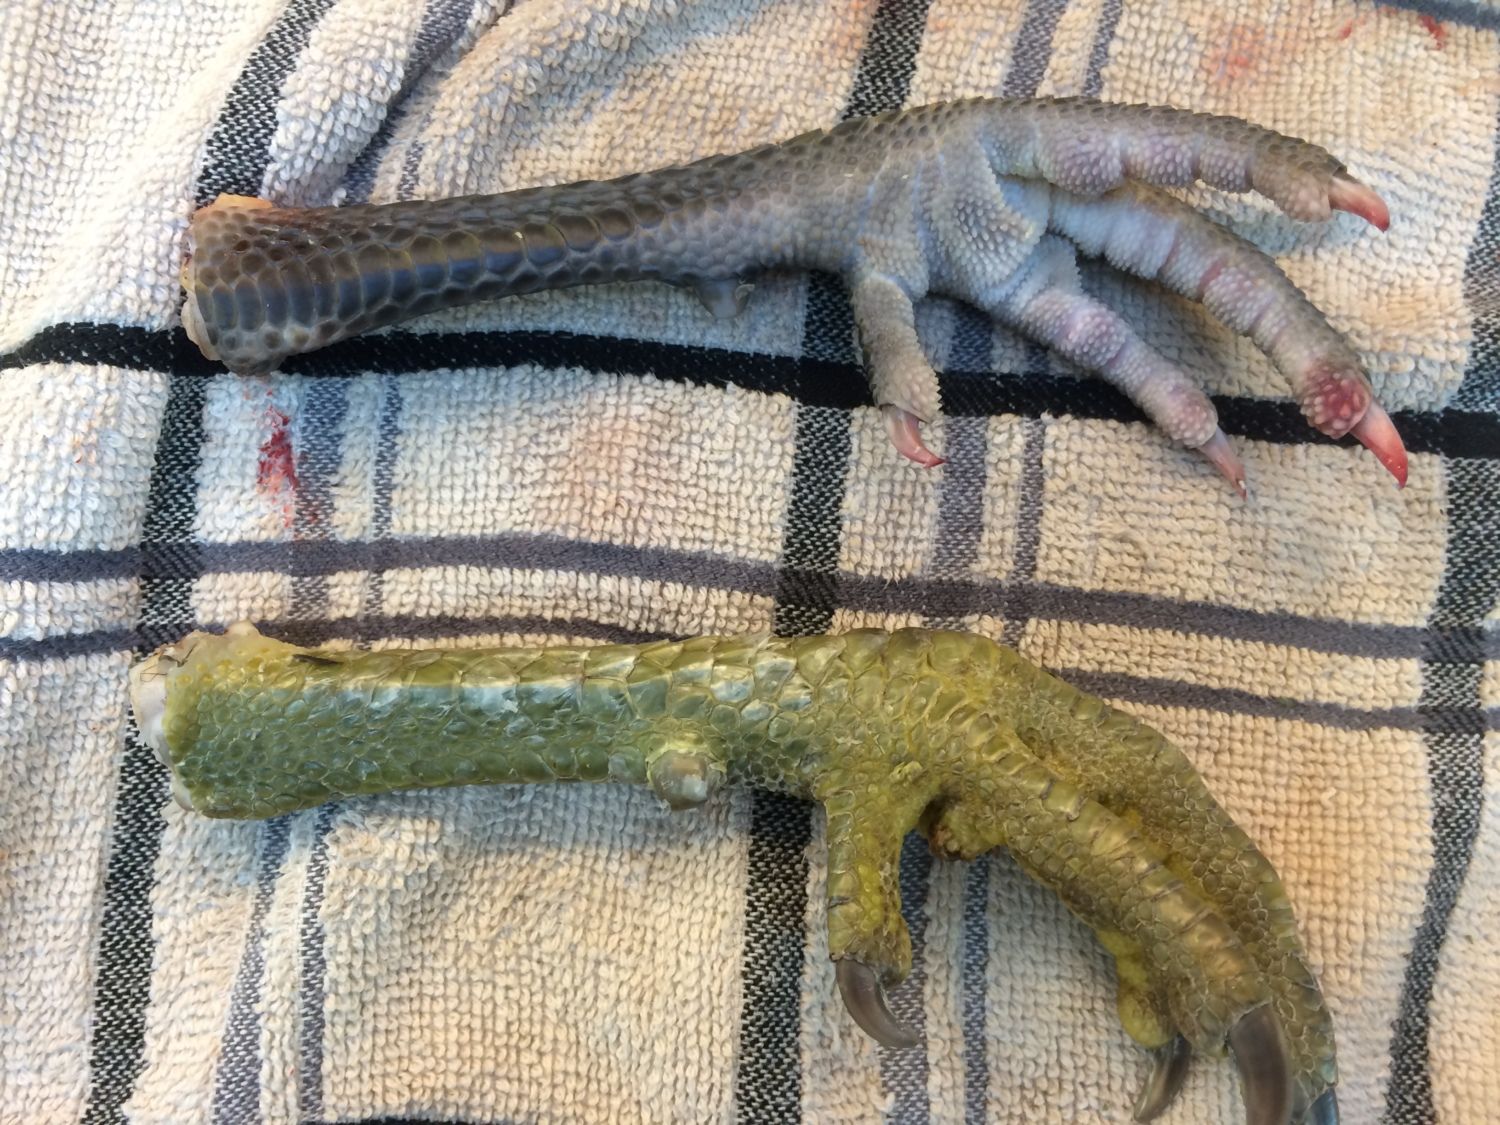
Done! Ready to make some delicious stock.
Well, that's it guys! Thanks for reading and good luck to everyone here with their poultry endeavors.
This method is ideal for birds such as roosters, old laying hens, other old/male poultry, and any small birds such as partridge or quail. It is significantly faster than standard plucking methods and while a skinned bird tends to be "uglier" than a plucked bird, unless the bird is for roasting or presentation purposes, it works just as well yet is twice as fast. I hope anyone reading is able to get good information from this, be they beginners or seasoned processors. Be warned that it IS graphic and includes detailed photos of the killing, skinning, and gutting process. Enjoy.
---------------------------------------------------------------------------------------------------------------------------------------------------------------------------------------------------
Step 0 of any slaughter is to gather your tools. I used to spend 20+ minutes getting all my supplies together to butcher a bird, then another 10+ double and triple checking everything. Now, after four years of processing, I just sharpen my knife, fill a bowl with water, grab a plastic grocery/small trash bag, and head outside. That's all that's strictly necessary for this method.
Step one is to get your bird and hang him. Or you can get an axe and lay him down on a stump; I don't use that method and can't give any practical advice on it; I'll be covering slitting the throat instead since it has been the best method I've found. I use baling twine to hang them by. in this case I wrapped it directly around the legs; for a more permanent option, you can tie a caribbeaner to the end of the baling twine and zip tie the legs together before clipping him up. It prevents you from having to spend five minutes untying him or simply having to cut the twine each time. I hang my birds off the back porch when killing them; if I hang them between two support beams, they are suspended in midair and unable to damage themselves on anything when bleeding out.
The best way to grab the head. Yes, this is uncomfortable for the bird; the grip has to be firm enough that he can't jerk his head away. It's best to only grab the head just before cutting, to minimize discomfort.
Side-shot showing where to cut. In hindsight it would have been better to do this guide using a non-bearded bird, but oh well.
Post-cut flapping. Expect about 2-4 minutes of this, though birds usually lose consciousness in less than a minute. You can be sure the bird is dead if the eye doesn't blink when poked.
The cut. I am not shy about cutting. Some folks do a neat slice on either side of the head; I do quick heavy sawing and cut back to the bone. If done hard with a sharp blade it won't take more than a few seconds to get a cut like this, and it guarantees you won't be missing any arteries.
Place the bird flat on its back on a clean surface.
Head off. I find it easiest to grab and twist to break the neck, then cut the remaining tissue with the knife.
Lift the skin around the top of the neck.
Slide the knife in, facing upwards against the skin. Split down the middle.
A good even split.
Continue splitting little by little, here you can see some of the breast emerging.
The upper breast can be seen here; that bulgy whitish thing to the right is the crop, in this case empty except a bit of air.
The crop can be peeled off with relative ease.
Follow the crop up the neck and you will find the esophagus and trachea. Slide your fingers between them and the meat of the neck, as is shown here, then slide them up the neck, separating the tissues.
Separated trachea/esophagus and neck.
Now you'll be performing the same process, but with the neck and the skin; wiggle your fingers between them and slide up.
Neck separated.
Time to cut the upper esophagus and trachea and crop away. Only do this if the crop is empty; if the crop contains food, you will want to separate it much later in the process.
Flip the bird over.
Pull the skin down on either side of the neck. See that white point white in the center? That's the top of the shoulder joint emerging.
Continue pulling the skin down around the wing. The sooner you can poke through the tissue of the armpit and get your fingers fully looped around the limb the faster it will go.
Skinned more.
You'll want to cut through the membrane my fingers are pinching.
Showing where to cut though the joint.
Partially cut through.
Most of the joint severed.
Success! Now repeat on the other side.
Half-way skinned.
Grab the pelt in one hand and the upper part of the bird in the other, and pull in opposite directions. The skin will peel down the back very easily.
Once you get to the tail you'll meet more resistance. Stop at that point and leave it be for now.
Flip again. Peel further down the breast.
Foot time!
Partially cut.
Almost there...
Perfect.
Now grab the leg around the thigh and strip down.
Fine the crevice behind the knee...
And pop your finger through!
Strip down and pull off the end of the leg.
One leg done.
Two legs done (almost).
Pull the skin down toward the vent about 1-2 inches beyond the point of the keel, and then flip the bird over.
Cut through the joint where the tail meets the body.
Cutting;
The joint is fully cut through, and another 1/2 inch or so of skin is peeling below the tail.
After 1/2 inch below the tail, angle the knife outward and begin the cut away the pelt.
Side view.
Circle around the remaining attached skin, leaving about 1/2-1 inch of skin and feathers on the bird.
Skinned bird and pelt.
Feathers and skin left around the vent.
Pinch the skin between your fingers and pull it up, placing the knife like this across the belly.
Slice just a little bit downward, enough to puncture the skin like this.
Push your finger into the hole...
And slip the knife in beside it (but be sure not to cut yourself!)
Angle the knife up and make sure to stay directly against the skin.
Cut to both sides.
Reach way up into the bird and pull out the heart first;
Here you can see the organs inside the bird. The gizzard, at first, will be attached via fat to the inner wall of the breast. The quickest way to detach it is to stick your finger in the bird, curve it around the fat, and pull back out, breaking it.
Organs halfway out.
Organs out, attached to the carcass only by fat and the end of the intestines.
Fat cut.
Pull the intestine to the side and make a U-shaped cut around and below the rectum.
Detached.
These may just explain how bold and aggressive he was...
The testes should come out with ease.
Lungs are still nestled firmly in the ribs.
One lung removed.
And the other.
"Dog food" pile (or keep the liver, if you for some weird reason don't find them absolutely horrendously disgusting)
"Trash/burn/bury" pile
The good stuff
Time for a good washing...
Bagging the trash
Yum!
Can't forget about these!
Set that to boil...
Mm, ready to cook. Crockpot is my favorite method for roosters.
He wasn't fitting in the crockpot!
There we go.
10 minutes later...
Twenty or thirty seconds should do it.
Nice and fresh.
Peeling...
One down, one to go.
Done! Ready to make some delicious stock.
Well, that's it guys! Thanks for reading and good luck to everyone here with their poultry endeavors.


