- Apr 13, 2012
- 125
- 4
- 93
My husband and I (mostly me since I am a lot handier than he is - nothing wrong with that though - I'm the one with all of the ideas too!) have been working on this for about 3 weeks so far - we still have a bunch of work to do - but the ladies (and gentlemen) are spending their first night in here tonight - I couldn't take the mess in the house anymore and tonight is the warmest it has been in weeks - with somewhat beautiful nights predicted for the rest of the week too.
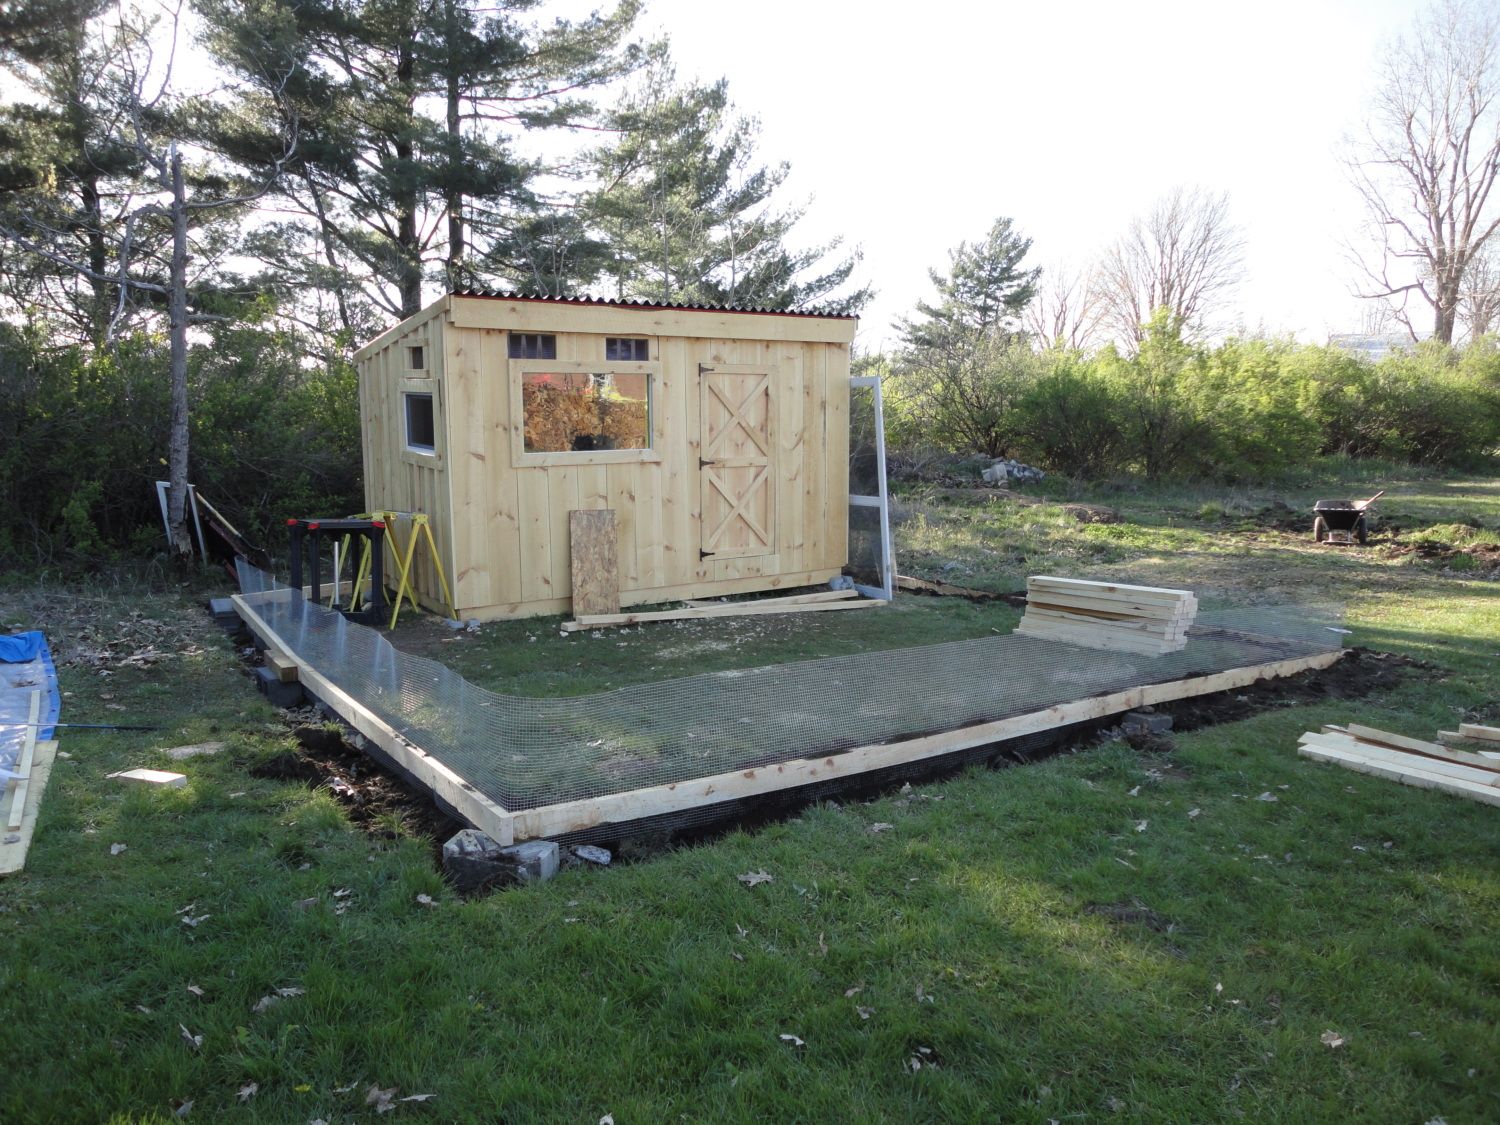
Our coop is 7'x12' and built out of Amish rough-cut lumber. I don't plan on painting or staining it this year - I might next year - we'll see......I might just poly it because I love the natural look. The run, when finished will be 20'x20' minus the coop itself (I don't want the chickens under the coop so I'm going to fill in low spots with dirt & rocks to keep them out.
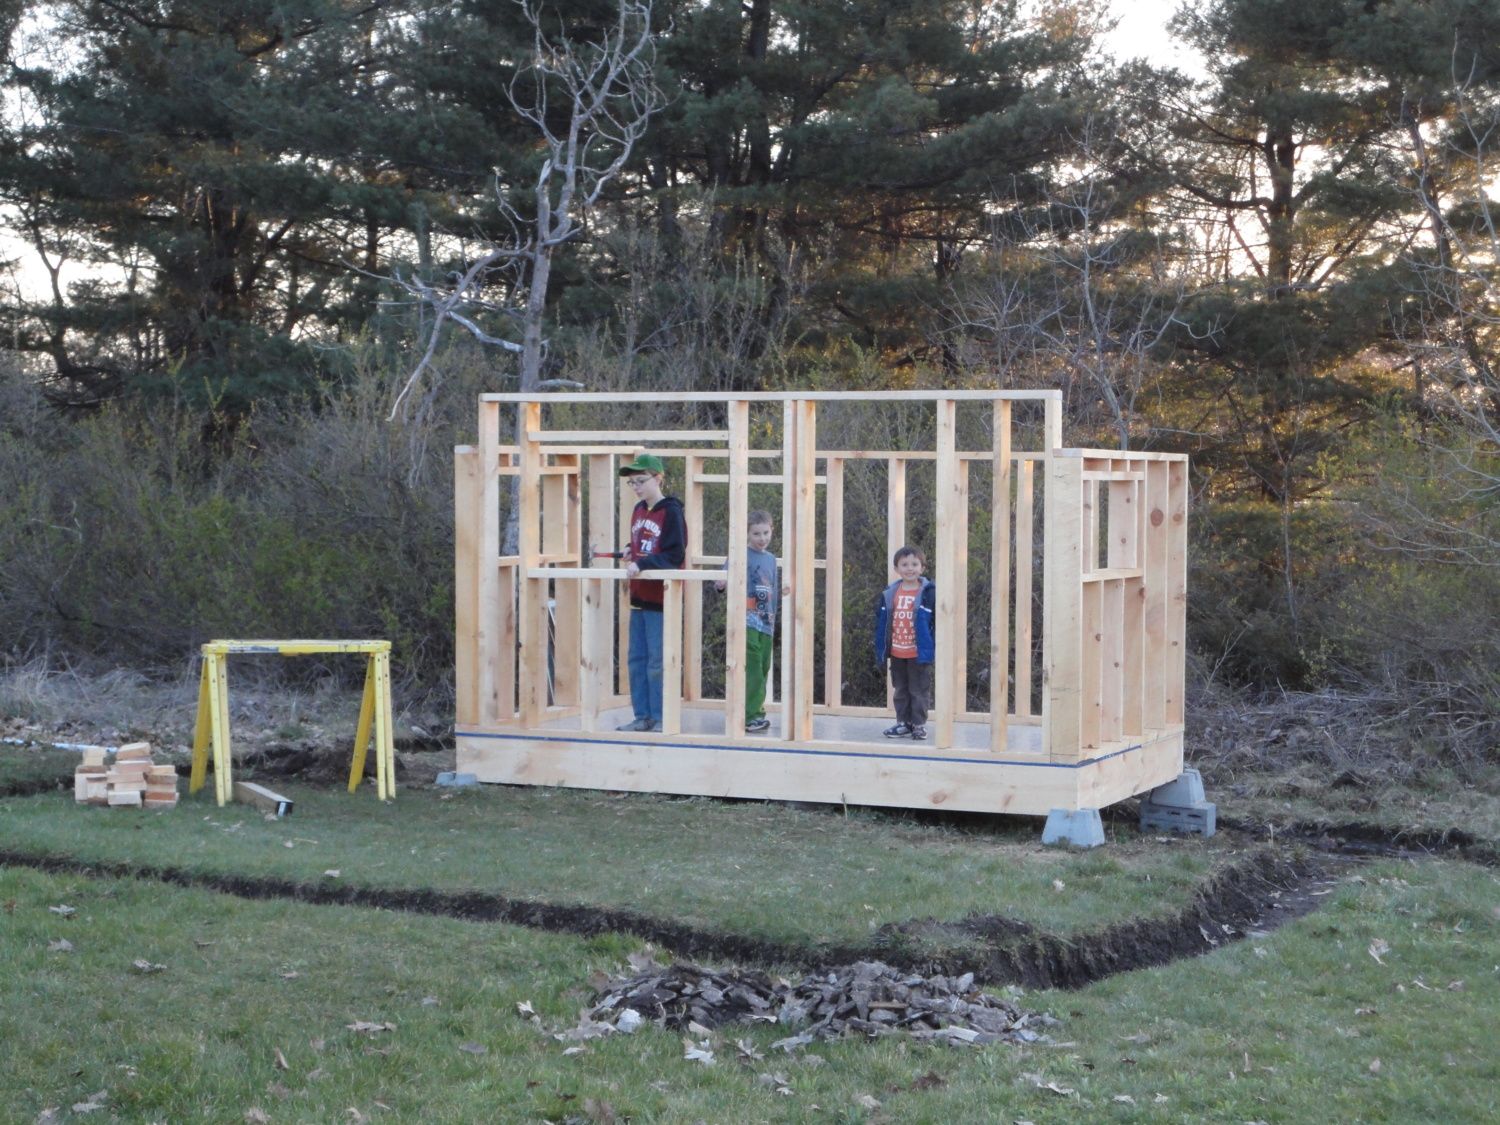
My assistants checking out the initial progress. You can see where I dug a trench all around the coop. We live on bedrock and I dug down to that (I certainly didn't have to dig far in most spots!) and I am burying hardware cloth in the ground to protect my girls from predators.
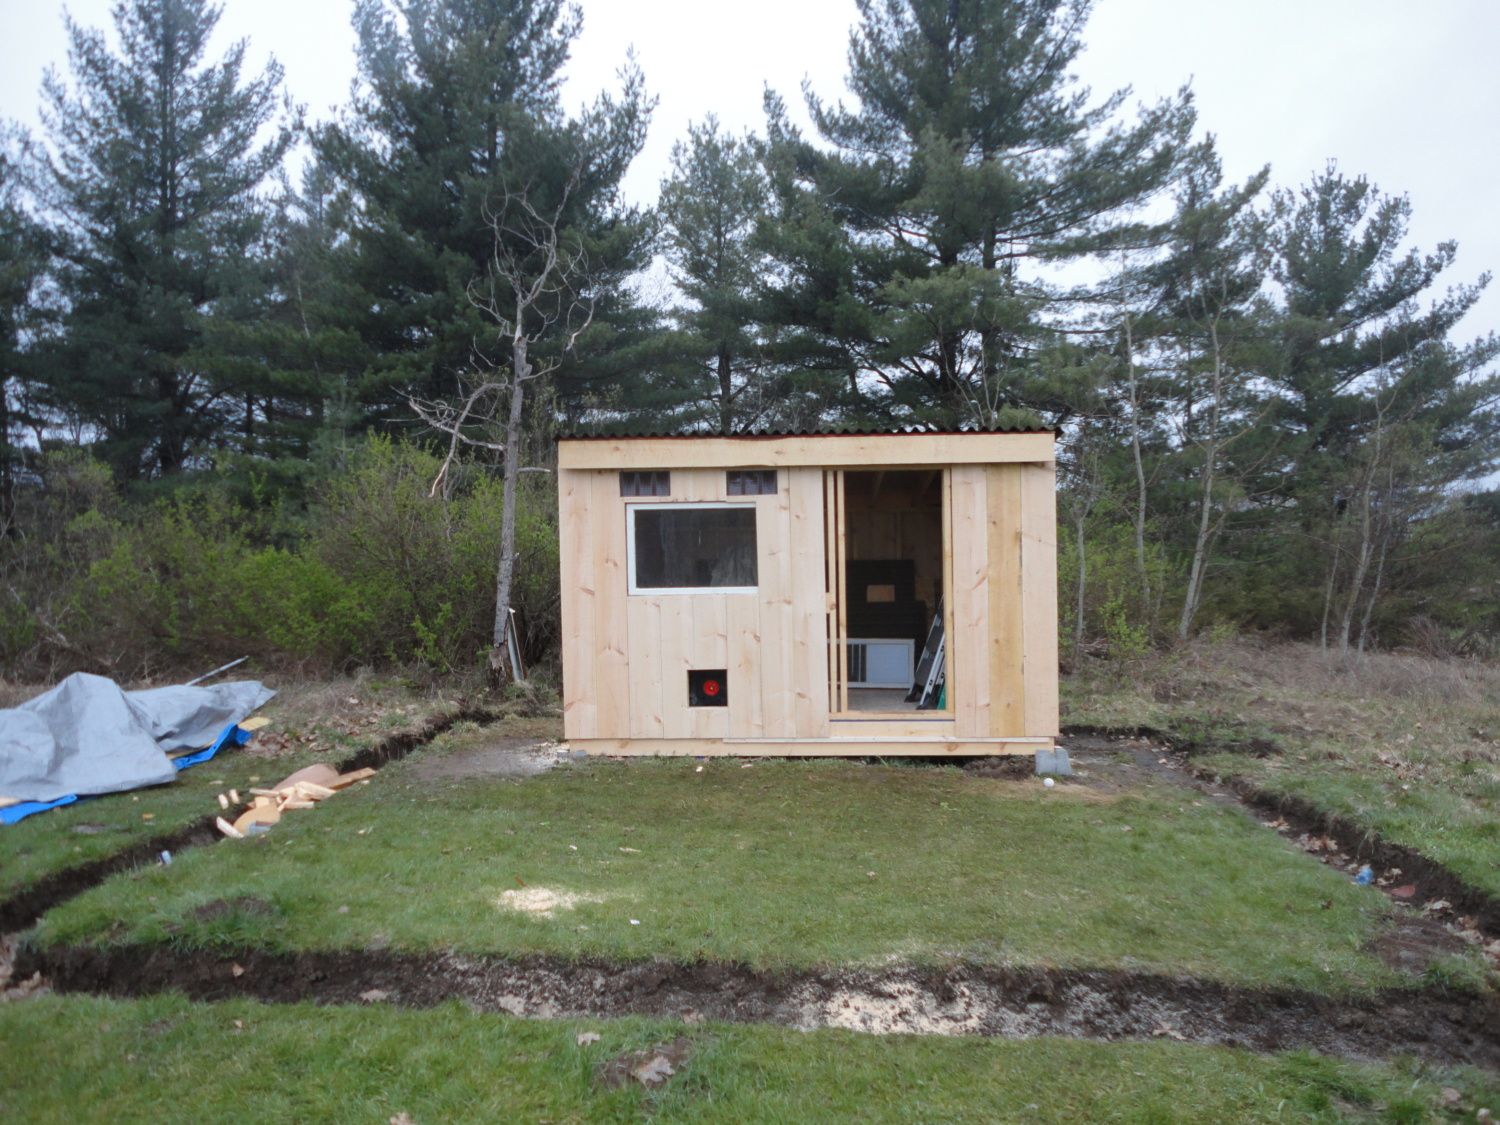
Right after I got all of the siding on the coop - before my door arrived.
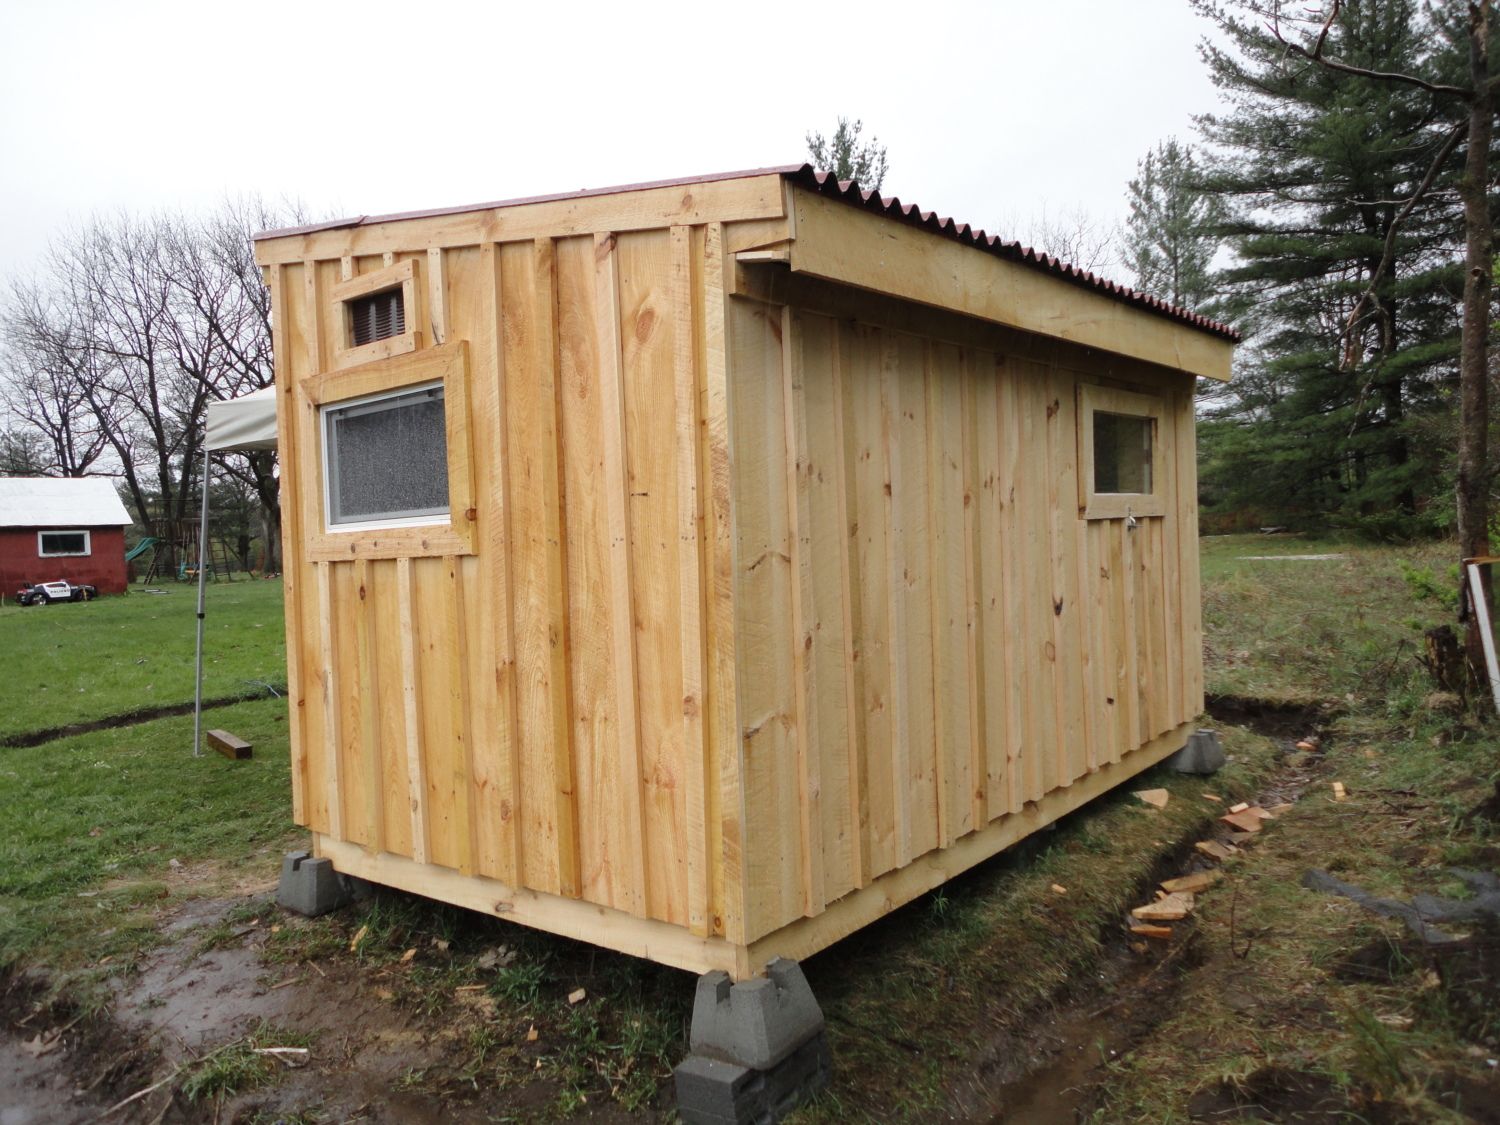
The backside. I have a vent above the window on the side - the window opens in for ventilation. The side window is also in my little storage/work area. That back window was one I picked up for free - I framed it and made it open out.
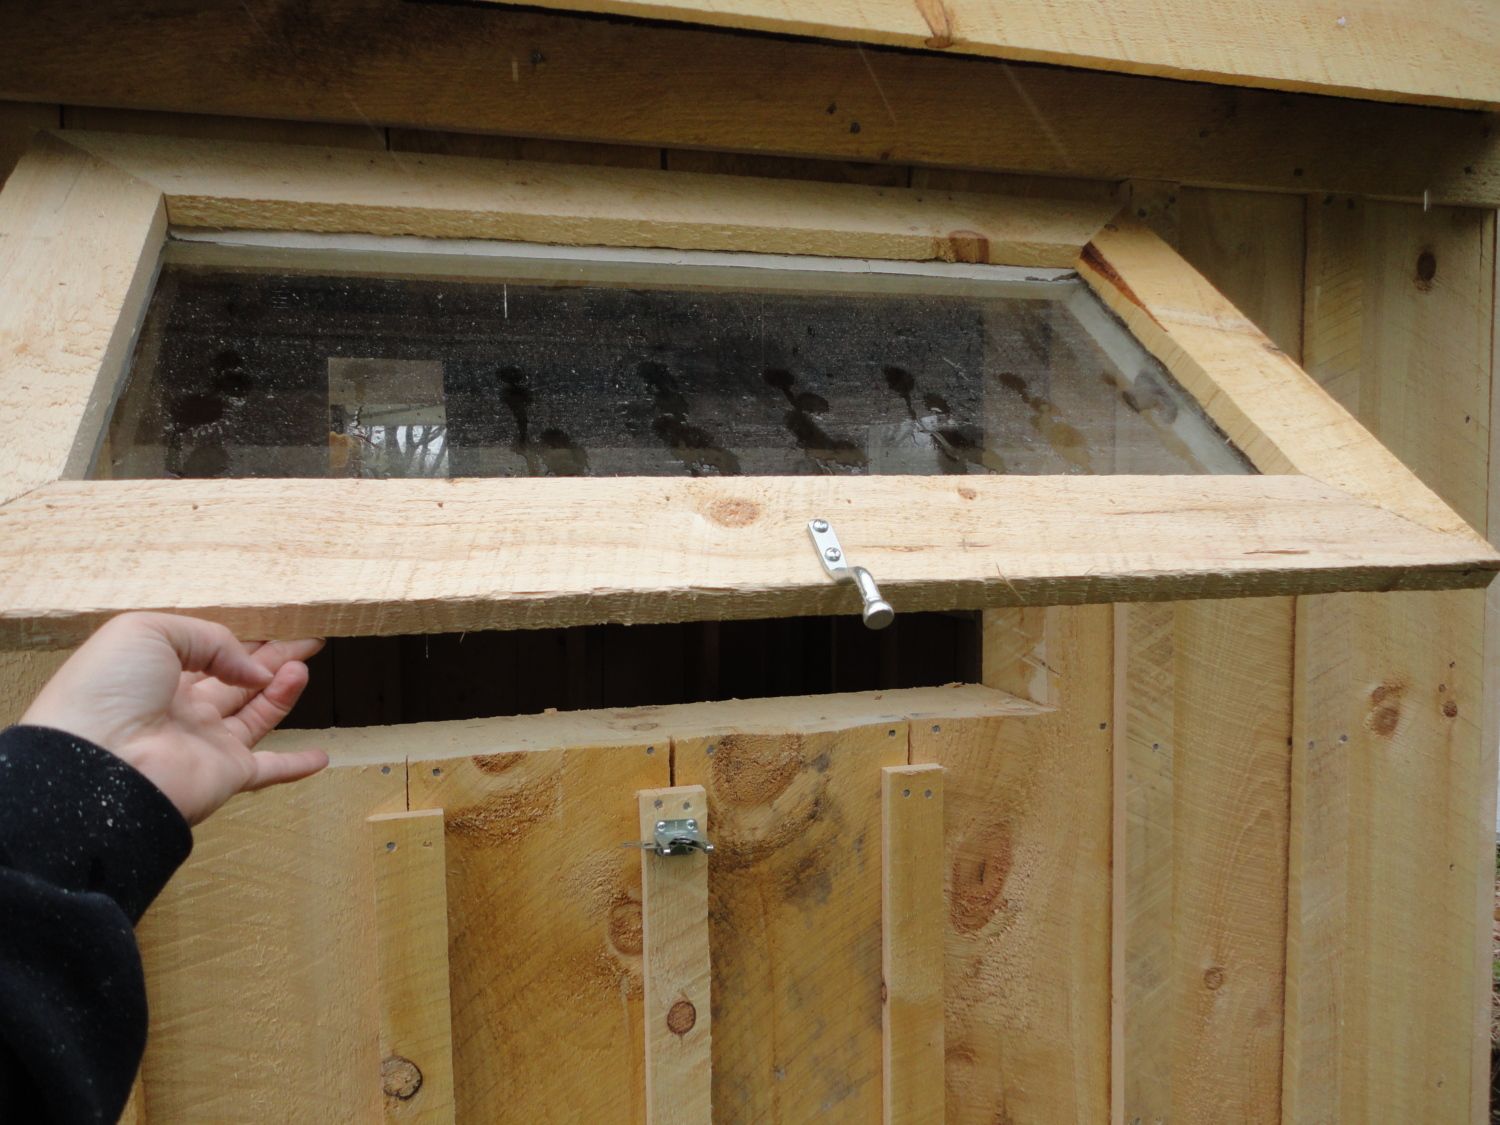
I used a gate latch on the bottom of the window to keep it shut - and I'll put a small board inside the window so when I need to open it, I can do so from the outside of the coop/run. I have to say - the gate latch works awesome. The window wanted to pop a little bit because of the hinges on the top but the latch keeps it closed perfectly.
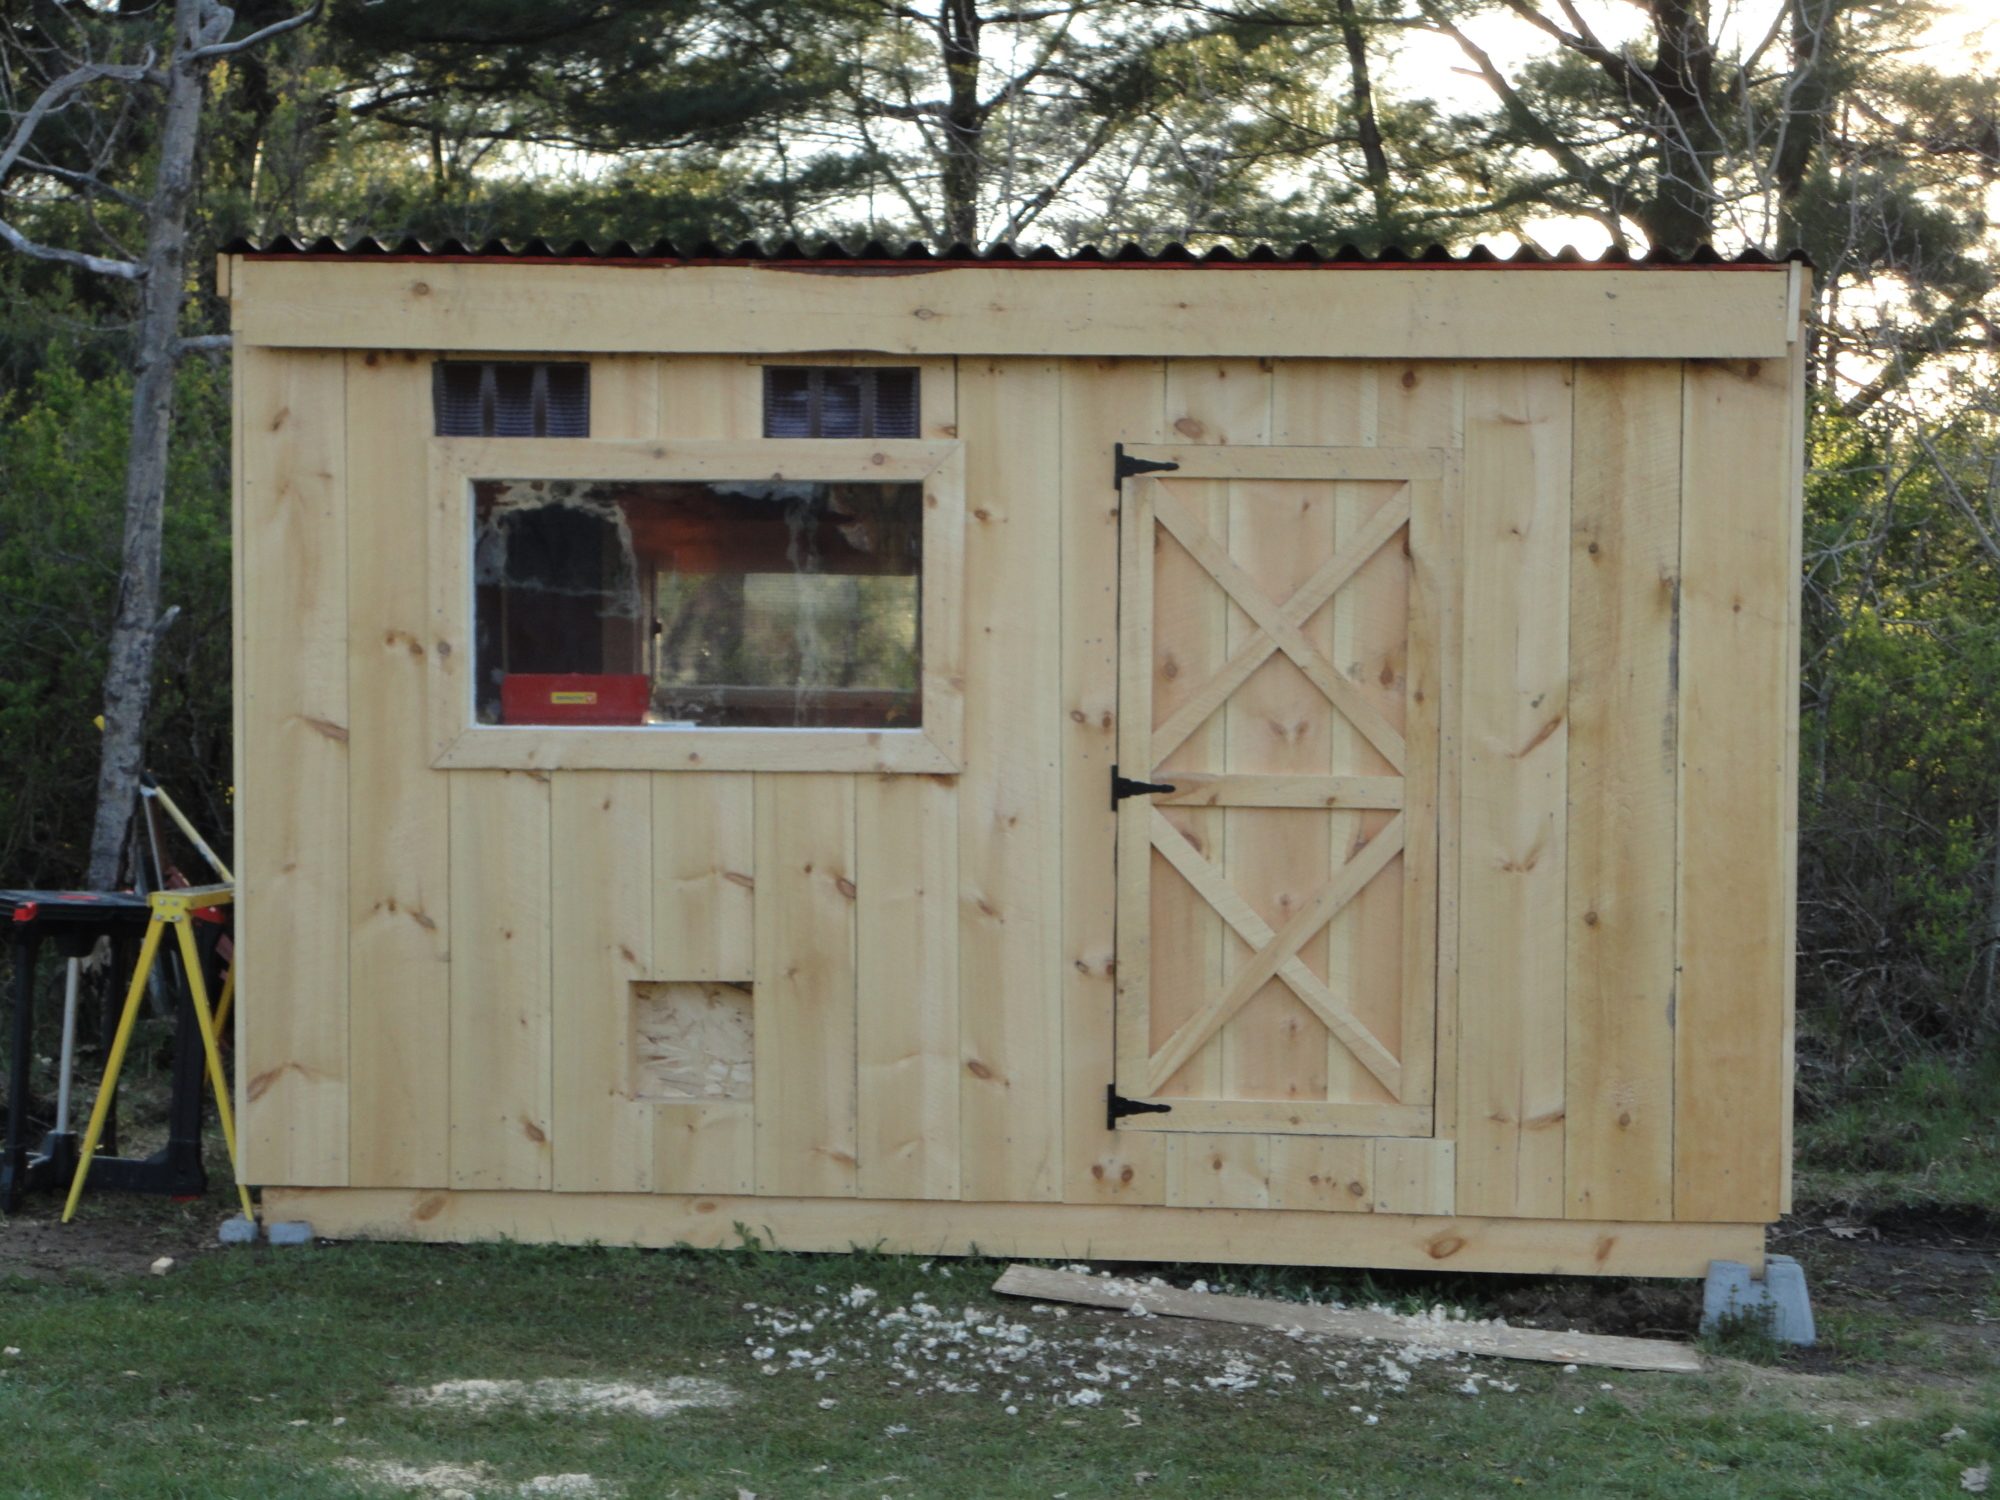
The front right now - It still needs the spacers on it and I need to build a pop door for the chickens - but it was more important to get the inside done for right now. The front window is stationary - it was kind of too big to make it open like the back window. Again - another free window.") The door needs a lock/handle still too - but I had it built by the Amish and I love how it came out. You can see where the ground is very unlevel and I need to fill in with dirt on the right side.....my back yard is wavy gravy!
The door needs a lock/handle still too - but I had it built by the Amish and I love how it came out. You can see where the ground is very unlevel and I need to fill in with dirt on the right side.....my back yard is wavy gravy!
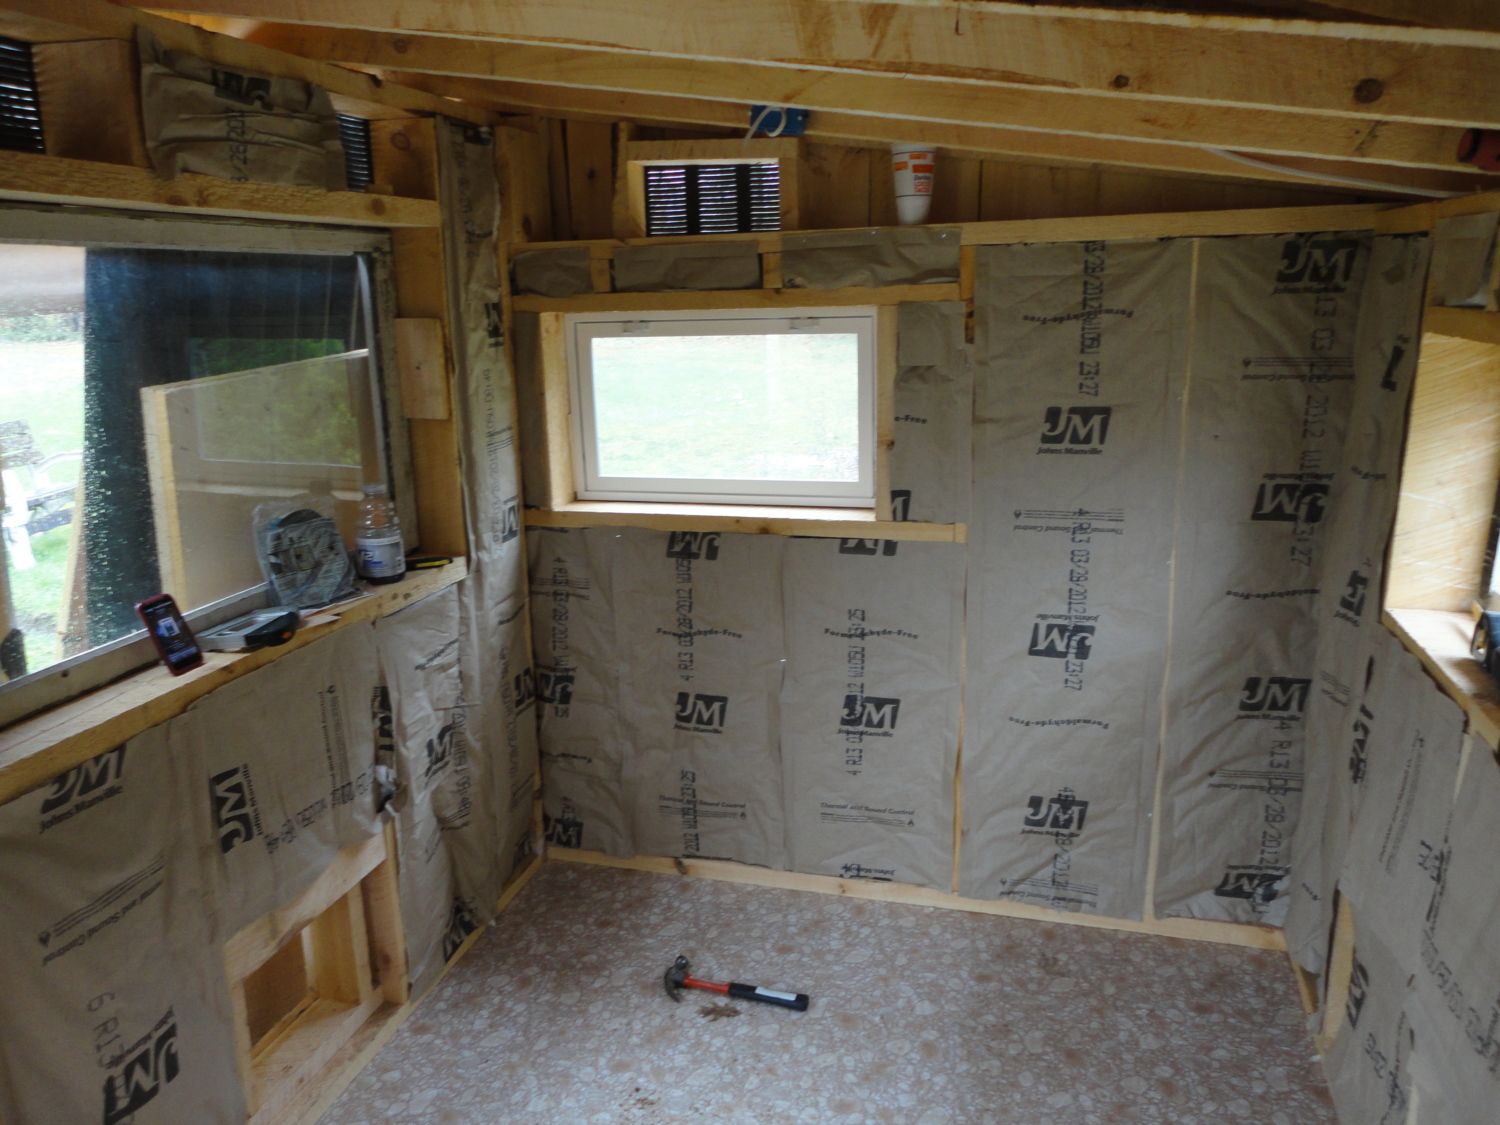
I live in Upstate NY so I did insulate the coop because it does get cold here in the winter (if you don't count this past winter!) Ooh - and when I say Upstate - I mean Upstate - like, almost in Canada, Upstate. Not Albany or Rochester...... much higher north.
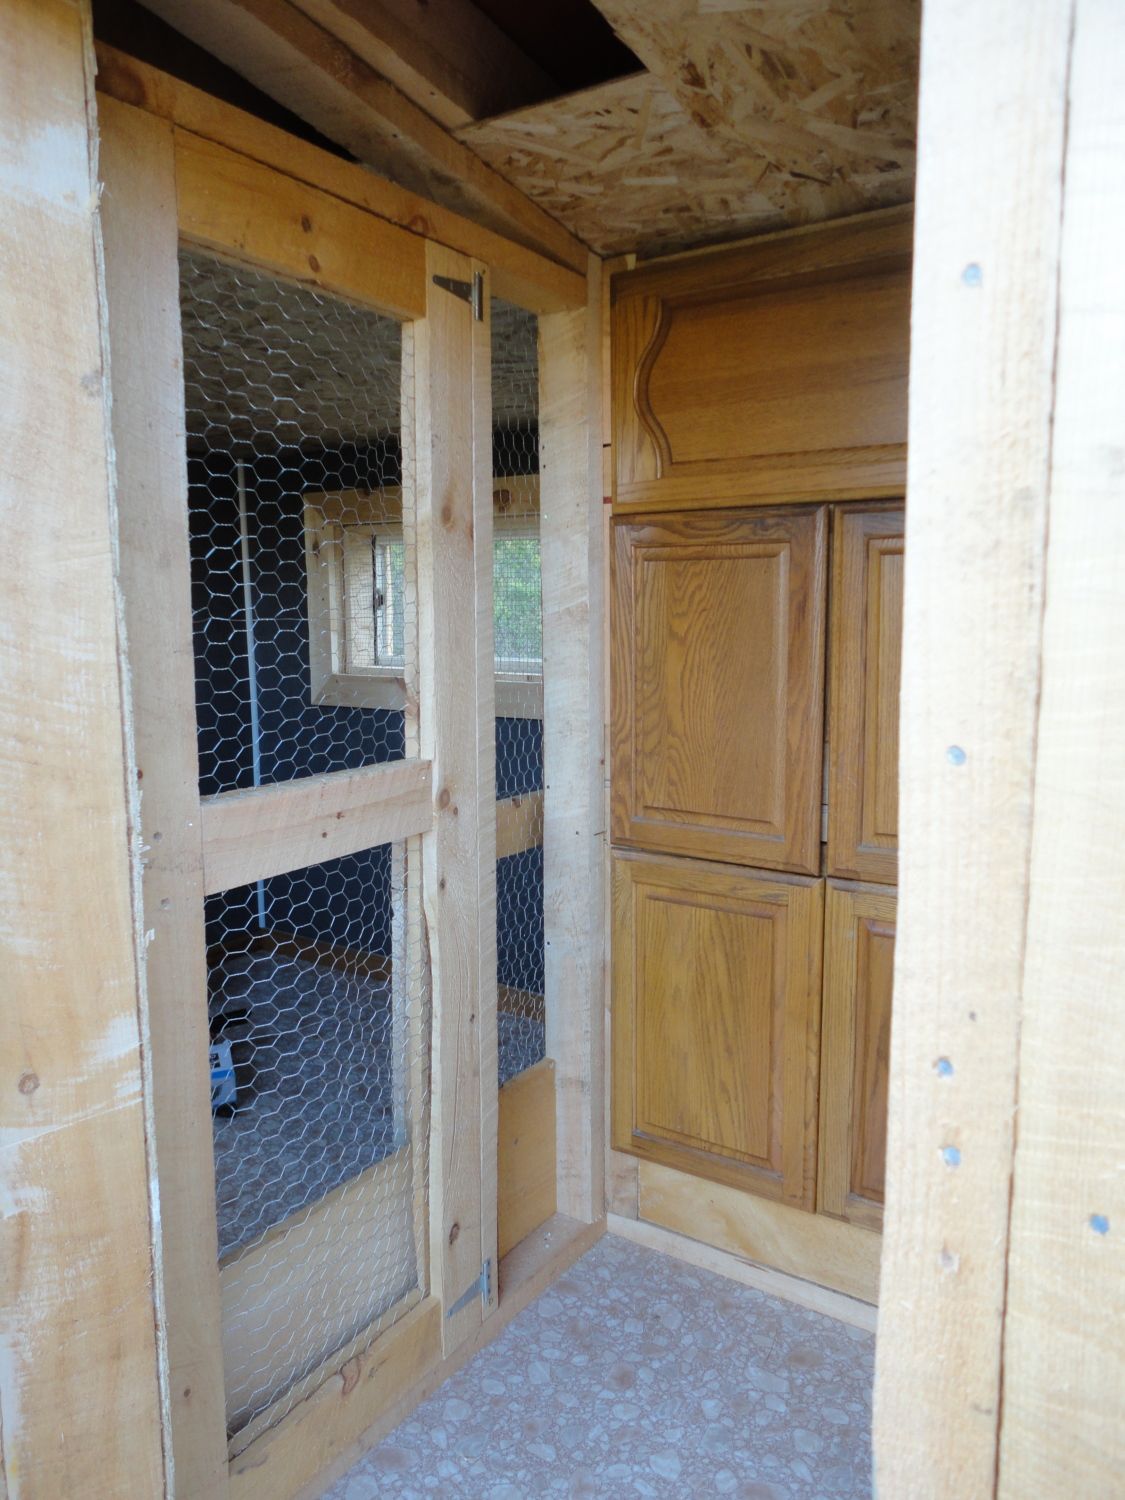
This is my little work area & the back of the nesting boxes. I used my mom's old kitchen cabinet doors (she got new ones made recently) - I want to paint this area something pretty funky - but I'll get to that soon enough. I have linoleum on the floors for easy cleaning - and under the nesting boxes, I do have an area that I can separate babies in or if I have a hen or two that needs to be left alone, I can put them in this area and they can have some privacy.
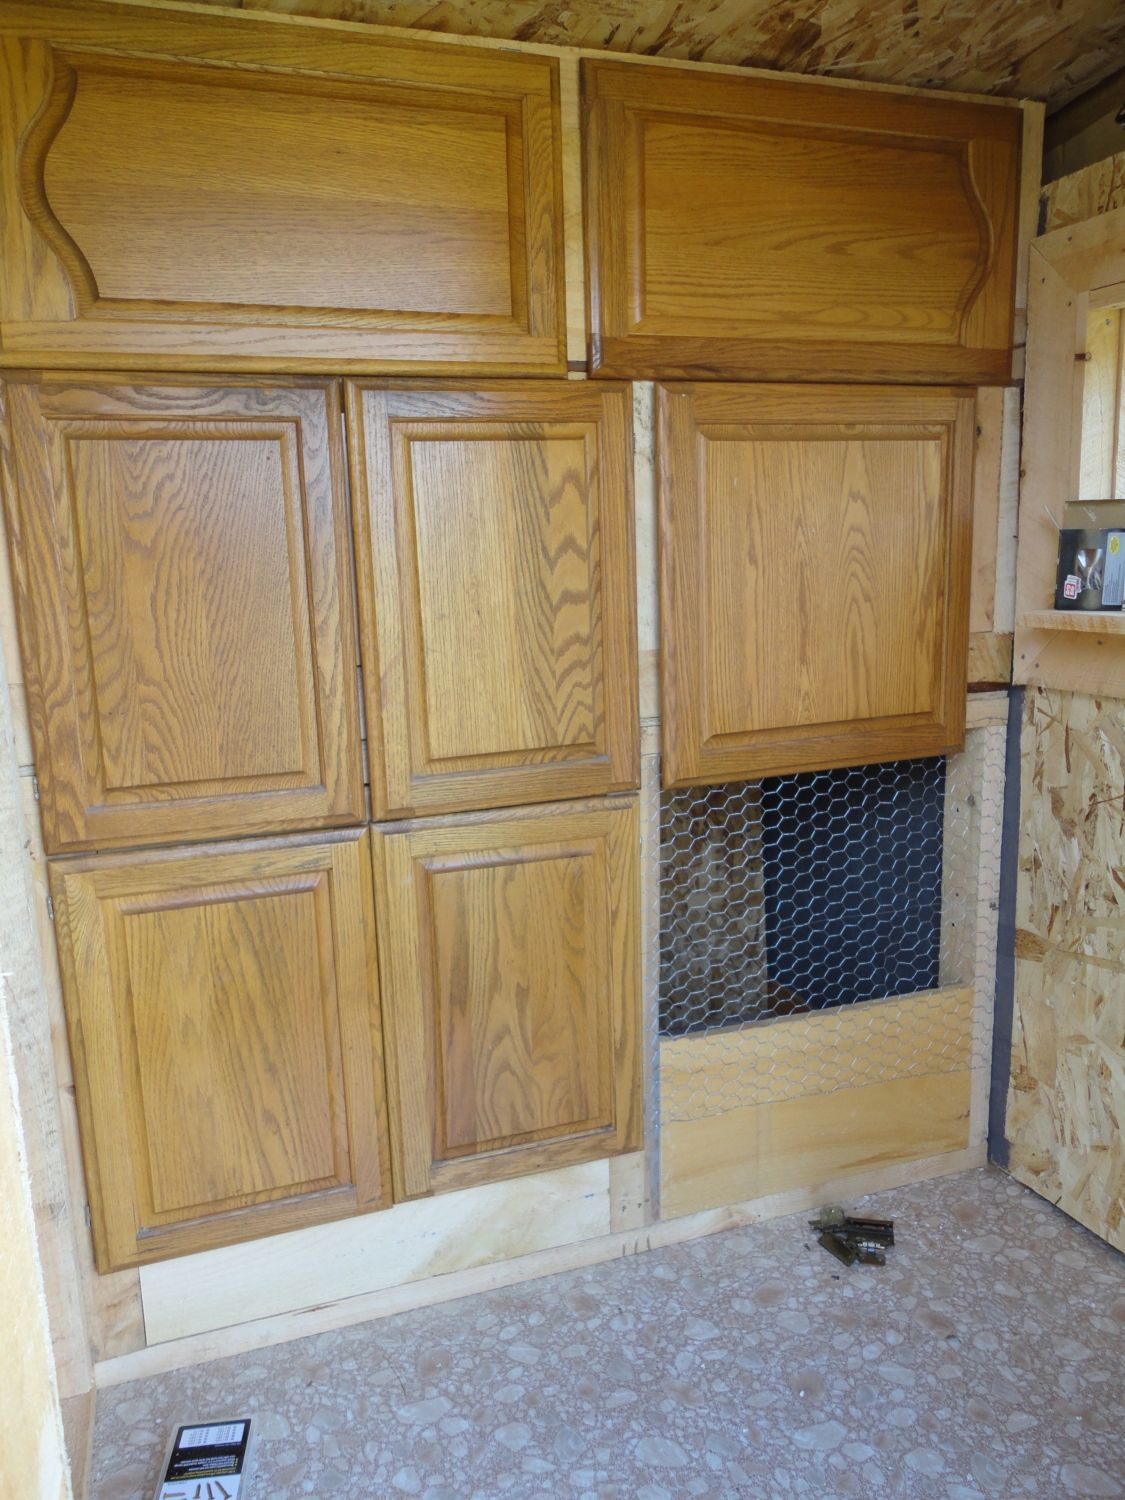
The top two sets of doors are nesting boxes, the bottom doors open up to that little area - now it has food/water in it - but if I have to, it will be for chicks/broody hen's or someone that just needs to be separated.
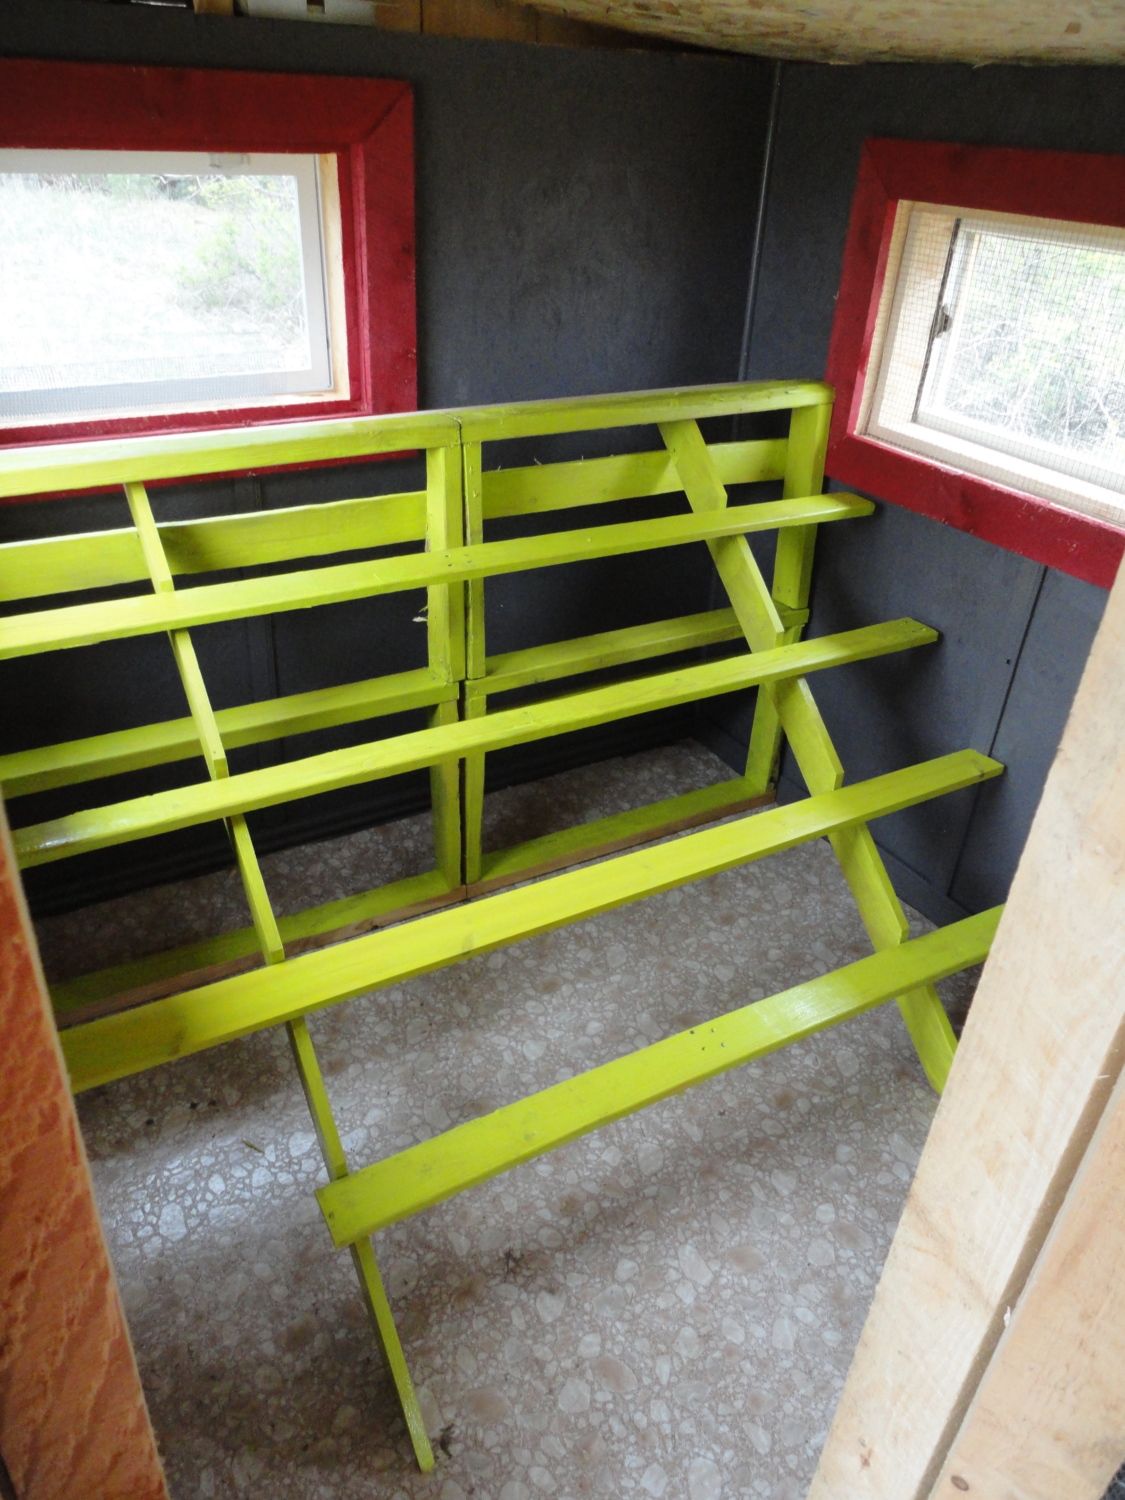
The left side of the coop is the actual roosting area. I painted the walls to make it easier to clean and I built a simple screen door so I can open the main door and get what I need to but keep the girls safe and where they belong.
I seriously struggled with the roosting area. I could not figure out a good way to do it using the free pallet thingys I had gotten and I only have enough wood left for the run. This is the best I could come up with - and I'm not sure I won't change it in the future. I left the bottom board shorter so that when it comes time for them to go outside, they could easily get out the door that is right there.
I know what you're thinking......... WHOA! That's some funky paint! I wanted to do something fun while protecting the wood and making it easier to clean. I have quite the collection of OOPS paints and the pink & green came from that stash - the gray on the OSB walls was another gallon of OOPS paint that I picked up. It was perfect because all of the paints are outdoor paints in colors that work well for me. I could never paint inside my house like this so I might as well have fun in the coop.
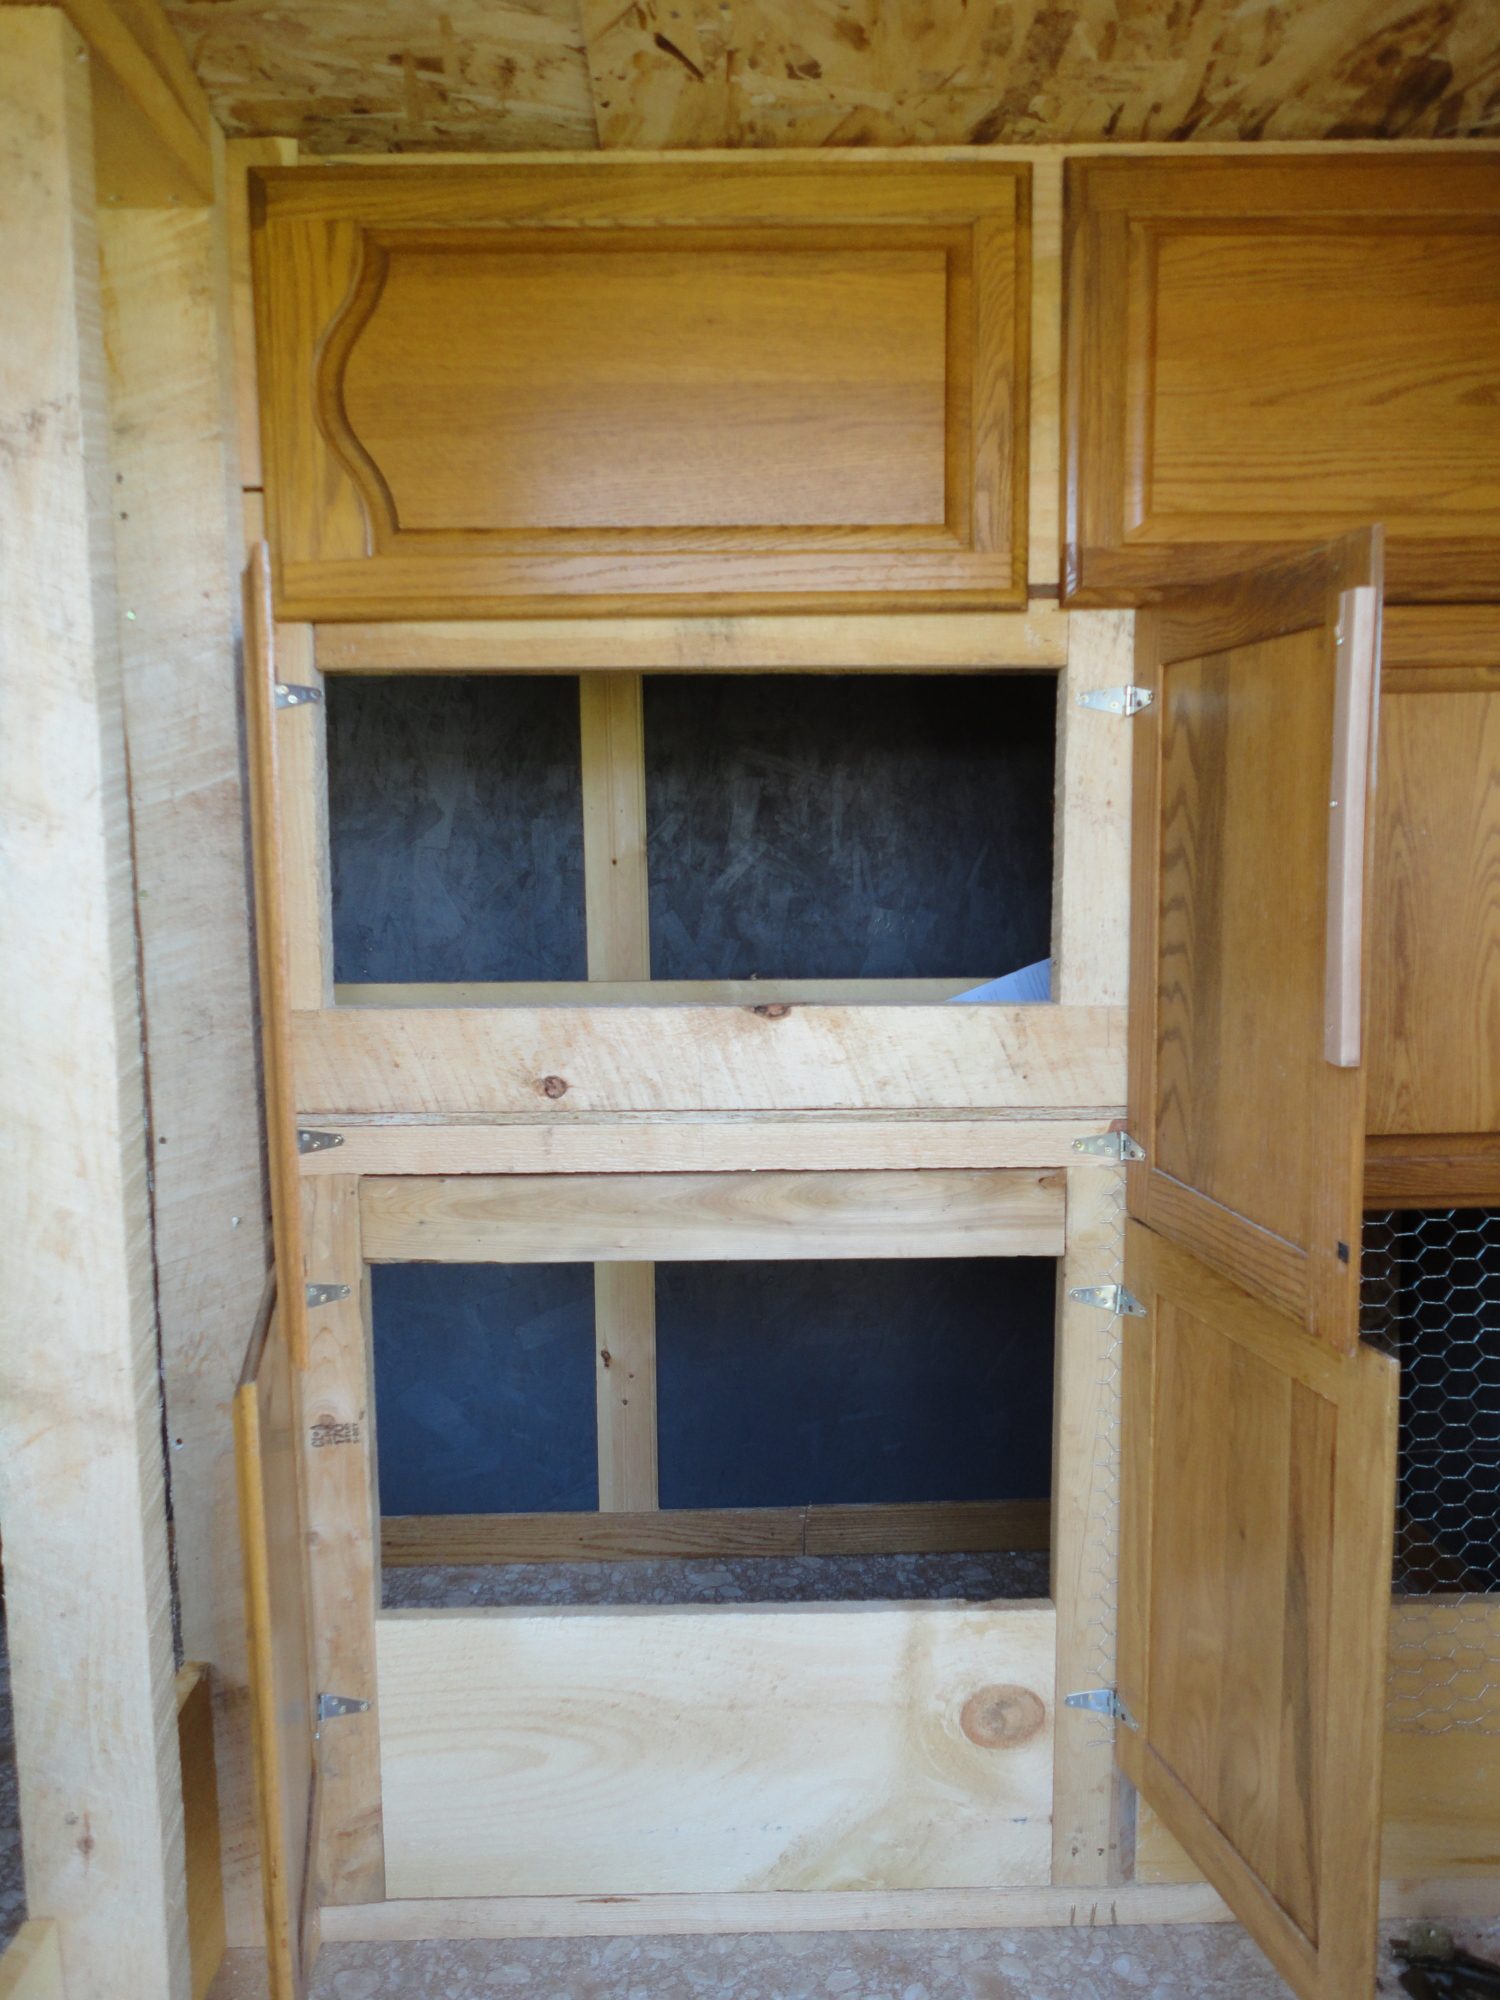
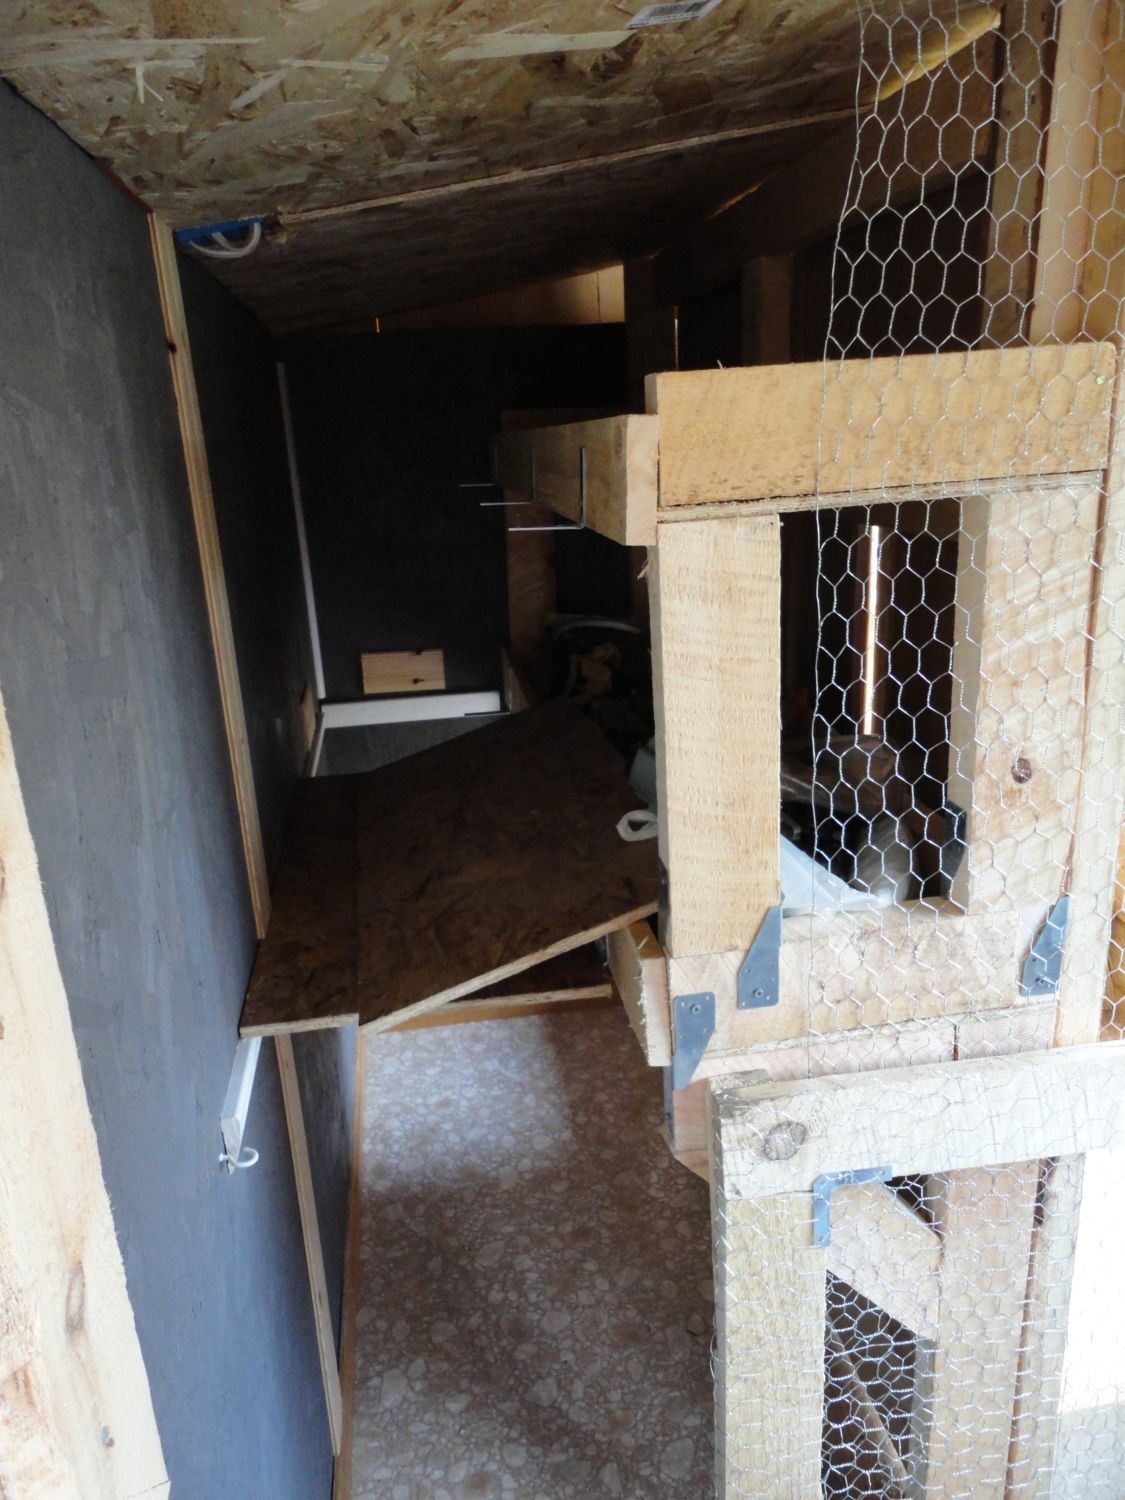
This is my nesting boxes and the cordoning area.......I haven't bothered to put the bars on the front yet since I do have it completely blocked off for now. I'm hoping I didn't screw up by putting the boxes up so high. Only time will tell and if I have to, I can make alterations. I did read that a good, dark, private area is what they will like so I thought this corner would be good for this. I am going to section off the boxes into 8 spots.
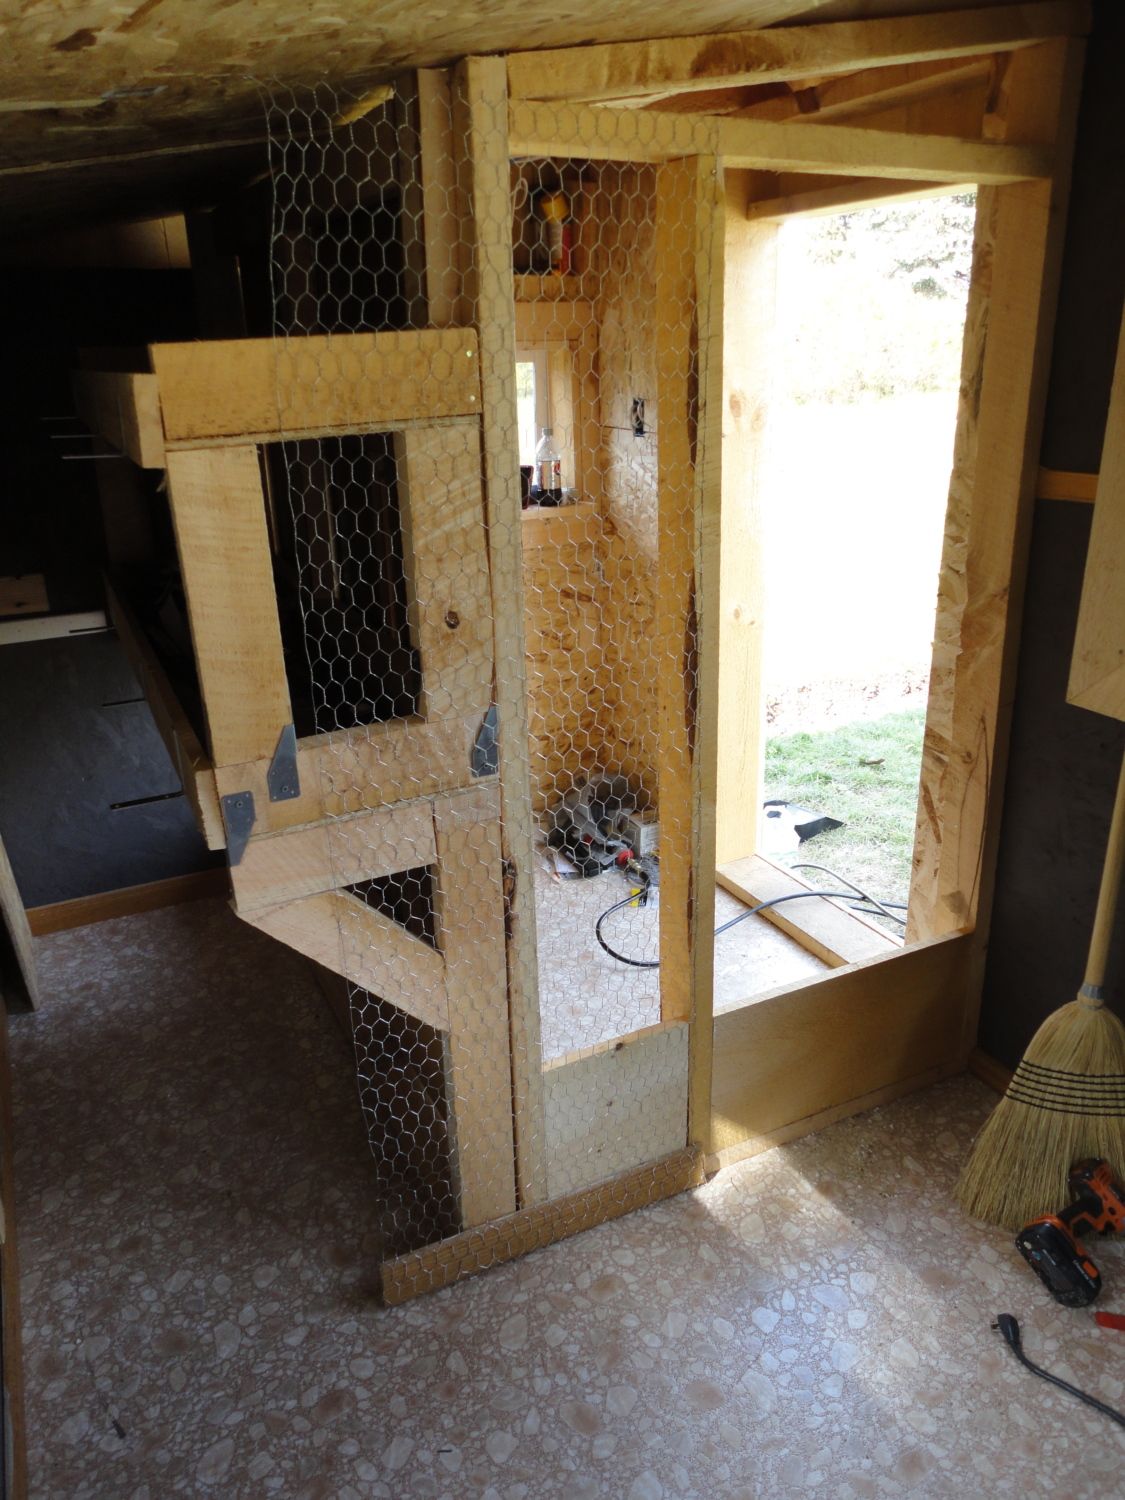
I can block off the nesting boxes from below by sliding a couple of boards in over the brackets and the ledges I put on the wall. I also have a gate I built for the bottom so if I need to section it off, it's pretty easy to do so. It's pretty dark in here so I'm hoping that that will make the ladies happy when they lay their eggs.
Now the fun part of building the run is starting - the hardware cloth is buried down to the bedrock - up to about 8" in some spots - then tacked to the base of the run - next up, walls and a "roof".
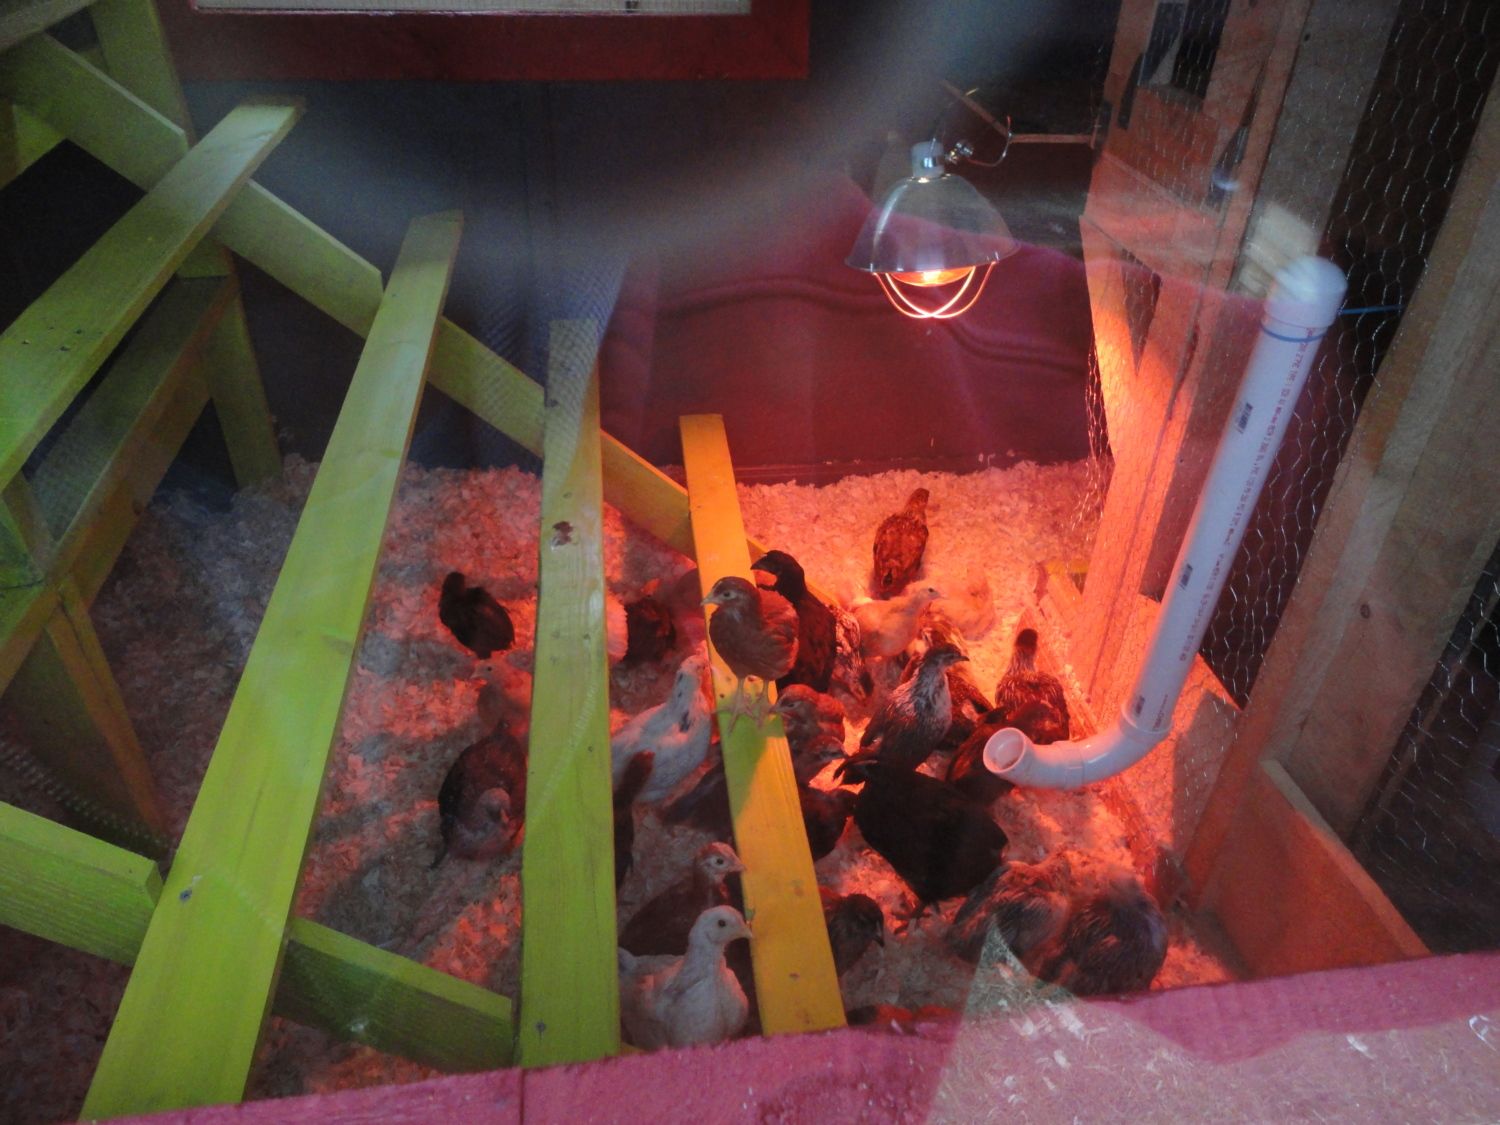
The ladies and gentlemen on their first night in their new home. I haven't dug the trench yet to run the electricity to the coop so for now, we have a heavy gauge extension cord run out there - but eventually, there will be 2 outlets in the ceiling and then two in my work area as well....
I'll post more pictures when we make more progress.
Our coop is 7'x12' and built out of Amish rough-cut lumber. I don't plan on painting or staining it this year - I might next year - we'll see......I might just poly it because I love the natural look. The run, when finished will be 20'x20' minus the coop itself (I don't want the chickens under the coop so I'm going to fill in low spots with dirt & rocks to keep them out.
My assistants checking out the initial progress. You can see where I dug a trench all around the coop. We live on bedrock and I dug down to that (I certainly didn't have to dig far in most spots!) and I am burying hardware cloth in the ground to protect my girls from predators.
Right after I got all of the siding on the coop - before my door arrived.
The backside. I have a vent above the window on the side - the window opens in for ventilation. The side window is also in my little storage/work area. That back window was one I picked up for free - I framed it and made it open out.
I used a gate latch on the bottom of the window to keep it shut - and I'll put a small board inside the window so when I need to open it, I can do so from the outside of the coop/run. I have to say - the gate latch works awesome. The window wanted to pop a little bit because of the hinges on the top but the latch keeps it closed perfectly.
The front right now - It still needs the spacers on it and I need to build a pop door for the chickens - but it was more important to get the inside done for right now. The front window is stationary - it was kind of too big to make it open like the back window. Again - another free window.
The door needs a lock/handle still too - but I had it built by the Amish and I love how it came out. You can see where the ground is very unlevel and I need to fill in with dirt on the right side.....my back yard is wavy gravy!I live in Upstate NY so I did insulate the coop because it does get cold here in the winter (if you don't count this past winter!) Ooh - and when I say Upstate - I mean Upstate - like, almost in Canada, Upstate. Not Albany or Rochester...... much higher north.
This is my little work area & the back of the nesting boxes. I used my mom's old kitchen cabinet doors (she got new ones made recently) - I want to paint this area something pretty funky - but I'll get to that soon enough. I have linoleum on the floors for easy cleaning - and under the nesting boxes, I do have an area that I can separate babies in or if I have a hen or two that needs to be left alone, I can put them in this area and they can have some privacy.
The top two sets of doors are nesting boxes, the bottom doors open up to that little area - now it has food/water in it - but if I have to, it will be for chicks/broody hen's or someone that just needs to be separated.
The left side of the coop is the actual roosting area. I painted the walls to make it easier to clean and I built a simple screen door so I can open the main door and get what I need to but keep the girls safe and where they belong.
I seriously struggled with the roosting area. I could not figure out a good way to do it using the free pallet thingys I had gotten and I only have enough wood left for the run. This is the best I could come up with - and I'm not sure I won't change it in the future. I left the bottom board shorter so that when it comes time for them to go outside, they could easily get out the door that is right there.
I know what you're thinking......... WHOA! That's some funky paint!
I wanted to do something fun while protecting the wood and making it easier to clean. I have quite the collection of OOPS paints and the pink & green came from that stash - the gray on the OSB walls was another gallon of OOPS paint that I picked up. It was perfect because all of the paints are outdoor paints in colors that work well for me. I could never paint inside my house like this so I might as well have fun in the coop. This is my nesting boxes and the cordoning area.......I haven't bothered to put the bars on the front yet since I do have it completely blocked off for now. I'm hoping I didn't screw up by putting the boxes up so high. Only time will tell and if I have to, I can make alterations. I did read that a good, dark, private area is what they will like so I thought this corner would be good for this. I am going to section off the boxes into 8 spots.
I can block off the nesting boxes from below by sliding a couple of boards in over the brackets and the ledges I put on the wall. I also have a gate I built for the bottom so if I need to section it off, it's pretty easy to do so. It's pretty dark in here so I'm hoping that that will make the ladies happy when they lay their eggs.
Now the fun part of building the run is starting - the hardware cloth is buried down to the bedrock - up to about 8" in some spots - then tacked to the base of the run - next up, walls and a "roof".
The ladies and gentlemen on their first night in their new home. I haven't dug the trench yet to run the electricity to the coop so for now, we have a heavy gauge extension cord run out there - but eventually, there will be 2 outlets in the ceiling and then two in my work area as well....
I'll post more pictures when we make more progress.

